Have you ever wished you could save all the settings in the themes you’ve made to reuse later? If so, you come to the right place. Let’s learn how to save a project as a custom theme and use it in ActivePresenter 9.
Besides the built-in themes that ActivePresenter 9 offers you, you can now create your own themes with unique settings. Moreover, the app allows you to save them as custom themes to reuse whenever you want. Sounds interesting? Keep reading to find out detailed helpful information.
You will walk through 4 stages in this tutorial:
Make sure to download and install ActivePresenter 9 on your computer!


Save Custom Themes
The very first step is to save your project as a custom theme. Perform either of the following:
- Access the Design tab > select Save Current Theme… from the bottom of the theme gallery. Then, type a name for your theme and click Save.
- Click the ActivePresenter
 button > Save or Save As… Alternatively, press CTRL+S on the keyboard. Next, select ActivePresenter Theme (*.aptheme) in the Save as type list > click Save.

Normally, your file is saved in the ActivePresenter Templates folder (C:\Users\<user_name>\Documents\ActivePresenter Templates (for Windows) or /Users/<user_name>/Documents/ActivePresenter Templates (for macOS)). In this way, on the Start Page, your theme will appear in the Custom section of the Templates tab.
For example, if you saved a theme called “Nature”, it will display in the Custom section of the Start Page like this:
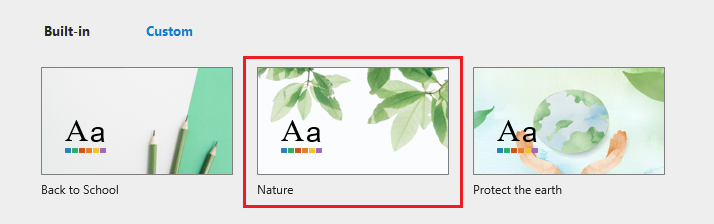
Note: In the Custom section, all the themes appear according to the alphabetical order of their names.
Use Custom Themes
Overall, ActivePresenter 9 lets you create projects from custom themes on the Start Page. To create a new project based on “Nature”, do as follows:
Step 1: In the Start Page > Custom > right-click or click the Nature thumbnail. Next, the Preview dialog appears like this:
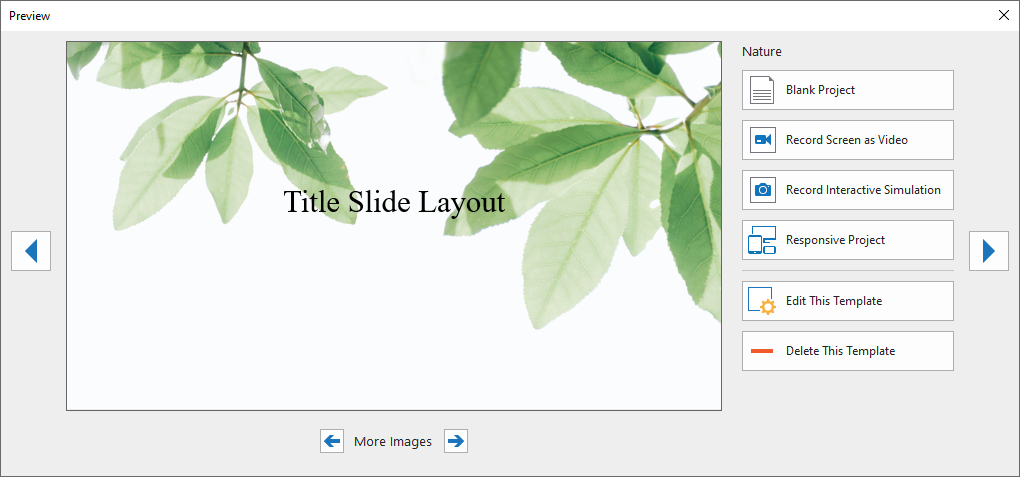
Here, you can:
- Create a new project. ActivePresenter 9 offers you four options: Blank Project, Record Screen as Video, Record Interactive Simulation, and Responsive Project.
- Edit or Delete the theme.
- See slides in the selected custom theme. To do that, click Previous
 or Next .
 - See other custom themes. To do that, click Previous Item
 or Next Item .
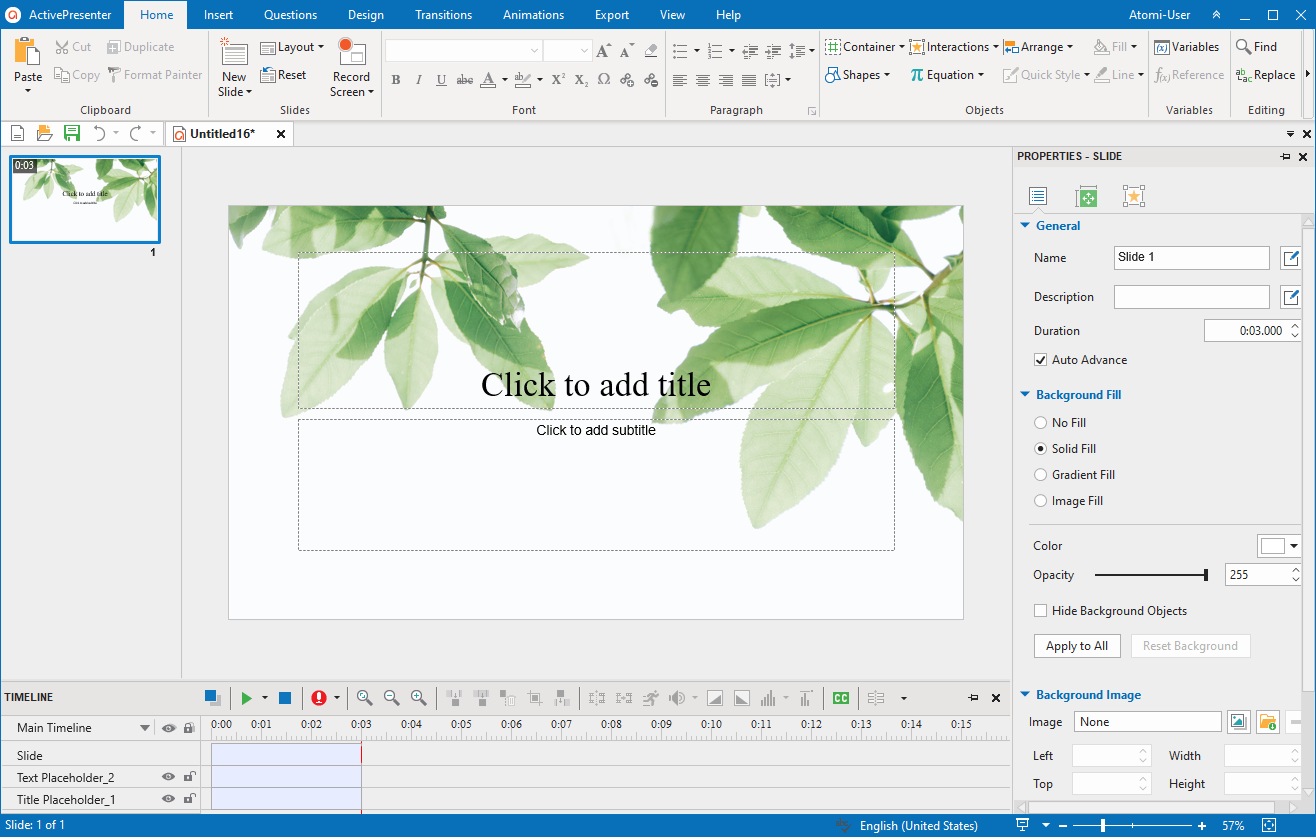
Step 2: Click one of the four options above to create a new project. For example, in case you select Blank Project, this is what you get:
Customize Custom Themes
Basically, custom themes are also themes. Therefore, you can edit and work with them the same way as you normally do.

Firstly, access the Design tab, as you can see your custom theme is displayed with a gray outline in the theme gallery. From here, you can:
- Modify Theme Colors.
- Change Theme Fonts.
- Change the Preset Background Style.
- Add or customize items on Slide Master.
- Save as Slide Templates.
Share Custom Themes
Let’s say that you want to share your custom themes with your friends and co-workers. For this reason, ActivePresenter 9 will surely take you one minute. All you need to do is send the .aptheme files to them. Then, make sure those files are saved in the ActivePresenter Templates folder on their computer. These themes will show up in the Custom section of the app’s Start Page.
That’s it! Hope that it inspires you when working with the app. Stay tuned for upcoming tutorials on our page. And don’t forget to visit our YouTube channel for more engaging video tutorials.
More articles: