(Last Updated On: February 3, 2021)
When working with a range of elements, you often want to align them evenly. This is useful when you want to create, for example, a user interface or a structured page. Saola Animate offers a variety of functions to align elements automatically and precisely.
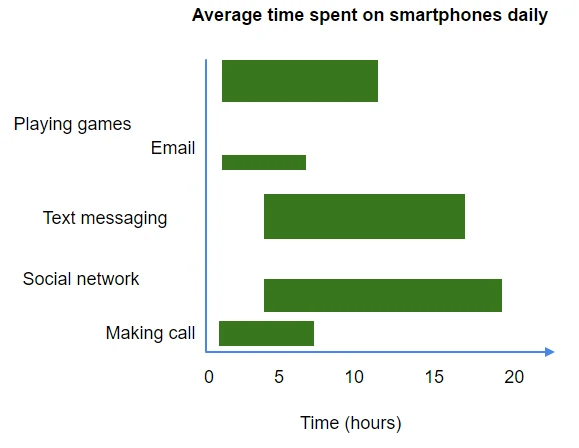
Suppose that you’ve created a horizontal bar graph like the picture below.
 This graph includes 5 activities and 5 time bars (green bars). However, after quickly drawing things, bars may look messy and have inconsistent appearance. Now it’s time to resize and align them to achieve a perfect graph with Saola Animate.
 Note: You can define a different reference element by clicking any of the currently selected elements without holding down CTRL.
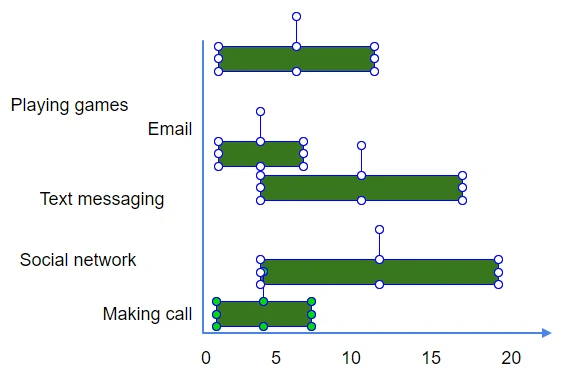
Step 2: Click Make Same Height (2) button on menu toolbar to match the height of all other elements with the height of the reference element, or you can right-click on the Canvas > Arrange > Size > Make Same Height, or click the Edit menu > Size > Make Same Height.
Note: You can define a different reference element by clicking any of the currently selected elements without holding down CTRL.
Step 2: Click Make Same Height (2) button on menu toolbar to match the height of all other elements with the height of the reference element, or you can right-click on the Canvas > Arrange > Size > Make Same Height, or click the Edit menu > Size > Make Same Height.
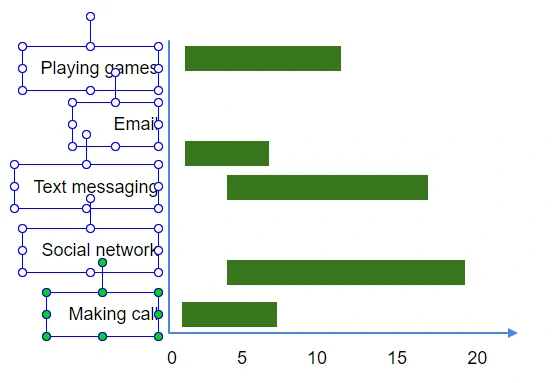
 Here is the result:

 Canvas snapping is turned on by default. To turn it off, click View > Canvas Snapping. To temporarily disable it, hold down CTRL when moving or resizing elements.
 option. This option is enabled by default. To turn it off, just go to the alignment toolbar and uncheck it. I will mention this option in the next part of this tutorial. Keep reading to know about it.
Now, in the bar graph mentioned earlier, suppose you want to align 5 activity labels to the right, take the following steps:
Step 1: Select all desired elements and define a reference element.
option. This option is enabled by default. To turn it off, just go to the alignment toolbar and uncheck it. I will mention this option in the next part of this tutorial. Keep reading to know about it.
Now, in the bar graph mentioned earlier, suppose you want to align 5 activity labels to the right, take the following steps:
Step 1: Select all desired elements and define a reference element.
 Step 2: Click Align Right button on the alignment toolbar, or right-click on the Canvas > Arrange > Alignment > Align Right, or click the Edit menu > Alignment > Align Right.
 The result is that the right edges of all selected elements have been aligned to the right edge of the reference element while the reference element is fixed at its position like below:
 Then you can do the same to align green bars to the left, or use Canvas snapping tool to fit each green bar to its corresponding activity label.
 option. As aforementioned, Align to Parent option is turned on by default. If this option is checked, alignment tools will align all selected elements to their parent. In case selected elements are top level ones, the parent is the scene, which means that all selected elements will align to the center or edges of the scene.

 option allows you to create a percentage-based alignment. When the parent size changes, this will keep the layout unchanged. It is useful when creating a responsive document.
Note: This option is only enabled when the Align to Parent option is selected.
For more information about flexible layout, please refer to our tutorial: Using Flexible Layout.
option allows you to create a percentage-based alignment. When the parent size changes, this will keep the layout unchanged. It is useful when creating a responsive document.
Note: This option is only enabled when the Align to Parent option is selected.
For more information about flexible layout, please refer to our tutorial: Using Flexible Layout.
 That’s how to resize and align elements in Saola Animate. Try it and let us know if you need help.
 This graph includes 5 activities and 5 time bars (green bars). However, after quickly drawing things, bars may look messy and have inconsistent appearance. Now it’s time to resize and align them to achieve a perfect graph with Saola Animate.
Resizing Elements
Saola Animate allows you to resize elements quickly with one of selected elements – the reference element. It is the last selected element with green handles while other selected elements have white handles. For example, in the bar graph above, the height of the green bars is inconsistent. To resize elements for the same height, do the following: Step 1: Select all desired elements, and define the reference element with green handles that you want to resize with it.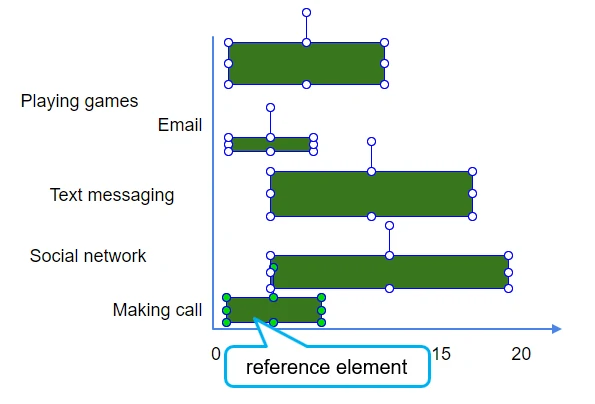 Note: You can define a different reference element by clicking any of the currently selected elements without holding down CTRL.
Step 2: Click Make Same Height (2) button on menu toolbar to match the height of all other elements with the height of the reference element, or you can right-click on the Canvas > Arrange > Size > Make Same Height, or click the Edit menu > Size > Make Same Height.
Note: You can define a different reference element by clicking any of the currently selected elements without holding down CTRL.
Step 2: Click Make Same Height (2) button on menu toolbar to match the height of all other elements with the height of the reference element, or you can right-click on the Canvas > Arrange > Size > Make Same Height, or click the Edit menu > Size > Make Same Height.
 Here is the result:
- Make Same Width (1): Match the width of all other elements with the width of the reference element.
- Make Same Size (3): Match the width and height of all other elements with those of the reference element, respectively.
Aligning Elements
After getting bars that have consistent look, now you need to align them evenly to achieve a perfect graph. Saola Animate provides various ways to align and distribute selected elements.Aligning Elements Using Canvas Snapping
Canvas snapping helps aligning elements. This tool snaps elements to the center or edges of the Canvas or other elements. One or two red lines will appear when an element comes in the vicinity of the Canvas or another element.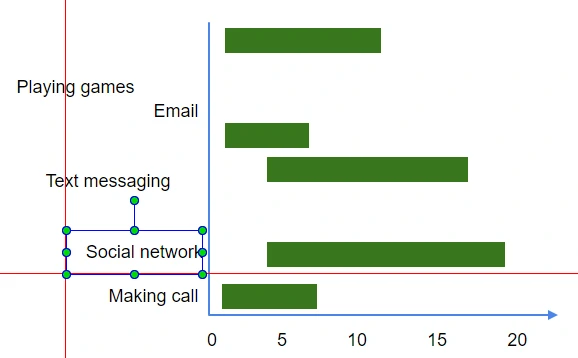 Canvas snapping is turned on by default. To turn it off, click View > Canvas Snapping. To temporarily disable it, hold down CTRL when moving or resizing elements.
Aligning Elements to Reference Element
Reference element brings to you a chance for not only resizing but also aligning selected elements with it easily. In case of this tool, you need to disable the Align to Parent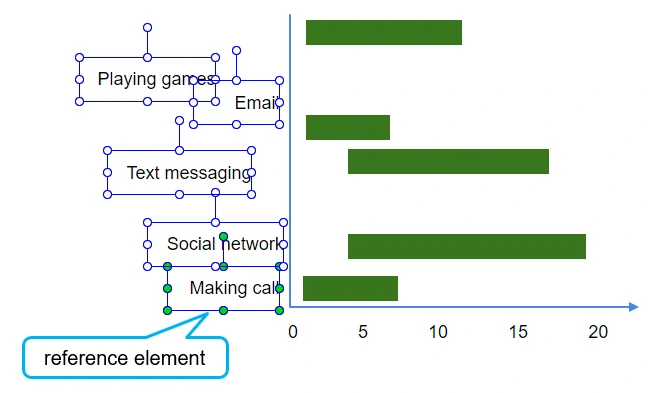 Step 2: Click Align Right button on the alignment toolbar, or right-click on the Canvas > Arrange > Alignment > Align Right, or click the Edit menu > Alignment > Align Right.
 Then you can do the same to align green bars to the left, or use Canvas snapping tool to fit each green bar to its corresponding activity label.

Aligning Elements to Parent
In Saola Animate, you can also align and distribute selected elements using Align to Parent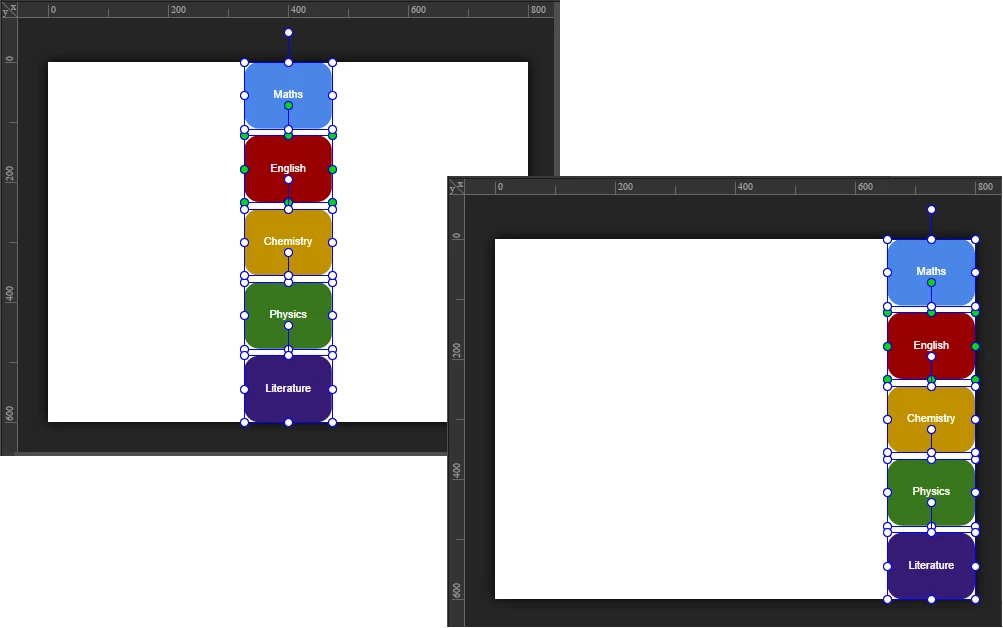
Aligning Elements with Flexible Layout
The Flexible Layout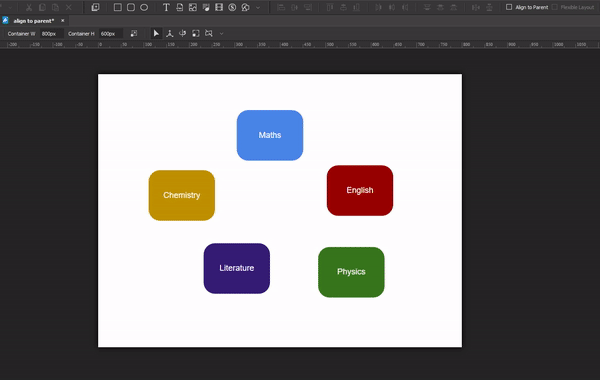 That’s how to resize and align elements in Saola Animate. Try it and let us know if you need help.