Whether you’re creating a tutorial, recording gameplay, demonstating software, or capturing trainig modules, screen recording is key when you need a quick and hassle-free solution. In 5 minutes, by the end of this blog, you can bring home with the best solutions to record screen with Windows 10.
This article provides the best way to record screen with in-depth how-to instruction, along with comparison of quick screen recording tool available based on your specific needs.
You might be surprised to learn that Windows 10 already has a built-in screen recorder – the Xbox Game Bar. It’s convenient for game play and ready to go.
While the Xbox Game Bar is a convenient starting point, its limitations might leave you wanting more.
For users who need to record their entire screen, capture specific regions, add webcam overlays, annotate recordings in real-time, or engage in more advanced editing, av dedicated screen recording software is the way to go.
That’s where ActivePresenter stands out as a promient candidate.
ActivePresenter is a free video editing software designed for teachers, educators, and content creators who want to make tutorials, video lessons, and training materials with more control.

Whether you’re making a how-to video or a full course module, ActivePresenter gives you the flexibility to create professional-looking educational content.
Therefore, you no longer need to switch between multiple apps anymore.
Experience ActivePresenter on your own (free download & no limited time for trial use)

We evaluate the features, how-to, pros and cons of both options to identify the most effective way for you to.
Let’s quickly break down the pros and cons of each approach to help you make the right call.
1. Screen record with Windows 10: Xbox Game bar – built-in app for Windows
Xbox Game Bar is a built-in screen recording tool in Windows 10, originally designed for gamers but useful for quick screen captures.
Here’s how to use it:
Screen record with Windows 10 step-by-Step Instructions:
1. Open Xbox Game Bar
Press Win + G to launch the Game Bar.
Note: If nothing happens, go search “Xbox Game Bar” at the taskbar.
2. Start Recording
- Hit the record button on the widget or simply press Win + Alt + R to start recording immediately.
- Your screen is now being recorded.
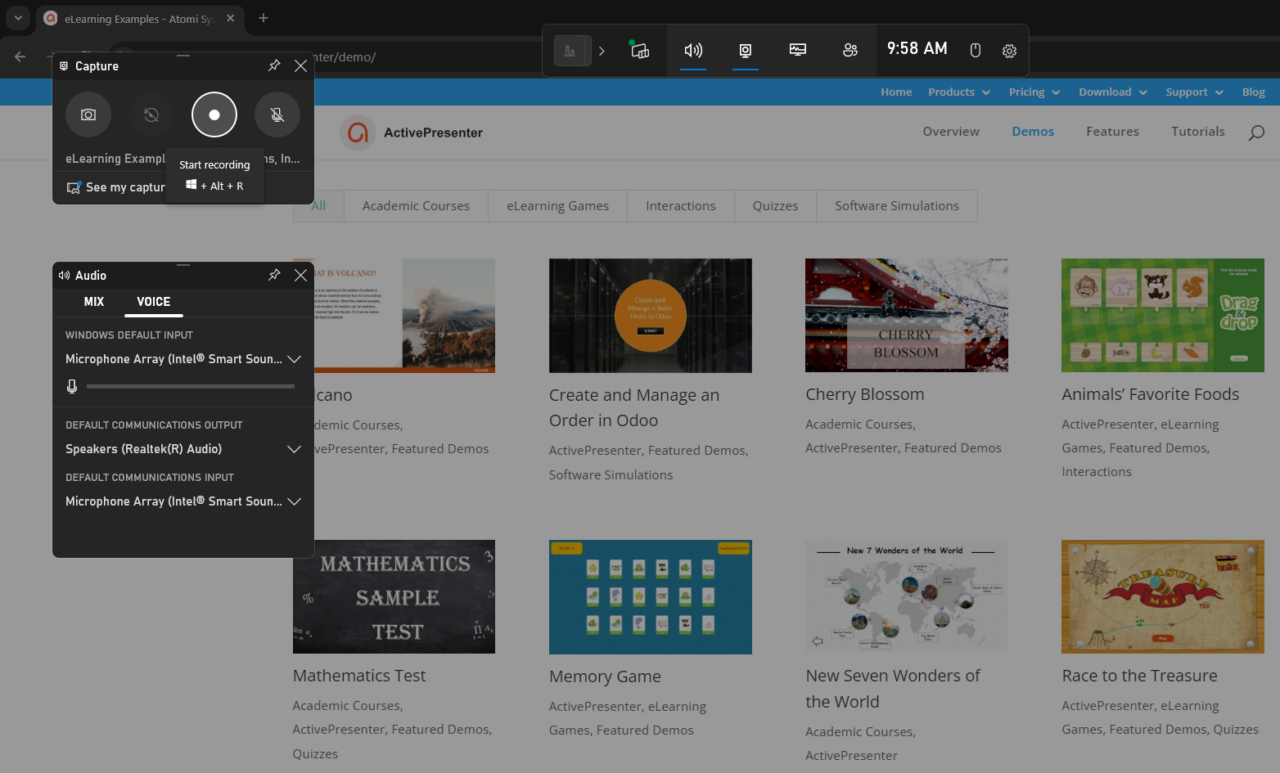
3. Take Screenshots
- You can also click the camera icon under Capture to take a screenshot at any time.
4. Stop Recording
- Click the stop button on the floating recording bar or press Win + Alt + R again.
Your recordings and screenshots will be automatically saved. - To access them, click “Show all captures” or go to the default save location:
C:\Users\[YourName]\Videos\Captures
Pros and Cons of Using Xbox Game Bar
✅ Pros:
- Built-in and free: No need to install any additional software
- Great for recording game: suitable to record game play
❌ Cons:
- No custom recording area: Only records full screen or a single active window
- No webcam support: Can’t record your face or presentations directly
- No editing tools: You’ll need a separate app to trim or edit your video
2. Screen record with Windows 10 (with webcam and editing) – ActivePresenter
If you’re looking for more control over your recordings—like selecting a specific screen area, recording with your webcam, or editing your footage—ActivePresenter is a great choice.
It’s a free screen recording and video editing tool designed especially for educators, trainers, and content creators.
Step-by-Step Instructions:
Download and Install ActivePresenter (Available on Windows and MacOS)
Head to the official ActivePresenter download page and install the software.
The free version has no time limit and includes most features you’ll need.
1. Start a Screen Recording
First, open the app. On the Start Page, select “Record Screen as Video.”
Next, you’ll see a small recording toolbar appear on your screen.
From here, you can begin customizing your recording:
Finally, select your audio input, such as your microphone, system audio, or both.
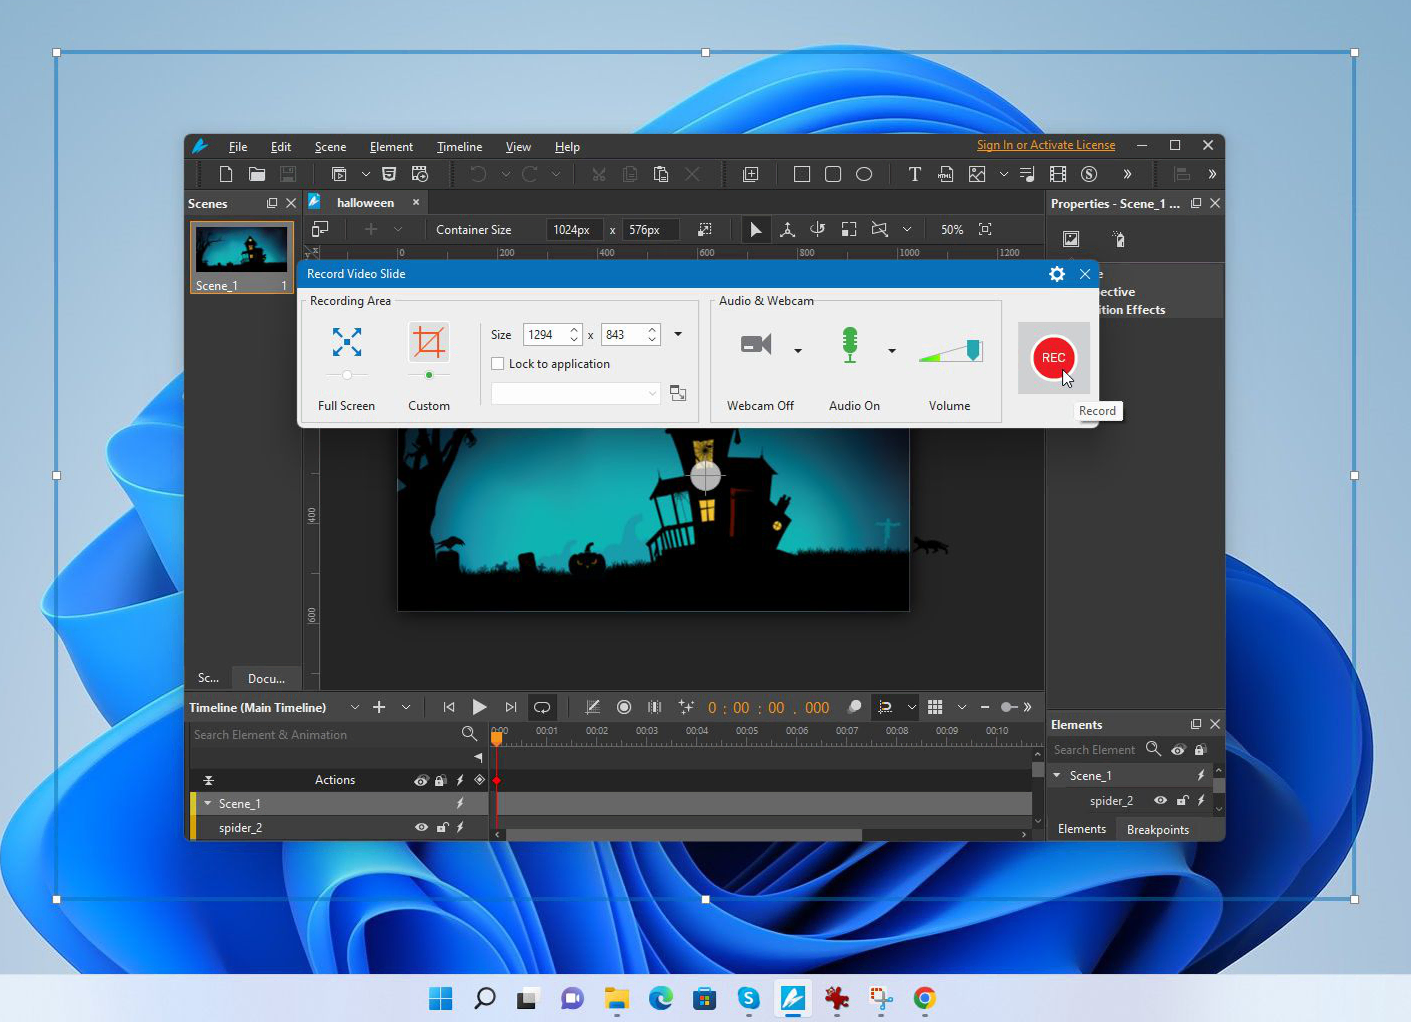
First, choose whether to record the full screen or a specific area.
Then, toggle the webcam option on or off, depending on your needs.
2. Begin Recording
Click the Record button to start.
During the recording, if you need a break, go to the small icon in the taskbar and click Pause.
To end the recording, either click Stop or press Ctrl + End.
3. Edit Your Recording (Optional)
After stopping, your recording opens in the working canvas. With ActivePresenter, you can process to:
- Trim unwanted parts (without cutting in multiple parts
- Speed up portions of the video
- Add annotations, text, or effects

- Change mouse cursor color, add click sounds without settings from beginning or even
- Split video into other slides to edit (very convenience for creating small modules) – My first and forever favorite features
- Then, export your final video in formats like MP4, AVI, or MKV
Pros and Cons of Using ActivePresenter
✅ Pros:
- Custom recording area: Choose exactly what you want to capture
- Webcam and audio options: Record presentations, tutorials, and facecam videos
- Built-in video editor: Trim, annotate, add effects—all in one app
- Export flexibility: Multiple video and image formats supported
❌ Cons:
- Downloadable version: Requires installation
Last Words
Both Xbox Game Bar and ActivePresenter offer great ways to screen record with Windows 10, but they serve different needs.
If you just need to record a game or quickly capture your screen (without a webcam), Xbox Game Bar is already built in and ready to go.
But if you’re creating tutorials, lessons, or any content that needs webcam input and editing, ActivePresenter is the better choice. It gives you the flexibility and tools to create polished, professional videos—all for free.
Pick the tool that matches your workflow, and you’ll be recording like a pro in no time.