Word Search Puzzle can be used as an eLearning game to make your courses highly interactive and more engaging. With simple steps, ActivePresenter will help you create a puzzle of your own.
Word Search Puzzle is a popular game that requires players to locate a list of words hidden in a grid. The words may be placed horizontally, vertically, or diagonally. By enjoying playing this game, players can benefit from improving spelling and vocabulary, reducing stress, to enhancing concentration. If you want to make a word search game, let’s try with ActivePresenter.
From Playing to Creating: Word Search Puzzle
How to Play?
In this Word Search puzzle, players are challenged to locate hidden letters of the given words on the right side.
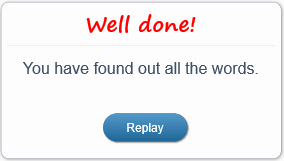
For example, for the Fish word, players need to click on the consecutive letters: F, I, S, H in the same row, column, or diagonal line. After selecting letters, players can click the Submit button. For a word found out, its given word will be hidden. If you want to clear all the incorrect letters that are selected by accident, just click the Remove button. Once players find out all the words, a feedback message will show up to congrats and let them replay the game.
Sound interesting, right? You want to start creating a Word Search puzzle, let’s download the app first, and then explore all its functionalities. More than just a screen recorder and video editor, ActivePresenter stands out as a powerful eLearning authoring tool with exceptional capabilities for creating interactive games. Easily design captivating experiences like quizzes, drag-and-drop activities, memory games, crosswords, and much more. With its flexible events, actions, and variables system, you have the creative freedom to build custom game logic and provide instant, personalized feedback, making learning fun, memorable, and highly effective for any audience.

Now, see how to create that Word Search puzzle in ActivePresenter.
How to Create?
This word search game includes 2 slides: Welcome and Game Playing slides. The first slide describes the game rules and has a button that allows players to start the game. Setting up this slide is quite simple. Meanwhile, you’ll spend more time on the Game-Playing slide. Along with built-in design features and events-actions, custom JavaScript functions are invoked to make the game highly interactive.
Let’s take a deep dive into the following steps in turn:
- Create the Welcome Slide
- Design the Game Playing Slide
- Customize Feedback Message
- Add Interactivity to the Game-Playing Slide
- Preview and Export the Game
Create the Welcome Slide of the Word Search Game
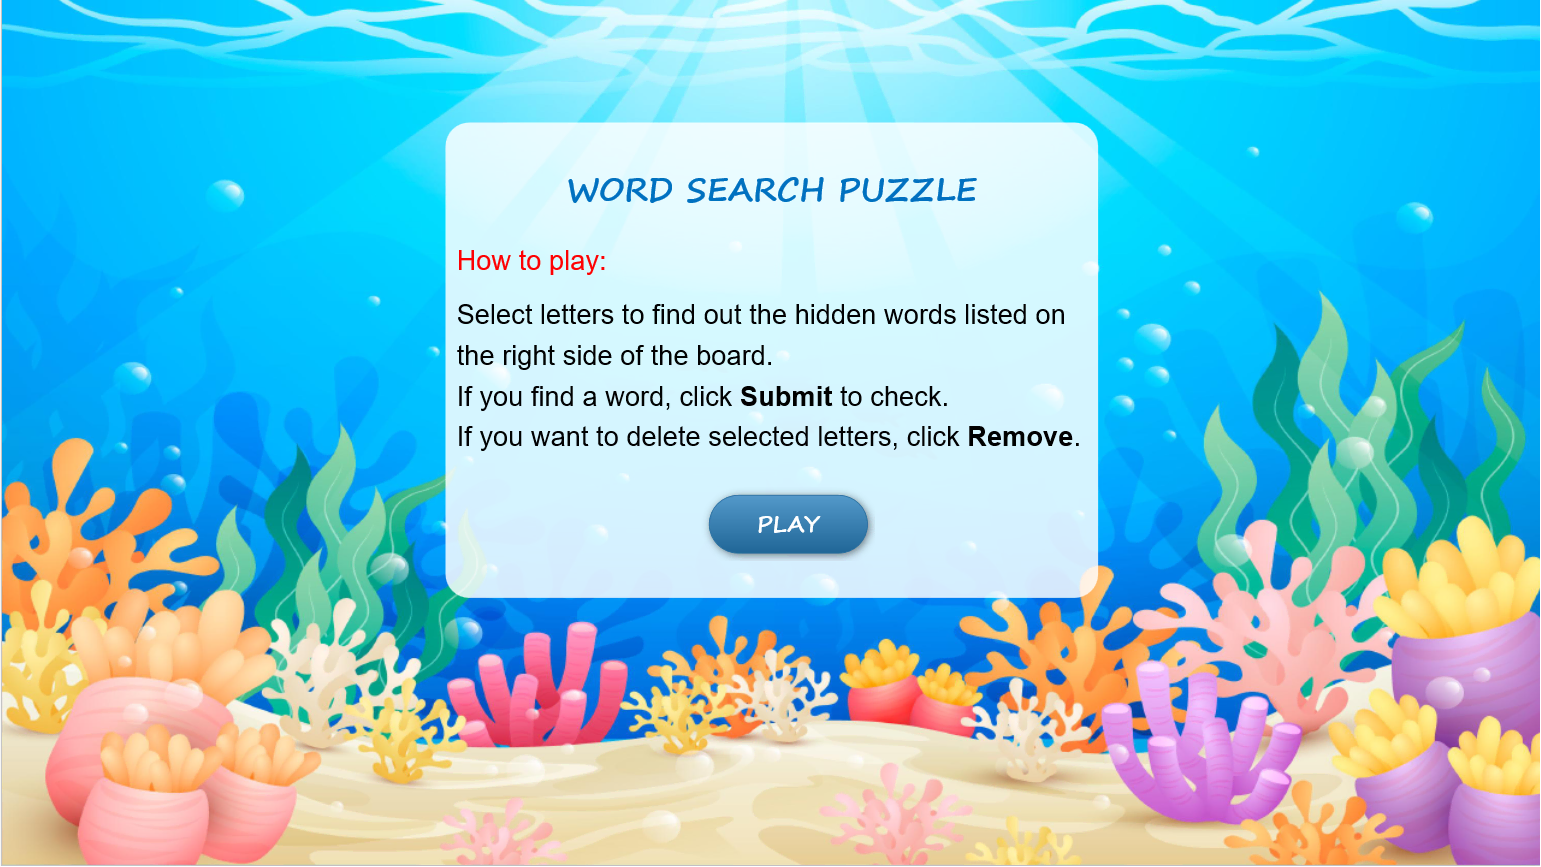
In this slide, you need to create a game title, game rules, and a Play button. Particularly, you can:
- Create a Word Search game title and game rules (Insert tab > Text Captions).
- Create the Play button (Insert tab > Button)
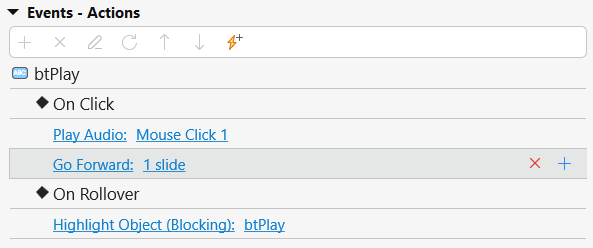
When players hover the mouse over the Play button, it pulses. Also, once they click on it, it will navigate to the Game Playing slide. To get it done, you set events and actions for the Play button as follows:
Note: To save time when designing the game, you can do some settings in the Slide Master view. That is to say, click the Change Slide Container button in the Slides pane > Slide Master. In the Master Layout, add the background image for the whole project (Properties pane > Background Fill > Image Fill). Meanwhile, uncheck the Auto Advance checkbox, so a slide will not automatically advance when it ends.
Design the Game Playing Slide
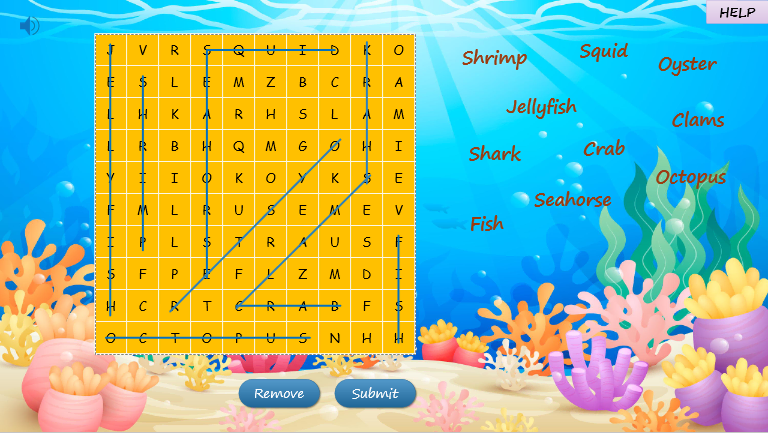
Your job in this step is to design the grid, create given words, add the Remove, Submit and Help buttons, and background music. Now, let’s start from the simpler task to the more complex one.
Add the Given Words and Three Buttons
In the Insert tab, you can:
- Select Text Caption objects to create given words on the right side of the board.
- Select Button to create the Remove, Submit, and Help buttons.
After that, it’s free to change their styles such as color, and font the way you want.
- Click Audio > choose an audio track from your computer to insert background music to the word search.
For the Help button, suppose that you click on it and there is an instruction shown up. To make it done, you do as follows:
- Copy and paste the instruction group from the Welcome slide.
- Hide it right from the beginning by right-clicking on it > Initially Hidden.
- Add the On Click event and Show Object action to the Help button to show the instruction.
- Insert a close button to the instruction (Insert tab > Shape).
- Add the On Click event and Hide Object action to the close button.
Design the Grid
In this Word Search puzzle, once players click a letter (a shape), it will change to the selected state. It may cost you time if you add a state for each shape manually. A tip here that may help you speed up your work is to copy a shape with its selected state already created. And then paste out as many shapes as you need. After that, drag these shapes to a grid using the Grid Box feature. To be more precise, do as follows in turn:
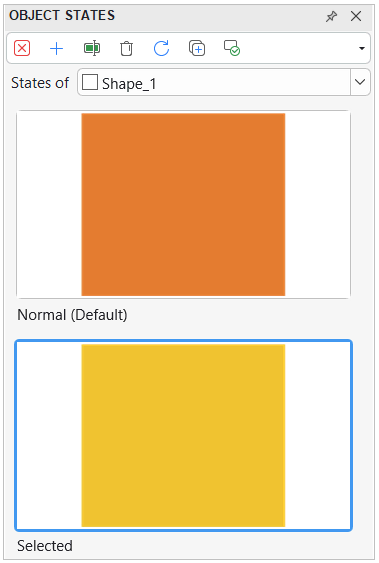
Create Shapes and Their Selected States
- Firstly, insert a shape to the slide by accessing the Insert tab > Shapes > Rectangle > change its color if you want.
- Secondly, navigate to the View tab > Object States > click the Edit States button to open the editing mode.
- Next, add a new state and enter its name, for example, selected.
- Change the state’s style in the Properties pane or the Format tab.
Here is what we got:
Copy and Drag Pasted Shapes into Grid
After creating a shape and its selected state, now you can use the copy and paste commands to create other shapes at once. Then, you need to align all these shapes into a grid. To make this process faster and more efficient, just use a Grid Box to do that. Take the following steps:
- Access the Insert tab > Container > Grid Box.
- Select all shapes at once and then drag and drop them into that grid box (1).
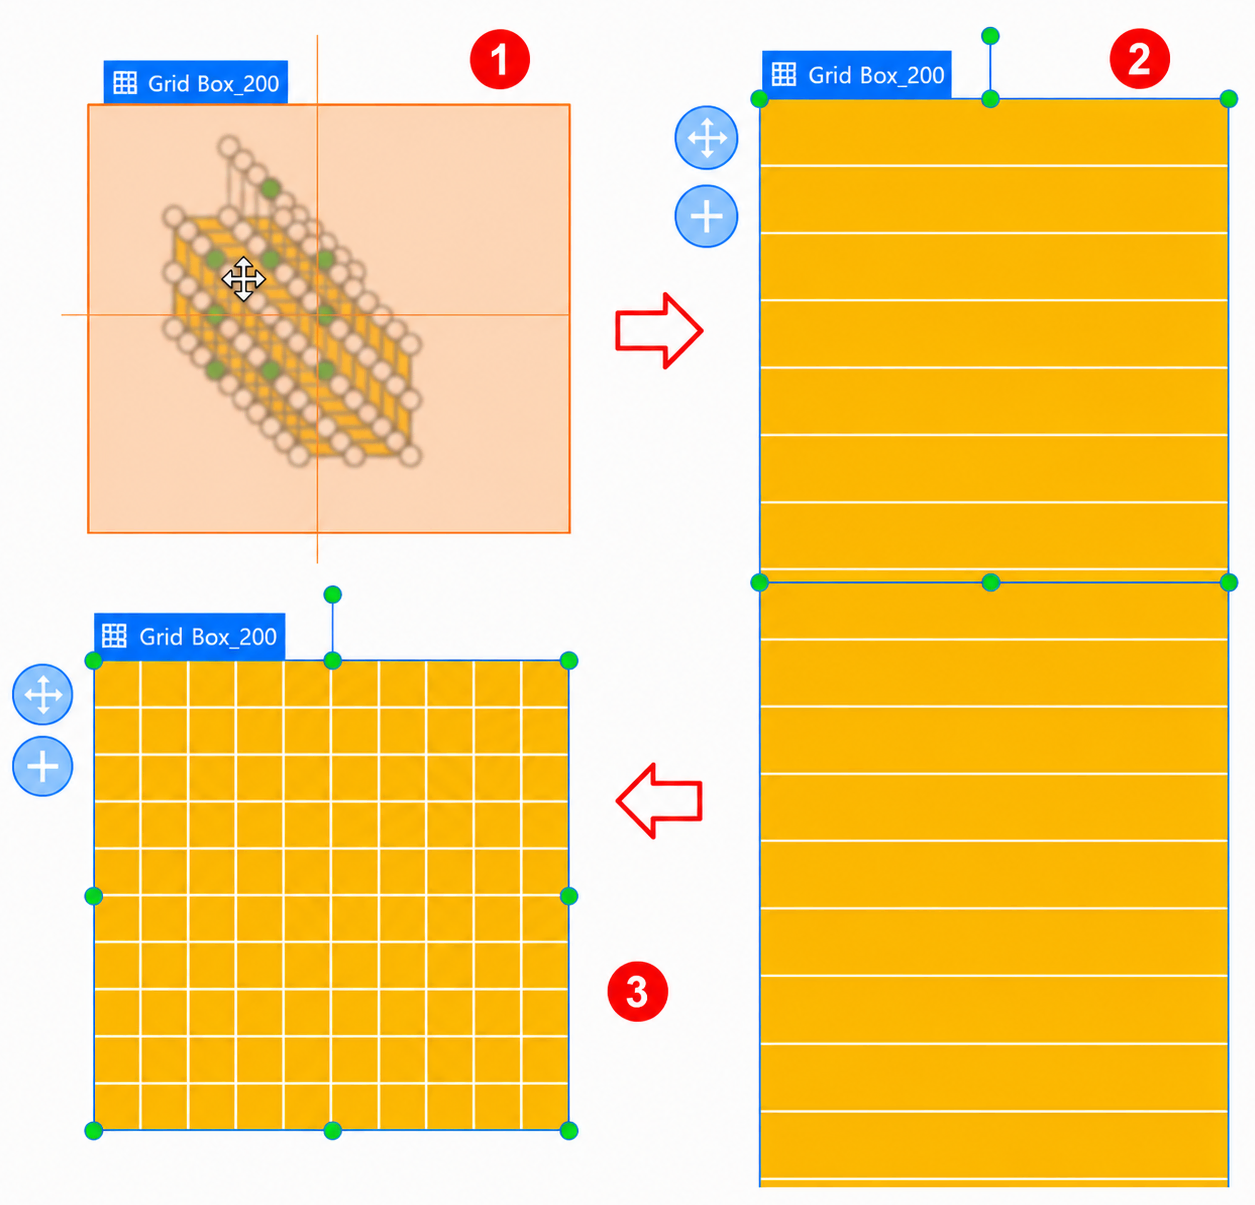
- Thanks to the Container Snapping mode, all the shapes which are snapped into the grid layout will have the same size (2).
- Navigate to the Properties pane of the grid box > Size & Properties tab > Transform section > adjust its width and height if needed. For example, if you want to create a square grid, you can set the size to 800px wide and 800 px high.
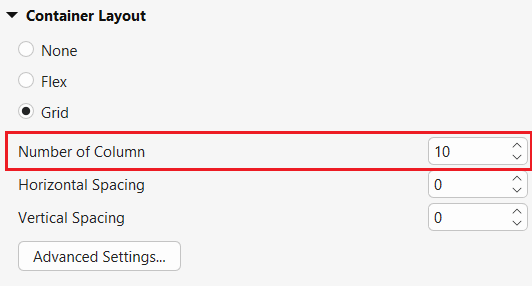
- Besides, in the Container Layout section below, just adjust the Number of Column to get your desired grid structure (3).
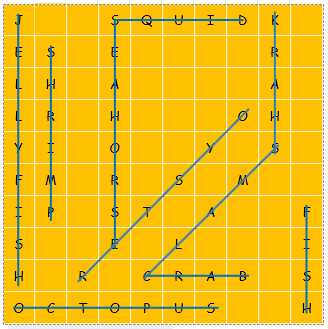
Insert Letters and Freeforms
Now it’s time to add letters to shapes within the grid in the Word Search puzzle. Also, you need to create freeforms striking through words, which indicates that a word has been found.
- You can insert the letters of the given words first. Using a printable word search worksheet is a way to make your work more easily. This will help you not to miss any words. Simply double-click each shape and enter a letter.
Tip: To change the font or color of all the letters at once, you can select the Grid Box, then change the letters’ style in the Home tab.
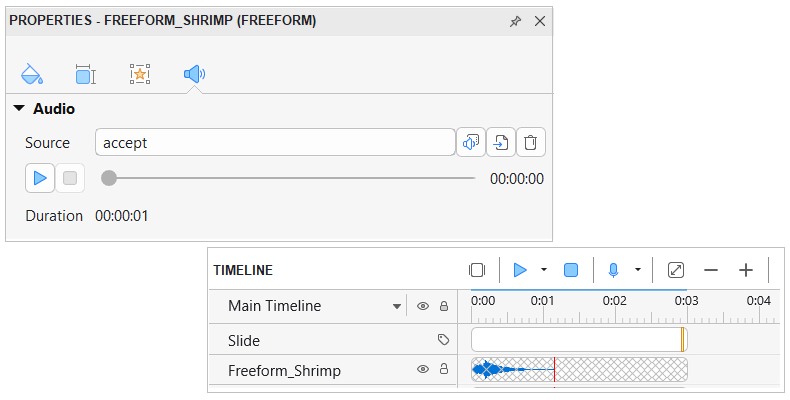
- To create freeforms striking through words, just access the Insert tab > Shapes > Lines and Arrows > Line. Don’t forget to rename these freeforms to specific names, for instance, Freeform_Shrimp.
After that, it’s necessary to right-click them > Initially Hidden to hide those freeforms as soon as the game starts. If you want to show them, you need the support of events-actions. Stay tuned for the later part.
In addition, you can optionally add audio to a freeform. Therefore, once it is shown, the audio will be played. To do that, navigate to its Properties pane > Audio tab > Audio section > import audio from your computer.
After all, fill in other letters in the rest of the grid the way you want.
Customize Feedback Message for the Word Search Puzzle
As said earlier, when players find out all the hidden words, a feedback message will be shown up. You are free to customize that feedback message the way you want. To do that, click the Change Slide Container button in the Slides pane > Feedback Master > Correct Feedback Layer > change the font and size of the text for that layer as you wish.
In addition, the Replay button lets players replay the game. To make this button work, just add event-action like this:
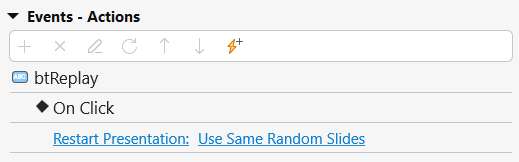
Let’s keep reading the later part to know how to show this feedback message.
Add Interactivity for the Game Playing Slide
This is the core part to create the Word Search puzzle. In this part, we will take advantage of events and actions to do some tasks. Particularly, change the state of shapes when they are clicked, show freeforms, hide given words, and show a feedback message.
Change State of Shapes When Being Clicked
That is to say, when players click a shape, it will change to the selected state. For that to happen, you need to add the On Click event and Change Object State action to each shape like this:
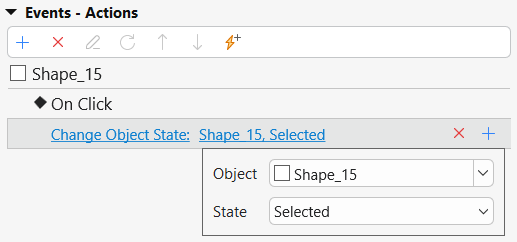
For other shapes, you can copy and paste the event. Then, change the target object.
Show Freeforms, Hide Given Words & Show Feedback Message
These three actions will occur when players click the Submit button. Hence, you will add events-actions to make this button work. Before doing this, firstly, you need to create a Number variable that will be applied to show the feedback message in events-actions.
Particularly, you can make a game add 1 point to that variable each time players find one word. With 10 given words, players need to collect 10 points for the feedback message to show.
To create a Number variable, access the Home tab > Variables > click the plus button to add a new variable > enter its name. Set Number type and default value > click Add & Close to finish.

Now, it’s time to add events-actions to the Submit button. Add the On Click event and these three actions in turn:
- Show Object: Choose a freeform from the Object drop-down list.
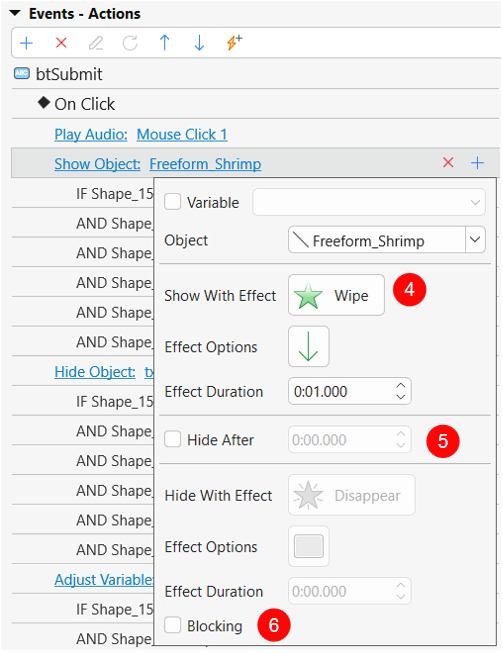
You need to take notice of some options:
- Choose the Effect Options (4): Choose the Wipe effect and an effect option to be the direction of the freeform that strikes through. For example, the From Top direction can be used for the Shrimp freeform. Besides, you can use the From Left direction for the Crab freeform.
- Deselect the Hide After checkbox (5) so the object will not disappear after a period of time.
- Uncheck the Blocking checkbox (6) to allow showing the current action as well as the following actions simultaneously.
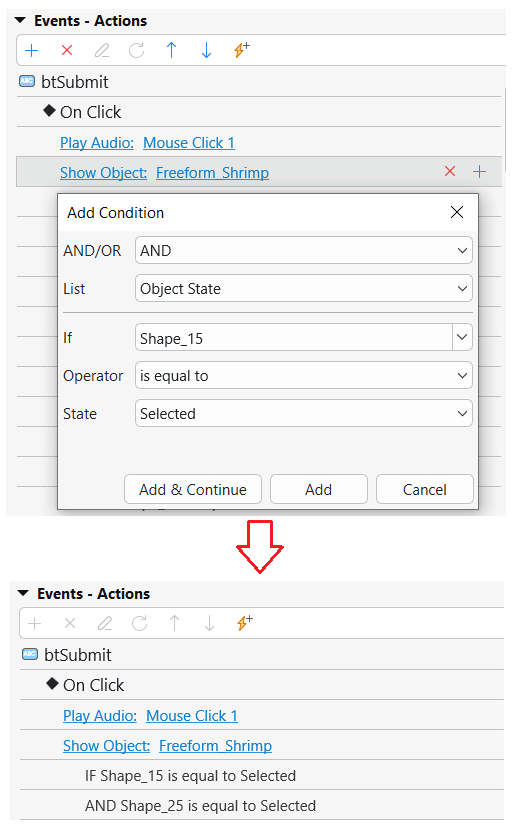
After that, you need to set up some conditions for this action to occur. For instance, if you want to show the Shrimp freeform, you can set conditions that all the consecutive letters: S, H, R, I, M, P are in the selected state.
Just click the plus button to add a condition > Add & Continue to choose another shape for the condition.
- Hide Object: With the same conditions for a given word, it’s better to copy the Show Object action above, then change to the Hide Object action. By doing this, you don’t need to set up conditions again.
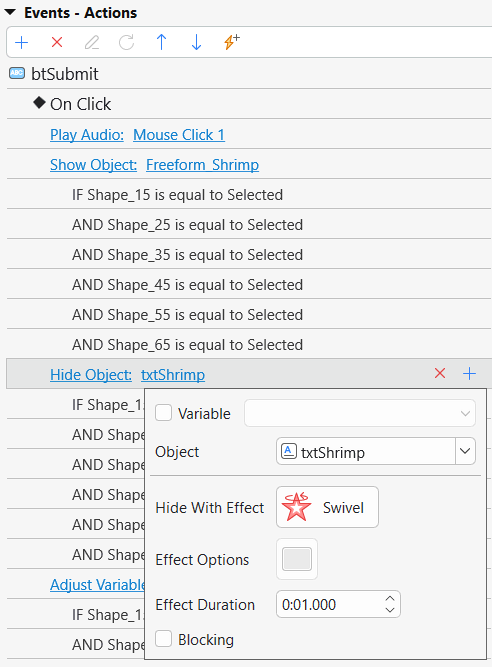
It’s free to set the hiding effect as you like. Besides, you can uncheck the Blocking checkbox to get the same result as in the Show Object action.
- Adjust Variable: Copy and paste the action above. Then, change to Adjust Variable action while keeping the conditions unchanged.
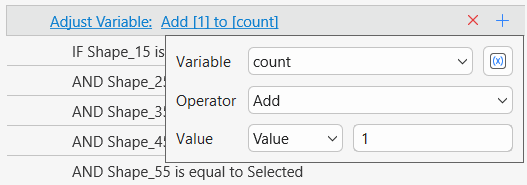
You need to create a couple of the Show Object/ Hide Object/ Adjust Variable actions with the same conditions for each given word. Keep performing the steps above for other words.
After all, add the following action to the button On Click event to show the feedback message when players get 10 points in total.

Clear All Shapes’ Selected State
Chances are you want to clear all shapes’ state from the selected state to the normal one when a word is found out. Or even you want to clear any shapes which are selected by accident. In that case, executing a JavaScript function may be the best way to speed up your work.
For that to be done, on the On Click event of the Remove button, add the Execute JavaScript action. And write the following script in the dialog that appears:

for (var i = 1; i <= 500; ++i) {
  var objectName = 'Shape_' + i;
  var object = prez.object(objectName);
  if (object) {
      object.state('Normal');
    }
 }
You need to add this line of code to the On Click event of the Submit button also. That way, all wrong letters will be cleared when you check any word.
Preview and Export the Word Search Game
After finishing, you can go to the Export tab and select HTML5 Preview to see what you’ve done.This lets you see any mistakes caused and make changes before exporting. If the result pleases you, just export it to HTML5, SCORM, or xAPI packages depending on your needs.

For your reference, you can download the sample project here.
That’s it. Don’t forget to visit our Blog and YouTube channel to see more useful eLearning content guidance.