Spot the Differences Game becomes familiar to players of all ages. Thanks to the game, players can improve their observation, analysis, and patience. Basically, we can create a Spot the Differences game easily by using Hotspot questions in ActivePresenter elearning authoring tool.
Before getting started, let’s download the app then you can open the sample project with the app.

So, let’s walk through all the necessary steps to create this interactive game right now!
How to Play the Spot The Differences Game?
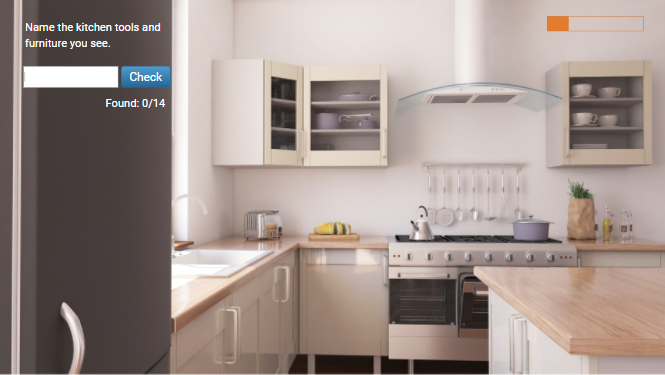
As the name implies, this interactive game requires players to find a set number of differences between two pictures that look nearly identical. Players will give answers by clicking on many spots in the pictures. The correct answers are the hotspots created before.
In each question, players have only one chance to submit the answer. If they cannot find the correct spots, they have to start the game all over again.
Now, it’s time to learn more about creating the Spot the Differences game.
How to Create the Spot The Differences Game?
1. Prepare for the Game
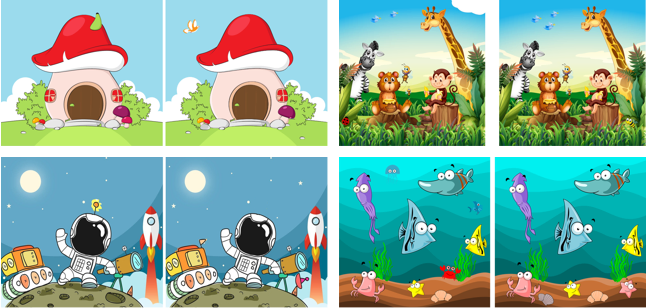
As indicated in the previous part, in this game, players will interact with pictures. Thus, the very first step is to create an image containing two nearly identical pictures. At first glance, the two pictures look the same, but if players look closely, they can see small differences.
To optimize your work time, go to the View tab > Resources, and drag all the prepared images to the Resources pane.
2. Add Hotspot Questions to Create Game Layout
Follow the instructions below to insert hotspot questions into your Spot the Differences game:
Step 1: Do either of the following ways:
- In the Home tab > Interactions > Hotspot.
- In the Questions tab > Hotspot.
Step 2: Add title (1) and image (2).
Click the image icon to insert an image you created from your computer or your current project. Here, I select an image directly from the Resources pane of the project.
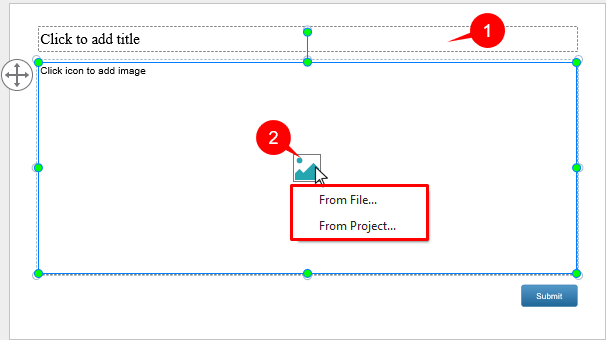
Step 3: Adjust the image size and the layout of the question reasonably.
3. Add Hotspots for the Game
In hotspot questions, each hotspot is considered a correct answer. In this section, we’ll learn how to add hotspots for the Spot the Differences game.
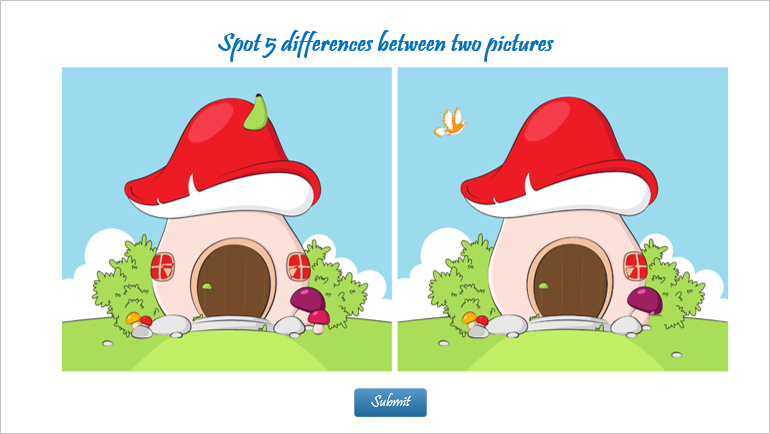
For example, the question requires one to spot 5 differences between two pictures. Hence, we need to add 5 hotspots corresponding to 5 differences.
To begin, let’s select the answer area. Next, click the green plus button and select Oval or Rectangle.
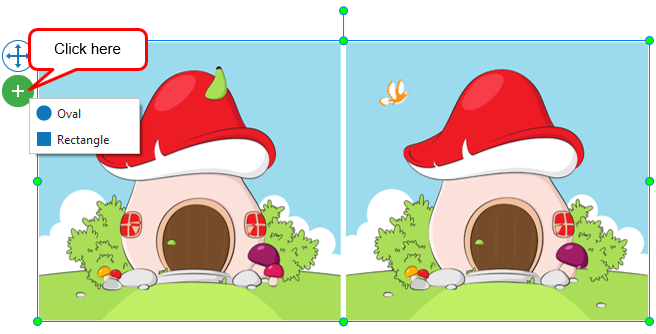
Then, click anywhere on the image to insert a hotspot. You can also drag it to any other desired position. Anytime you insert a hotspot into the image, it is set as a correct answer by default. Repeat this process to add other hotspots or just Copy (CTRL+C) and Paste (CTRL+V) hotspot to achieve your goal.
4. Beautify and Create Interactivity for the Game
To create a lively and engaging Spot the Differences game, customize some other elements such as hotspot style, interactivity, feedback layers, etc.
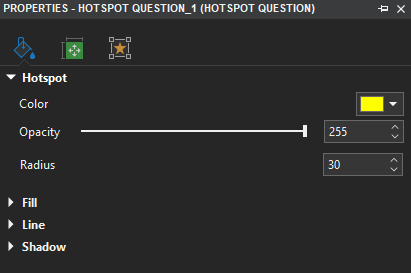
4.1. Customize Hotspot Style
Let’s beautify your hotspot style by selecting the answer area, in the Properties pane > Style & Effects tab, you can easily adjust the hotspot color, opacity, radius, or other properties.
4.2. Customize Interactivity
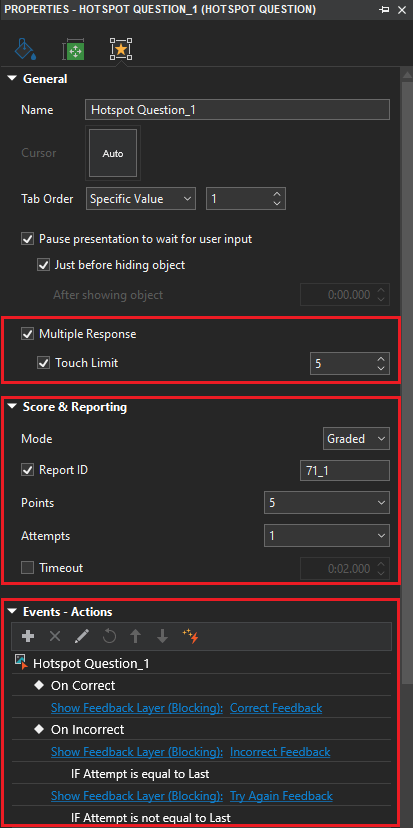
Now, we’ll move on to the Interactivity tab to set up the General, Score & Reporting, and Events – Actions sections for the game.
General Section
- Touch Limit: Select this check box and enter a specific value to limit the number of hotspot touches by players. For example, if you define the Touch Limit value as 5, ActivePresenter will just receive the first 5 clicks, then players cannot click any other spots. However, they can clear each clicked spot by clicking it again. Next, click another spot instead.
Score & Reporting Section
- Mode: Select either Graded or Survey mode. The Survey mode helps you to collect information, opinion, or feedback from players. For example, interest, satisfaction, importance, etc. Meanwhile, the Graded mode allows for assessing players’ performance with Points and Attempts.
- Points: Set points for the correct answers. For instance, if you enter the value as 5, when players give a correct answer to each question, they will get 5 points.
- Attempts: Set the maximum attempts that players can interact with each question in the game. For example, if the value in this box is 3, players will have 3 times to interact to find out the correct answer. In contrast, if the value is 1, players just have only 1 time to answer each question.
- Timeout: Set a time limit in which players can respond to each question. For instance, I set the Timeout value as 3 minutes. After 3 minutes, if players cannot submit the answer, the question will be disabled.
Events – Actions Section
- Events – Actions: Allow setting interactive feedback. Those feedback will appear right after players submit their answers. For example, if players give the correct answers, the Correct Feedback Layer will be shown, or vice versa.
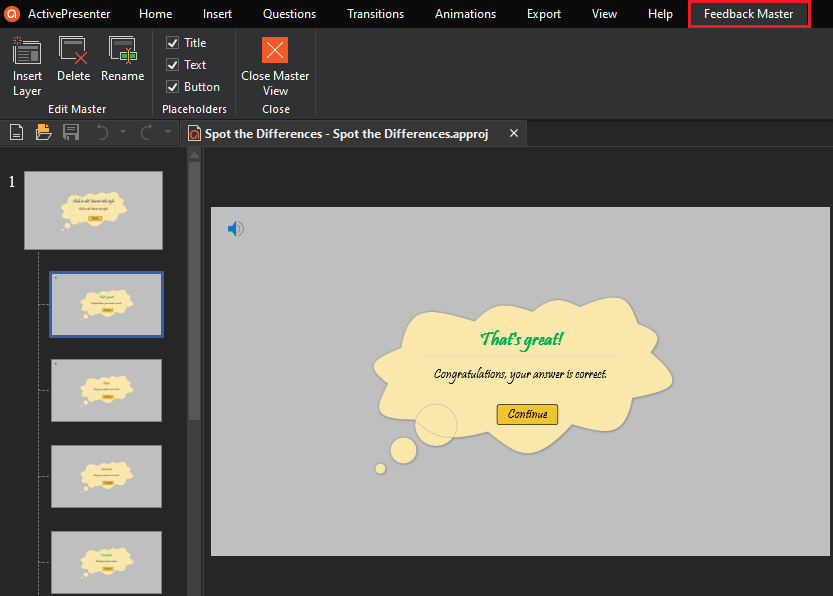
4.3. Customize Feedback Master
With a few clicks, you can create interesting feedback as you desire. Navigate to the View tab > Feedback Master. In the Feedback Master view, you can adjust the shape, information, color, font of each layer, and button.
In addition, you can add images or audio for feedback layers:
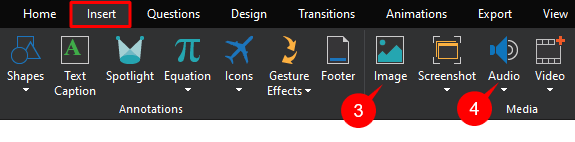
- Image: Open the Insert tab > Image (3). Next, pick up one image from your folder.
- Audio: Access the Insert tab > Audio (4). Then, select audio from your computer/ built-in list, or create your own new one.
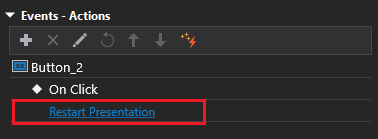
As shown in the rule of the game, if players submit a wrong answer, they will have to start playing again. So, we’ll add the Restart Presentation action to the Continue button of the Incorrect Feedback Layer.
5. Preview and Export the Spot the Differences Game
After completing the interactive game, you can preview it to see how it works. Just open the Export tab > HTML5 Preview.
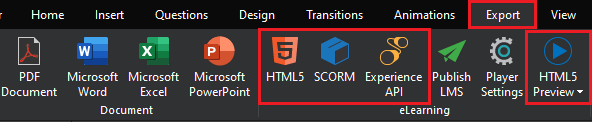
Finally, ActivePresenter enables you to export your game to HTML5, SCORM, or xAPI packages depending on your needs.
Final Words
That’s all the techniques to create the Spot the Differences game in ActivePresenter. Stay tuned for the upcoming interactive game and eLearning videos on our YouTube channel. Have a great time!
Table of Contents
See also:

Follow us: