Is creating tutorial videos as difficult as you might think? This blog will reveal secrets on how to make them with ActivePresenter.
Apart from reading materials or listening to in-class lessons, watching tutorial videos is one of the most effective methods of learning something new. The reason is that videos provide both information and vibrant visual images, which help students retain information more effectively. Do you wonder how to create a tutorial video? This blog will show you how.
Interested in creating engaging and effective tutorial videos like the ones you find so helpful? Before we dive into the “how-to,” consider the powerful tool that can simplify the entire process: ActivePresenter. From screen recording and annotation to interactive elements and professional editing, ActivePresenter equips you with everything you need to create compelling video tutorials. Start creating your own impactful tutorials with ActivePresenter today!

Table of contents
- What is a tutorial video?
- When are tutorial videos used?
- How to create a video tutorial with screen recording?
What is a Tutorial Video?
Tutorial videos (also called how-to videos) are videos that include step-by-step instructions and explanations on how to do a process or complete a task. Each video lasts for 2 – 10 minutes. In a tutorial video, guidance, annotations, questions, and interactions are the key elements to attract the students’ attention.
When are Tutorial Videos Used?
You can see this type of video in any field for training or educational purposes. In general, tutorial videos are the first choice when you would like to teach someone a process or share information. For example, in Information Technology, tutorial videos are considered a means of transferring information. Users can quickly obtain knowledge and use the software effectively by watching these videos.
In short, if you know how to do something in a cool way or you are an expert in any field, you can create a tutorial video and share it with others easily. Details about the way to create tutorial videos with screen recording in ActivePresenter are mentioned in the next section.
How to Create a Tutorial Video with Screen Recording?
1. Choosing a Topic
The first step of creating a tutorial video is to choose a topic. Your video topic has already been determined if you make only one video. However, if you would like to make a series of videos, you have to reflect on the topic of each video. In this way, you can avoid content overlapping or lacking problems.
2. Making an Outline and Writing a Script
Once completing choosing a topic, you need to make an outline and write a script for your video. These are considered indispensable parts of every video-making process. You start outlining by listing all the main ideas and then organizing them in a logical order. By doing so, you are not only able to organize your thoughts logically, but your learners also follow and understand your content better. Once finished creating your outline, you can base on it to write a detailed script for your video. Besides, it will help save a lot of time if you use your script to create closed captions for your video.
3. Recording Screen with ActivePresenter
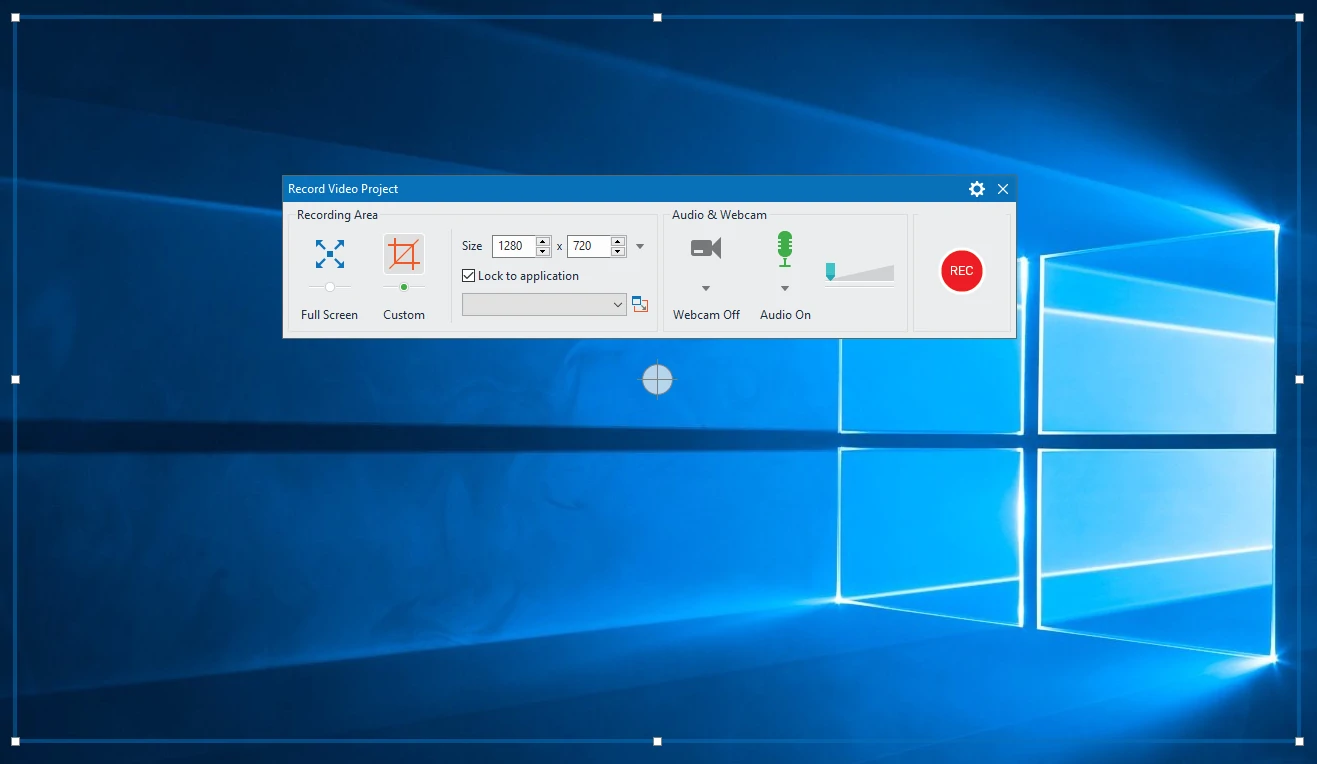
Before that, make sure to turn off all unnecessary applications and notifications that may pop up on your screen while recording. Then, you will record your screen with ActivePresenter – powerful software that allows recording your screen and edit video for free. Once installed ActivePresenter on your computer, you need to set up some settings before recording. For instance, choose to record system audio or audio from a microphone. Or set up to record webcam simultaneously or separately.
After that, you hit the Record button to start recording. You can pause or stop recording during the recording process. Whenever you make a mistake, it is possible to stop and rewind the recording.
4. Editing Videos
Previewing after recording can help check if you have missed any part of the recording or not. If there is any mistake, you can easily decide to rerecord or edit the recording, avoiding time-consuming for the next steps. Thanks to built-in video and audio editing features, ActivePresenter let you edit the recording with ease.
- Cut, delete unwanted parts
- Insert time for video
- Change the video’s playback speed
- Add annotations such as shapes and video animations
- Reduce noise, change audio volume
- Add closed captions
Besides, you can also record narration or convert text to speech, depending on your need. ActivePresenter supports using voices from 3 providers: Amazon Polly, Google Cloud, and Microsoft Azure.
5. Adding Questions and Interactive Elements
In some tutorial videos, you can add some interactive objects to boost learners’ attention and help them remember better. ActivePresenter has a set of questions and interactive objects like Mouse Click, KeyStroke, and Button by default. You can create your desired questions with just a few clicks. Note that only the HTML5 output format allows your learners to interact with your content. Other video formats such as MP4, MKV, AVI, WMV, or WebM don’t.
6. Exporting to Video
When finished creating your project, you select a proper format for your project. Before that, you should preview your project by clicking the HTML5 Preview button. Thanks to this feature, you can see what your video looks like after it has been published. Also, it helps you to check if there is any mistake or not.
Once you have completed checking your project, export it in the appropriate format. If your project is just a video, not including any interactive element, then the video format is good to go. You can find the Export to Video option in the Export tab of ActivePresenter. This option provides a lot of video formats such as MP4, MKV, WMV, AVI, and WebM. Then, you can share videos with others via YouTube or social media like Facebook and Instagram. Besides, if your tutorial videos include elements such as quizzes that require learners’ interaction, Export to HTML5 is more suitable.
Above are the steps to create a tutorial video with ActivePresenter. Hopefully, you will find it helpful.
See Also: