Have you ever wondered how to record screen on Mac, especially when you’re a newbie? Today’s article will provide you with the 3 simplest ways to do that.
For Mac users, knowing to record the Mac screen is a helpful skill that can benefit them in both their work and personal lives. Recording Mac screen to make tutorial videos, online classes, online meetings, a bug you’re facing when using software, and more is now at your fingertips. Below, we’ll walk you through a step-by-step process to screen record your screen with the built-in Mac screen recorders. Besides, another way to record the Mac screen by using third-party software is also suggested for you. Fortunately, these options all work with macOS Monterey, macOS Big Sur, macOS Catalina, macOS Mojave, or any other Mac computer.

Now, keep reading to learn how to screen record on Mac.
#1. Record the Mac Screen with Screenshot Toolbar
As you know, Apple launched the Mojave operating system in 2018 with the screen record feature added. That pre-installed app is called Screenshot. Utilizing keyboard shortcuts is a convenient way to screen record on Mac. So, if you have macOS Mojave or newer versions, here are the step to record your Mac screen:
Step 1: Open the Screenshot Toolbar by simultaneously pressing Command + Shift + 5. Then, you’ll see a toolbar popup at the bottom of your screen.
Step 2: Select Record Entire Screen to record full screen. Alternatively, pick up the Record Selected Portion to record the specific section you want.

Step 3: Click Options to customize the recording settings. There are four main parts to adjust, including:
- Save to: defines the location to save your recording, for instance, desktop, documents, mail, etc.
- Timer: allows you to set up the countdown timer.
- Microphone: enables you to decide which microphone to use.
- Options: provides you with further options for recording settings.
Step 4: Hit the Record button once you’ve selected your desired options.
Step 5: Do either of the following ways to stop recording. Firstly, press Command + Shift + ESC hotkeys. Secondly, click the Stop button (a square within a circle icon) at the top of the menu bar. Lastly, hold down Command + Shift + 5 again then select the Stop Screen Recording button.
After that, the recorded video will automatically save as a QuickTime movie (MOV) in the predefined location. Its thumbnail appears at the bottom right corner of the screen so you can easily click to open it. Then, you can trim your recorded video within seconds.
#2. Record the Mac Screen with QuickTime Player
If you are running an older version of macOS, is there any way to screen record on Mac? No worries! QuickTime screen recording is here to help. In general, QuickTime Player is widely known as a video player on Macs, but it’s also a great screen recorder. Below is the process for recording your Mac screen with QuickTime Player:
Step 1: Find and launch the QuickTime Player app on your computer.
Step 2: Click File in the menu bar > New Screen Recording or press Control + Command + N on the keyboard.
After that, the Screenshot Toolbar appears at the bottom of the screen. You can follow steps 2,3,4,5 in the first way to capture your Mac screen.
Once it stops recording, the player will open the video automatically. Click File again to save your recorded video at your desired location.
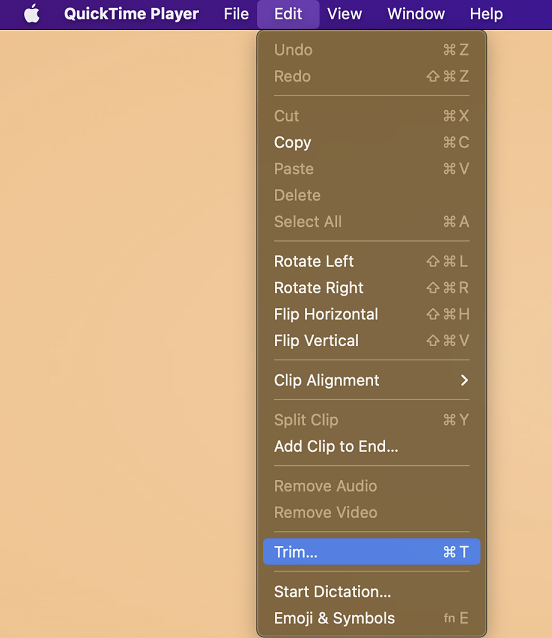
Besides, QuickTime Player also offers you basic functions to edit your recorded video. It allows users to trim, rotate or change the video playback speed as they want.
As such, you know how to use built-in apps to record your Mac screen. Although these apps can help to record quickly and conveniently, they don’t give you enough handy video editing tools. For example, you cannot insert text captions to explain what you do. Or, normalizing audio amplitudes is out of reach. To create professional videos, you may need to find and integrate another video editor. That’s time-consuming, indeed!
The best solution is using third-party software that covers both screen recording and video editing features. So, read on to know more!
#3. Record the Mac Screen with Third-Party Software – ActivePresenter
In this part, let’s learn how to record your screen on Mac with ActivePresenter. This is an all-in-one screen recorder, video editor, and eLearning authoring tool. Thanks to that, you can record your full Mac screen or just a specific area, window, or application with webcam and audio simultaneously or independently. Its amazing features will surprise you, for sure. After recording, the powerful pre-installed audio/video editing tools allow you to convert the recorded files into professional videos.
Now, grab the steps below:
Step 1: Launch ActivePresenter after downloading and installing it.
Step 2: Select the Record Screen as Video option from the Start Page to get a recorded full-motion video. Have in mind that ActivePresenter also offers to create interactive software simulations with the Record Interactive Simulation function.
Then, customize the default settings as you wish in the Record Screen as Video Project dialog. It is possible for you to specify the recording area, change the recording volume, adjust the settings for webcam, audio, mouse cursor, and more. See Record Screen as Video with ActivePresenter 9 for more information.
Step 3: Start recording by hitting the REC button. After the 3-second countdown, every motion on the Mac screen can be recorded.
Step 4: Finish recording by holding down the key Option + Command + 2 (⌥⌘2). Alternatively, click the ActivePresenter icon in the menu bar.
Once, the app navigates you to the editors so that you can edit your recorded video effectively.
Step 5: Export the video to suitable video formats. When finished editing, the tool enables you to export the file to video in many different format types, including MP4, AVI, WMV, WebM, and MK4. Thanks to that, you can share the exported video to a variety of places instead of the MOV one.

Bonus Tips
ActivePresenter provides you with a wide range of audio/video editing tools from basic to advanced. For example, cut, copy, delete, and crop range. Also, change volume, change playback speed, and freeze the frame are added. Moreover, reducing audio noise, converting text to speech, using the green screen effect, etc., are just a breeze.
What are you waiting for?
Just click to download ActivePresenter for your Mac.

Final Words
So, recording a computer screen on Mac is a fantastic experience. And, it’s easy to screen record on Mac, isn’t it? Hope that this article is helpful for all Mac users. If you want to explore the options to record your screen on Windows’ newest version, refer to the article How to Record Screen on Windows 11. And don’t forget to visit our Facebook, Twitter page, and YouTube channel for more interesting information.