Apart from many predefined shapes, Saola Animate lets you draw your own lightweight vector graphics. You can draw lines, curves, shapes, or mimic hand-drawings using different freeform drawing tools.
This tutorial covers:
Drawing Vector Graphics
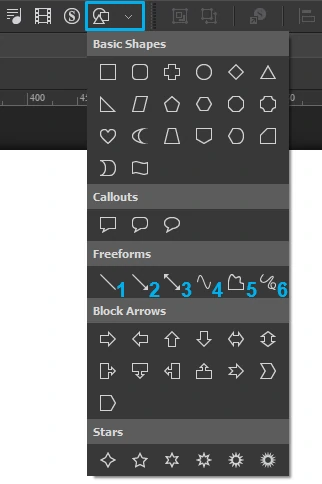
To draw custom vector graphics, in the main toolbar, click Insert Shape.
Besides numerous predefined shapes, you can use six freeform drawing tools, including:
- Line, Arrow, Double Arrow (1, 2, 3): Draw simple straight, point to point lines with or without arrows.
- Curve (4): Draw curved lines or shapes.
- Freeform Shape (5): Draw lines/shapes that have both straight and freeform segments (dual capability).
- Freeform Scribble (6): Draw freeform lines/shapes as if you were using a pencil on paper.
As soon as you select the drawing tool, the cursor changes into a cross hair.
Drawing Lines
Click anywhere on the Canvas to set the start point. Then, move the mouse without releasing the mouse button to draw a line. While moving the mouse, hold down SHIFT to constrain the line to 0, 30, 45, 60, 90, 120, 135, 150, and 180 degrees. To set the end point, just release the mouse button.
Note: You can change the line and arrow style in the Properties pane > Border section.
Drawing Curves
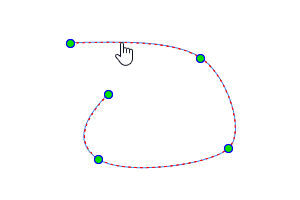
Click anywhere on the Canvas to set the start point. Then, move the mouse to a different position to form a line. To curve the line, just click the mouse button. As you move the mouse, the curve changes correspondingly. Each click adds a new turn to the curve.
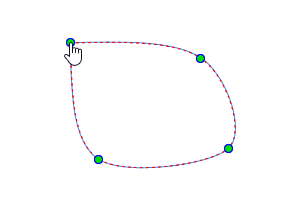
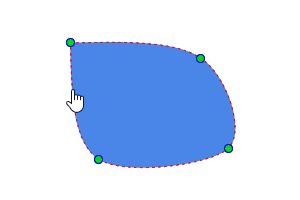
A curve can be either open or closed. If you want an open curve, double-click to set the end point. Otherwise, move the mouse near the start point and left-click to get a closed curve.
Drawing Freeform Shapes
The Freeform Shape tool allows you to draw both straight and freeform lines. First, click anywhere on the Canvas to set the start point. To draw a straight line, release the mouse button and place the cursor elsewhere, then click. If you keep holding down the mouse button, you’ll draw a freeform line. When drawing, you can alternate between straight and freeform lines within the same line shape.
Similar to drawing a curve, you can double-click at any time to set the end point, making an open freeform shape. Otherwise, move the mouse near the start point and left-click to get a closed shape.
Drawing Freeform Scribbles
The Freeform Scribble tool enables you to mimic hand-drawings. Once you start a scribble, keep holding down the mouse button until you finish. The point where you release the mouse button will be the end point of your drawing.
Editing Vector Graphics
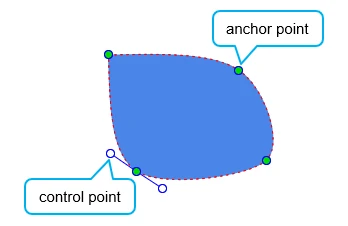
To edit a freeform drawing, right-click it > Edit Point to open the editing mode. In the editing mode, the shape is outlined by a red dashed line containing multiple green circles. These green circles are anchor points which indicate the start and end of each line segment.
When you select an anchor point, two blue handles appear with control points (white circles) at their ends. Drag control points to adjust the degree of the curve or line on either side of the anchor point in relation to the next anchor point along the line.
Take note of the following:
- When dragging a single control point, the remaining control point will move to maintain the angle between them. To change the selected point only, hold down CTRL or ALT while dragging it.
- When the anchor point and the control point have the same position, clicking will select the anchor point. If you want to select the control point, hold down ALT and click the mouse.
Adding and Deleting Anchor Points
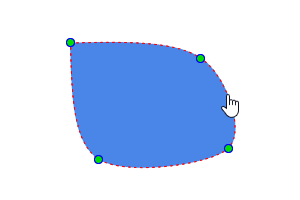
To add an anchor point, click and drag the outline.
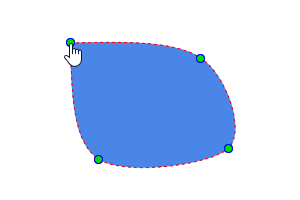
To delete an anchor point, hold down SHIFT and click an anchor point. Deleting an anchor point makes the line change accordingly.
Opening and Closing Paths
To open a closed path at an anchor point, right-click the anchor point > Open Path. Otherwise, right-click anywhere within the path to open it at the start point.
To close an open path, right-click it > Close Path. A linear segment is added from the previous end point to the start point.
Making Straight Segments
Right-click a curved segment and select Straight Segment to straighten it.
Exiting the Editing Mode
Once you finish editing, click any elsewhere outside to exit the editing mode. Alternatively, right-click a shape no matter its outline, anchor points, or control points, and select End Edit Point.
That’s how you draw custom vector graphics with different freeform drawing tools. Don’t forget that Saola Animate also provides a wide variety of predefined shapes which are all lightweight and scaled without pixelation.
