There are times when creating training/tutorial videos, you might have a long video scene or audio part which contains not much important information and you want to speed it up, for example downloading a file, waiting for a process completion. In reality, you can increase or decrease speed either for the whole video/audio or just parts of them. ActivePresenter allows you to do that easily.
This, as a result, not only saves the project duration and size but provides better viewer’s experience. Let’s take a quick glance at how to do that in the article bellow.
Change whole video/audio speed
To change speed for the whole video/audio, take following steps:
Step 1: Select video by clicking the video object.
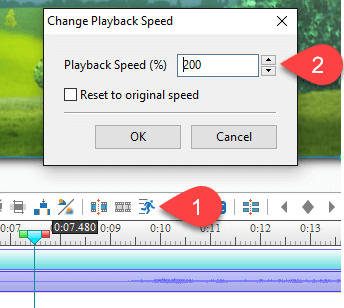
Sept 2: Click the Change Playback Speed button. (1)
Step 3: Specify the percentage of change. (2)
Reset to original video/audio speed
After changing the video/audio speed, you still can have its original one. To do that, just take followings:
Step 1: Select the video.
Step 2: Click the Change Playback Speed button. (1)
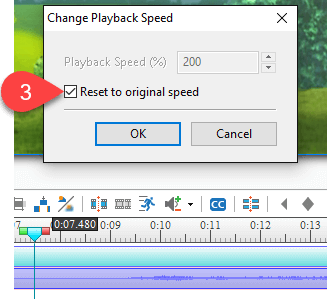
Step 3: Select Reset to original speed button. (3)
Change a specific video/audio part speed
To change speed for just a part of the video, at the very first step, you have to select the range so as ActivePresenter to know where you want to apply the changes. Now, take following steps:
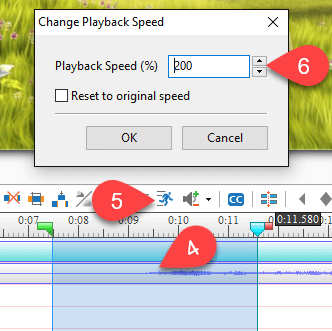
Step 1: Select the range by dragging the red and green markers along the ruler. (4)
You can zoom the Timeline in for more precisely selection if necessary.
Step 2: Click the Change Playback Speed button. (5)
Step 3: Specify the percentage of change. (6)
Reset a specific video/audio part speed
To restore the original speed for just a part of the video or audio, at first, you have to select exactly the range that you have changed the speed before. It’s recommended that you should turn the snap mode on. Now, take the following steps:
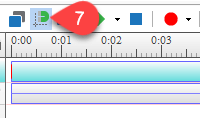
Step 1: Click the Snapping button to turn the Snap mode on. (7)
Step 2: Select the range. (4)
Step 3: Click the Change Playback Speed button. (1)
Step 4: Select Reset to original speed button. (3)
So, it’s quite easy to change any video or audio speed with ActivePresenter, isn’t it? Hope that it will help in your video/audio editing procedure. Please give it a try and let us know if you have any obstacle.


