You might have visualized in your head how to make your presentation interactive. However, do you know step by step how to convert your existing PowerPoint presentation into an eLearning module? There is a must-have item you should not miss out on. It is a powerful eLearning authoring tool. Therefore, this post will guide you in detail how to add interactivity to your premade PowerPoint presentation using an all-in-one course creator, ActivePresenter.

Stage 1: Preparation
Prepare PowerPoint Presentation
Designing the core content of your presentation in PowerPoint in advance will help save time a lot if you have been familiar with using Powerpoint. Or even if you want to create everything from the very beginning, you can still do that easily in ActivePresenter. No matter which way you choose, all materials will need to be well-prepared first:
- A scenario of the whole course/ presentation
- Text content for each slide
- Audio recording/ background music/ sound effects for each slide and object
- Images for illustration
- Videos/ screen recordings for illustration
- Intended animations/ transitions/ interactions
- Downloadable resources
Before coming to animated and interactive factors, make sure to complete all the content in the static state first. And, one tip at this step is avoiding lengthy texts. You should use mind-mapping techniques to make the overview of the presentation logically and consistently. Also, visual elements are especially necessary. To illustrate information, try using infographics, charts/ graphs, and videos/ images instead. Later on, integrating interactive elements to your presentation like quizzes, sliders, buttons, or mouse clicks will even increase the attractiveness of the slides.
Import PowerPoint into ActivePresenter
After finishing preparing the PPT presentation, it’s time to use the second tool, ActivePresenter, to add interactive elements to your PowerPoint. Or, if your computer doesn’t have Microsoft PowerPoint installed, you can still import PowerPoint slides directly into ActivePresenter 9.
- On the Start Page, click Import PowerPoint > browse and select the PowerPoint file you want to import.
- In the workspace, click the ActivePresenter button (1) > Import PowerPoint (2) > select the PowerPoint file on your computer.
Read this full tutorial here for more information about how to import.
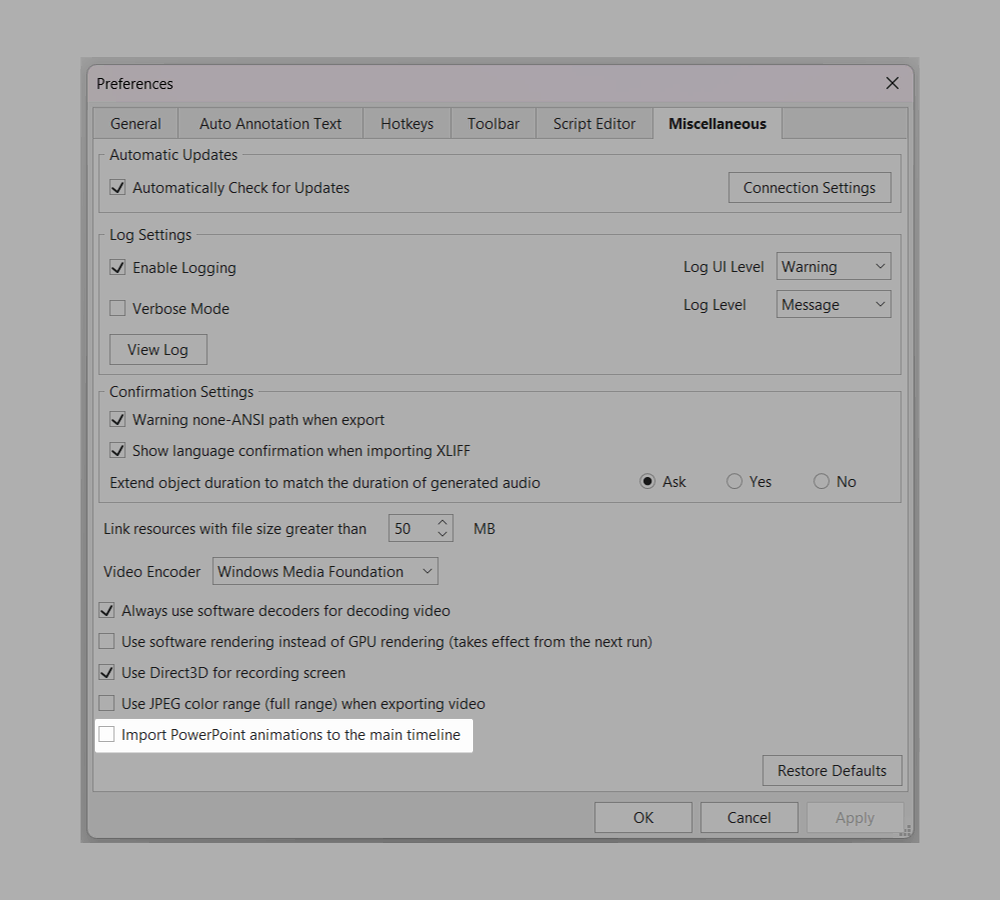
But, before importing your PPT presentation into ActivePresenter, don’t forget to check if your setting is Import PowerPoint animations to the main timeline or not. Your checking or unchecking this option will affect how you control the animations later in the output. Let’s continue reading to understand.
Stage 2: Conversion from PowerPoint to Interactive eLearning Module
Differentiate Animations in Click Sequence Timeline and in Main Timeline
As mentioned above, checking or unchecking the Import PowerPoint animations to the main timeline will lead to 2 cases:
| Uncheck the option | Check the option | |
| In which timeline are animation imported and edited? | Click Sequence timeline. Animations will be edited separately in this timeline. | Main timeline. Animations will be edited in the main timeline and the animation bars are stuck to the object bars. |
| How do presenters control animations when presenting? | Control like in PowerPoint: – Click the mouse – Press the arrow key – Coordinate with other effects on slides | Control similarly to other authoring tools: iSpring, Articulate,… – Use navigation toolbar in the HTML5 output – Interact with interactive elements (button, slider, text entry, mouse click, drop area,..) – Set up timings and start time for animations in advance |
| How are the animations edited in each case? | 1. Choose either Start On Click or Start With Previous 2. Set up delay time (start time) for each animations 3. Change animations speed 4. Change effects’ order | 1. Add entrance and exit effects 2. Add emphasis effects and motion paths 3. Adjust object animation effects |
| Link to refer to | Work with Click Sequence Timeline | Create Object Animation Effects in ActivePresenter Add Slide Transition Effects in ActivePresenter How to Navigate among Slides Using Buttons |
Adjust Imported Slides’ Properties
When finishing importing the PowerPoint slides, ActivePresenter will launch a new project with the slides included. All similar factors like texts, shapes, graphs, videos, images, sound, and so on will be kept totally. Fonts, sizes, and colors of objects are consistent with those in PowerPoint as well. But before that, don’t forget to install the necessary fonts on your computer for ActivePresenter to access and display them correctly.
Each PowerPoint slide now becomes an ActivePresenter slide. And, you can use various functions and commands to edit the slide and its contents similarly to how you edit in PowerPoint and even more. For example, copying, cutting, or deleting slides/ objects, splitting and merging slides, changing slide transition effects, recording extra screen tutorials, or adjusting animations.
Add Interaction Object or Interactive Quiz into the PowerPoint Presentation
If you feel too familiar with animations in PowerPoint and want to find something more interesting, ActivePresenter can perfectly solve that need. Not only does the software support all similar animations in PowerPoint, but it also allows you to create other types of interactive navigation between slides and objects.
Create Interaction Objects for Your Interactive PowerPoint Presentation
When you add these interaction objects to your slides, users can interact with these objects in the HTML5 output by
- answering questions,
- clicking on a button,
- dragging and dropping objects,
- selecting checkboxes/ radio buttons,
- or entering text into a text box.

The available interaction objects you can use in ActivePresenter are questions, mouse clicks, key strokes, text entries, drop areas, buttons, checkboxes, radio buttons, sliders, dropdowns, and animated timers. Details about each of these objects can be found in this overview tutorial.
Add Interactive Questions to Your Interactive PowerPoint Presentation
Besides interaction objects, what makes eLearning tools like ActivePresenter favorable among creators is its built-in presets. For example, in ActivePresenter, those presets are built-in question types. Users no longer need to self-design question layout or find ways to make them interactable. The 13 types of questions in ActivePresenter have been set up in advance with:
- ready-made 3 parts visually (question title, answer area, and submit button)
- built-in Score & Reporting and Events – Actions systems
- built-in feedback messages when learners answer questions correctly, incorrectly, or undone
You can take a look at the overview post of these 13 types of questions in ActivePresenter here.
Trigger Events – Actions to Create Interactive PowerPoint Presentation
After building all the content visually, it’s time we came to setting up interactivity for the whole presentation or course. As you can see from the settings of interactive questions above, events and actions are important parts if you want to create highly interactive quizzes, courses, or games in any authoring tools, especially in ActivePresenter 9.
- An event is an activity that users do to interact with an object. For example, hovering the mouse over/out an object, or clicking on an object.
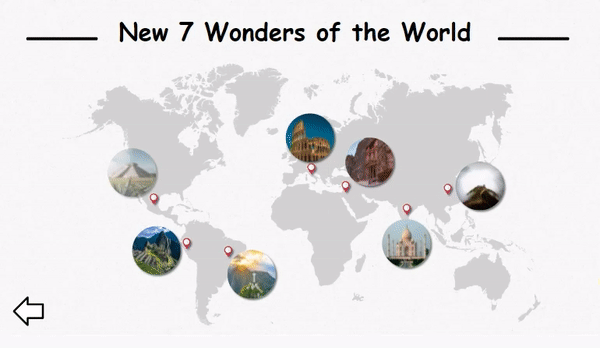
- When an event occurs, it triggers one or several actions. In the demo above, actions could be highlighting the image, showing the info text, or navigating to another slide.
Let’s read this tutorial to know in more detail how to work with events and actions to trigger interactivity in ActivePresenter.
Stage 3: Sharing & Publishing
Unlike normal PPT presentations, to view the outputs made in authoring tools, you will not view and share them directly. Instead, you will need to share on certain platforms or compress as a zip file to send it. This is because your outputs include interactive elements. To be able to interact with them, viewers will need to get access to the platforms where you upload the outputs. In ActivePresenter, there are 3 ways for users to export and distribute the outputs.
Export to HTML5
If you choose this option to export your project, you will need a web server. This is because the output uses the HTML5 standard. And you will embed this output into a webpage. Once finished exporting and embedding it, users can view and interact with the content on the World Wide Web. However, this method does not allow tracking user interaction and results as using an LMS. For example, the game I embed below is the result of exporting to HTML5 and embedding it into this website:
You can take a look at more tutorials below:
Embed HTML5 Course into a Webpage
Export to SCORM or xAPI to Upload to LMS
This is the recommended method for all eLearning creators. You will use a Learning Management System (LMS) in this case. This means that you will have to export your project to SCORM or xAPI package. It enables you to effectively manage, deliver, and track training courses. You can explore popular LMS options like Moodle Cloud, TalentLMS, and Scorm Cloud.
And, to know whether to choose Export to SCORM or Export to xAPI, you will need to define which formats your LMS supports the best. Let’s read the tutorials below to better understand.
Export Project to xAPI Packages
Compress as A Zip File and Share
The final option is to compress the project as a zip file and share it. In this way, you can share it via any sharing platforms like email, Google Drive, OneDrive, Zalo, and so on. However, this method also lacks the tracking capabilities of an LMS. It only supports viewers viewing and interacting with the content.
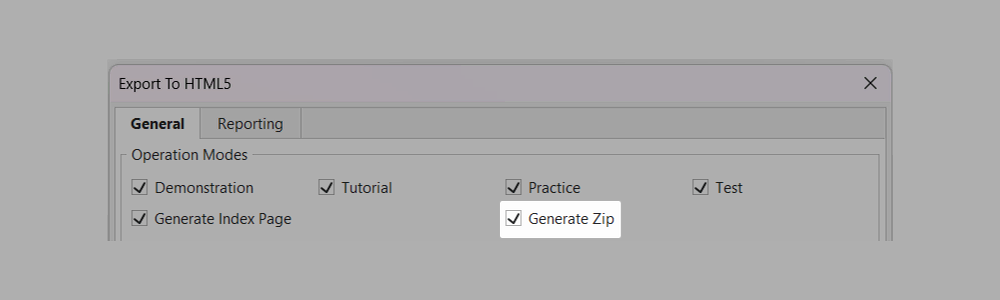
So, you will choose Export to HTML5, then tick the Generate Zip option.
Final Thoughts
Turning a static PowerPoint presentation into an interactive course module has no longer been a challenge once you own an ActivePresenter license. Download the software and try all features with no limitation in trial time and functionality now. Millions of users have chosen ActivePresenter as a reliable companion in terms of interactive course editing and screen recording? What about you?

Table of Content
2: Conversion from PowerPoint to Interactive eLearning Module