Suppose that you have English videos, films, or eLearning courses. Then you want them to reach French, Spanish audiences/learners or people all over the world. How? It’s simple. Let’s create multilingual subtitles for them.
The term multilingual subtitles refer to displaying subtitles in multiple languages, but not simultaneously in your video. It makes your content reach wider audiences. No matter which language audiences speak, they can understand the audio and video content.
Definitions
There are some terms you may feel confused about them:
- Subtitles are the text-based translation of the audio. Their target audience is people who speak different languages. Audiences can hear the soundtrack while reading subtitles in their own language to understand the content.
- Multilingual subtitles are the practice of displaying subtitles in multiple languages. Only one language is displayed at a time.
- Multi-language subtitles are the same as multilingual subtitles, but all languages are displayed at a time.
- Captions are the same-language text versions of the audio. Also, they describe other sounds like music, background noises and audio cues. Captions mainly serve deaf or hard-of-hearing audiences, or in situations when the audio is muted. So, audiences need more sound descriptions to understand the story.
Create Multilingual Subtitles for Videos/eLearning Courses
There are several ways to create subtitles in multiple languages for your videos or eLearning content. However, in this blog, you will learn how to do that using ActivePresenter. This app is a 3-in-1 screen recording, video editing and eLearning authoring tool. First of all, let’s download and install the latest version of it on your computer.

Now, let’s learn how to create French and Spanish subtitles for your content.
Step 1: Create the First Subtitles (French)
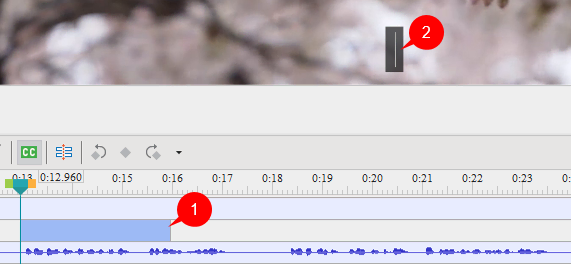
Firstly, create French subtitles as the first language by adding closed captions. ActivePresenter allows you to add closed captions manually or import an *srt file into the project. To add manually, open the Insert tab > Closed Captions, or click the CC button on the Timeline pane.

Then, a closed caption node (1) will appear at the position of the playhead on the Timeline pane, and a closed caption editor (2) appears on the Canvas for you to type the subtitles.
You can type the French subtitles into the caption editor (2) now. However, the present default language is English. So, before adding subtitles, you have to add French language:
- Go to the Insert tab > click the drop-down arrow on the Closed Caption button > Multiple Languages. Alternatively, click the
 Edit Language button in the Properties pane > Size & Properties > General. After that, the Edit Language dialog appears:

- Click the plus button (3) to a add new language.
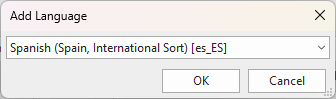
- Select French in the Add Language dialog, then click OK.
- Click the (5) button to set French as the default language.
- Input a piece of French subtitles into the Text field (6).
- Select English in the Current Language dropdown and click the button (7) to remove this language (optional).
- Then click Close to finish.
Now, the French subtitles that you’ve input in the Text field appear in the closed caption editor (2) on the Canvas. Continue adding French subtitles by adding closed caption as usual. For more details, see How to Add Closed Captions.
Remember to drag the end edge of the CC node to adjust its timing to make CC synchronize with the audio.
On the other hand, if you have a French subtitle (*.srt) file in advance, you can import it to the project. Click the arrow on the Closed Caption button in the Insert tab > From File… > Import To Single Slide or Import To Multiple Slides > select the subtitle file.
Step 2: Add the Second Language (Spanish)
To create multilingual subtitles for your content, repeat the adding language step as above. Here, we add Spanish as the second language.
Step 3: Add Spanish Subtitles
After adding Spanish as a new language, now turn to adding the Spanish subtitles to the project. To do that, perform the following steps:
- Select each CC line in the dialog.
- Type the Spanish subtitles in the Text field.
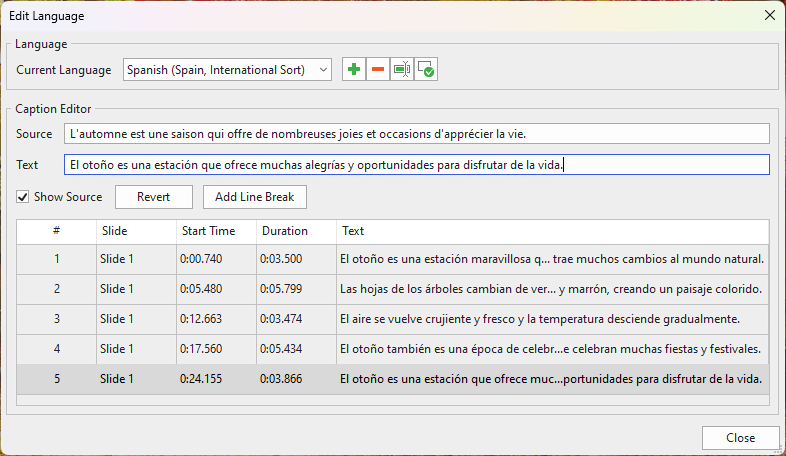
In the dialog:
- Show Original: Select this checkbox to show the Source field.
- Revert: Revert the new language to the original one.
- Add Line Break: Add the <br> tag to a text to break it into new lines.
After that, the added text of the new language will replace the old one in the selected CC line.
- Click Close to apply.
Step 4: Enable the Subtitle Toggle Button
ActivePresenter allows you to hide/show subtitles as well as switch them between multiple languages by clicking the CC button on the player. To enable this button, open the Export tab > Player Settings. Then, in the Player Settings dialog, access the General tab > General Parameters > Toolbar > tick the CC Button check box > click OK to save the changes.
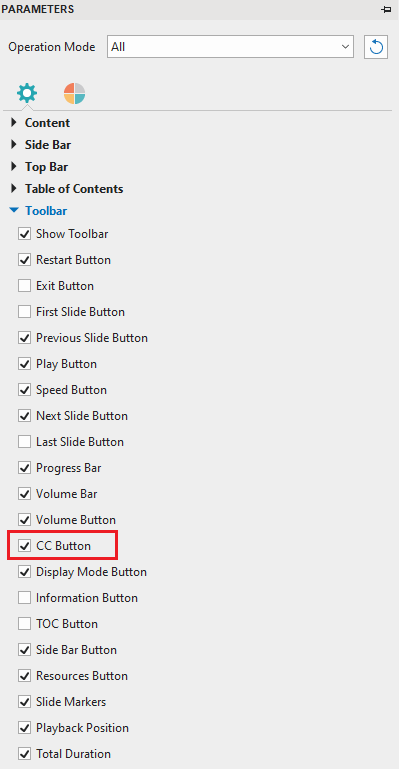
By doing so, the CC button appears in the bottom right corner of the player.

Step 5: Preview and Export
Before exporting the project, you should preview it to check how subtitles display on the output and whether they synchronize with the audio. Open the Export tab > HTML5 Preview. See Preview HTML5 Output to learn more.
Then, you can export the project to videos or HTML5 output. Besides, if you want to export subtitles separately, right-click a CC node in the Timeline pane > Export Closed Caption To File. ActivePresenter will generate each language to a subtitle file as a .srt file.
So, you’ve learned how to create multilingual subtitles for videos or eLearning courses. If you have any questions, feel free to contact us. Besides, follow our Blog and YouTube channel for more helpful articles and videos.
See more: