Let’s read this whole blog to learn how to apply 7 must-know video editing tips for beginners to create professional-looking videos in a short time by using ActivePresenter 9.
Overview of Video Editing for Beginners
You’re at the start of creating a video by yourself. What is your visionary scope when talking about video editing? Is it just so simple with basic video editing techniques like Cut, Copy, Delete, and Crop Range? Or, will it be more fascinating but overwhelming with too many difficult techniques? Well, take it easy first. You can still master your video editing skills with simple steps if you choose the proper software to get started with.
So, here are some must-know editing tips to apply while editing no matter which level you are at. They are Crop, Mirror, Freeze, Join, Change Speed, Blur, and Green Screen. It’s pretty easy to find these features in any editing tool. However, you may wonder where to find the whole package of these features in just an app to simplify your editing experience. The answer is below.
ActivePresenter – A Comprehensive Solution of Video Editing, Screencasting, and Content Creating for Beginners
ActivePresenter is a leading eLearning authoring software in the field of content creation and editing. You can freely create videos, images, slides, presentations, eLearning courses, audio tracks and more from ActivePresenter.
Before getting started, let’s download the free version of ActivePresenter and you can try all the features as long as you want.

ActivePresenter allows you to edit both imported and recorded videos. One thing you should pay attention to before applying any technique is you need to select the video object on the Canvas/Timeline pane or a range of it on the Timeline pane. This will enable the upcoming techniques to appear.
Video Editing Tips and Techniques for Beginners
Crop – Remove Unwanted Parts of a Video
This feature helps you remove unwanted parts of videos.
- First, navigate to the Crop section in the Size & Properties tab of the Properties pane or Format tab. Alternatively, right-click the video and select Crop. Then, a red line rectangle, the crop area, will cover the border of the video object.
- Drag the crop area or fill in a number in each combo box in the Crop section to specify the cropped area.
- Lastly, click anywhere on the Canvas to finish cropping your video.
Read the full tutorial here: How to Crop Images and Video in ActivePresenter
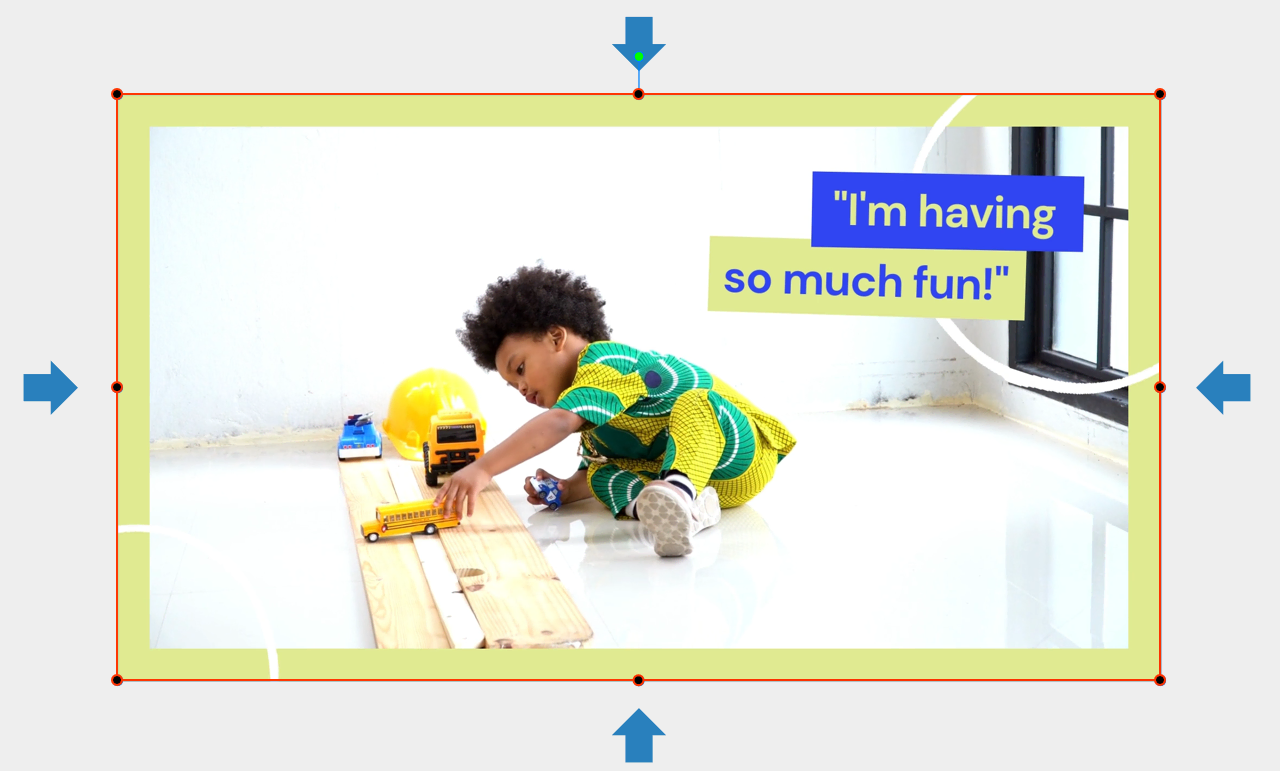
Mirror – Flip the Video Horizontally
Besides normal rotating options, you can easily mirror a video in ActivePresenter 9 by flipping it horizontally. Just right-click the video or choose the option in the Format tab > Rotate > Flip Horizontal.
Read the full tutorial about rotating and flipping objects here: How to Rotate and Flip Objects in ActivePresenter
Freeze – Insert Time to a Video
If you want to freeze the video for a certain amount of time to explain more information or let users watch exactly what is on the screen, simply do this in ActivePressenter 9 by using the Insert Time feature.
- First, place the Playhead at the position you want to freeze on the Timeline pane.
- Next, click the Insert Time button.
The default frozen time in the dialog is 2 seconds. - Lastly, adjust the duration as you want.
For example, drag the whole bar to change the start time.
Or, drag the right-side edge of the yellow bar to increase or decrease the duration of the added time.
Explore the full instructions of inserting time to a video here: How to Insert Time to Videos in ActivePresenter
Join – Make Two or More Videos Become 1
Almost any editing app allows you to cut the video into smaller parts to easily edit. However, not many offer users the Join feature to make two or multiple videos become 1. In ActivePresenter 9, you can simply split and join the video(s) with just a few clicks.
To split the video, after selecting the video:
- Place the Playhead where you want to split on the Timeline pane.
- Click the Split Audio/Video Objects button.
To join two or more videos:
- Choose the videos by holding down CTRL or SHIFT on the keyboard while clicking the mouse.
- Click the Join Audio/Video Objects button.
Learn the full tutorial to split and join the video(s) here: How to Split and Join Video(s) in ActivePresenter
Change Speed – Speed up or Slow down a Video
Speed-up or slow-down are common techniques for all editors. You can easily change the speed of a whole video or just a part of it in ActivePresenter 9.
- First, select the entire video or a specific video part by dragging the Start and End marker of the Playhead along the Timeline.
- Then, click Change Playback Speed.
- Finally, customize the value in the dialog as you want.
The default value is 200%.
To speed up the video, enter a value higher than 100%.
In contrast, enter a value lower than 100% to slow down the video.
Choose Reset to original speed to get back to the original video speed.
See more insights about changing the speed of a video here: How to Change Video Speed in ActivePresenter
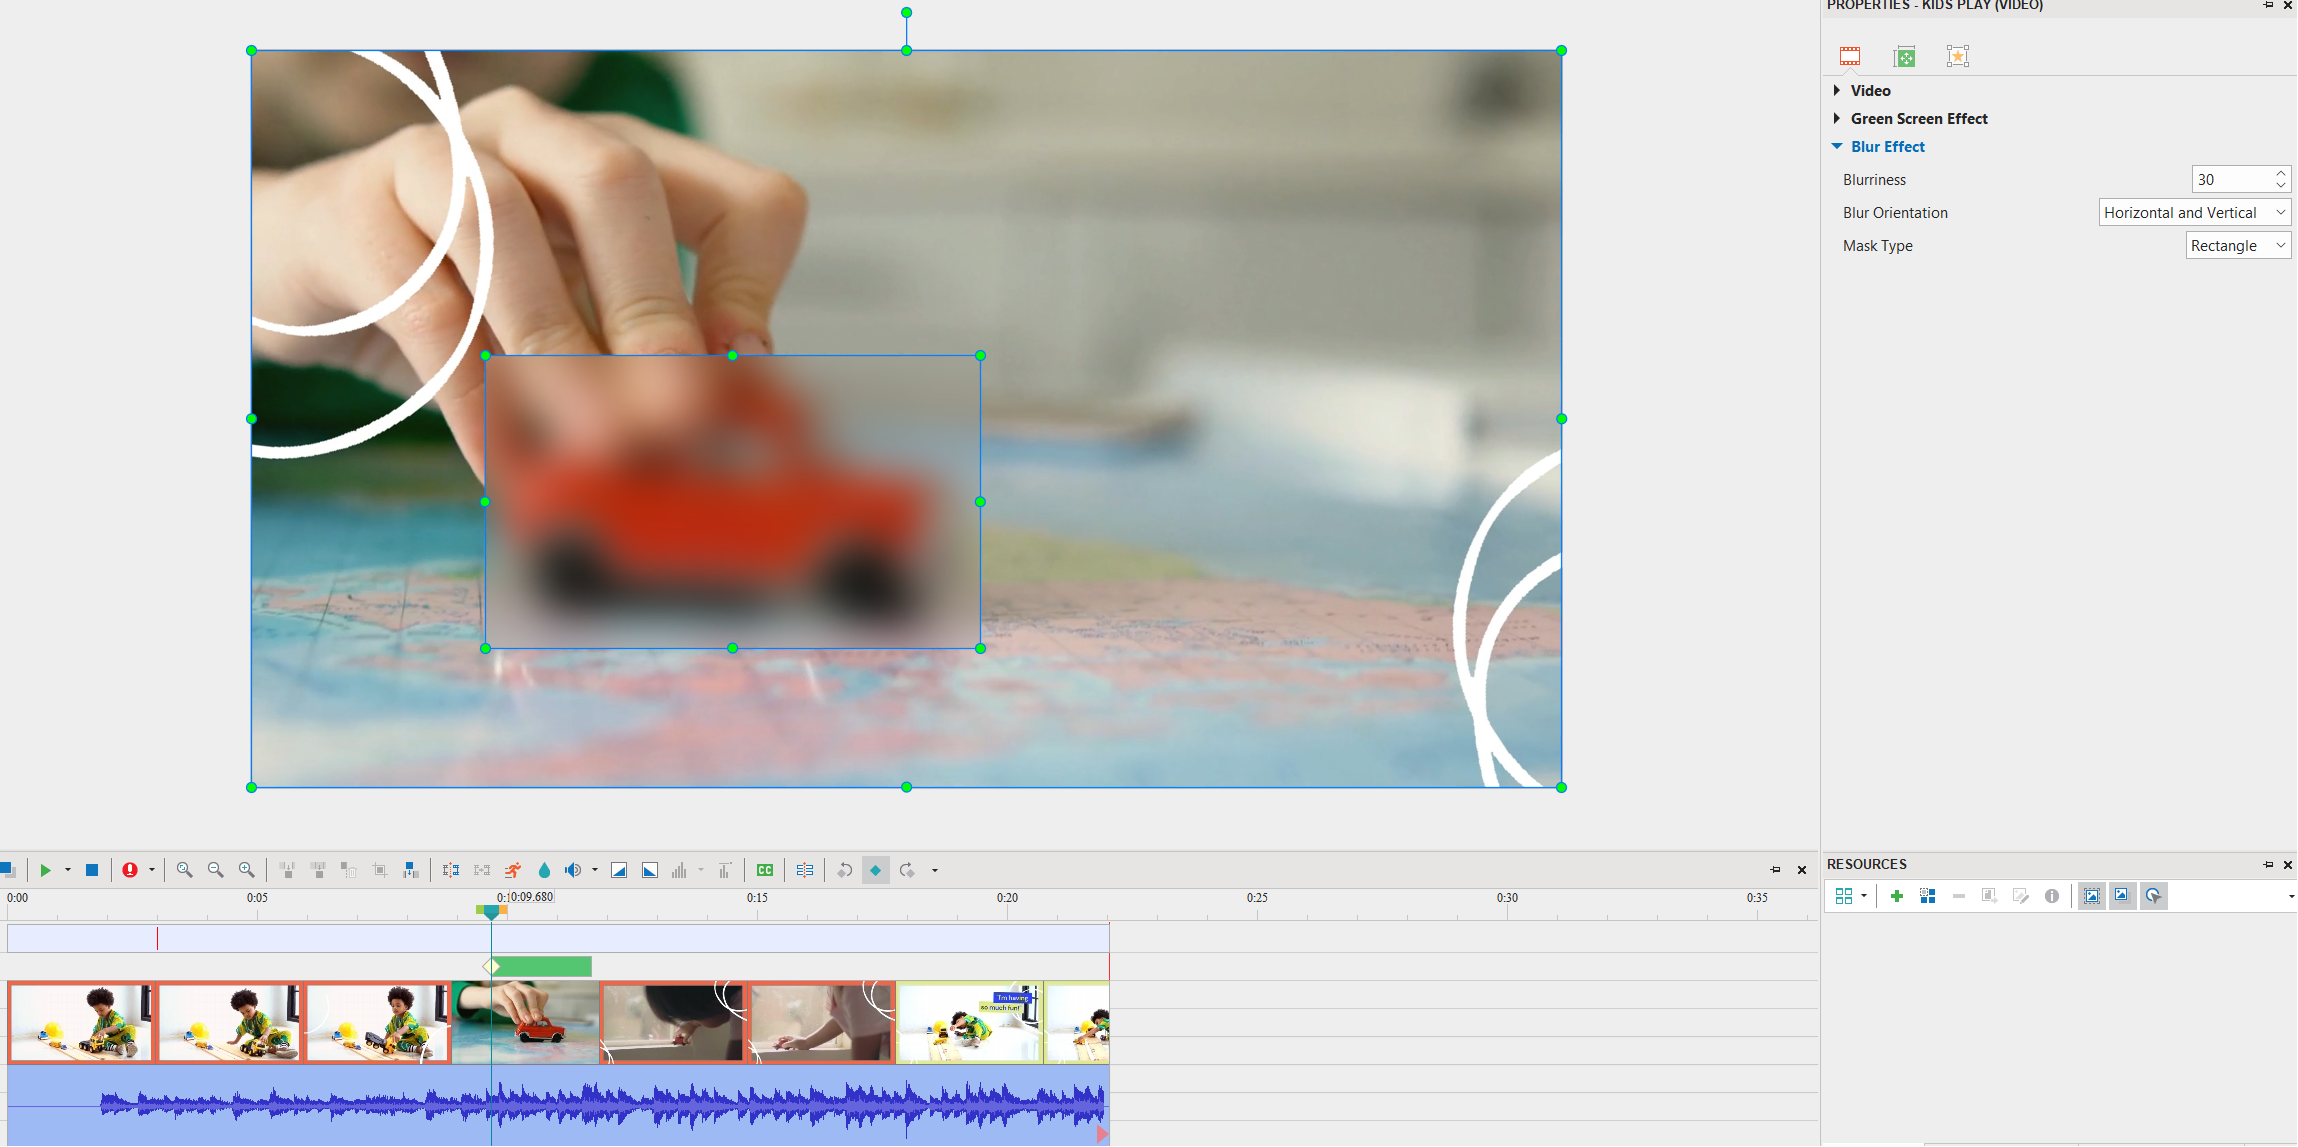
Blur – Hide Unwanted Information
Sometimes, your video might include some private or unnecessary information you want to hide. This feature is especially useful in those cases.
- First, select a range of the video on the Timeline pane.
- Next, click the Insert Blur Area button.
- Then, decide the blur duration in the pop-up dialog.
- Finally, customize the blur area in size, position, blurriness, orientation, and type.
And, to blur the moving object in your video, use the keyframe feature for precision. You just need to place the Playhead at each position you want to add a keyframe. Then, click the Add/Remove Keyframe button or simply move the blur area on the Canvas to create a new keyframe.
See more details about blurring moving objects here: How to Blur Moving Objects in ActivePresenter
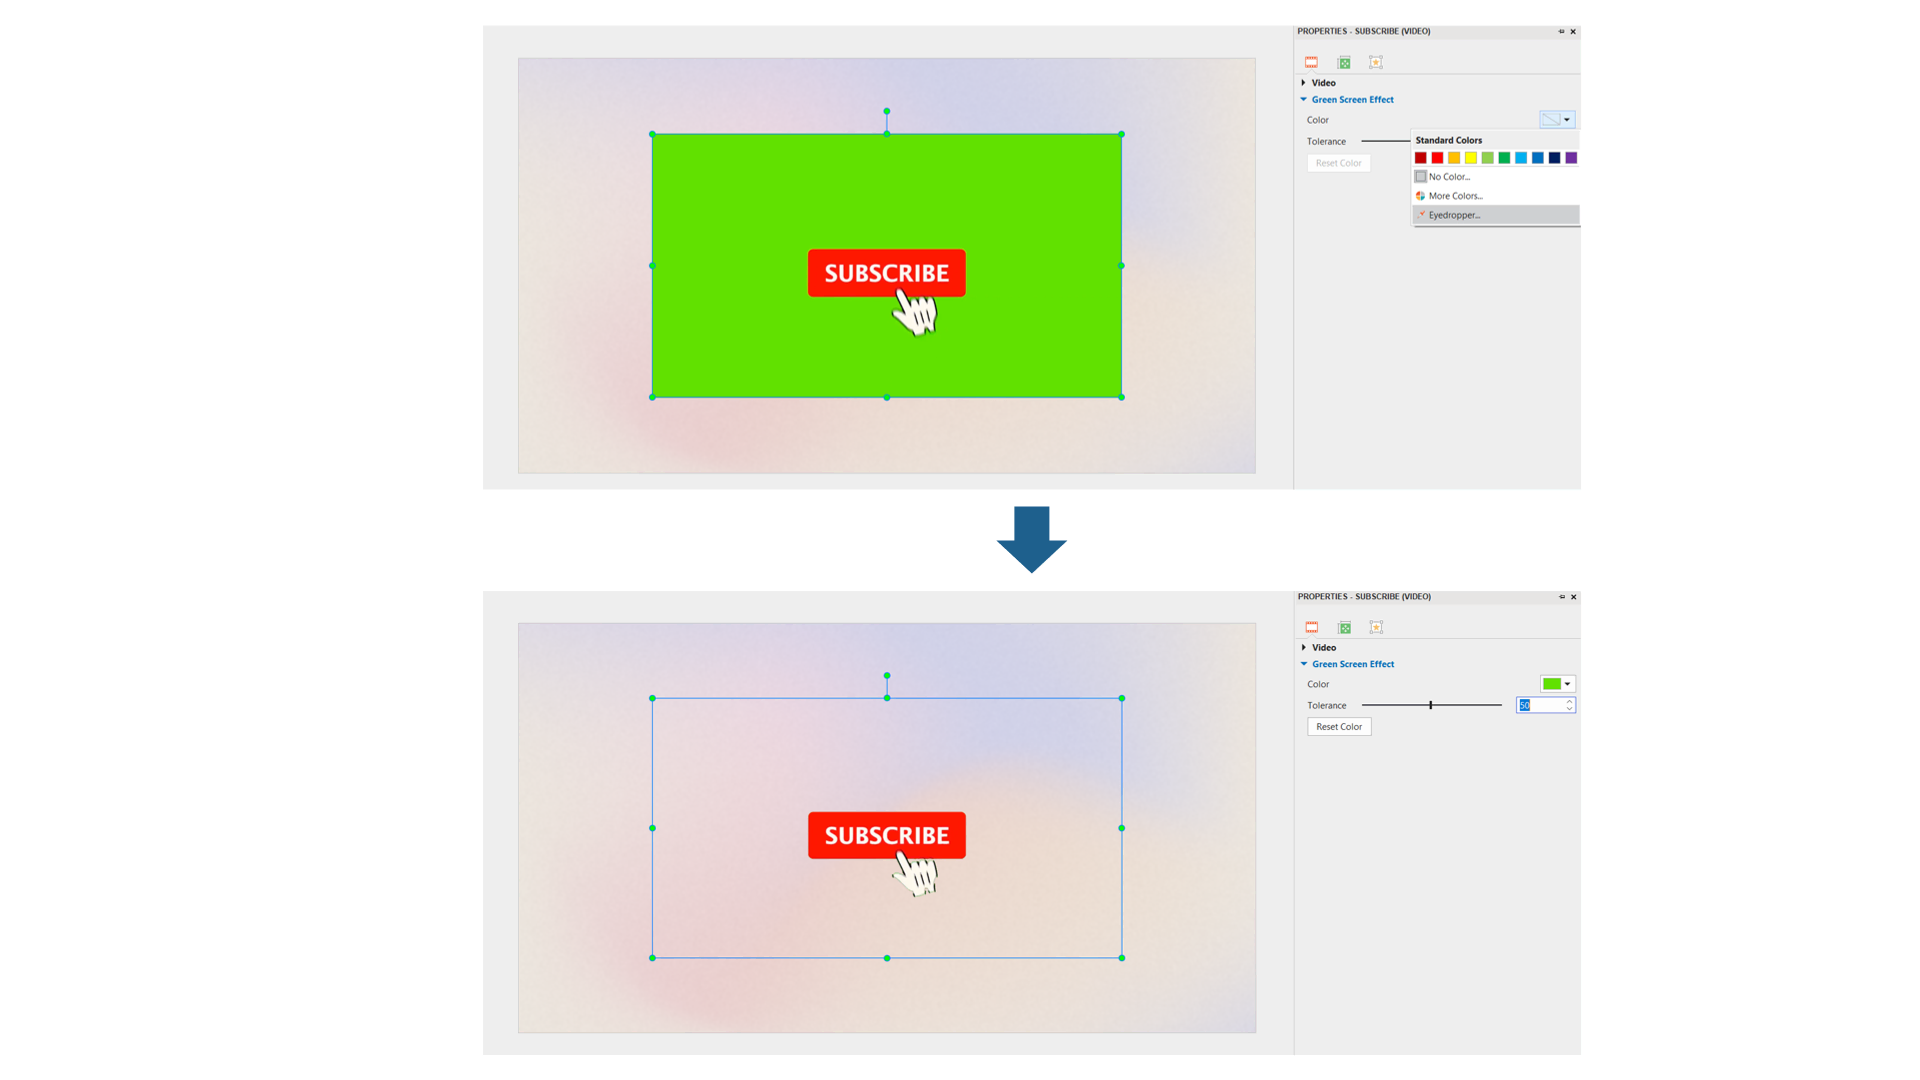
Green Screen – Blend a Video with Another Video Layer
This feature helps you blend a video with another layer of video easily. A typical example of this is in the weather forecast where a presenter stands in front of a moving weather map. The technique of it is to key out a color from a video, then replace that color with another video. In fact, any solid color can be used, but green is the most commonly used because it provides good contrast and rarely occurs on the human body.
- First, access the Media tab of the Properties pane to see the Green Screen section.
- Then, choose a color from the Color option to key out. More precisely, you should use the Eyedropper to choose the color from the video.
- Finally, move the Tolerance slider to adjust the range of color to key out.
See the detailed tutorial on how to use the green screen effect here: How to Use Green Screen Effect in ActivePresenter
Final Words
In conclusion, above are the 7 techniques that you should apply to the video editing process for beginners. With these tips, you have leveled up yourself in the field of video editing. Thus, mastering other complicated techniques later on is no longer a concern. Visit our YouTube and Blog now for more helpful tips. Also, keep in touch with us via our Community if you have any further questions.
See Also
Free Video Editing Apps for Windows