Closed caption or CC is the text version of the spoken part of videos, or movies. It makes videos/movies more accessible for people who are hard of hearing. So, in this post, you will learn how to add CC to projects in ActivePresenter 9.
Table of content:
- Add closed captions
- Add more languages to closed captions
- Format closed captions
- Convert closed captions to speech
- Toggle the closed caption
- Export closed captions to file
- Delete closed captions
Add CC to Projects
To add closed captions to your project, follow the steps below:
- Play the Playhead at the timestamp that you want the closed caption to appear.
- Click either the CC button on the Timeline pane or in the Insert tab.

Then, an CC node will appear on the Timeline pane at the position of the Playhead. On the Canvas, an CC editor also appears for you to type the caption.
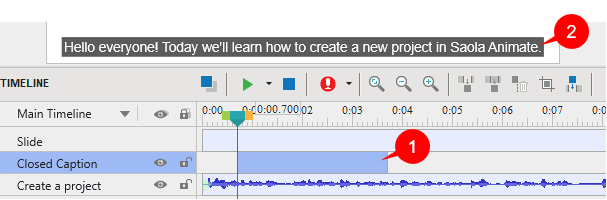
- Type the caption in the editor (2). Repeat these steps to add more closed caption nodes. These nodes are put in the same line on the Timeline and considered as one closed caption object.
- Drag the CC node or its start/end point to change its timing and duration. You should display each CC for adequate time so that your audience can read it comfortably.
Besides, take note of the following:
- If you don’t specify the timestamp, ActivePresenter 9 will append the new CC node to the end of the previously existing CC node.
- The CC nodes are arranged in time order. There is no overlapping in time between CC nodes, meaning that only one CC node can be displayed at a time.
- You cannot switch the order of the CC nodes.
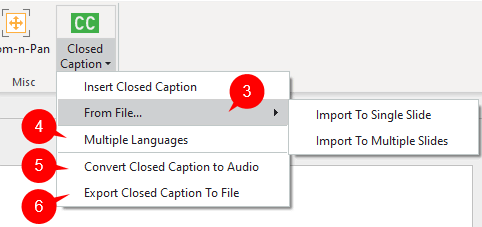
Note: If you have a subtitle file (*.srt) in advance, you can import it to the project. In the Insert tab, click the arrow on the Closed Caption button > From File… (3) > Import To Single Slide or Import To Multiple Slides > select the subtitle file that you want to import.
Add More Languages to Closed Captions
ActivePresenter 9 allows you to add more than one language to your closed captions so that foreign learners/audience can access your videos/eLearning courses easily.
To do that, perform steps below:
- Select one CC node in the Timeline pane.
- Click the drop-down arrow on the Closed Caption button in the Insert tab > Multiple Languages (4). Or, click the
 Edit Language button in the Properties pane > Size & Properties > General.
 - Click the plus button and select the language you want to add.
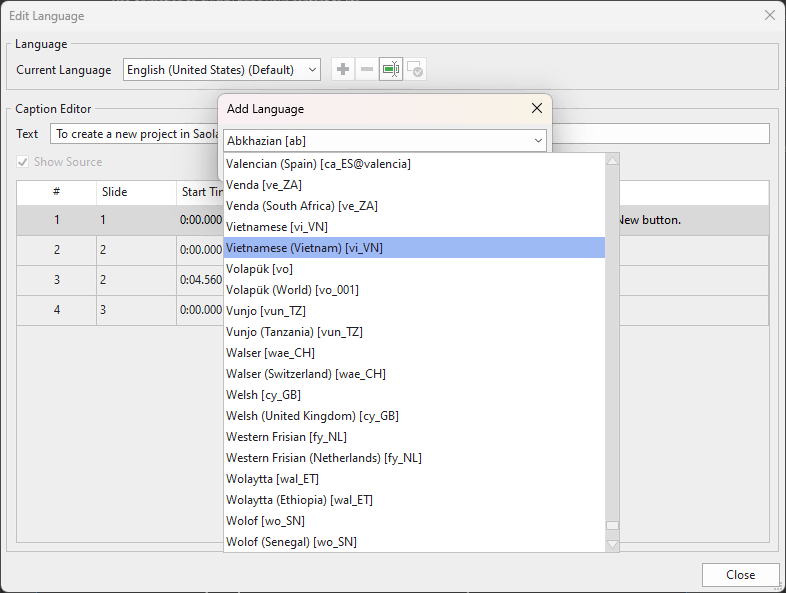
- Select each sentence of the source text, then type the version of the new language into the Text box.
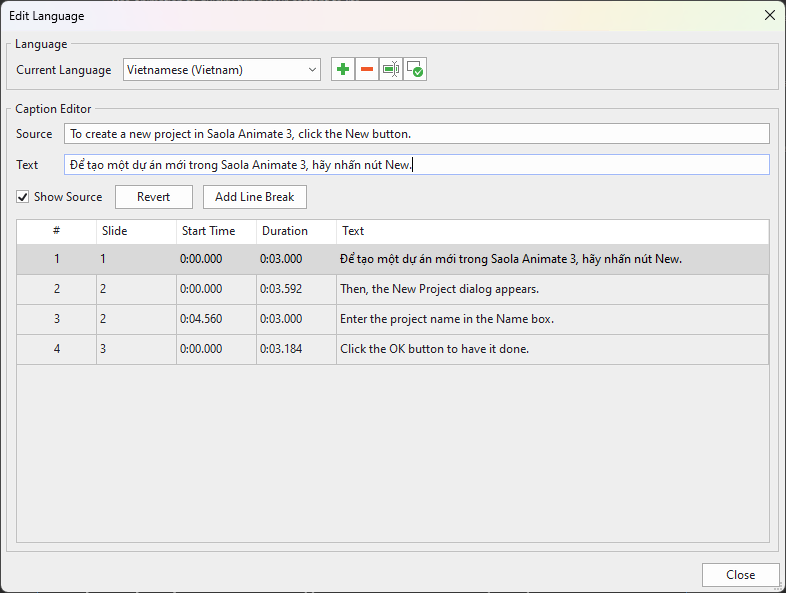
- Click Close to save and finish.
See Add Multiple Languages to Closed Captions for more details.
Format Closed Captions
To change the closed caption’s style, select a CC node, then use commands and options available in the Home tab, Format tab, or the Properties pane. The changes will be applied to all CC nodes in your project. If you add new CC nodes, they also inherit the new changes.
Remember that, in case you export the project to video, remember to export closed captions as hard subtitles to encode it to the video.
Note: The style of the closed caption will be the same regardless of displaying in any language.
If you want to preview closed captions in other languages, select a CC node > Properties pane > Size & Properties > General > Caption Language > choose any language from the drop-down list.
Convert Closed Captions to Speech
You can convert closed captions to audio in ActivePresenter 9 thanks to the Text-to-Speech feature. To do that, right-click a CC node > Convert Closed Caption to Audio, or access the Insert tab > Closed Caption > Convert Closed Caption to Audio (5).
Then, all CC nodes in the current slide produce a combined single audio object.
For details about this, see Convert Text to Speech.
Toggle the Closed Caption
There are two ways to toggle closed captions: using the CC button in the player or using actions.
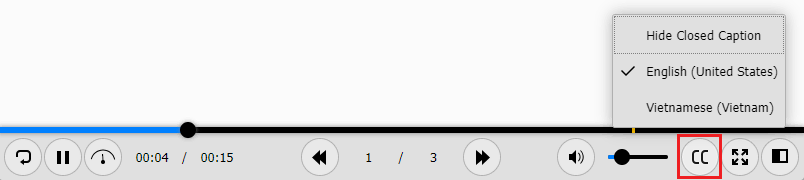
Use the CC Button in the Player
To enable this button, open Export tab > Player Settings. Then, navigate to the General tab of the Player Settings window > General Parameters > Toolbar > select the CC Button check box > OK to save changes. By doing so, the CC button will appear at the bottom right corner. Learners can click this button to toggle the closed caption or change language of closed caption.
Note: ActivePresenter allows you to customize the player for each operation mode separately or all of them together. Click the Operation Mode combo box and select the mode you want. See Customize HTML5 Player Settings for more information.
Use Actions
Another way to control closed captions is using actions. ActivePresenter 9 provides the apCCVisible variable that helps show or hide the closed caption. Set the variable to true to turn the CC on, and false to turn it off.
For example, you can create your own CC button that allows users to show or hide the closed caption:

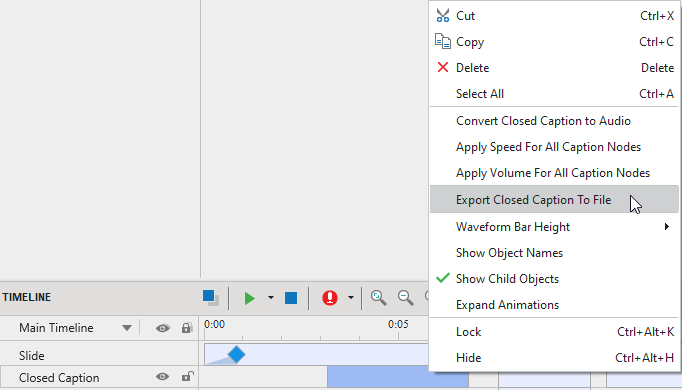
Export Closed Captions to File
ActivePresenter 9 allows you to export closed captions to *.srt file without exporting project to video. To have it done, right-click a closed caption node on the Timeline pane > Export Closed Caption to File. Alternatively, open the Insert tab > Closed Caption > Export Closed Caption to File (6).
Delete CC
To delete one or more CC nodes, select them in the Timeline and press DELETE.
To delete all CC nodes, click the Closed Caption name to select all the nodes and press DELETE.
That’s all about the steps to add and work with closed captions in ActivePresenter 9. Download and try this feature now.

Don’t forget to visit our Tutorials page and YouTube channel to get more ActivePresenter 9 written and video tutorials up-to-date.
Related topics: