A slider lets you specify a value or define a range by dragging it along the track. An example of how it can be used is to display stages on a timeline. Let’s follow the instructions in this article to create a timeline slider with ActivePresenter 9, a powerful elearning authoring software for teachers and trainers.
As you may know, ActivePresenter 9 lets you create sliders for your projects. It means you can add sliders to the project, set up their properties, and interact with them in eLearning outputs. One of the most common applications of sliders is creating an interactive timeline. More specifically, the slider track represents a timeline in which the list of events is listed chronologically. When you drag the thumb along the track, the values get updated. Then, the events associated with the values are shown. Today, let’s dig deep into this article to learn how to create a timeline slider like that in ActivePresenter 9. It will cover the following steps:
- Prepare for Creating a Timeline Slider
- Create the Timeline Slider
- Preview, Export, and Share the Project
Before getting started, download the app and open this sample to visualize a timeline slider better:

Let’s start!
Prepare for Creating a Timeline Slider
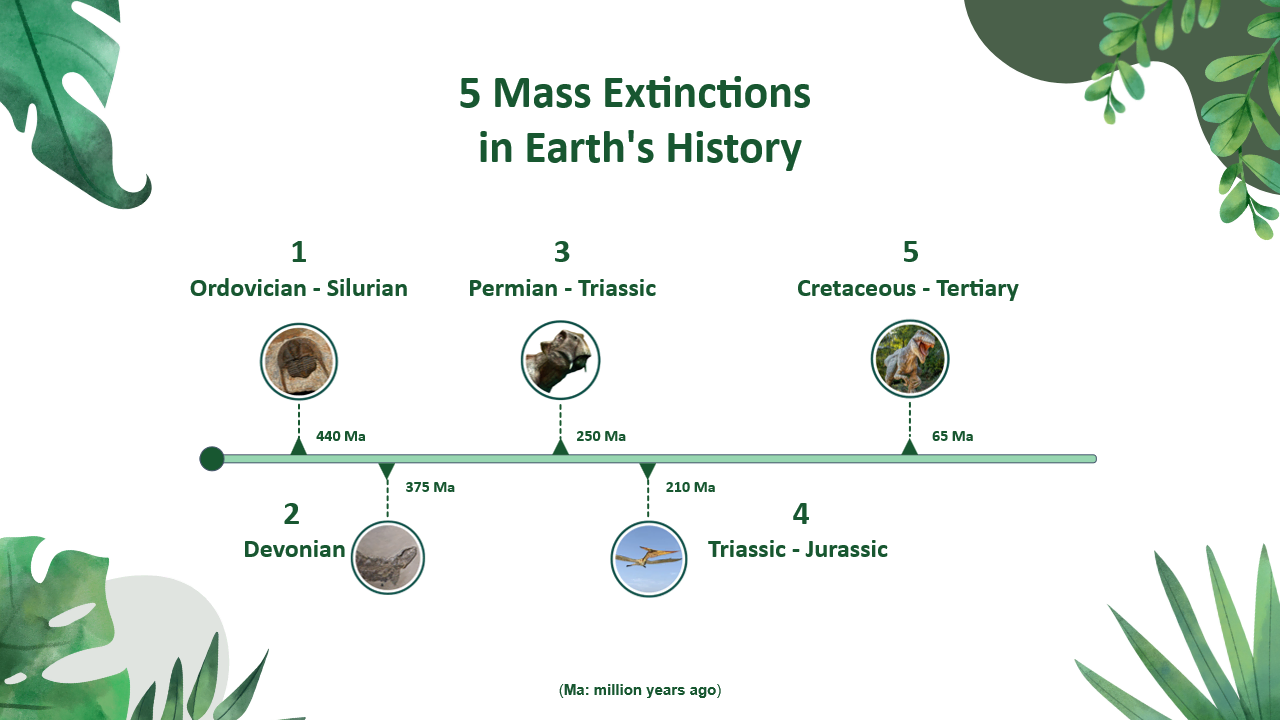
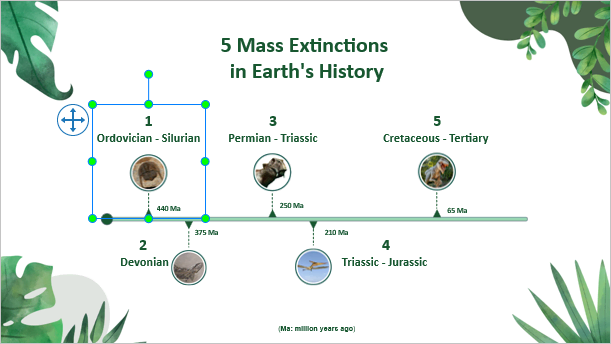
Creating a timeline slider requires you to come up with ideas for what you want to display. After that, prepare the materials you need. For example, the sample above is about the 5 mass extinctions in Earth’s history. They will be shown as 5 events on the timeline. Each event displays its order, name, a picture of an extinct species in that event, and the year it occurred. Therefore, in this case, you need to:
- Research the information about the 5 events carefully. You can find it in articles, studies, and on the web. Then, show them as text objects on the slide.
- Search for pictures of 5 extinct species in each event, and edit them (if needed) to display well on the slide.
Besides, find or design a background image for the project. It makes the slide look more catchy.
When all the materials are ready, let’s go to the next step – create a timeline slider.
Create a Timeline Slider
- Insert a Slider into the Slide
- Add Markers to the Timeline Slider (Optional)
- Add Event Information to the Timeline
- Create Advanced Actions to the Slider
- Add Events – Actions to the Slider
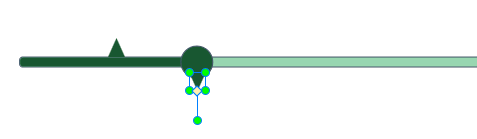
As can be seen in the sample, the timeline slider thumb is dark green and the track is lighter green. The thumb’s initial position is at the start point. The track has 5 markers which are marked with 5 triangles. They represent the year that those events happened. Their distance is not equal. At first, you see the 5 markers only. When you drag the thumb to a specific value (which is marked by a milestone) on the track, you hear the sound. The milestone at that value is hidden. Then, the information about the associated event pops up. In addition, when you drag the thumb, the event(s) which occurred first (on the left of the thumb) keeps displaying. To create a timeline slider like that, you can follow the steps:
Keep on reading the next parts to learn how to add a slider to your project.
Insert a Slider into the Slide
With ActivePresenter 9, it’s easy to insert a slider into a slide, quickly change styles, set up its properties, and add a variable to it. The step-by-step instructions are as follows.
Insert and Style the Slider
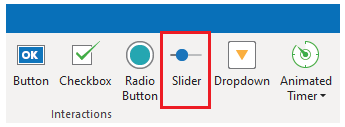
To insert a slide, open the Insert tab > Slider.
Then, click or drag the mouse on Canvas to draw a slider. Its length depends on how long you drag it.
Next, to style the slider that you have created, select it and navigate to the Format tab. Then, easily choose a built-in style in Slider Styles or customize the track and thumb using Slider Tools.
Set up the Slider Properties
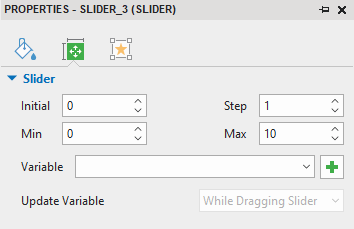
As described in the How to Work with Slider in ActivePresenter 9 tutorial, you can set up slider properties in its Properties pane > Slider section. The section provides you with 4 values: Min, Max, Step, and Initial. Let’s clarify what they are.
Imagine the timeline slider as a 10 cm ruler. The start point of the ruler is 0 and the endpoint is 10. These points represent the Min and Max values of the slider respectively. If you split the slider into 10 even ranges then each range means one Step of the slider. The Initial position of the slider thumb can be any value in the range [0;10].

By doing that way, in the Slider section, set the Min and Max value as 0 and 10 respectively. One step of the Step value is 1. The Initial position of the thumb is at the start point, so its value is 0.
Add Variable to the Slider
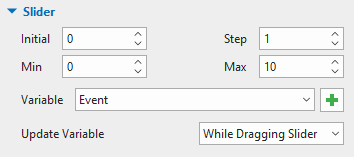
You can choose to update the value of the Slider after or while dragging the slider. To do that, you need to add a number variable to it. Simply click ![]() next to the Variable list box. In the dialog that appears, type Variable Name as “Event” for example.
next to the Variable list box. In the dialog that appears, type Variable Name as “Event” for example.
Next, choose While Dragging Slider from the drop-down list to make the variable get updated while you drag the slider.
Add Markers to the Timeline Slider (Optional)
In fact, this step is optional. You can choose whether to show the markers on the timeline. They are actually the mark of each line in the example of the ruler. In the sample, there are 5 markers. They are not arranged evenly since gaps between every 2 timestamps are not equal. They help learners see the position where they can get information about the events on the timeline. If you want to add them to the timeline, follow the steps below:
- Add a triangle shape to the slide (Insert tab > Shapes > select
 > drag to draw one on Canvas).
 - Make 4 more copies of the triangle (CTRL+C > CTRL+V).
- Change their size to fit the slider (select all the triangles > Properties pane > Size & Properties > Transform section > Width, Height).
- Style them (Properties pane > Style & Effects tab > Color, Line, Shadow, Opacity).
- Name each of them, for example, “marker 1”.
- Arrange them to the right position on the slider.
In this sample, events 1 to 5 are arranged at lines 1, 2, 4, 5, and 8 on the timeline slider. Since the slider doesn’t have split lines on it, it’s difficult to know where the lines are. Here is a tip. You can temporarily change the initial position of the thumb to the line you wish. Then, move the marker to the position of the thumb. For example, you need to find line 1. So, in the Slider section, change the Initial value to 1. As a result, the thumb jumps into the line 1 position. Now, simply move the marker to the thumb position.
To align them better, use the align commands in the Format tab, or change the value of the Left and Top combo boxes in the Transform section.
See more about How to Rotate and Flip Objects in ActivePresenter 9.
Add Event Information to the Timeline
Now, it’s time to add information about the events to the timeline slider. There are 2 types of information: text and picture. Regard them as normal objects, insert them into the slide, and move them to the markers’ positions. To do that, follow this instruction:
- Create events’ order+name, the year they occurred (Insert tab > Text Caption).
- Insert illustrated pictures (Insert tab > Images > select all the necessary images> OK).
- Add 5 vertical lines to connect the text and pictures with the markers (Insert tab > Shapes).
- Style the text and lines how you wish (Properties pane > Style & Effects tab > Color, Line, Shadow, Opacity).
- Group the objects of one event together (select those objects > CTRL+G).
- Name each group, for example, “1stEvent”, “2ndEvent”.
- Hide the 5 groups (select the groups > right-lick > Initially Hidden).
Create Advanced Actions for the Slider
Advanced Action is a powerful feature in ActivePresenter. If you have watched interactive eLearning tutorial videos on our YouTube channel, you may be familiar with them. To create an advanced action, navigate to the Questions tab > click Advanced Actions. Then, the feature can be added to this sample as follows.
Create Advanced Actions for Events
Next, let’s create advanced actions for each event. Following the normal logic of a horizontal timeline, events are listed chronologically from left to right. When the thumb reaches the marker’s position, the marker is hidden, and the associated event information is displayed. While you drag the thumb from left to right or vice versa, only the event(s) on the left of the thumb keep showing. But, at the start point of the timeline (line 0), no events are shown since you arrange those events from line 1. The others are in lines 2, 4, 5, and 8. Therefore, we can create advanced actions to hide and show each event as follows:
| Advanced Actions Name | Parameters |
| HideEvents | Hide all events. |
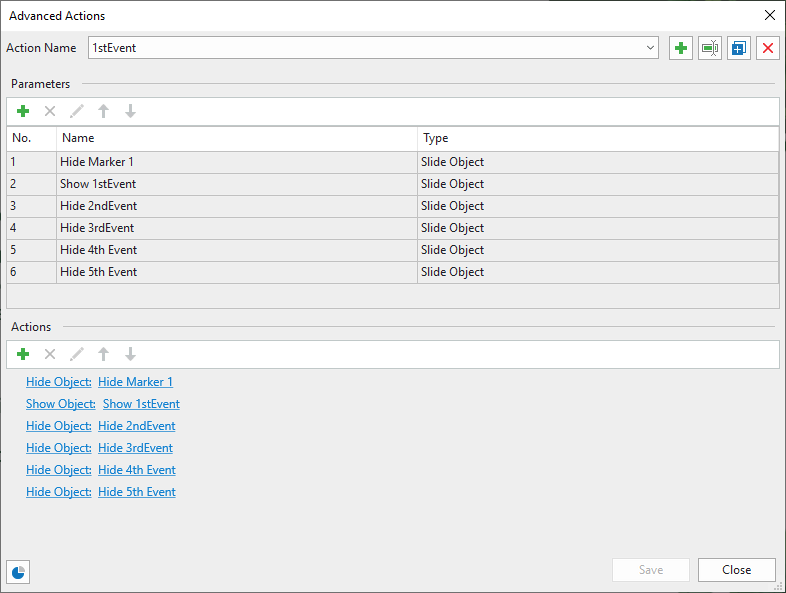
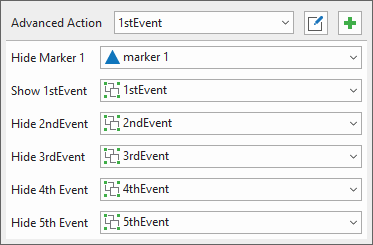
| 1stEvent | Show the 1st event, hide marker 1, the 2nd, 3rd, 4th, and 5th events. |
| 2ndEvent | Show the 1st & 2nd ones, and hide marker 2, the 3rd, 4th, and 5th events. |
| 3rdEvent | Show the 1st, 2nd, and 3rd events, and hide markers 3rd, 4th & 5th events. |
| 4thEvent | Show the 1st, 2nd, 3rd, and 4th events, and hide marker 4 and 5th events. |
| 5thEvent | Show all the events, and hide marker 5. |
The type of all the parameters is Slide Object. Following that way, you get one of the advanced actions, for example, for the advanced action 1stEvent like this:
Next, simply do the same way to the other events.
Create Advanced Actions for Markers (Optional)
If you didn’t create markers earlier, skip this step. In case you added markers to the slider, they will be hidden when the events show up. So, to let them display again when you drag the thumb back to the start point, you can create an advanced action for it. To do that:
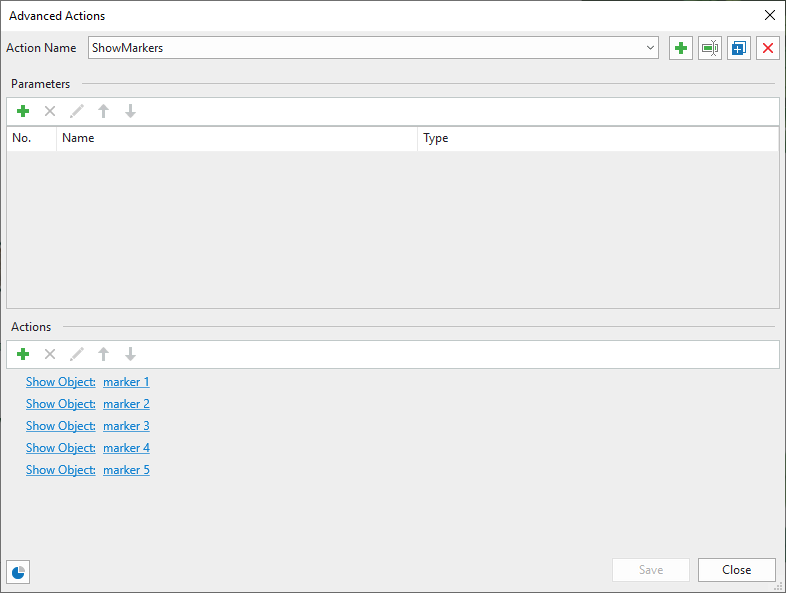
- Add new and name the advanced action, for example, “ShowMarkers” (click next to the Action Name list > type a name > OK).
- In the Actions section, add 5 Show Object actions.
After that, you get the ShowMarkers advanced action like this:
Actually, it’s possible to add the Show Object action separately to the slider. However, the event looks more complicated.
Add Interactivity to the Slider
To make the slider work and display events while dragging the slider, you need to add events and actions to it.
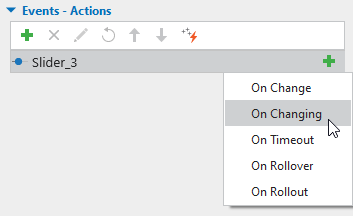
Add On Changing Event to the Slider
Firstly, to let actions occur while you drag the thumb, you select the slider > Properties pane > Interactivity tab > Events – Actions section > click On Changing.
Add Events – Actions to the On Changing Event
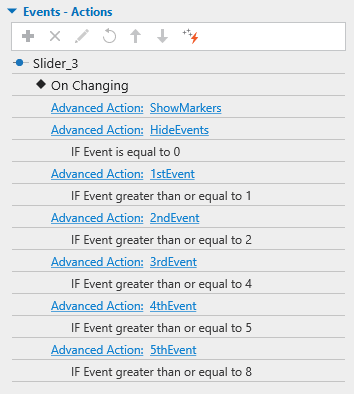
Now, you can add the advanced actions created earlier to the On Changing event of the timeline slider. To do that, click Add Action > Advanced Actions > choose one from the list. For example, you choose 1stEvent. Then, click the dropdown box of each parameter to choose the slide object you want to show.
Do the same way to complete adding the other advanced actions. The order of them is HideEvents, then 1stEvent to 5thEvent.
However, there is a notice here. Each event shows up when the thumb reaches or passes the marker of that event. For example, the 1stEvent first shows when the thumb reaches marker 1 and keeps showing when the thumb is dragged to the next lines and markers on the right. Therefore, you need a condition for showing it. You can take advantage of the variable “Event” created above. It’s associated with the slider’s value. More specially, the conditions of those events are listed below:
| Advanced Actions Name | Conditions |
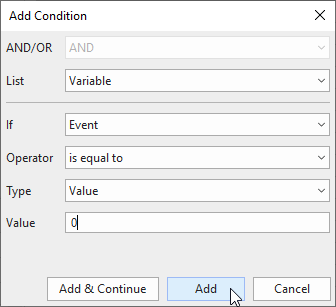
| HideEvents | If Event is equal to 0. |
| 1stEvents | If Event is greater than or equal to 1. |
| 2ndEvents | If Event is greater than or equal to 2. |
| 3rdEvents | If Event is greater than or equal to 4. |
| 4thEvents | If Event is greater than or equal to 5. |
| 5thEvents | If Event is greater than or equal to 8. |
Then, to add a condition to an action, click Add Condition ![]() and select the value in the list. For example, this is the condition of the HideEvents:
and select the value in the list. For example, this is the condition of the HideEvents:
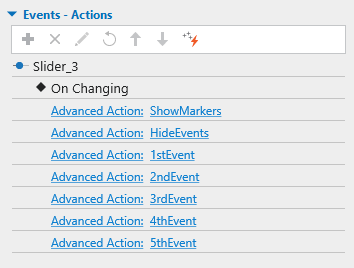
After adding the conditions to all the advanced actions, you get a list of actions and conditions like this:
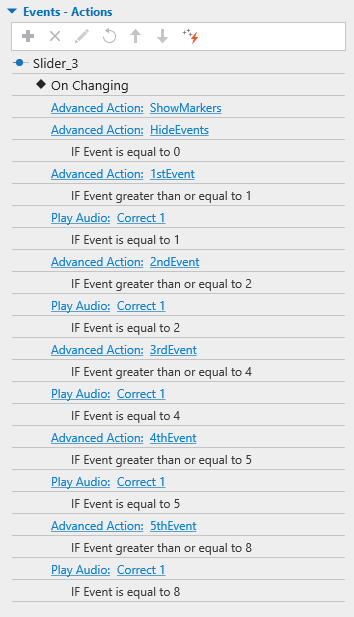
Last but not least, to make the interaction more engaging, whenever the thumb reaches the marker, the correct sound plays. To do that, in the On Changing event > add the Play Audio > Correct 1. Remember to add the condition that the audio only plays when the thumb is dragged to the specific value.
Finally, you will get the events – actions of the timeline slider as below:
Preview, Export, and Share the Project
As in the previous versions of ActivePresenter, you can check how it works on HTML5 output by pressing F5.
To make the project more attractive, create more information slides. Then, add the On Click event > Go to Slide action to each event. In this way, when you click on any event, it directs you to the information slide of that event.
The last step, to export the project to eLearning outputs such as HTML5, SCORM, and xAPI packages, navigate to the Export tab > select one of the outputs you wish.

That’s how to create a timeline slider in ActivePresenter 9. Download the app and try all the features unlimitedly. Follow our Tutorials page, Blog, and YouTube channel for more information. If you have any questions, feel free to contact us.