Animal classification is an engaging and educational game designed to help learners categorize animals based on their characteristics, such as habitat, diet, or species group. This interactive activity enhances critical thinking and knowledge retention, making it ideal for students of all ages. ActivePresenter, a powerful eLearning authoring software, provides an excellent platform for creating interactive quizzes and games. With its drag-and-drop functionality, customizable feedback, and intuitive interface, ActivePresenter allows educators to design immersive learning experiences with ease.
Feel free to click this button to download ActivePresenter if you haven’t installed it on your computer yet.

Animal Classifiaction Game Rules
There are 9 animals, divided into two main categories: Domestic and Wild Animals. Learners will drag and drop the animals into the correct categories. When an answer is correct, a tick mark appears, and a correct sound is played. If the answer is incorrect, a cross mark shows up, the wrong sound plays, and the item is returned to its original position.
Steps to Create
The game consists of two slides: an opening slide and a game slide. Since both slides use the same background image, it is added to the Slide Master. To do this, go to the View tab and open Slide Master. Select the master layout and insert the background image there.
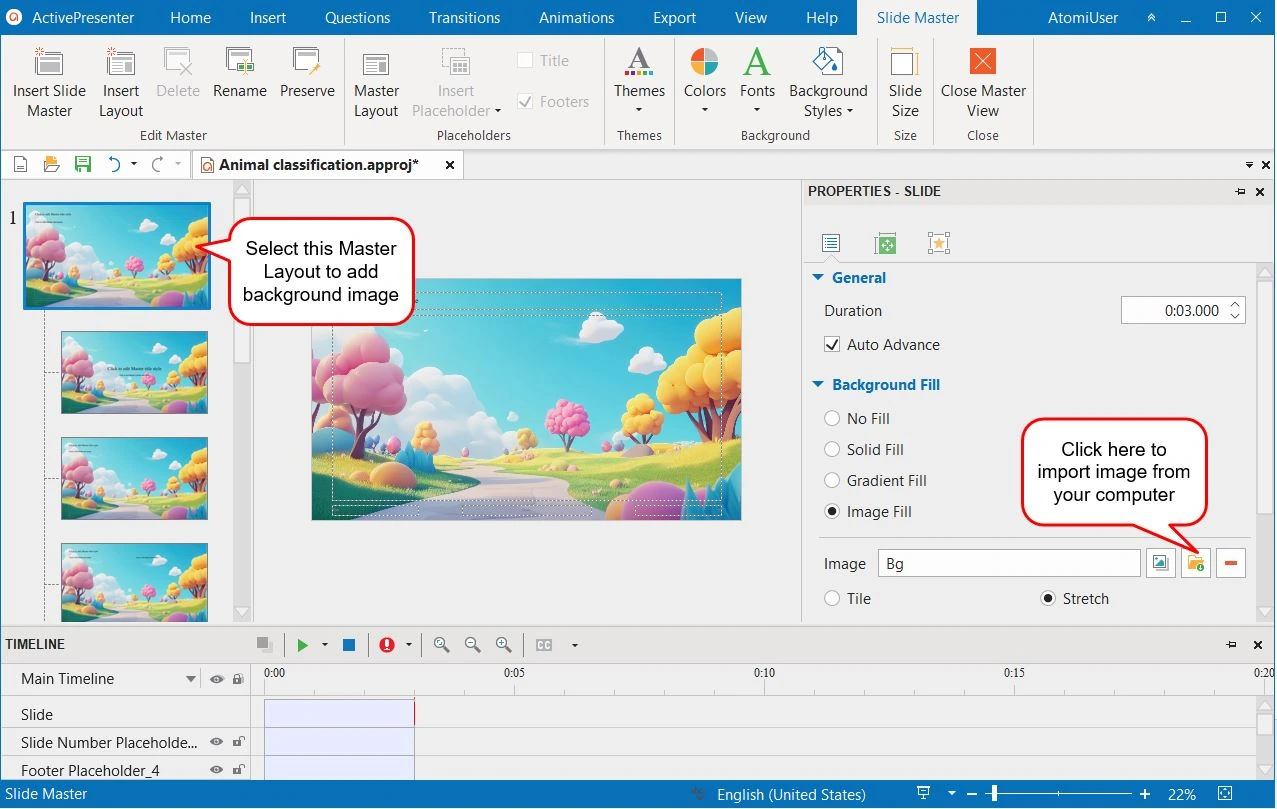
Let’s explore how to create this animal classification game in detail.
Create Opening Slide
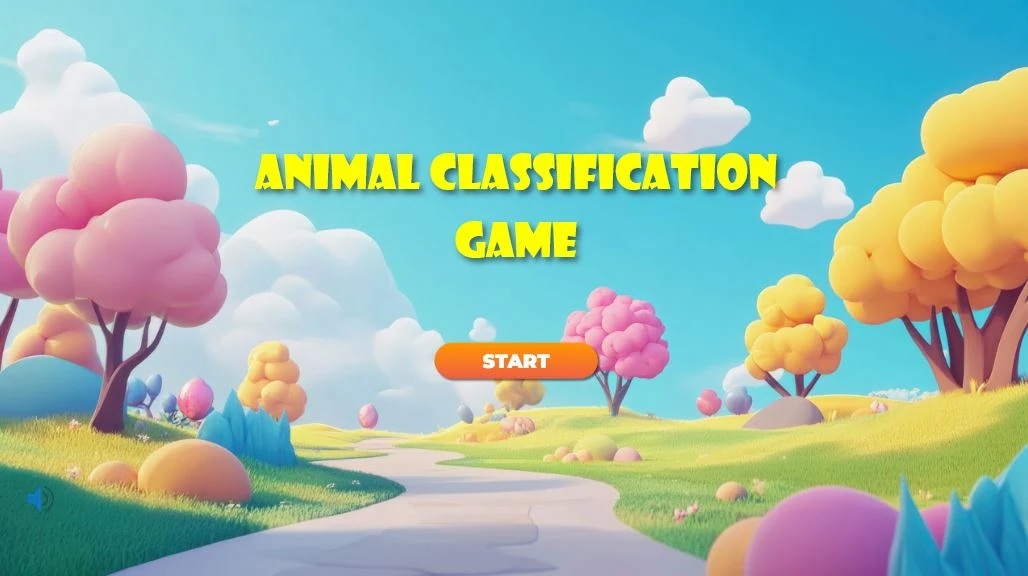
This slide features a game title and a Start button.
- To insert the title, go to the Insert tab and click on Text Caption. You can also add animations if desired. For example, I applied a Zoom In effect to the text with the following animation settings:
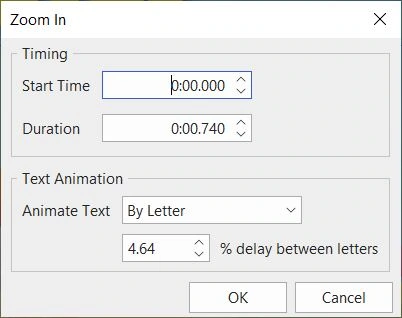
- To create the Start button, go to the Insert tab and select Button. Style the button as needed, then double-click it to add text. Next, assign the following actions to the button:
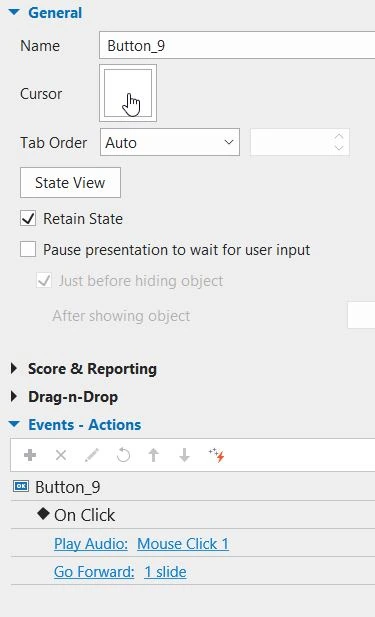
Create Game Slide
- Start by creating a shape object with an image of the corresponding animal. Group them together and set the group as a drag source. You can also rename the group or add animation effects if needed. To create more animals, simply duplicate the group.
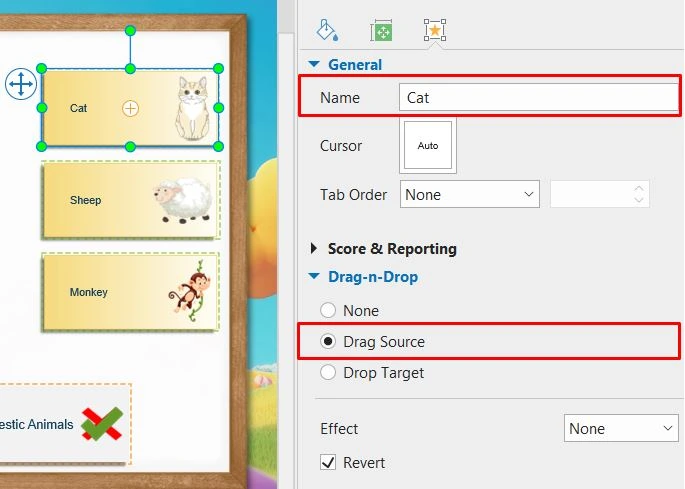
2. Create an object and designate it as a drop target.

3. Create a variable to count the number of correct answers.

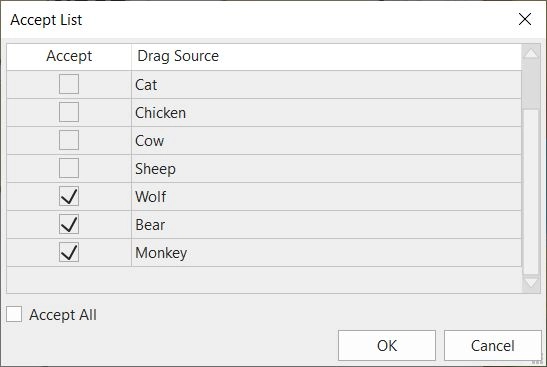
4. For the Accept List, you check the correct answers from the list:
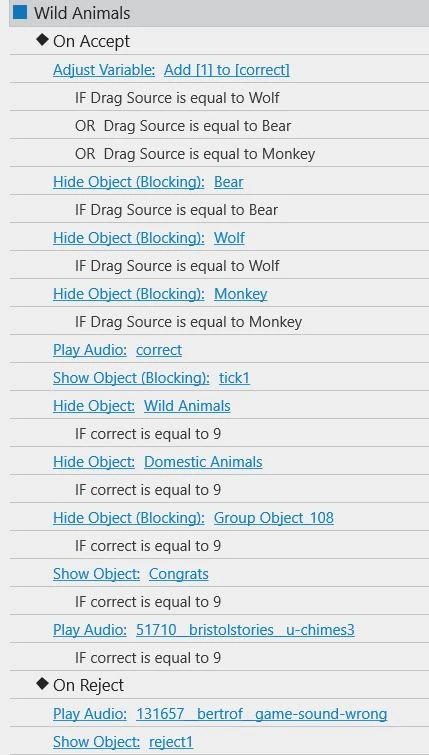
Add events and actions to the drop target. Duplicate these for the other Domestic Animals group.
After that, you add a mouse click to prevent the slide from ending. Delete its correct and incorrect messages, and set No Fill, No Line to hide it.
5. Shrink project
To reduce the project file size, go to the ActivePresenter button > Project > Shrink, then check the Delete All Unused Resources option and click Shrink.

Conclusion
By following these steps, you now have the tools to create an interactive animal classification game in ActivePresenter. This game not only makes learning fun but also encourages critical thinking and retention. With the flexibility of adding animations, sound effects, and custom feedback, you can tailor the experience to meet the needs of your learners. Start experimenting with different game types, and soon, you’ll be creating interactive content that leaves a lasting impression. Happy creating!
Don’t forget to follow our Blog and YouTube channel to get the latest updates about eLearning!
You can download the sample project here for your reference.