Every L&D manager used to cope with this situation: you spend weeks making a training video, roll it out company-wide, and then check the completion statistics only to find that 60% of employees dropped off in the first two minutes. Sound familiar?
After nearly a decade of making eLearning content and training videos, I’ve learned that the difference between a training video people finish and one they abandon has almost nothing to do with budget. It comes down to structure, pacing, and the right tools.
In this guide, I’ll walk you through a proven, step-by-step process to make a training video that actually works, plus introduce you to ActivePresenter, the all-in-one tool that makes professional video-based learning accessible to anyone, even without a video production background.
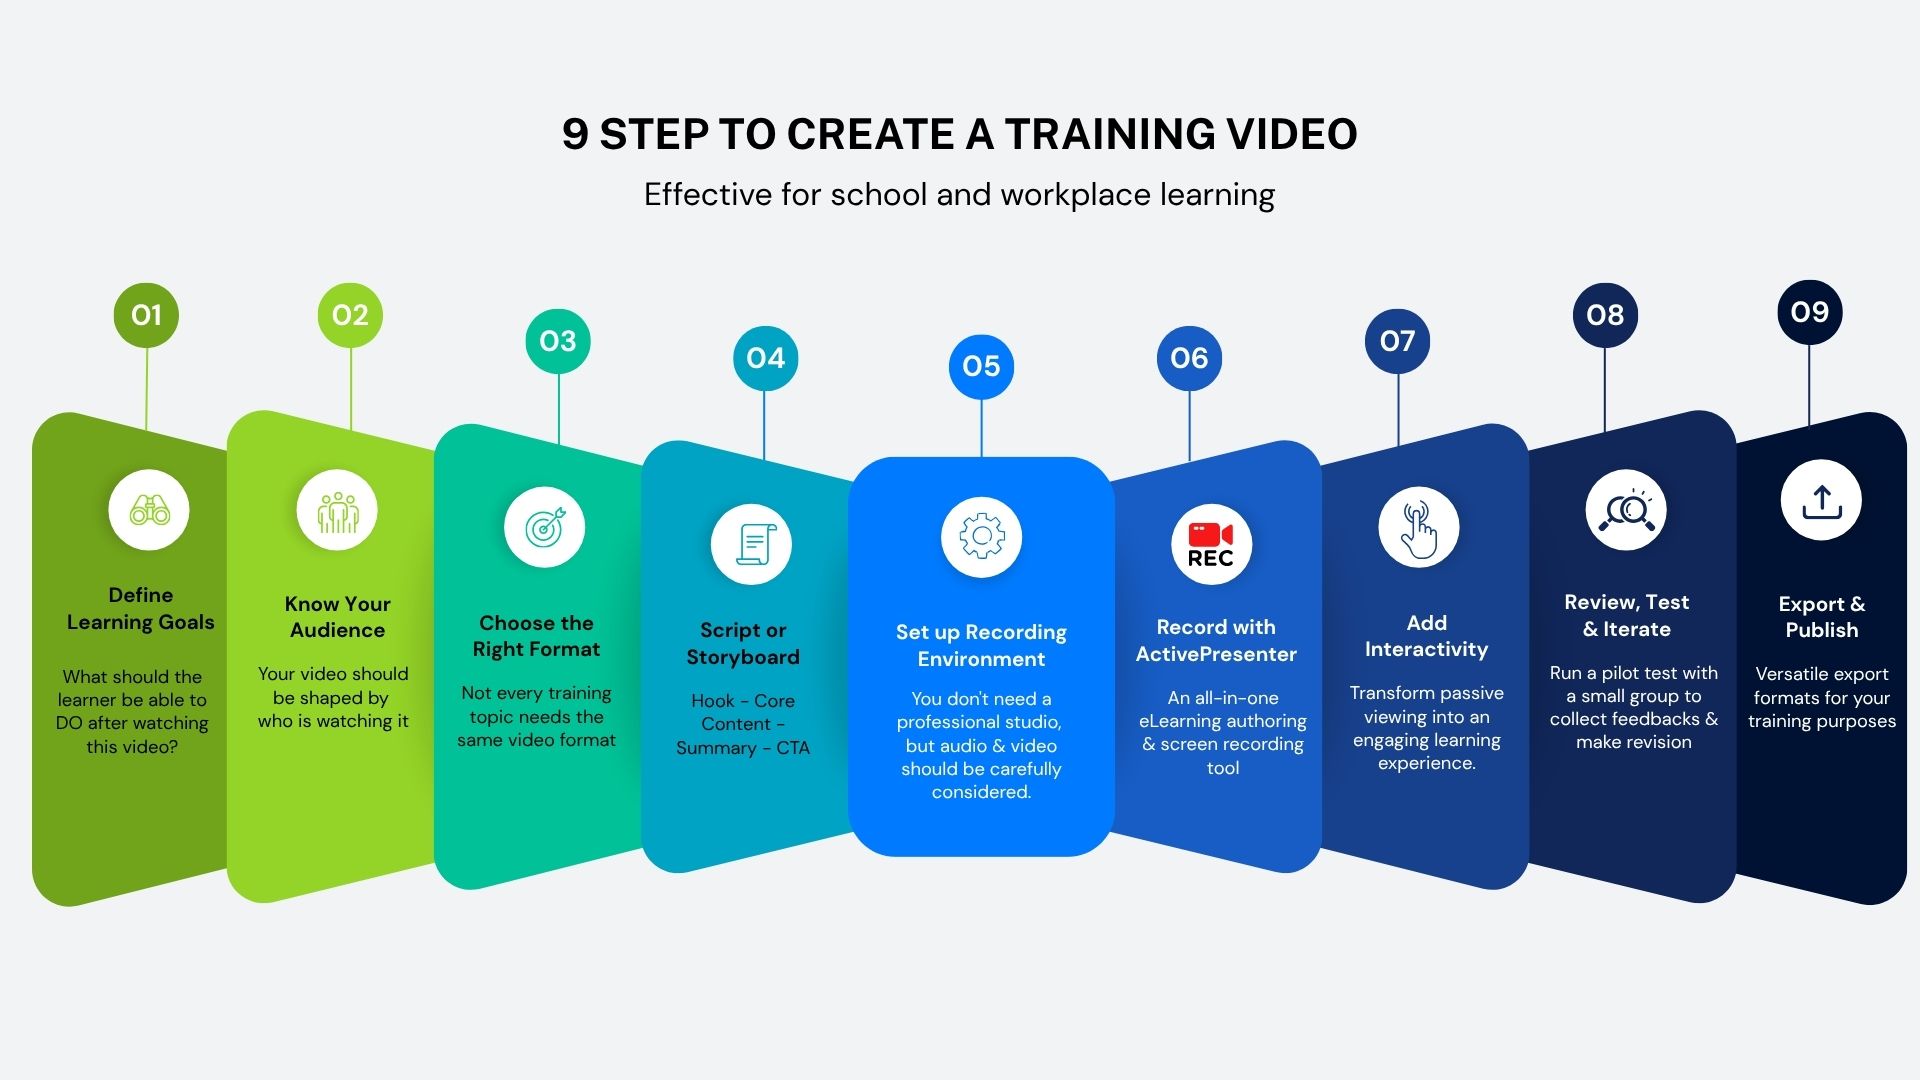
Step-by-Step Guide: How to Make a Training Video
Step 1: Define the Learning Goal
Before you open any software or press Record, ask yourself one critical question: “What should the learner be able to DO after watching this video?”
This is the difference between a vague training video (“This video is about cybersecurity”) and a purposeful one (“After this video, you will be able to identify and report a phishing email in under 60 seconds”).
Use the SMART framework to define your objective:
- Specific: Target one skill or behavior per video
- Measurable: Can you test it with a quiz or task?
- Achievable: Is it realistic within the video’s scope?
- Relevant: Does it connect to real job performance?
- Time-bound: What’s the expected learning timeframe?
💡 Pro Tip: One of the biggest mistakes I see is trying to cover too much in a single video. If your learning goal has more than one verb, split it into two videos. Microlearning wins every time.
Step 2: Know Your Audience
Your content should be shaped by who is watching it. A training video for frontline retail staff needs a completely different tone, vocabulary, and visual approach than one designed for senior IT engineers.
Ask yourself:
- What is their current skill level?
- What devices will they use to watch? (Mobile? Desktop?)
- How much time do they realistically have?
- Are they motivated, or is this mandatory compliance training?
Understanding your audience prevents you from over-explaining to experts or losing beginners entirely.
Step 3: Choose the Right Format
Not every training topic needs the same video format. Here are the most effective types and when to use them:
| Format | Best For | Example Use Case |
| Screen Recording | Software tutorials, IT onboarding | Showing how to use a CRM system |
| Talking Head | Culture, leadership, soft skills | CEO message on company values |
| Screencast + Voiceover | Process walkthroughs | Expense reporting procedure |
| Software Simulation | Compliance, safety, technical skills | Simulating banking software for tellers |
| Animated Explainer | Abstract concepts, new hire orientation | Explaining company structure |
For most corporate training scenarios, especially software training and process documentation – screen recording with voiceover is the most efficient and scalable format.
Step 4: Write a Script or Create a Storyboard
Skipping this step is the #1 reason training videos feel disorganized and rambling. Even a rough outline makes a massive difference.
For shorter videos (under 3 minutes):
- Write a full word-for-word script
- This also doubles as your closed caption source
For longer, more visual content:
- Create a storyboard: sketch each scene with a note on what’s shown on screen and what’s said
💡 Pro Tip: Read your script out loud before recording. If any sentence takes more than one breath to say, it’s too long. Short sentences = clearer delivery = more engaged learners.
Script structure that works:
- Hook (0–15 sec): State the problem or what they’ll learn
- Core Content (bulk of the video): Teach the skill step-by-step
- Summary (last 30 sec): Recap the key takeaways
- CTA (final 10 sec): Tell them what to do next
Step 5: Set Up Your Recording Environment
You don’t need a professional studio, but a few basics go a long way:
Audio (most important):
- Use a USB condenser microphone or a quality headset
- Record in a quiet room, close doors and windows
- Hang a blanket behind you to reduce echo if needed
Video (for talking head):
- Natural light from a window in front of you
- Keep the background clean and professional
Screen (for screen recording)
- Set your display to 1080p or higher
- Close unnecessary browser tabs and notifications
- Use a clean desktop background
Step 6: Record Your Training Video with ActivePresenter
This is where the right tool makes all the difference. ActivePresenter is consistently my top recommendation for making training videos in a corporate context.
Why ActivePresenter Is the Perfect Choice
ActivePresenter is a free, all-in-one eLearning authoring and screen recording tool. It’s built specifically for instructional designers and trainers who need to produce professional video content without a steep learning curve or enterprise-level budget.
Here’s what makes it stand out:
High-Quality Screen Recording
Capture your screen in lossless quality. You can record your full screen, a specific application window, or a custom region. Simultaneously capture your webcam and microphone for a polished, multi-layered recording.
Non-Destructive Video Editing
Unlike basic screen recorders, ActivePresenter gives you a full timeline editor. Trim, cut mistakes, add zoom-and-pan effects, insert annotations, and overlay text, all without permanently altering your source footage.
Split Video Feature – The Secret to Microlearning
One of ActivePresenter’s most powerful (and underused) features is the ability to split a long recording into multiple short video segments with just a few clicks.
Here’s why this matters: research on microlearning shows that videos under 6 minutes have dramatically higher completion rates. Instead of recording 10 separate clips, you can:
- Record your full workflow or process in one continuous session
- Use the Split feature on the timeline to divide it into logical chunks
- Export each segment as an individual video or slide
This is a game-changer for creating video-based learning modules, you get the efficiency of a single recording session with the engagement benefits of bite-sized content.
SCORM/xAPI Export
Package your training videos directly into SCORM or xAPI format and upload to any LMS – no third-party tools required.
Free to Use
ActivePresenter’s free version includes full screen recording and video editing capabilities. No watermarks. No time limits on recordings.
The table below summarizes ActivePresenter’s ability to create various types of training videos.
| Format | Can ActivePresenter do it? |
| Screen Recording | ✅ |
| Talking Head | ✅ |
| Screencast + Voiceover | ✅ |
| Software Simulation | ✅ |
| Animated Explainer | ⚠ limited (lack of library & advanced animation) |
Step 7: Add Interactivity (Optional but Recommended)
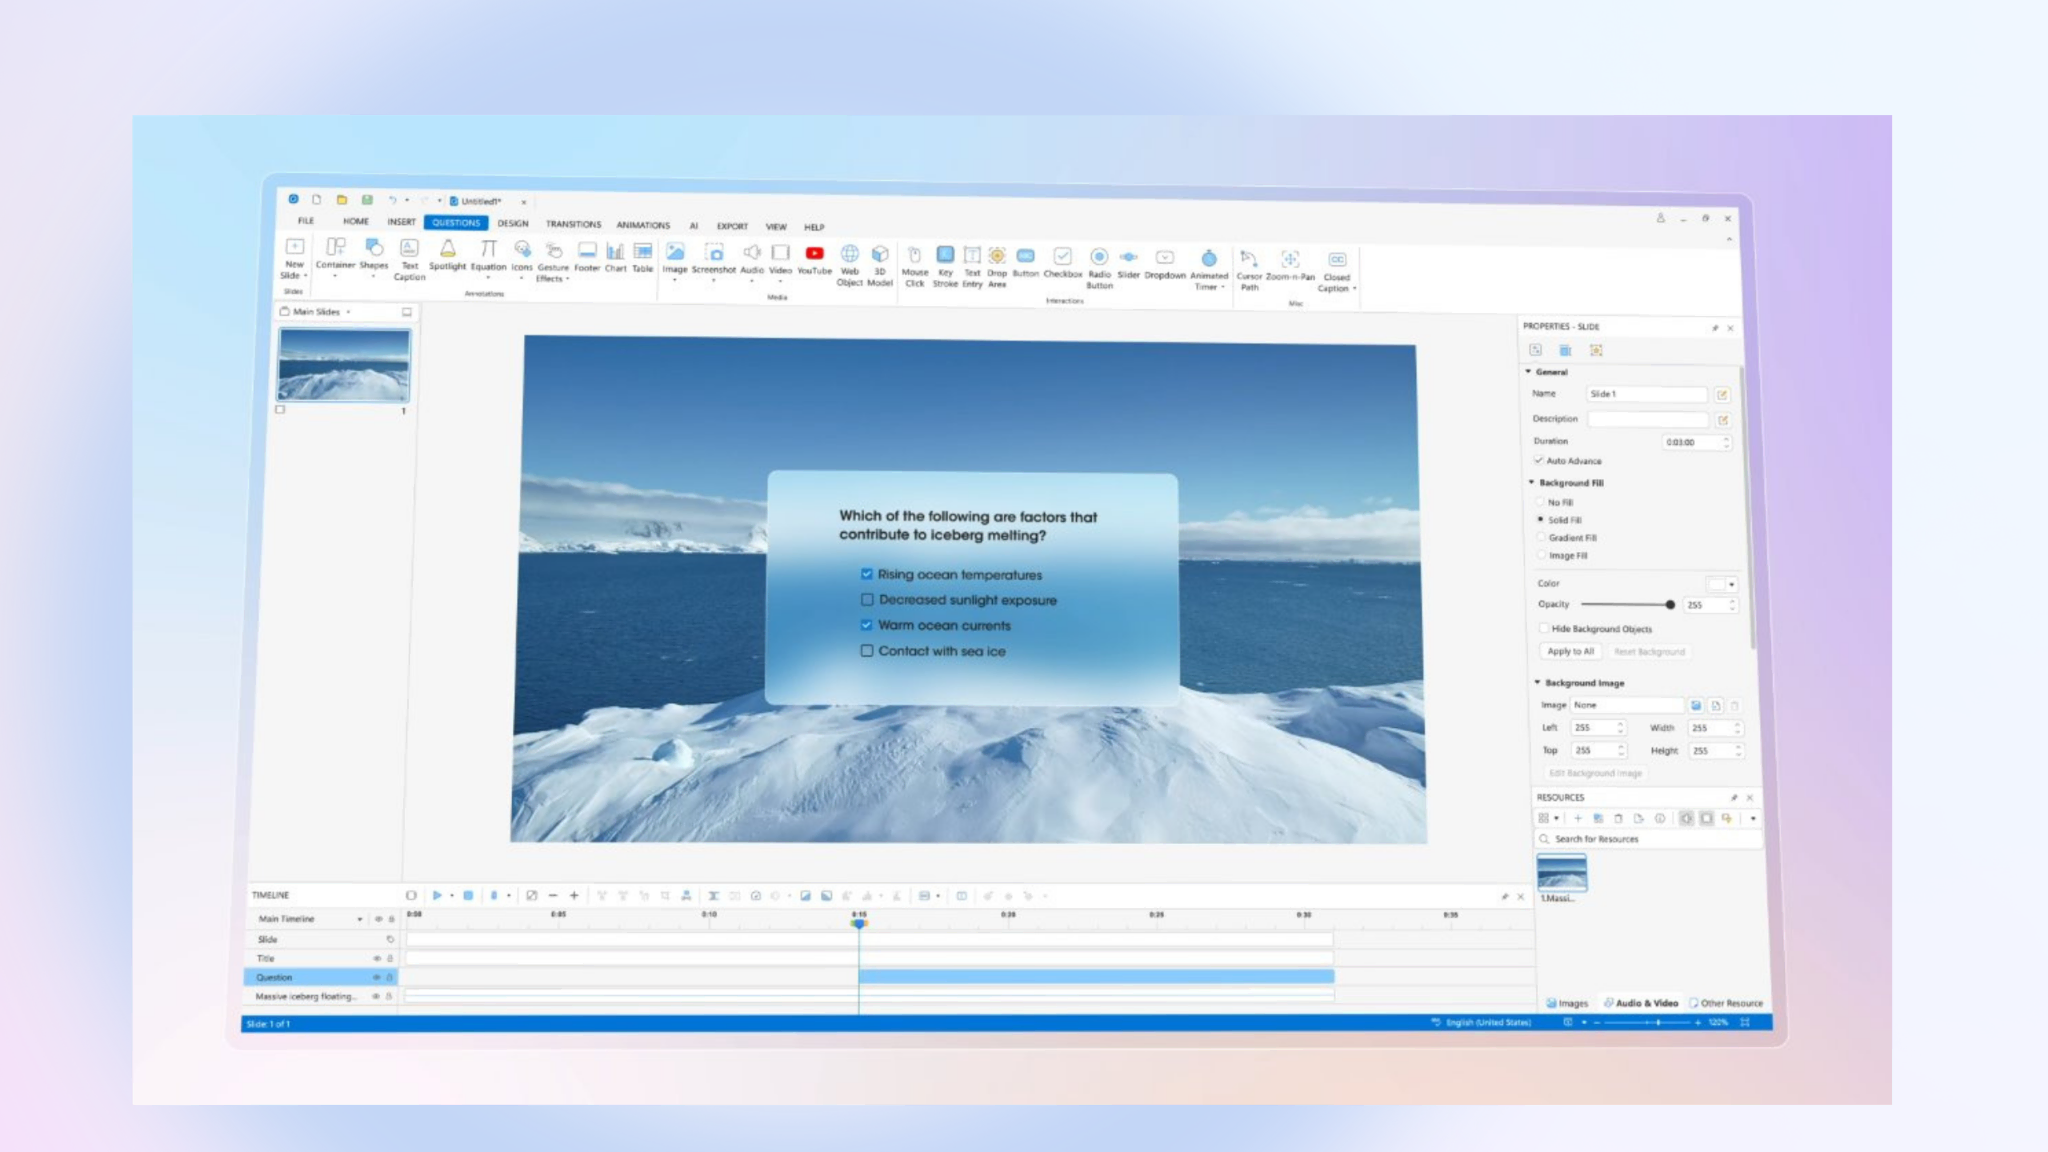
Insert quiz questions, click interactions between video segments to reinforce learning and boost retention. ActivePresenter provides a robust suite of tools to transform passive viewing into an engaging learning experience.
This means you are able to:
Create Interactive Video Quizzes: Incorporate any of the 13 interactive question types, such as Multiple Choice, Drag-and-Drop, Fill-in-the-Blank, or Hotspots directly into your video timeline.
You can customize the scoring, number of attempts, and time limits, while pausing the presentation to wait for user input to ensure learners interact with the content before the video proceeds.
Add Click Interactions and Drag-and-Drop Activities: Beyond simple questions, you can insert interactive objects that trigger specific “Events & Actions.” This includes labels, sorting activities, or clickable elements that reveal additional information, reinforcing key concepts through hands-on engagement.
Maintain Consistency with Masters: Utilize Slide Masters and Feedback Masters to ensure a professional and uniform appearance for all question slides and feedback layers across your entire project.
Step 8: Review, Test, and Iterate
Before publishing your training video company-wide, always run a pilot test with a small group:
- Does the audio quality meet expectations?
- Is the pacing comfortable, not too fast, not too slow?
- Are the on-screen visuals clear and readable?
- Do learners achieve the stated learning objective after watching?
Collect feedback, make revisions, and then publish. Training content is never truly “finished”, you need to plan to review and update it at least annually.
Step 9. Export and Publish
Choose your output format:
- MP4 video – for uploading to YouTube, Vimeo, or your intranet
- HTML5 – for browser-based delivery without an LMS
- SCORM 1.2 / 2004 / xAPI – for LMS integration with tracking
3 Real-World Use Cases
Use Case 1: Banking Software Onboarding
A regional bank needed to train 500 new tellers on their core banking system. Using ActivePresenter’s software simulation mode, the L&D team recorded the full workflow once, then used the Split feature to create 12 focused microlearning videos, each covering one transaction type. Completion rates jumped from 54% to 91% compared to their previous PDF-based training.
Use Case 2: IT Helpdesk Knowledge Base
An IT department created a library of 3-5 minute screen recording tutorials for common employee issues (resetting passwords, configuring VPN, using the ticketing system).
With ActivePresenter, each video was recorded, edited, and exported in under 30 minutes per topic. The result: a 40% reduction in repeat helpdesk tickets.
Use Case 3: Retail Compliance Training
A retail chain needed annual compliance training for 2,000+ employees across multiple locations. The L&D team built a SCORM course in ActivePresenter combining short video segments with embedded quiz questions. The course was deployed through their LMS, with automatic tracking of who completed it.
Pros & Cons of Using ActivePresenter for Training Videos
| ✅ Pros | ⚠️ Cons |
| Free version with no watermarks | Windows & macOS only (no Linux) |
| All-in-one: record, edit, publish in one tool | No cloud-based collaboration (desktop app) |
| Excellent SCORM/xAPI export | Mobile recording not supported |
| Split video feature for microlearning | |
| Active community and documentation |
Summary: Your Training Video Checklist
Before you hit publish, run through this quick checklist:
- Learning objective defined (SMART)
- Audience analysis completed
- Format selected for the content type
- Script or storyboard written
- Recording environment optimized
- Video recorded with ActivePresenter
- Timeline edited — dead air, mistakes removed
- Video split into microlearning chunks (under 6 min each)
- Interactivity added (quiz, simulation, or branching)
- Pilot tested with a sample group
- Exported in the correct format for your delivery platform
Start Making Training Videos Today For Free!
Making a training video that employees actually watch and learn from isn’t about having a Hollywood budget or a video production degree. It’s about having a clear goal, a solid structure, and the right tool.
ActivePresenter gives you everything you need to go from raw screen recording to polished, SCORM-compliant, microlearning-ready training content — all in one place, and completely free to start.
Download ActivePresenter for free and create your first training video today. Your employees (and your completion rate dashboard) will thank you later.
