Saola Animate offers a user-friendly interface for building HTML5 animation. This tutorial will show you a brief overview of the Saola Animate user interface.
This tutorial covers:
Welcome Screen
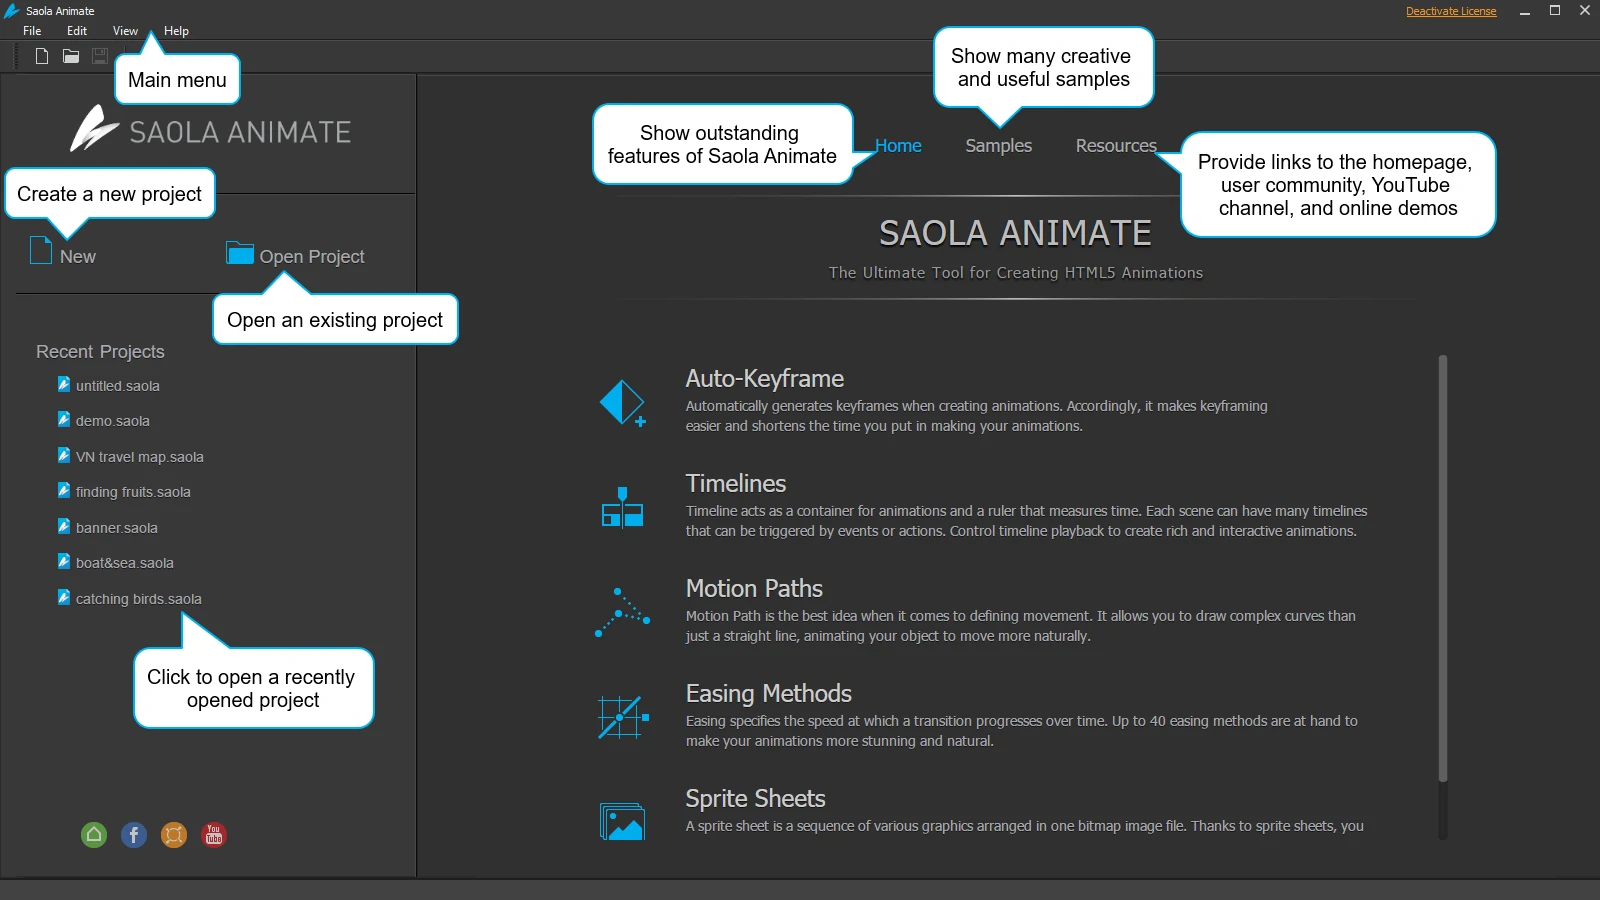
The Welcome Screen is the first thing you see when launching Saola Animate. This screen is also displayed when no project opens. It allows quick access to a number of common tasks and links to many useful samples and other resources.
In the main menu, you can:
- Click Edit > Preferences to customize the application settings.
- Click View > Language to change the display language.
- Open the Help menu to get assistance with the application such as documentation, updates, and subscriptions.
Saola Animate Workspace
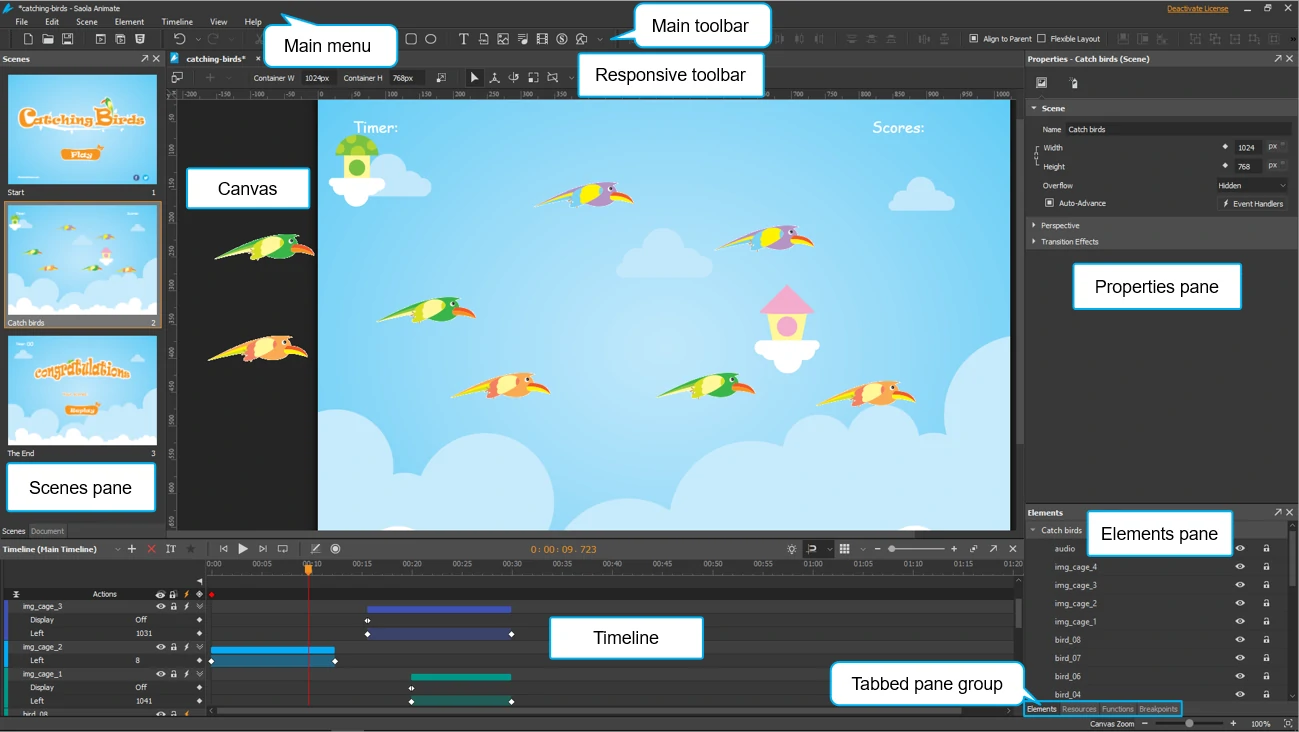
Saola Animate provides a customizable workspace with a large central area for editing content. The central area (the Canvas) is surrounded by a main menu, a toolbar, a timeline, and a set of panes.
Main Menu and Toolbar
The main menu contains seven drop-down menus. Located below it, the main toolbar contains buttons that act as shortcuts to the most frequently used commands from the main menu.
- File menu controls major events such as creating a new project, opening an existing one, previewing, and exporting projects to HTML.
- Edit menu lets you cut, copy, paste, and arrange elements on the Canvas. This menu also includes a command for creating symbols.
- Scene menu helps you manage scenes.
- Element menu allows you to insert all types of elements into a document.
- Timeline menu lets you control the timeline and animations. There are also commands for adding keyframes, labels, and triggers.
- View menu allows customizing the workspace such as showing or hiding toolbars and panes.
- Help menu provides assistance with the application such as documentation, updates, and subscriptions.
Canvas
The Canvas is the central area of the application window. It displays scene content and allows adding, modifying, and arranging elements. When working on the Canvas, you can change the zoom scale to view the entire scene or just a particular area of it. The minimum value for zooming out is 10% while the maximum value for zooming in is 400%.
Do one of the following to zoom the Canvas:
- Hold down CTRL and scroll the mouse wheel up/down to zoom in/out. You can also press CTRL+= to zoom in and CTRL+- to zoom out.
- Use the Canvas Zoom controls at the bottom right corner of the application window. Drag the slider or click the + or – button to zoom in/out. Alternatively, click the Zoom percentage level to choose the zoom level you want.
- To scale the Canvas so that it fits into the viewport size, press CTRL+0 or click the Fit on Screen button. The Canvas will zoom in or out automatically to ensure that all scene contents appear in the viewport window.
If you zoom in the Canvas too much, it will show horizontal and vertical scroll bars. Just scroll the mouse wheel to scroll the Canvas vertically. Hold down SHIFT and scroll the mouse wheel to scroll the Canvas horizontally.
Timeline
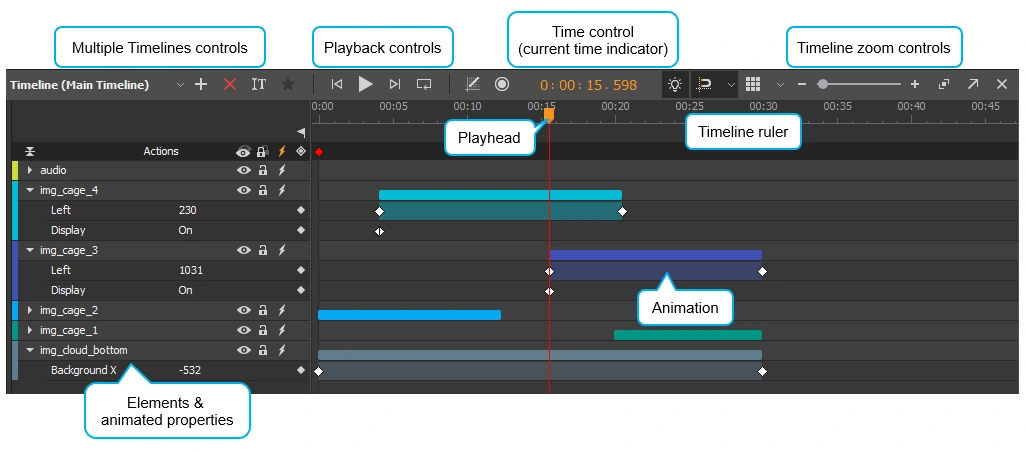
The Timeline pane contains animations, as represented in a time-based view. It allows you to play, stop, and control animations while working in Saola Animate.
Other Toolbars and Panes
- Located above the Canvas and below the document tab, the Responsive toolbar contains commands for creating and managing breakpoints, ranges, and layouts in a responsive document.
- Along with it, the Breakpoints pane allows you to quickly select a layout to edit and switch between the normal mode and the responsive editing mode.
- The Scenes pane contains thumbnail views of scenes in a project.
- The Document pane displays document properties and export options.
- The Properties pane displays element properties and provides lists, text fields, and other controls to adjust and fine-tune element properties.
- The Elements pane displays all elements included in a project. It allows viewing, changing the selection, locking, and toggling the visibility state of elements.
- The Resources pane displays all resources in a project. It also holds all the symbols you have created or imported into your project and allows you to edit symbols.
- The Functions pane displays all JavaScript functions in a project. Create and manage functions to control various aspects of a document.
That’s an overview of the Saola Animate user interface. Remember that you can always customize the workspace so that it suits your preferences and working style. Now give Saola Animate a try and feel free to contact us at any time you need help.


