Last Updated On: July 26, 2022
Images are essential to compelling HTML5 animation. Today’s tutorial shows the ways to add images to HTML5 animation in Saola Animate.
This tutorial covers:

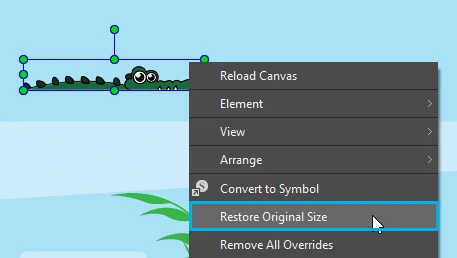
 While editing images, chances are you want to revert them to their original size. Just right-click the images on the Canvas and select Restore Original Size. The option works at any time without affecting images’ other properties except the size property.

 To swap an image with another, go to the Image section. Then, do either of the following:

- Adding Images to HTML5 Animation
- Renaming Image Elements
- Removing Image Elements
- Resizing Image Elements
- Replacing Image within an Image Element
- Animating the Background Image
Adding Images to HTML5 Animation
Saola Animate lets you add a vast variety of image formats to a project. Supported formats include JPG, JPEG, PNG, BMP, SVG, and GIF. It means that you can use both static and animated images, and both raster and vector files as well. For the vector image format, it’s also possible to use predefined shapes or draw freeform ones. To add images to HTML5 animation, do one of the following:- Directly drag or copy images from your computer onto the Canvas.
- Click the Image button in the toolbar, then select one or more images that you want.
- Click the Element menu > Image. Alternatively, you can right-click the Canvas > Element > Image.
- Import images into the Resources pane to store and make them ready for use afterward. To do so, drag images into the pane or click the Import button. After that, you can drag images onto the Canvas or right-click them > Add to Scene.
Renaming Image Elements
You may want to rename an image element after adding it to a scene. Do one of the following:- Double-click the image element’s name in the Timeline or the Elements pane. Then, enter a new name.
- Click the Properties pane > General > Name and rename the element.
Removing Image Elements
If you don’t want an image element anymore, select it on the Canvas or in the Elements pane and press DELETE to remove it. Be aware that you cannot delete an element in the Timeline pane. Note: Even if you delete an image element on the Canvas, the corresponding image still remains in the Resources pane. To completely remove an image, you must delete all image elements associated with it. Then, delete the image from the Resources pane.Resizing Image Elements
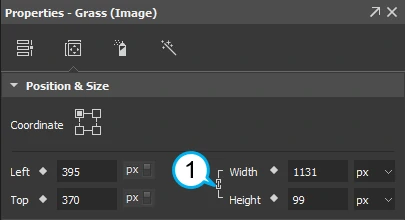
Image elements maintain their aspect ratio by default, which keeps them proportional while being resized. To change the ratio, clear the Link width to height check box (the chain icon) (1) in the Properties pane > Position & Size. While editing images, chances are you want to revert them to their original size. Just right-click the images on the Canvas and select Restore Original Size. The option works at any time without affecting images’ other properties except the size property.

Replacing Image within an Image Element
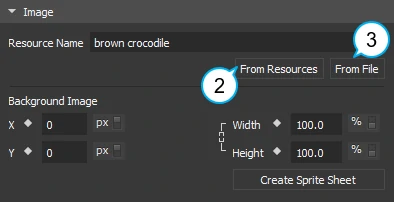
For image elements, the Properties pane includes the Image section. Here you can work with the image embedded within an image element. You can replace that image with another one without affecting any animation associated with the element. This comes in handy when you want to change the content but maintain the animation you created. To swap an image with another, go to the Image section. Then, do either of the following:
- Click From Resources (2) to choose a new image from the Resources pane.
- Click From File (3) to choose a new image from your computer.
Animating the Background Image
Saola Animate enables you to animate the position and size of the embedded image.
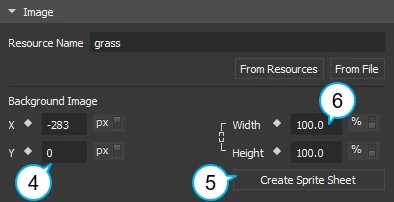
- Background image has the background x and background y properties (4). Animate these properties can repeat the image horizontally and/or vertically, creating sprite sheet animation (5).
- By default, the image size unit is set to percentages (6), making the image scale when you resize its container. To keep the image size the same while resizing its container, change the size unit to pixels.
- Change the width and height of the container to percentages.
- Set the background image position to [X, value: 50%; Y, value: 50%].
- Change the background image size to pixels.