Saola Animate makes it easy to create HTML5 animation for different screen sizes. When working with the application, the first thing to do is creating a new project. Then, you’ll import content, create animations, add interactivity, and finally export the project to HTML5. In this tutorial, you’ll learn the first step: creating a new project.
This tutorial covers:
Creating New Projects
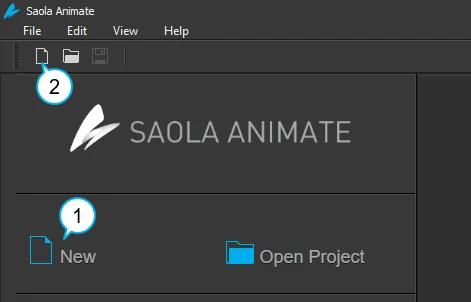
To begin, open the application. On the Welcome Screen, press CTRL+N or click the New button (1 or 2) to create a new project.
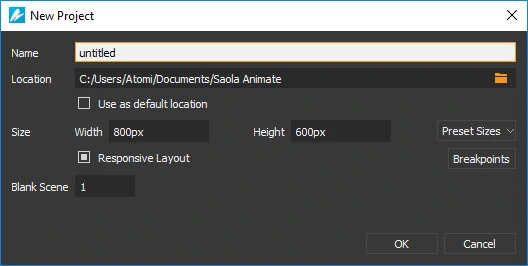
In the New Project dialog, fill in required information and click OK to submit. Be aware that you can choose to create a responsive document or a non-responsive one right at this moment or later, when you edit the document.
Creating Non-Responsive Projects
To create a non-responsive project, specify the project name, location, size, and number of blank scenes.
- Name: Name of the project.
- Location: Location of the project. You can click the Browse button to navigate to a location. Select Use as default location to make a location to be default every time you create a new project.
- Width, Height: Size of the container in which the document is embedded. The container size is editable afterward in the Responsive toolbar > Container W/H. You can select a preset size by clicking Preset Sizes.
- Blank Scene: Number of blank scenes you would like to initially create. The scene size, by default, is the size of the container. Remember that you can insert as many scenes as you want when you edit the document.
Once you click the OK button, you’ll have a new project opened within Saola Animate. The project contains a number of blank scenes as you specified earlier.
Creating Responsive Projects
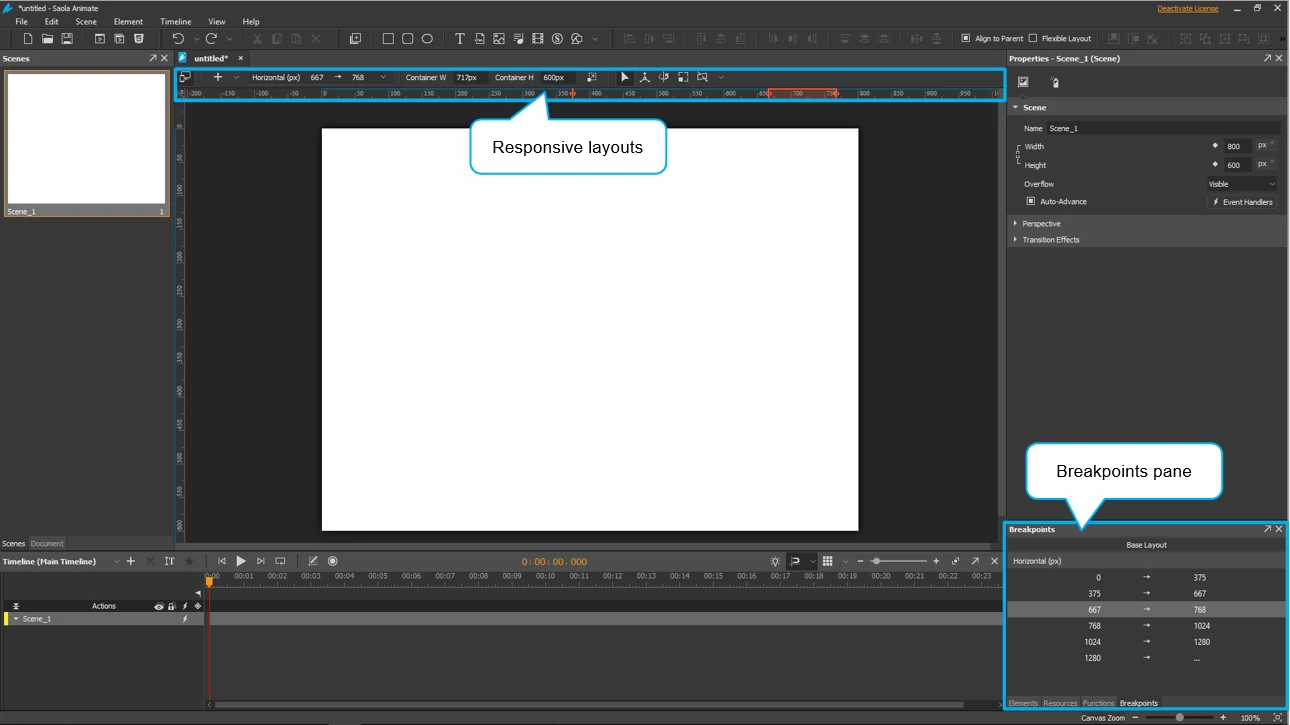
If you want to create a responsive project, select the Responsive Layout check box. In a responsive project, each scene has different layouts created based on breakpoints. The scene size starts at 100% of the container and the viewport width is set to the device width.
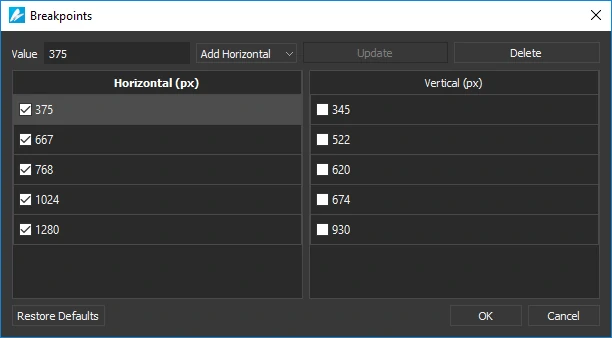
Selecting the Responsive Layout check box enables the Breakpoints button. Click this button to add and manage breakpoints before creating a responsive project. Be aware that you can still adjust breakpoints later when you edit the document.
A responsive document has different layouts created based on breakpoints.
Saving Projects
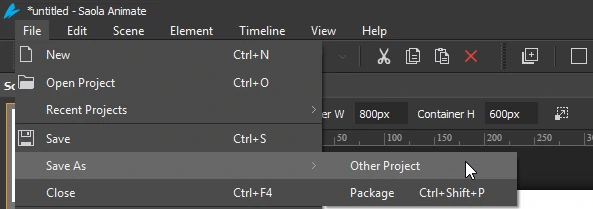
Save a project by pressing CTRL+S or clicking the Save button in the toolbar. You can also save a project as a file with a different name. This is useful when you want to make a backup of your project or just want to save the project to a new location. To do so, click File > Save As > Other Project. Fill in required information in the Save As dialog and click OK to submit.
Besides, you can save a project as a package (*.saolapack) for faster and easier sharing. Click File > Save As > Package. Provide the file name for the package and click Save to submit.
Opening Projects
There are several ways you can use to open an existing project. Besides accessing the project folder and double-clicking the manifest file (*.saola), on the Welcome Screen or in the open project window, you can:
- Press CTRL+O, then browse and open a project.
- On the Welcome Screen, click the Open Project button. If the project you want is listed in the Recent Projects section, just click to open it.
- In the open project window, click Open Project (3) in the toolbar. You can also click File > Recent Projects on the menu bar and select a recently opened project.
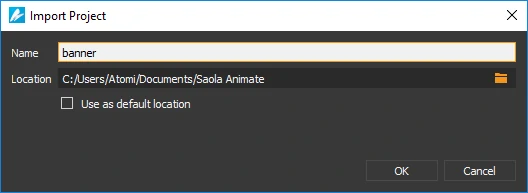
You can also import a project from a package file. Click the Open Project button and select a package file (*.saolapack). Next, fill in the project name in the Import Project dialog and click OK to import.
That’s how to create, save, and open projects in Saola Animate. Stay tuned for more helpful tutorials about Saola Animate and HTML5 animation.
