The role of written materials in training is irrefutable and sure enough, you will need to create them sometimes. Today, I am eager to show you how to create helpful software operations manuals with a powerful screen recording and eLearning authoring tool – ActivePresenter. Don’t miss this, otherwise, you’re gonna miss a chance to bring your users a very useful source of information to master your software.
And, to successfully create software operations following our guidance below, you will need to download the app first. Don’t worry, downloading and using is free of charge. And you can test the features with no limitation in time or functionality!

With ActivePresenter, what kind of software operations manuals can you create?
First, let’s make some following questions clear: What kind of software operations manuals do you need to create? What kinds of help that bring most benefits to your users? Well, it can be a Word, Excel, or PDF file that consists of clear steps telling viewers exactly what to do. With ActivePresenter, they are all attainable.
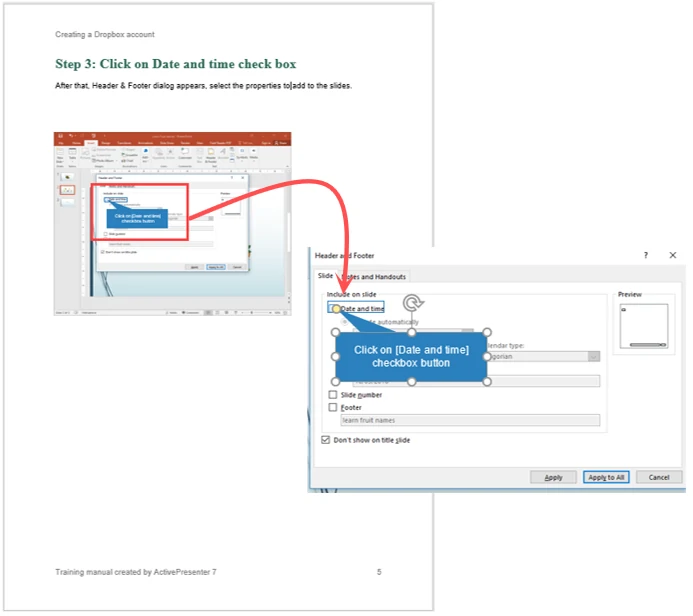
Below is a screenshot of the manual (in Word and PDF format) demonstrating how to insert header and footer in Microsoft PowerPoint:
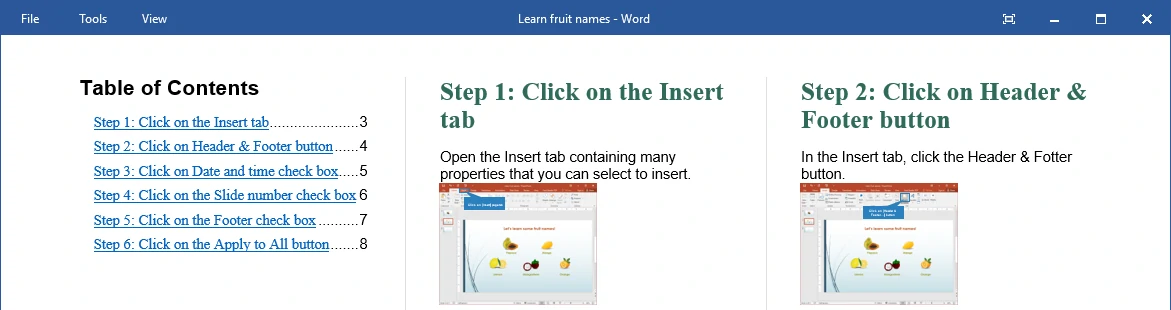
Software operations manuals are not just boring document files with a step by step procedure. They can contain visualization such as screenshots, images and annotations to clarify the information. For instance, you can have a Word file with multiple pages, each page is one step that you have taken. The first page is the table of content (TOC) with internal links for users to navigate between headings.
The text color, font, and style are able to vary the way you design them. What about header and footer? You can not only have them but also customize them either by using built-in tools in ActivePresenter or by creating your own Word template (not available for PDF exporting).
So, how to create software operations manuals?
With ActivePresenter, you can get it done in two ways. One is use the screenshot feature and the other is use the Record Software Simulation mode. This article will discuss the second way. Of course, you can create a manual by combining these two methods, as long as you master them.
Note: One useful feature in creating software operations manuals is Active Window. It allows exporting the active areas that gain the focus. This means each page of the training material will include Active Window areas only. You’d better take a look at it beforehand.
1. Record screen
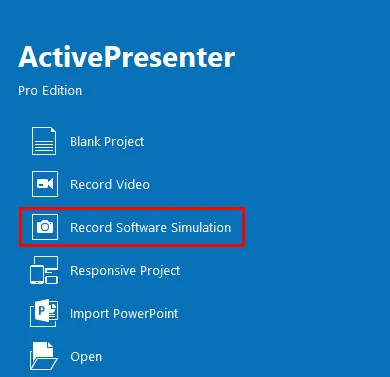
Step 1: Open ActivePresenter, select Record Software Simulation mode.
In the Welcome screen of the app, click Record Software Simulation. This mode lets you record screen and saves the result as multiple slides. The rigid principle is whenever you press a key or click a mouse button, the app will save it as a single slide. Besides, rolling the mouse will result in a slide as a video.
Step 2: Define recording options.
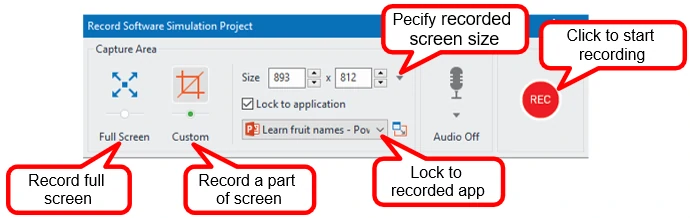
Defining recording information beforehand saves you much time. It avoids you from recording again and again. It also lets ActivePresenter know how you want to record screen. All of these settings can be done in the Record Software Simulation Project dialog. For example, you’d better select the screen recorded area or even lock the recording window to the target application. This makes the recording window fit perfectly the application, leading to a good-looking result.
Besides, since what you need are software operations manuals (document files), recording audio is not necessary. Just ignore it.
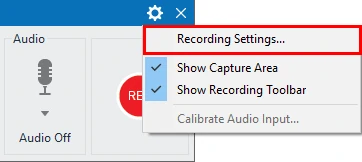
Next, what if you want to have more advanced settings before the recording? No worry as ActivePresenter provides you with the Recording Settings dialog. Just click the Settings icon at the top-right corner of the Record Software Simulation Project dialog.
Basically, you just need to care about the Cursor and Annotation tab. These tabs contain the settings for the mouse cursor and auto-generated annotations. They are two of the most frequently used properties here.
#1. Annotations and interactions:
The Annotation tab of the dialog lets you decide whether to record annotations and interactions (correct/incorrect messages, etc) or not.
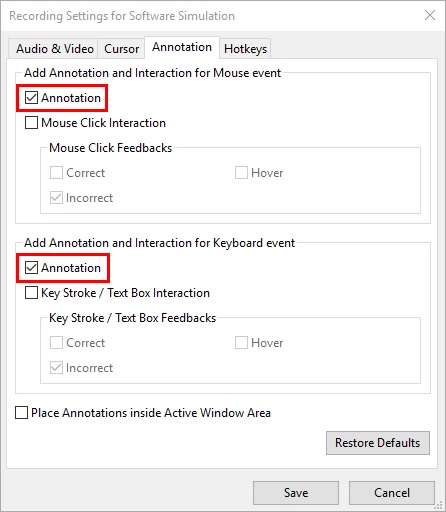
Most of the time, feedback messages are not needed in manuals because users use them to read and find out information, not to get feedback. So, simply uncheck their corresponding box. Otherwise, exclude them from the output in the exporting phase (see how in the exporting section).
On the other hand, select the Annotation check box to include explanation shapes. These shapes contain text that “speaks out” each of your interactions with the mouse or keyboard (mouse/keyboard event). ActivePresenter will automatically add an annotation (shape with text) for each time you press the mouse button.
#2. Mouse cursor:
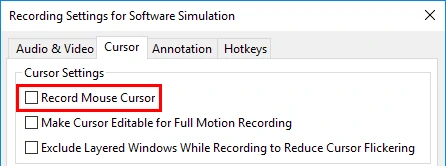
When creating software simulations, it’s recommended that the Record Mouse Cursor feature should be enabled so that you can edit the cursor later. However, you cannot export mouse cursor to the document file type. So, because you are creating training materials, exclude this option.
See following tutorials to attain more information about the recording mode:
Tip: Before recording, you should turn unused apps off to avoid pop-up notifications that can appear in the output.
2. Edit project after recording
#1. Delete slides/steps
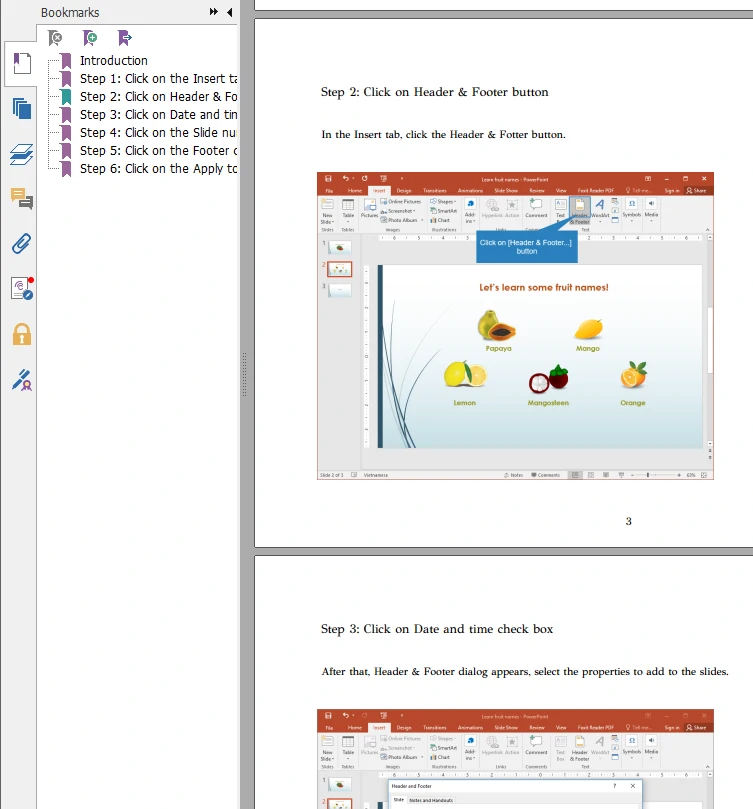
When the recording is finished, you will have a project with multiple editable slides. Each slide is a step that you’ve done. When exporting the project, one slide doesn’t necessary to be one page of the output file. You can choose to export one or two slides on a page. Continuous option and compact option are also available.
During the recording, there is a high chance that you will make some redundant mouse movements or make some mistakes that should be removed. In that case, just delete the slide that contains the redundant step.
#2. Change slide name and slide description
Normally, slide name is automatically generated with the text inside the annotation shapes. You should change it to a more content-related one because it appears many times. Besides, slide names should be different.
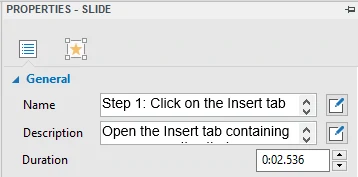
To do that, in the Slide Properties tab of the Properties pane, enter the slide name and description in their corresponding box. Change text font, style, and color if needed (click the edit button next to each box and do the change in the pop-up dialog).
See following tutorials to learn more about how to edit a slide in a project:
- Inserting and Deleting Slides
- Copying, Cutting, and Pasting Slides
- Splitting and Merging Slides
- Changing Slide Names
#3. What about slide duration?
As you can see in the recorded project, slide durations are different and they can be changed easily. However, the slide duration doesn’t matter when it comes to the document output. What you need to do is edit annotations in each slide of the project.
#4. Edit annotations
Each annotation is considered as a slide object, meaning you can change its size and position. Most of the time, annotations are placed at the desired position in slides. If not, simply drag and drop it to where it should be. Added to that, change the text inside the shape if you think it is not clear enough for a particular situation.
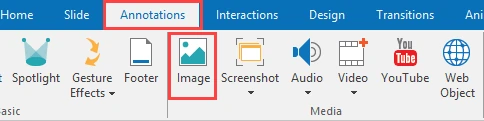
#5. Add contents (annotation, images, corporate icons, etc.)
You are free to add images to any slide and any step of the project. This comes in handy especially when you want the training manual to have a logo of your product or organization. To insert an image, open the Annotations tab and click Image.
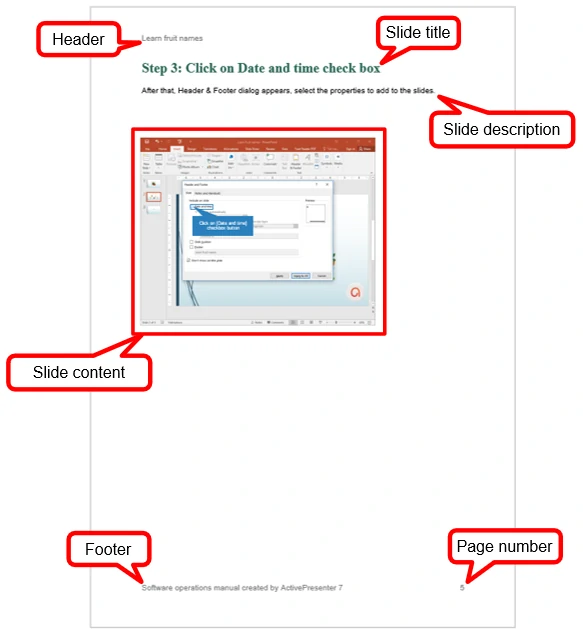
Below is the screenshot of a PDF output page with the ActivePresenter logo at the bottom-right corner of the page:
Tip: Regardless the number of slides in a project, you don’t have to insert a logo into all of the slides one by one. Use Slide Master to add it to multiple slides at once. See the tutorial Adding Company Logos to Your Training Content to know how.
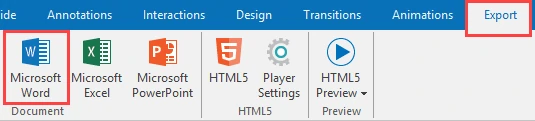
3. Export project to document formats
Finally, let’s export the project to any of document types. Open the Export tab and select one type.
Note: Unlike an exported Word file, the PDF file is uneditable. You cannot change the content after exporting. If you are sure about the content, export to PDF. Otherwise, export the project to Word, edit the content and convert it to PDF file afterword is a good idea.
The Exporting To Microsoft Word window with an intuitive interface lets you select which properties to export in a matter of clicks. From here, you can exclude the feedback messages from the output, choose to create TOC, etc.
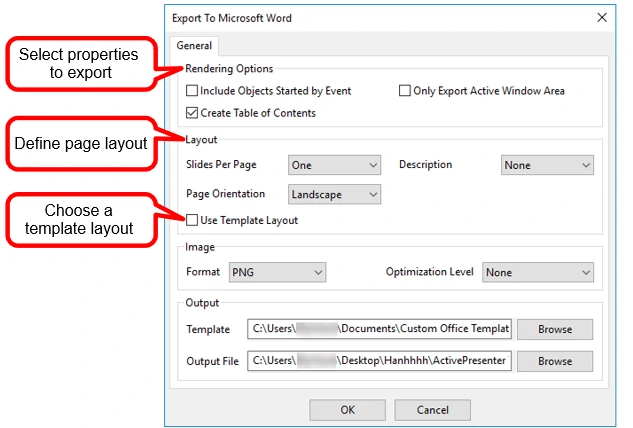
More interestingly, you can define the layout of the exported document as well as the background quality. When it comes to the layout, use the template if you want to give training manuals a more personal look. See Creating and Using a Custom Word Template to know how to have your own style of template for the exported Word document.
In the era of online and distance learning, software operations manuals become a must-have type of materials. With a clear and applicable help, users can learn how to use the software in their self-space without interrupting their busy supporters.
Now, use ActivePresenter to create practical guides to help users get the most out of your products. Don’t forget to visit our tutorial page for many useful tutorials.
