ActivePresenter 7 supports Slide Masters that allows you to maintain a consistent feel and look to all your slides in a project. You can easily design the default themes, colors, fonts, background styles, text, objects and determine the object placement in slides. It’s a must-use feature when you want to design your course in minutes. Let’s see how amazing this feature is in this tutorial.
What you will learn in this tutorial:
- Overview of Slide Masters
- Creating Slide Masters & Layouts
- Managing Slide Masters & Layouts
- Customizing Slide Masters & Layouts
- Applying Layouts to Slides
Now is the time to dive deep into each of them.
Overview of Slide Masters
When you create a new project, your project uses a theme. This theme includes a Slide Master. If you apply many different themes to the project, the project will have many Slide Masters. To work with Slide Masters, you have to access the Master View. (In the View tab > Slide Master). It will open a new contextual Slide Master tab for you to edit.
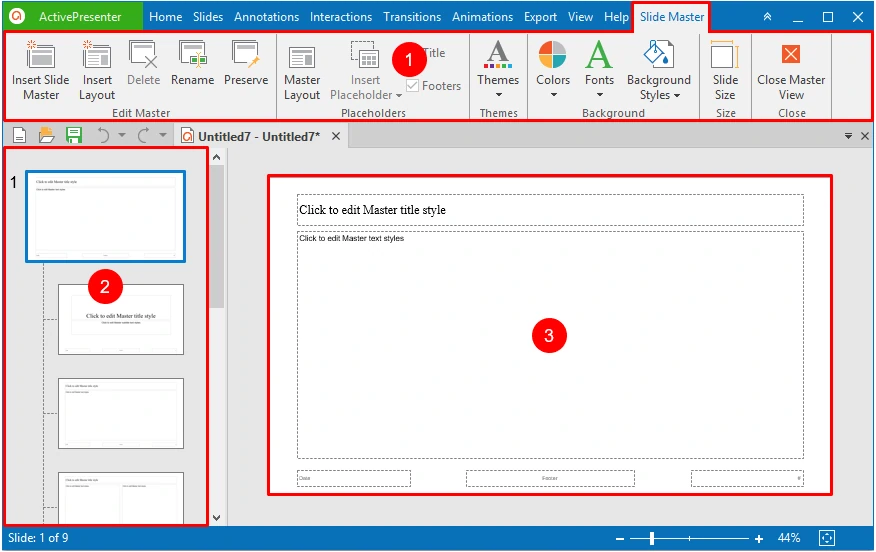
As can be seen, the Master View consists of three main parts. The first part (1) is a Slide Master tab containing groups of useful commands for you to work with. The second part (2) is a left pane showing Slide Masters previously set up for the current project. And the third part (3) is the canvas previewing changes of the selected layout in the left pane. If you make a blank project or haven’t created any Slide Master before, you see a default Slide Master.

A slide master consists of a master layout and a set of custom layouts. In the left pane, the master layout is the first thumbnail which appears slightly larger than all other thumbnails of custom layouts below it. Custom layouts inherit all the properties from the master layout. However, you can make changes to each custom layout as you wish. All changed properties will be no longer inherited from the master layout. You can create a new slide master or add more custom layouts to a slide master if you want.
Using Slide Masters, you can:
- Quickly edit the look of all slides. Come in handy when you have a long project with multiple slides.
- Easy to add content placeholders like text, images, and questions.
- Save tons of time as you don’t need to type the same information on more than one slide. This is helpful when your need is a logo, a symbol or a slogan appearing across all slides.
Note:
- Each Slide Master has at least one layout.
- Whenever you create a project and access the Master View, you always see at least a Slide Master.
- A project possibly has more than one Slide Master.
- The Master View is where to create, manage, and customize any Slide Master/layout. It’s impossible to do those tasks in any other places.
Creating Slide Masters & Layouts
ActivePresenter allows you to add as many Slide Masters and layouts as you want. This task is done in the Master View. To open the Master View, click the View tab > Slide Master ![]() .
.
Insert Slide Masters
To perform this task, do one of the following:
- In the Slide Master tab > Insert Slide Master
 .
. - Right-click anywhere in the left pane > Insert Slide Master.
Then, the new Slide Master with multiple layouts appears at your desired position in the left pane.
Insert Slide Layouts
To insert a layout into a Slide Master, do either of the following:
- Select the slide master/layout > Slide Master tab > Insert Layout .
- Right-click anywhere on the left pane > Insert Layout.
Then, the new layout appears with the same theme properties as the selected slide master or layout. It also has a default title text box and three footer text boxes.
Managing Slide Masters & Layouts
It’s easy to manage your Slide Masters and layouts in the Master View. You’re able to copy, duplicate, rename, delete, and preserve them.
Copy Slide Masters & Layouts
To copy a Slide Master/layout, do as follows:
Step 1: Select your Slide Master/layout and press CTRL+C. Or, right-click it and select Copy.
Step 2: In terms of copying Slide Masters, click Paste or Paste (Keep Source Formatting) to perform the task.
In case of layouts, do either of the following:
- Press CTRL+V or select Paste from the context menu. ActivePresenter will make a copy of the layout in the current Slide Master.
- Select Paste (Keep Source Formatting) from the context menu. Then, both copied layouts and Slide Master from which they inherit properties are replicated.
Duplicate Slide Master & Layouts
To create similar Slide Masters or layouts, just duplicate them. Do the following:
Step 1: Right-click your Slide Master/layout.
Step 2: Click Duplicate Master/Duplicate Layout in the context menu.
Rename Slide Masters & Layouts
If there are many similar Slide Masters or layouts within a project, you should give them descriptive names. This makes it easier to select and use them later.
To perform this task, choose one of the ways below:
- Select a Slide Master/layout > Rename.
- Right-click a Slide Master/layout > Rename Master/Rename Layout .
Then, the Rename Master/Rename Layout dialog appears. Enter a name > OK.
Delete Slide Masters & Layouts
If you no longer need a Slide Master/layout, just remove it. Do as follows:
Step 1: Select a Slide Master or layout.
Step 2: Click Delete ![]() in the Slide Master tab. Or, press the DELETE key.
in the Slide Master tab. Or, press the DELETE key.
Note:
- Deleting a Slide Master remove all of its corresponding layouts.
- You can’t delete any Slide Master/layout that are currently being used by any slide in your project.
Preserve Slide Masters
The Preserve button is meant for storing Slide Masters which you want to keep them for reusing later. To do that, follow these steps:
Step 1: Select one or more Slide Masters.
Step 2: In the Slide Master tab > Preserve ![]() .
.
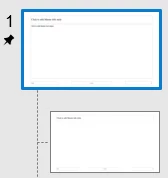
Then, a pushpin icon will be shown at the top-left corner of the slide master.
Note:
- When adding a new Slide Master, it will be automatically preserved.
- If you don’t want to preserve a Slide Master anymore, click Preserve again. In this case, ActivePresenter displays a confirmation dialog to ask if you want to delete it. This dialog doesn’t appear when that Slide Master is currently used in the current project.
Customizing Slide Masters & Layouts
Options to Design Slide Masters & Layouts
To customize a Slide Masters/layout, you have to open Master View. In the View tab, click Slide Master. At the same time, the app provides useful features on the Slide Master tab to design Slide Masters/layouts.

Bear in mind that some commands are unavailable (dimmed) in this view: The Master Layout command is only available for customizing master layouts. This means that this function enables when master layouts are selected. The Insert Placeholder, Title, and Footers commands are only available for customizing custom layouts. Then, you can use most tools on tabs like Home and Annotation to do this task.
Below are the commands in the Slide Master tab:
- Master Layout : Add or remove placeholders like title, text, date, footer, and slide number in Slide Masters.
- Insert Placeholder : Add placeholders to a layout. There are 8 types of placeholders, including Content, Text, Image, Video, Media, Question, Report and Button.
- Title: Display a title placeholder on layouts if it’s checked.
- Footers: Show a footer placeholder on layouts if it’s checked.
- Themes : Apply a consistent theme to your Slide Masters/layouts.
- Colors : Use consistent Theme Colors for your Slide Masters/layouts.
- Fonts : Use consistent Theme Fonts to your Slide Masters/layouts.
- Background Styles : Apply a Preset Background Style to Slide Masters/layouts.
- Slide Sizes : Change the size of Master Slides. See Changing Project Size for more details.
After finishing the design phase, you need to exit the Master View to see the change. To do that, click Close Master View ![]() in the Slide Master tab. Then, the changes you made to Slide Masters and their layouts will be automatically applied to slides which are based on them. In addition, when you click New Slide and Layout in the Home tab or Slide tab, you see new slide layouts are updated.
in the Slide Master tab. Then, the changes you made to Slide Masters and their layouts will be automatically applied to slides which are based on them. In addition, when you click New Slide and Layout in the Home tab or Slide tab, you see new slide layouts are updated.
Note:
- If you want to add any object like text, image, video or button to your slides, just select these objects in the Insert Placeholder command in the Slide Master tab. Otherwise, the objects you add from other commands, for example, Text Caption in the Annotations tab, will be treated as background image, which are unable for you to edit in Normal view.
- To edit the font, size, and color of text in the Text Placeholder box, you simply select the box itself (not the text inside the box) then customize these things in the Font group in the Home tab.
Tips to Design Slide Masters & Layouts
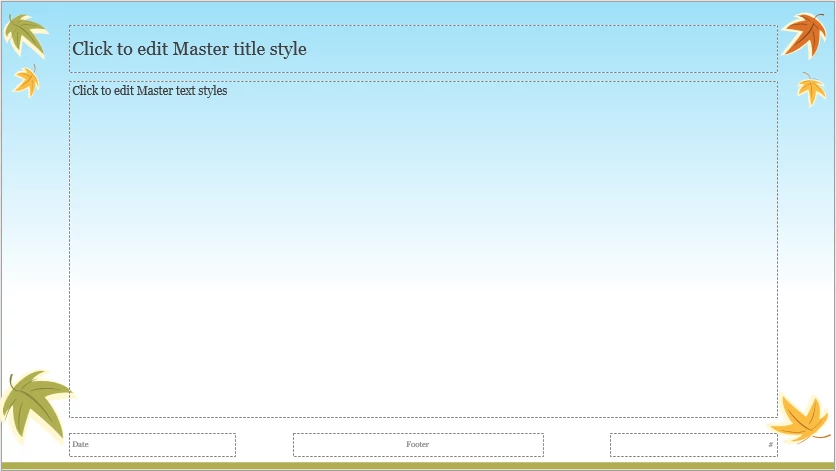
- ActivePresenter allows you to add background graphics to themes with the Background Fill feature. With this in mind, you have freedom to create beautiful themes like this in minutes. For more information, see Modifying Slide Background.
- When you make any change to Slide Masters, it’s a good idea to review your projects for seeing how the change affects each slide. Thus, you can know which slides don’t look exactly right the way you want.
- It’s a good idea for you to edit your slide master and layouts before you begin to create slides. The reason is that all the slides that you add to your presentation are based on your custom edits. In case you edit the slide masters or layouts after you create slides, you’ll have to reapply the changed layouts to the existing slides in your presentation in Normal view.
Applying Layouts to Slides
There are two ways to use slide layouts for slides in the current project. That is, change the layout of existing slides or insert new slides.
Change Layouts of Existing Slides
To change the layout of any existing slide, you need to select one or more slides, then do one of the following:
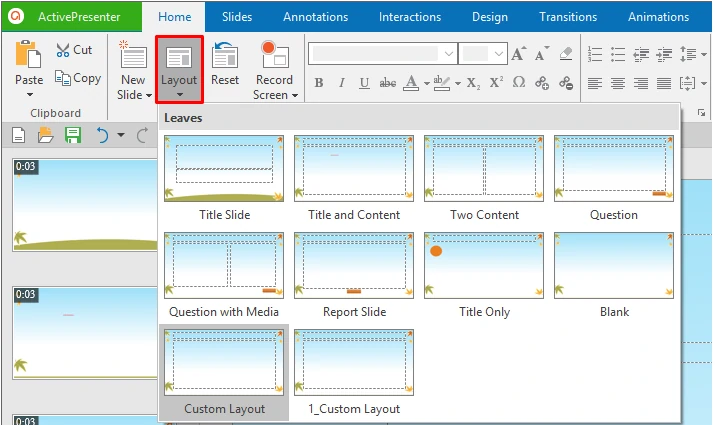
- In the Home or Slide tab: click Layout > select a layout from the gallery.
- Right-click the selected slides > select a layout from the gallery.
Insert New Slides
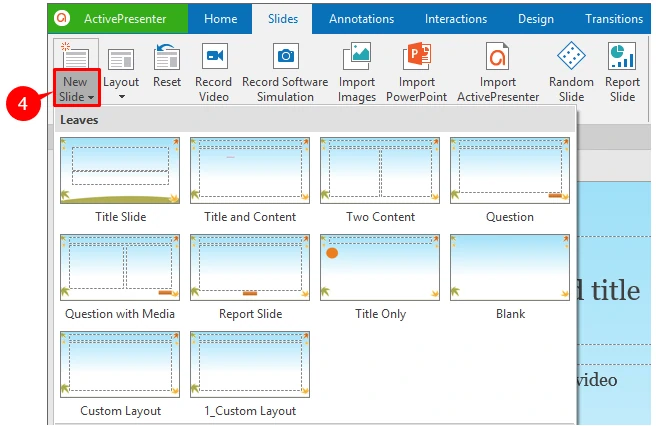
Another way to use slide layouts is to insert new slides. To do that, you specify the location you want to add a new slide first. A new slide with a different slide layout will be inserted below the slide that you select. Then do as follow:
In the Home or the Slide tab, click the drop-down part of the New Slide button, then select your desired layout in the drop-down menu.
That’s all about using Slide Masters in ActivePresenter 7. Try it right now, and you will find it very useful when designing eLearning contents. Feel free to contact us if you need any help.