When you create a new project, it always has the default slide size (or project size) which is 1280 x 720. However, ActivePresenter allows you to change it to any sizes.
Besides, when you resize projects, the new size can be either smaller or larger than the old one. Both cases affect the objects in slides differently. Don’t be worry because ActivePresenter provides further options to scale the project exactly the way you want.
Remember that you cannot change the size of the responsive project, however, you can change its slide layout.
How to Change Project Size?
To resize projects, do as follows:
Step 1: Open the Design tab.
Step 2: Click Slide Size ![]() . This opens the Change Project Size dialog, take one of the following ways to select the new size:
. This opens the Change Project Size dialog, take one of the following ways to select the new size:
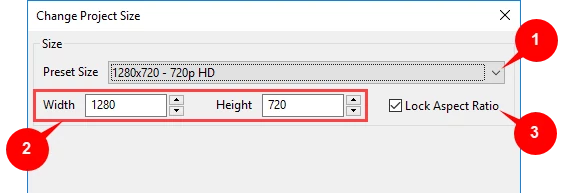
- Quickly apply one slide size from the Preset Size list (1). The list contains different sizes ranging from small to large.
- Enter values in the Width and Height spin box (2).
Note: Regardless the way you choose; the new project size can be smaller or larger than the previous size. In each case, you can have further options to adjust the contents of the slides. We will talk more about them in the next part of this article.
Step 3 (Optional): Check the Lock Aspect Ratio check box (3) if you want to keep the ratio between the width and the height of the slide size.
By selecting this check box, ActivePresenter will automatically change the height according to the width, and vice versa so that the aspect ratio can be maintained.
New Project Size Is Smaller than Previous Project Size
If you use the new size that is smaller than the previous one, ActivePresenter offers two options: Scale or Crop the contents.
Scale Contents
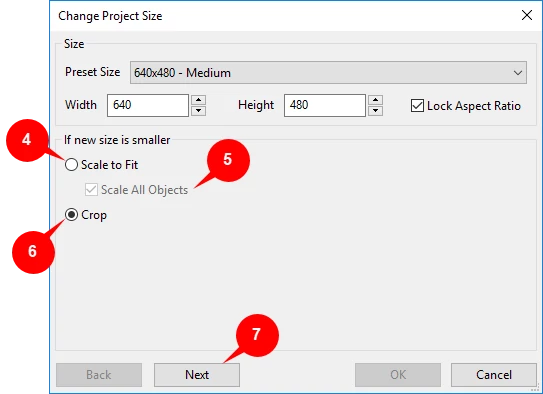
- Scale to Fit (4): If you want to scale the content, click this button. The slide will be scaled in to fit the new slide size.
- Scale All Objects (5): When you select this check box, all of the objects in the slide will be scaled to fit the new slide size, including placeholders in slides and Slide Masters.
Note: If you select Scale to Fit but don’t select Scale All Objects, the slide is scaled. However, all of the objects in the slide still keep their original sizes which are sometimes too large in comparison with the new slide size. You can adjust their sizes after that.
Crop Contents
In case that you don’t want to scale the contents but want to keep a specific part of each slide, you can choose to crop it. ActivePresenter will crop the content to fit the new slide size.
To do that, take the following steps:
Step 1: Click the Crop button (6).
Step 2: Click the Next button (7). This opens the following dialog:
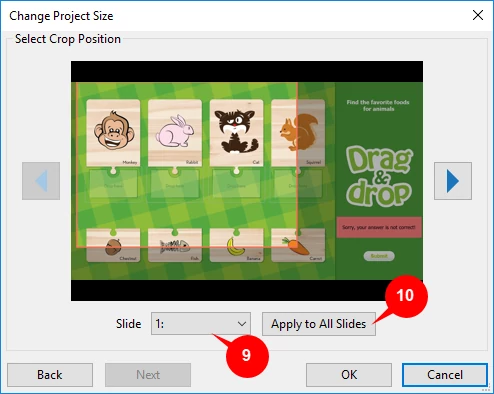
Step 3: Drag the orange frame to the desired portion that you want to keep. The area outside of the orange frame will be trimmed off.
ActivePresenter allows you to crop each slide individually or all of them at once:
- Crop each slide individually: Select the slide from the Slide list (9). You can also click the left arrow button
 or right arrow button to select slides one by one. After the selecting, drag the orange frame to the desired position and click OK.
 - Crop all slides at once: Select any slide of the project, drag the orange frame to the desired position, and then click the Apply to All Slides button (10). Click OK and all slides will be cropped at the same position.
Note: When you choose to crop the slide in any position, objects and placeholders of the slide or Slide Master will not be cut. They keep their original sizes and you can manually drag their handles to fit the new slide size.
New Project Size Is Larger than Previous Project Size
If you use the new size that is larger than the previous size, you will have two options: scale or fill the contents.
Scale Contents
In case that the new size is larger than the old size, ActivePresenter also allows you to scale contents. This option is the same as the option you have when the new size is smaller than the old one. However, the slide and its objects will be scaled out to fit the new larger size.
Fill Contents
As being said earlier, when the new size you select is smaller than the old size, you can choose to crop the content. Now, when the new size is larger than the old one, you can choose to fill it if you want.
With this option, ActivePresenter will keep the slide background and fill it with the new size at a specific position. Remember that this option doesn’t resize the slide objects and fill them.
Take the following steps to do that:
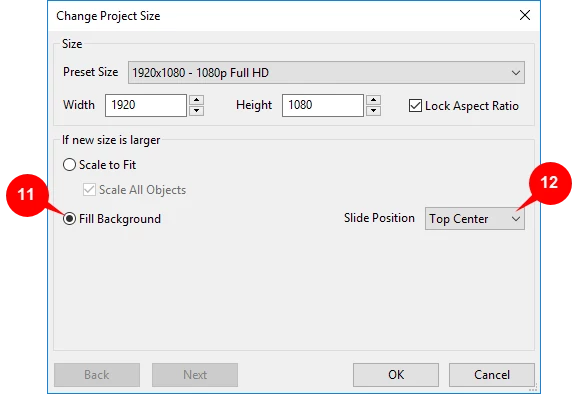
Step 1: Click Fill Background (11).
Step 2: Select the slide position to fill from the Slide Position list (12). It’s the position where the filled content appears on the slide.
Step 3: Click OK to apply the fill and close the dialog.
So, it’s easy to resize projects in ActivePresenter 7, right? You can change the size of any project to any size in some simple steps.
Hope that you enjoy the article. Many useful tutorials about how to use ActivePresenter are available on our tutorial page, let’s visit it to get the most out of the app.