In previous versions, if you want to change fonts of objects in your slides, you have to do that for every single object. But from ActivePresenter 7, you are given a very new feature: Theme Fonts.
In a word, working with Theme Fonts allows you to adjust the fonts for heading and body text easily. Besides, you’re free to edit an existing set of Theme Fonts or create your own one. Today, we’ll walk you through all of these tasks.
Overview of Theme Fonts
Working with Theme Fonts is a good way to create a consistent look for your contents in any project. As mentioned earlier, each set of Theme Fonts consists of a heading font and a body font.
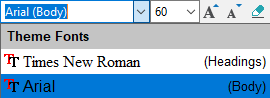
- The heading font is used for slide titles.
- The body font is used for body text on slides, including text that you type into text boxes, captions, buttons, and shapes. Besides, it’s also used for the answer choices in quizzes.
ActivePresenter 7 provides some built-in theme fonts in the theme font gallery. To see them, go to the Design tab and click Fonts.
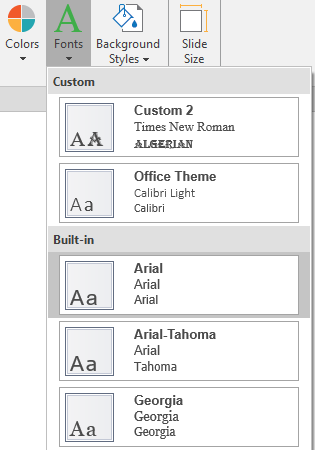
As can be seen, the gray outline denotes the currently used theme fonts. Besides, for each set of theme fonts, there is a name, a heading font, and a body font displayed.
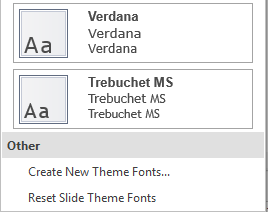
The theme font gallery has three sections. The Custom one includes theme fonts you’ve created. The Built-in has preset theme fonts. At the bottom of this gallery, the Other section offers options to create and reset theme fonts. We’ll discuss them in the following parts of this tutorial.
Note: You can hover over any Theme Fonts in the gallery to see how they will affect the look of your text.
Apply and Manage Theme Fonts
To apply a set of Theme Fonts to all slides, click Design > Fonts. Then, click the set you want. This is the fastest way to change the Theme Fonts of your project. But, note that this way affects only slides that share the same Slide Masters as the current slide. In other words, it only applies the new theme fonts for those slides only. Theme Fonts of other slides which use other Slide Masters remain unchanged.
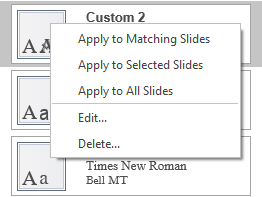
To have more options, right-click any set of Theme Fonts. Then, do any of the following:
- Apply to Matching Slides: This option works the same way as when you click a set of Theme Fonts.
- Apply to Selected Slides: This applied the Theme Fonts to currently selected slides only.
- Apply to All Slides: This applied the Theme Fonts to all slides in your working project.
- Edit: This brings you to the theme font editor where you can edit your Theme Fonts.
- Delete: If you no longer need any Theme Fonts, select this option to remove it. After that, those Theme Fonts don’t appear in the theme font gallery anymore.
If the new Theme Fonts don’t please you, click Reset Slide Theme Fonts to restore the original Theme Fonts. This option is at the bottom of the theme font gallery.
Note: The Edit… and Delete… options are available for custom Theme Fonts only.
Create New Theme Fonts
To create a new set of Theme Fonts, do the following:
Step 1: Click Design > Fonts.
Step 2: Click Create New Theme Fonts… to open the Create New Theme Fonts dialog.

Step 3: Click the Heading font and Body font drop-down button to select your desired heading and body font from the lists. In doing so, remember to look at the Sample box to preview the changes you’ve made.
Step 4: Enter a name for new Theme Fonts in the Name box. Then, this set of Theme Fonts appears in the theme font gallery. After that, you can use it for the current project or any future project.
Note: ActivePresenter saves custom Theme Fonts in C:\Users\<username>\AppData\Roaming\ActivePresenter\themes\fonts (for Windows) or /Users/<username>/Library/Application Support/ActivePresenter/themes/fonts (for macOS). From here, you can:
- Rename theme font files.
- Delete any theme font file. Then, they no longer appear in the theme font gallery.
- Share and reuse theme font files.
Tip: If your desired fonts don’t appear in the Heading font and Body font drop-down lists, download and install them on your computer. Then, restart the ActivePresenter app and access these lists again. You will see your desired fonts.
Modify Theme Fonts
Like custom Theme Colors, ActivePresenter also lets you edit any custom Theme Fonts. Here’s how:
Step 1: Click Design > Fonts.
Step 2: Right-click your custom Theme Fonts > Edit. Then, do the same steps as when you create new Theme Fonts.
That’s it! Get started working with Theme Fonts in ActivePresenter 7 right now. Also, don’t forget to follow our Tutorial page to get more useful tips and tricks when using the app.