Need to resize video or change video resolution on Windows 11 for free? Are you looking for a helpful free video resizer? If so, this blog is for you. You may find scaling videos easier than you ever imagined.
Why do we need to resize videos or change video resolution? It’s to fit the frame of platforms. As can be seen, many platforms on the internet now have different aspect ratios for videos. For example, the TikTok video aspect ratio is always vertical at 9:16, while that of YouTube videos is always 16:9 landscape frames. Therefore, resizing videos to fit the platform frames can satisfy the visual. Besides, scaling a video sometimes means reducing its size. As a result, its data is reduced. This approach is suitable for platforms that limit data uploads. Besides, it helps speed up the upload and free up the space on your computer.
If you are a Windows 11 user then resizing a video in Windows 11 can be done easily using built-in tools like Video Editor or third-party software like ActivePresenter. ActivePresenter is a powerful free screen recorder with diverse video editing features from basic to advanced.
Now, let’s dive deep into each of these two tools.
Resize Video on Windows 11 with Video Editor
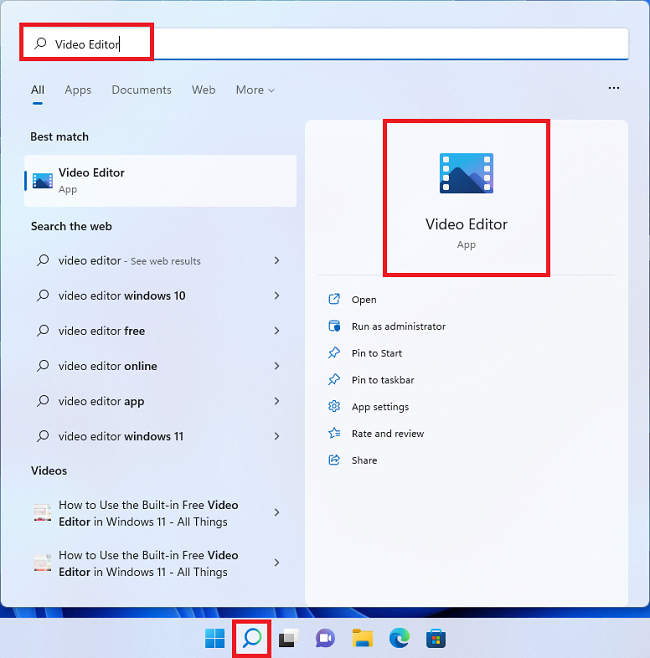
Video Editor is an application used to resize videos on Windows. It’s a good choice of a simple video resizer. You can change the video resolution in the blink of an eye with just a few clicks. To open the app, type “Video Editor” in the search box from the Taskbar, and click to select the app.
Then, follow these steps to resize a video with Video Editor.
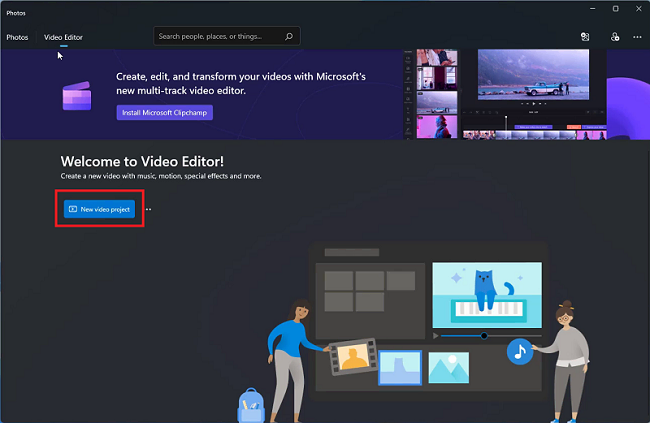
Step 1: Create a new project.
Click “New Video Project” to start with a blank project. Then, type a name to the project in the dialog that pops up.
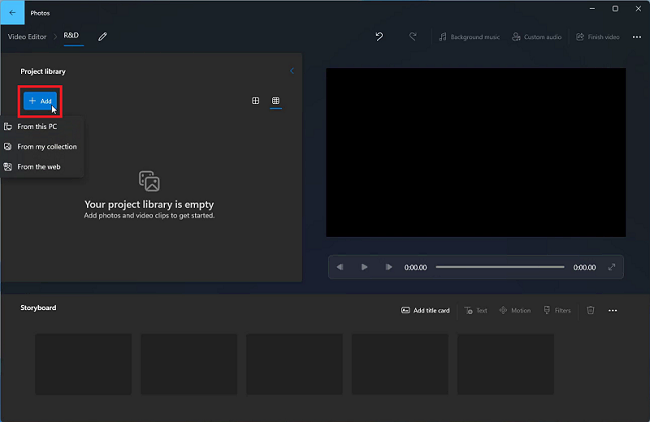
Step 2: Insert the video you want to resize.
Click Add to insert the video into the project. It can be on your computer, collection, or from the web.
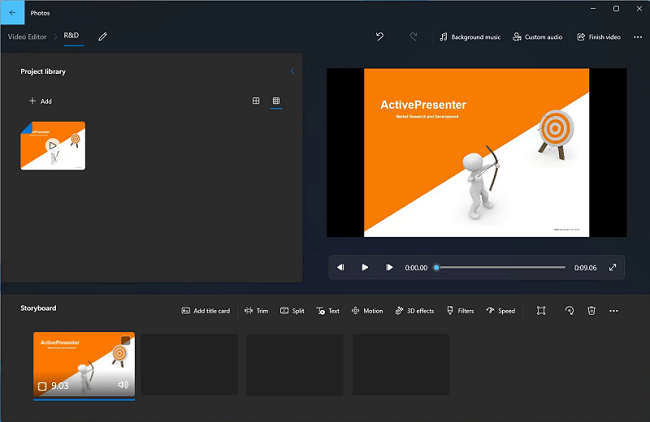
Step 3: Drag the video to the Storyboard.
Now you can see it on Canvas.
Step 4: Resize the video.
In this step, the app allows you to shrink the video to fit the frame or remove black bars before exporting. To do that, do either of the following:
- Right-click the video on Storyboard > Resize > Remove black bars or Shrink to fit.
- Click
 on the Storyboard > select Remove black bars or Shrink to fit.

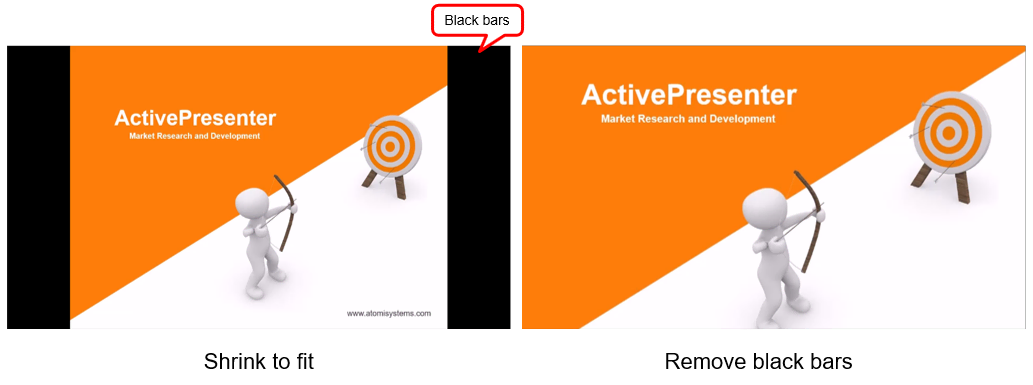
Which options should be chosen? It depends on how you want the video to be displayed. In fact, the frame of the Canvas is 16:9. The video which has the same frame can be displayed on full Canvas. Those which have different frames may be surrounded by black bars if you select Shrink to fit. Otherwise, some parts of the video will be cropped to fit the frame when you click Remove black bars. Let’s see the difference between the 2 options when you insert a 960×720 dimension (4:3) video.
Step 5: Export a shareable video.
After deciding how the video looks, click Finish video on the top-right corner of the app to export it. Here you have 3 options:
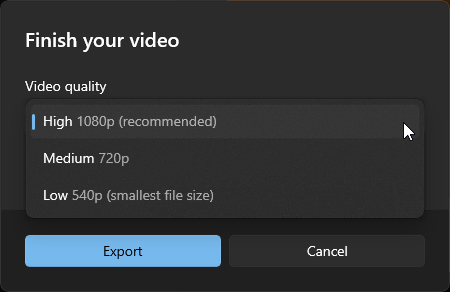
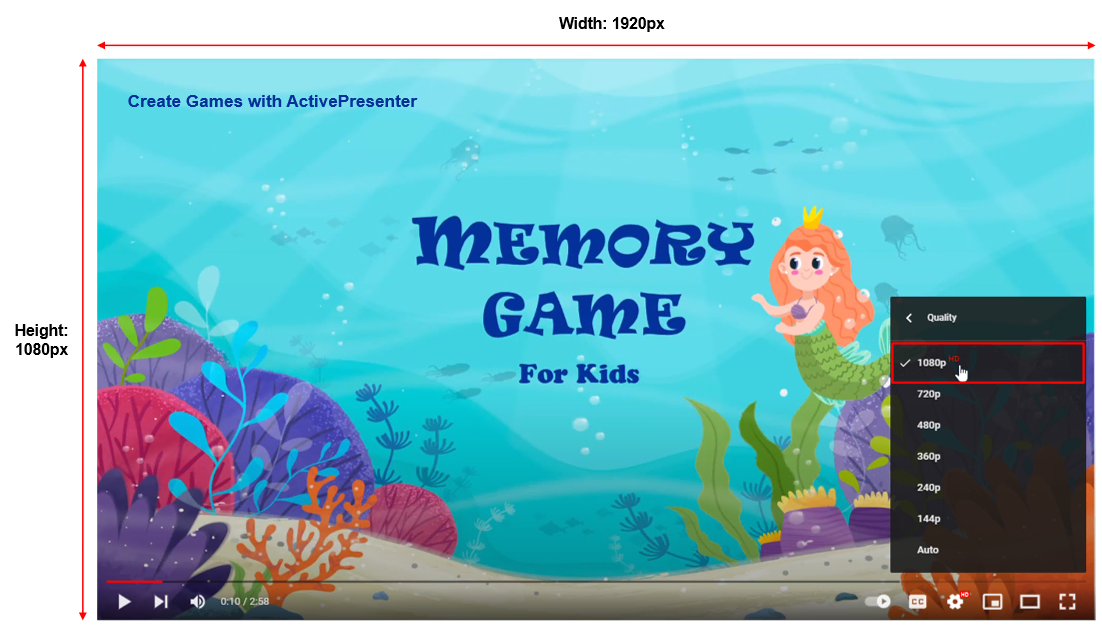
High 1080p means the output video has the Full HD resolution, its size is 1920x1080px. This is the recommended option. The video has the best quality. If you just want the video quality to be high definition (HD), select Medium 720p. The video size will be 1280x720px. Low 540p is the last option which can export a 960x540px video.
Then, click Export to finish resizing the video.
That’s how to resize a video with Video Editor on Windows 11. As the app is suitable for simple editing, you have fewer options to choose the video quality.
Resize Video on Windows 11 with ActivePresenter
For more advanced editing, ActivePresenter is a great option as a powerful screen recording and video editing tool. When it comes to video resizing, the app lets you scale videos to any size you desire.
After installing, as soon as you open the app, you can see the Start Page. Then, do the following steps to resize a video.
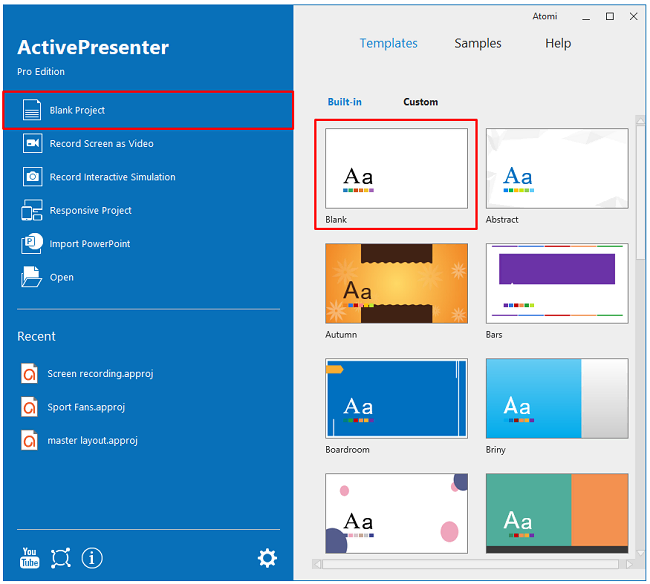
Step 1: Create a blank project.
To do that, click Blank Project on the left pane, or Blank in the Built-in section.
The newly created project has a Title slide with 2 placeholders. The slide size is 1280x720px (16:9) by default.
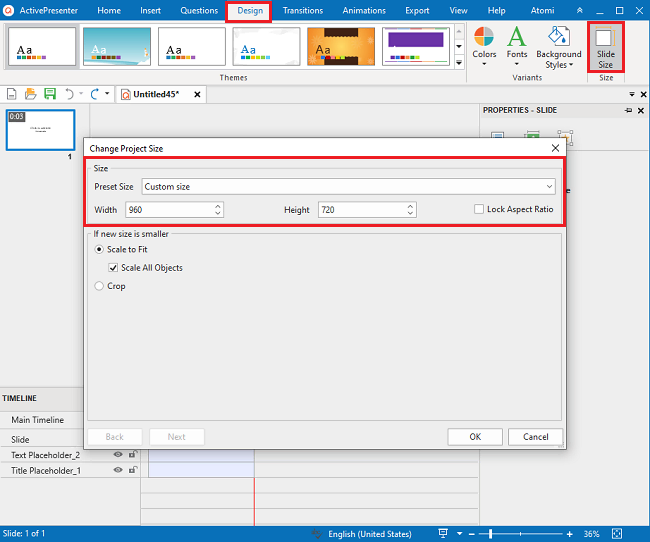
Step 2: Change the project size (optional).
If your video’s aspect ratio is not 16:9, you should change the project size. This will resize the slide in the project so that it has the same aspect ratio as the video. To change the slide size, navigate to the Design tab > Slide Size. On the Change Slide Size dialog that appears, select a preset size in the Size section. If it doesn’t meet your needs, untick the Lock Aspect Ratio, then type new values or click the arrow in the spin boxes to change the width and height. For more information, refer to the tutorial How to Change Slide Size in ActivePresenter.
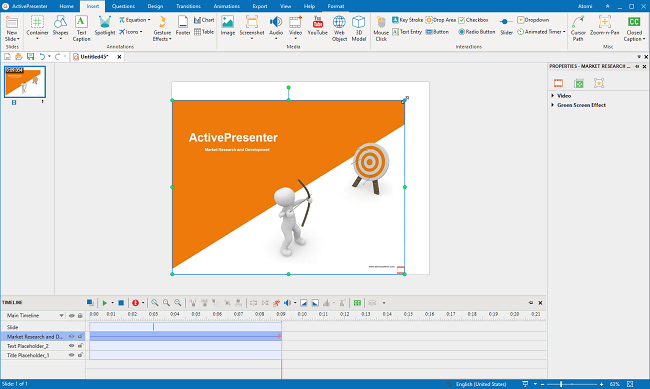
Step 3:Insert the video into the project.
Navigate to the Insert tab > Video > select the video you want to resize.

Step 4: Scale the video on Canvas.
This step makes the video size fit the slide size. So, there is no white area surrounding your video.
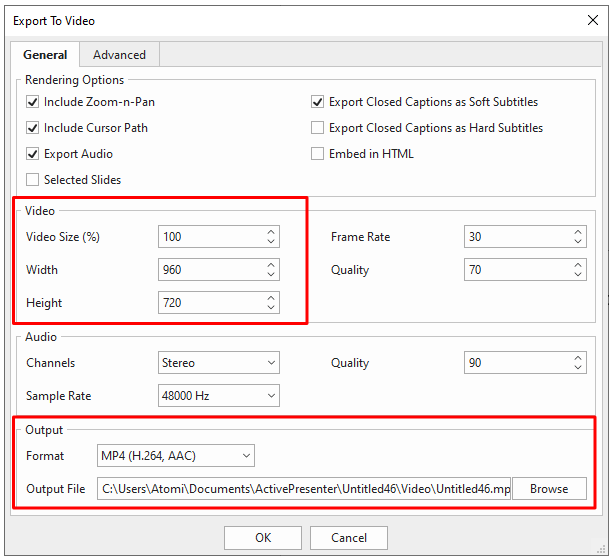
Step 5: Export the video.
To do that, open the Export tab > Video. Then, you can change the video size (%), or its width and height in the Video section of the Export To Video dialog. You can also change other values such as frame rate and quality in this section. Refer to the tutorial for further information. Finally, select a format for the output video in the Output section. The app allows exporting a video to MP4, AVI, WMV, WEBM, and MKV.
That’s how to resize a video on Windows 11 with ActivePresenter. Remember that the app is not only a video resizer but also a video editor. It provides you with basic and advanced tools to make your videos more perfect. You are free to use all basic features to edit the videos. The output can be used for non-commercial purposes. If you want to enhance the video and audio, consider the Standard and Pro version. They have more amazing features that you may need.
Download ActivePresenter and try all the features for free!

Final Words
You have learned two handy ways to resize a video on Windows 11. Discover a number of interesting things that ActivePresenter can bring to you. Subscribe our YouTube channel, follow our Blog for more updated information.
More Articles: