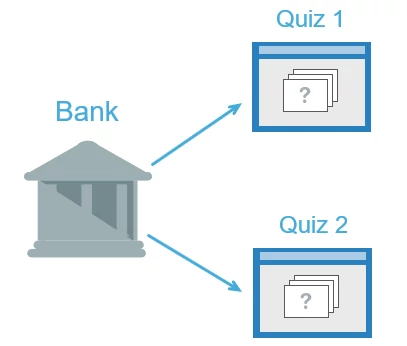
In eLearning course design, question pools (also question banks) are really practical. They come in handy when you wish to reuse questions or create several different versions of the same quiz.
In this tutorial, we show you how to create and manage question pools. Also, you’ll know the technique to import pools from other projects. In terms of drawing slides from pools to create random slides, we save it for another tutorial.
Overview of Question Pools
Basically, a question pool contains a list of question slides which don’t appear directly in the output. It’s used to randomize the order of questions in a quiz. That is, you put questions into a pool, and then draw them out when you need to create randomized questions. So, you can keep quizzes from being predictable. Besides, using question pools is a good way to organize and manage related questions in one place.
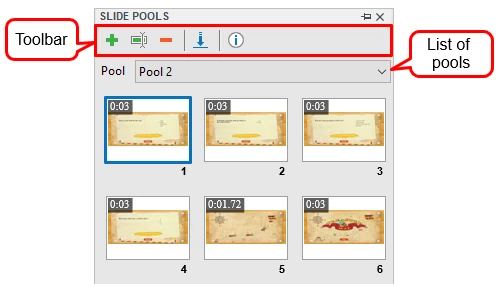
In ActivePresenter, you can add not only question slides but any other slides to pools. For this reason, question pools are also called slide pools. All slide pools are kept in the Slide Pools pane. It’s where to create and manage slide pools.
To use slide pools, you can move slides in the Slides pane to a pool or create a new slide from this pane. Then, to show these slides in the output, you need to use random slides. This helps make slides appear randomly in the output. Additionally, the app allows you to move any slide in a pool to other pools or back to the Slides pane.
Create and Manage Question Pools
Create New Question Pools
By default, the app gives you “Pool 1” without slides. To add a new pool, do the following:
Step 1: In the View tab > Slide Pools . Then, the Slide Pools pane appears.
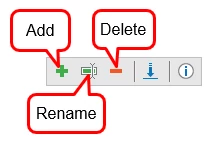
Step 2: Click Add to open the Add Pool dialog. Name your pool and click OK.
Rename Question Pools
To rename a question pool, do as follows:
Step 1: Select a pool from the Pool drop-down list.
Step 2: Click Rename. Then, enter a name you want.
Delete Question Pools
To delete a question pool, do as follows:
Step 1: Select a pool from the Pool drop-down list.
Step 2: Click Delete. Then, the selected pool and all slides inside it are removed.
Manage Slides in Slide Pools
Add Slides to Slide Pools
There are two ways to add slides to a slide pool. First, add existing slides in the Slides pane to the pool. Second, create new slides right inside the pool.
1. Add Slides in Slides pane to a Slide Pool
To add slides to a pool, in the Slides pane, right-click one or more slides > Move Slide To > select a pool. As these slides are moved to the Slides Pool pane, they no longer appear in the Slides pane.
2. Create New Slides Inside a Slide Pool
To do this, in a pool, right-click anywhere in the Slide Pools pane > New Slide. In case you right-click a slide early on, the new slide will have the same theme properties as the selected slide. Otherwise, the new slide inherits theme properties from the first theme of the current project.
Edit Slides
You can edit slides in pools. Just select a slide inside a pool and edit as normal. For example, cut/copy/delete slides, change their layout, add objects to them, etc.
Move Slides from a Pool to Another
The app allows you to move any slide in a pool to another pool. To do this, perform these steps:
Step 1: Select a pool from the Pool drop-down list.
Step 2: Right-click one or more slides > Move Slide To > select a pool to which you want to move that slide.
Move Slides from a Pool to Current Project
You can move slides from any pool to the current project as well. To do this, right-click slides in a pool > Move Slide To > Slides.
Note: Apart from this, you can copy slides in a pool and paste them into another pool or into the Slides pane.
Import Slide Pools from Other Projects
You can reuse slide pools across projects. Do as follow:
Step 1: In the Slide Pools pane > Import Pool .
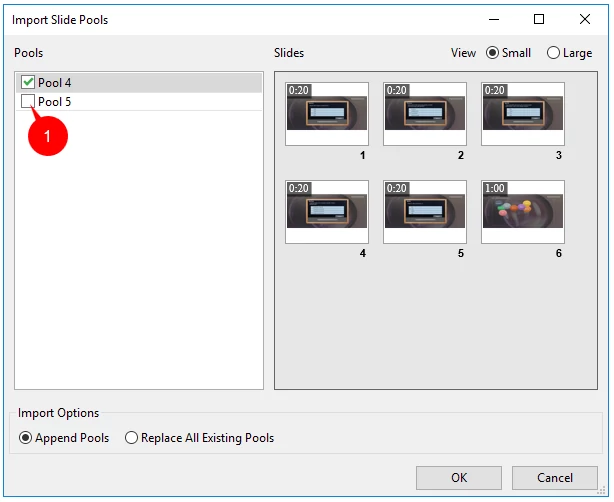
Step 2: Browse your file system and select a project file (*.approj) which contains slide pools you want to reuse. Then, the Import Slide Pools window appears like this.
This window has two boxes. The Pools box is where to show pools in the selected project. The Slides box displays all slides in each pool. To change the view mode, click the Small or Large button.
Step 3: Select a pool to import. By default, all pools are selected. But if you don’t want to import a pool, just deselect the corresponding check box (1).
Step 4: Select import options.
- Append Pools: Import a pool as a new pool and keep all previously created pools in the current project.
- Replace All Existing Pools: Import a pool as a new pool and replace all previously created pools in the current project.
Step 5: Click OK to apply changes.
That’s how to create question pools in ActivePresenter. The next tutorial will guide you how to draw slides from question pools to create random slides. So don’t miss them out!


