We’ve learned how to create projects in ActivePresenter 7, from creating blank projects to creating responsive projects. Today, we’ll learn how to create projects using Microsoft PowerPoint slides. This is a content-generation method where we import PowerPoint slides into a new ActivePresenter project.
Note that this method is different from inserting Microsoft PowerPoint slides in the currently working ActivePresenter projects. Alternatively, you can also insert google slides templates. See Inserting and Deleting Slides in ActivePresenter 7 for more details.
Select PowerPoint Projects to Import
Before importing slides, make sure Microsoft PowerPoint is installed on your computer. This ensures that ActivePresenter will import slides correctly.
Then, do one of the following to select the PowerPoint project from your file system:
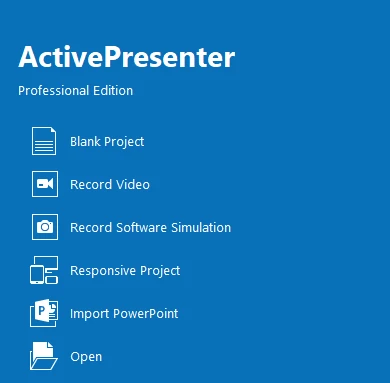
- On the Start Page, click Import PowerPoint:
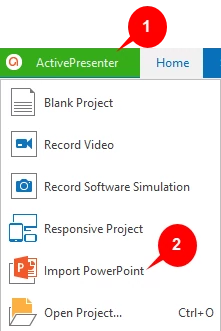
- In the currently opening project, click the ActivePresenter button and click Import PowerPoint:
After that, browse the location where you store the PowerPoint file and select it.
Import PowerPoint Slides
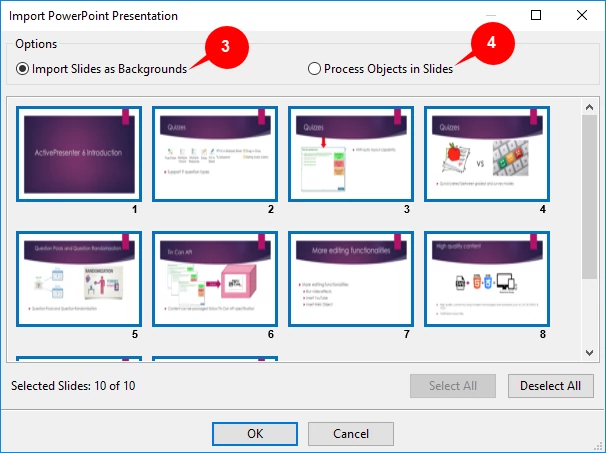
After selecting the PowerPoint project having slides that you want to use, ActivePresenter will launch the Import PowerPoint Presentation window as shown in the screenshot below:
Now is the time to import those selected slides into a new ActivePresenter project. Take the following steps to do that:
Step 1: Define how to import PowerPoint slides.
As you can see in the image, there are two options that you can choose to import PowerPoint slides: Import slides as background or as separate objects.
- Import Slides as Backgrounds (3): Each slide turns into a background image for a corresponding slide in ActivePresenter project. All the separate objects in the PPTX/PPT slides will be flattened into one image, and you cannot manipulate/animate them anymore. However, you can add more objects to slides if needed.
- Process Objects in Slides (4): All the objects in each PowerPoint slide are imported into the corresponding ActivePresenter slide. Then, you can manipulate those objects and then annotate the slides in ActivePresenter.
So, if you need to edit objects in the slide after importing, you should choose Process Objects in Slides.
Step 2: Select PowerPoint slides to import.
By default, ActivePresenter will select all of the slides. You can click the slides that you don’t want to import to deselect them. Besides, you can click Deselect All to deselect all slides.
Step 3: Click OK to start importing projects. ActivePresenter will launch a new project with the slides that you have selected.
Each PowerPoint slide becomes an ActivePresenter slide. After that, you can edit and manage imported slides as normal slides in other ActivePresenter projects. This means you can use many tools and commands to edit the slide and its contents, for example splitting and merging slides, changing slide transition effects and timing, etc.
So, you’ve learned a new method to create a new project in ActivePresenter 7. Hope that you enjoy it and feel free to ask if you have any question. And don’t forget our tutorial page which has many useful articles.


