Last Updated On: March 18, 2020
In the past, to show different views of the same object, you needed to insert multiple objects and used the “hide and show” technique. But from ActivePresenter 7, you no longer have to do that. Now the app offers you a very useful and practical feature: Object States.
Using Object States is a good way to change the appearance of an object according to learner interaction. For example, zoom in a button or change its color when learners hover over it. Besides, ActivePresenter allows you to add as many states as you want. Keep in mind that Objects States aren’t available for object groups.
 > Edit States. Then, the Edit States mode opens.
Step 3: Click Add State or right-click the Active state > Add State.
Note:
> Edit States. Then, the Edit States mode opens.
Step 3: Click Add State or right-click the Active state > Add State.
Note:
Overview of Object States
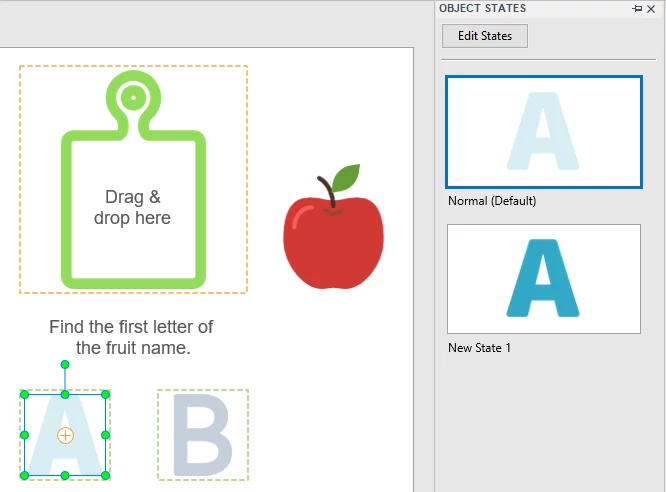
Basically, a state is a collection of visual elements defining the look and feel of an object. In ActivePresenter, most objects support states, except for Zoom-n-Pan, Cursor Path, and Closed Caption. Some objects have only one state while others have multiple default states. To view all states of an object, you need to access the Object States pane. Here you’re given a toolbar with a lot of commands to edit states and a button to open the Edit States mode. Let’s take a look at states of the Button object. This is a typical example of an object having many states.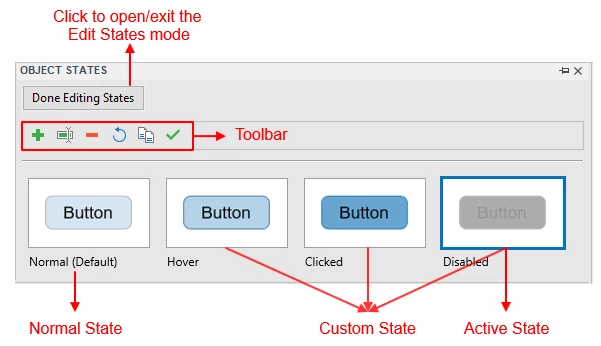
- Normal: By default, it’s the initial state of an object when it first appears in the output. Note that the initial state can be changed.
- Hover: This is how the object appears when learners hover over it.
- Clicked: This is how the object appears when learners click it.
- Disabled: A disabled object is still visible to learners, but it won’t respond when hovered, clicked, or dragged. Unless you set it as the initial state, you’ll need to use a trigger to show this state.
- Normal state: Each object always has a Normal state, and you can’t delete or rename it. But you’re able to customize this state like its color and size.
- Custom state: An object may have multiple Custom states. They can inherit visual properties from the Normal state. In the case of the Button object, Custom states are Hover, Clicked, and Disabled.
- Default state: The Normal state is the Default state by default. You can set any other state as a Default one.
- Active state: During the Edit States mode, the state you selected is the Active state. When the first time you access this mode, the Normal state is the Active state.
- Easily develop interactive contents without using multiple objects. There’s no need to constantly hide and show objects in a single project.
- Declutter and simplify the Timeline. For example, you can use different colored states to change the shape color based on learners’ actions rather than inserting many objects with separate colors.
Adding Object States
An object has at least one state by default. To add extra states, do the following: Step 1: Select an object. Step 2: In the View tab > Object States- If you don’t select an object, the Edit State button is unavailable.
- When you’re in the Edit States mode, all other objects in the current slide will be grayed out and unclickable.
Managing Object States
ActivePresenter 7 offers you some commands to manage object states. These commands are placed in the toolbar, or you can right-click a state to see them.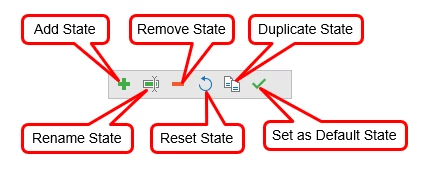
-
- Remove State: Delete the selected state.
- Duplicate State: Duplicate the selected state. The new state has the same properties as the original.
- Rename State: Select this to rename the selected state. After that, you’ll see the name at the bottom-left corner of the state thumbnail.
- Reset State: Restore the original state if you aren’t satisfied after editing the selected state.
- Set State as Default: Select this to label the selected state as a default.
Editing Object States
In terms of editing Object States, ActivePresenter allows you to:- Change the appearance of any state, including its text, size, shape type, color, effects, and position.
- Add events and actions for Object States.
- To change the state of an image, access the Properties pane > Size & Properties > Image > choose another image from the current project or from your computer.
- To change the background image of a state, access the Properties pane > Style & Effects > Fill > Image Fill.
- To change the fill, mark, and border of Check Box and Radio Button, go to the Format tab.
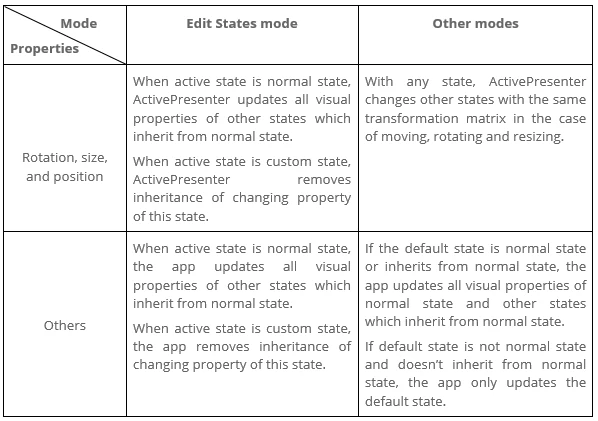
- When changing visual properties of a state, consider these constraints: