
ActivePresenter eLearning authoring software lets you add custom AI providers so you can use services from providers you already have an account with. This gives you more flexibility when working with AI-powered features, such as image generation.
Before you begin, make sure that you have registered an account with the AI provider and have the required credentials, such as an API key or API token.
- Open the AI Services Settings
- Configure Your AI Service and Manage Custom Providers
- Click Add to Create a Custom Provider
- Configure the Provider Script
- Confirm That the Custom Provider Was Added
- Use the Custom Provider in an AI Feature
- Edit a Custom AI Provider
- Remove a Custom AI Provider
- Helpful Tips for Using Custom AI Providers
Note: Images generated through a custom AI provider do not consume ActivePresenter AI Credits. Any usage charges are determined by your AI service provider based on your own account and pricing plan.

Step 1: Open the AI Services Settings
First, open the AI Tab in ActivePresenter 10.
In this section, you can view the available AI services and manage the providers connected to ActivePresenter.

Step 2: Configure Your AI Service and Manage Custom Providers
In this step, you will set up your desired AI service category, manage your provider list through the Service providers section, and update your custom provider settings whenever necessary.
- Select the AI Service: Choose the type of AI service for which you want to add a provider (for example, select Image Generation if you want to generate images using another provider).
Tip: The available settings and required information may differ depending on the AI service you select. - Edit a Custom AI Provider (When Needed): If your API key changes or you need to update the provider settings, you can easily do so by following these steps:
- Open AI Services Providers.
- Select the custom provider you want to update.
- Click Edit.
- Update the provider name, API key, service accounts, or script settings as needed.
- Click OK to save your changes.

Step 3: Click Add to Create a Custom Provider
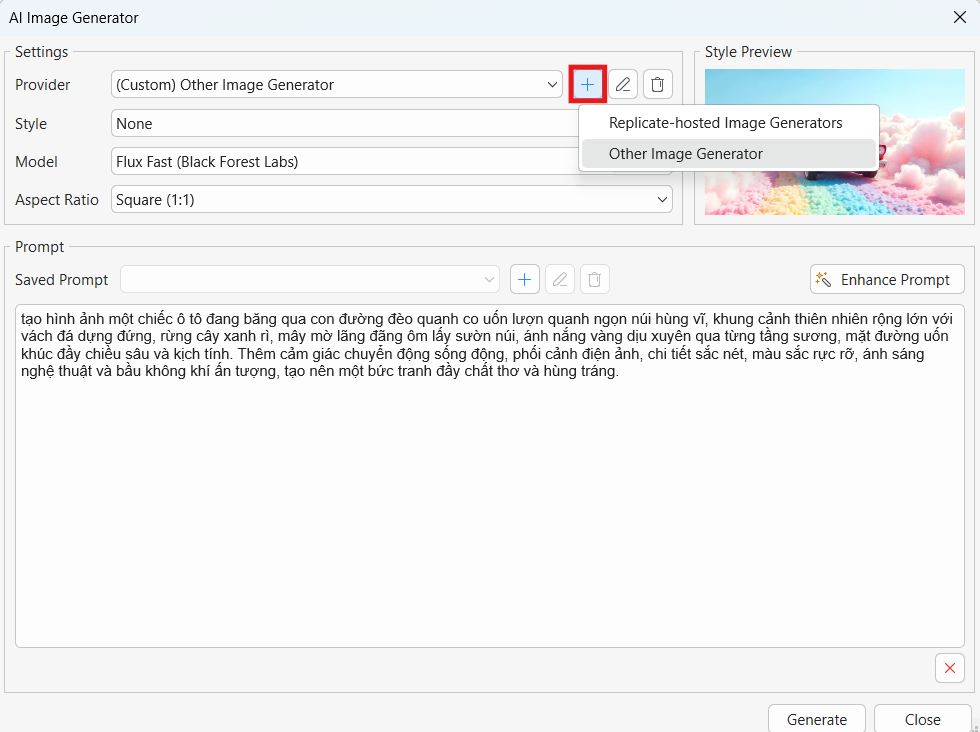
In the provider section, click Add to add a new custom AI provider.
Example (Image Generation): For image generation, you can also select Add Custom Image Generator from the Provider drop-down list in the Image Generation dialog.
Step 4: Configure the Provider Script
In the script editor that appears, complete the required functions for your custom image provider. Depending on your image generation service, this may include:
- get_info(): Define the available image generation models, supported aspect ratios, and image styles.
- generate_image(): Implement the logic to send the prompt and selected options to your image generation service, then save the generated image to the output file path provided by ActivePresenter.
- log_message() (optional): Add log messages to help monitor the generation process or troubleshoot issues.
- raise_error(): Return an error message when image generation fails or an unexpected error occurs.
When you finish implementing the required functions, save the script and test the provider to verify that it can generate images successfully.
Tip: Make sure the generated image is saved to the output_file_path provided by ActivePresenter. Otherwise, the application will not be able to load the generated image.
Step 5: Confirm That the Custom Provider Was Added
After saving, your new provider appears in the provider list. ActivePresenter displays the word Custom before the provider name so you can easily identify it.
If the provider does not appear, check that you clicked OK rather than Cancel, then reopen the AI Services settings and try again.
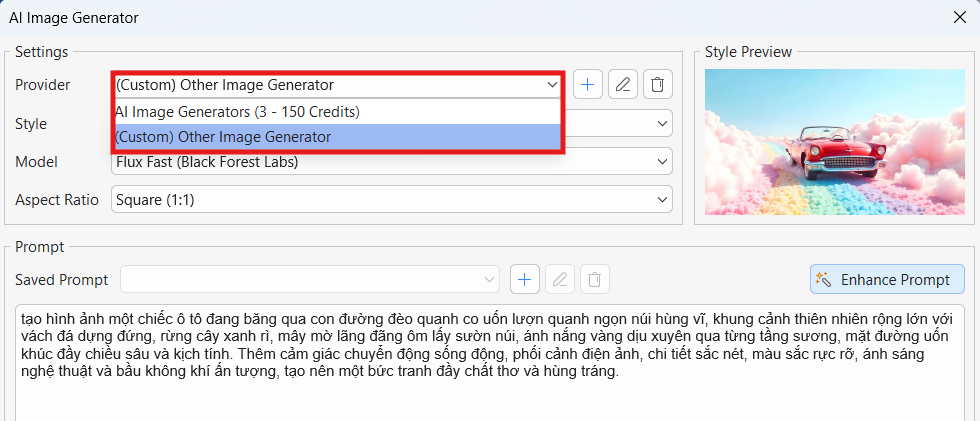
Step 6: Use the Custom Provider in an AI Feature
You can now select your custom provider when using the related AI feature.
For example, to use a custom image provider:
- Go to the AI tab.
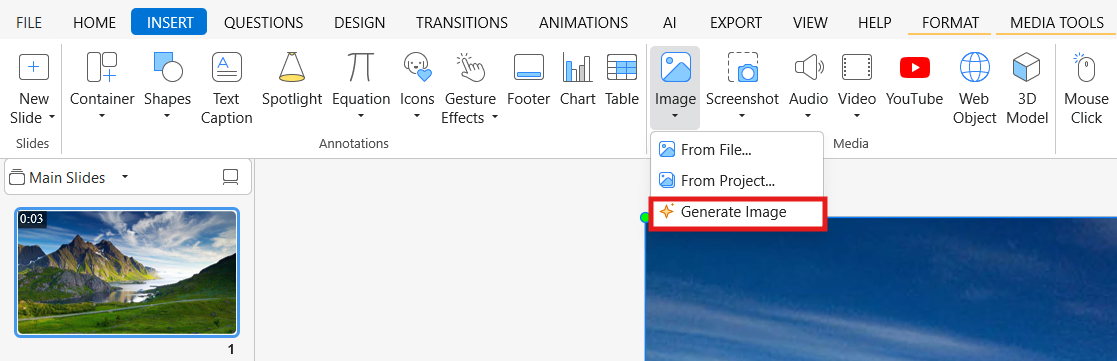
- Click Image Generation.
Alternatively, go to Insert > Image > Generate Image. - Open the Provider drop-down list.
- Select your custom provider.
- Choose an available model, style, and aspect ratio.
- Enter your prompt and click Generate.
Tip: The available models, styles, and aspect ratios depend on the provider you select. A custom provider may offer different options from the providers included with ActivePresenter.
Remove a Custom AI Provider
If you no longer use a provider, remove it from ActivePresenter to keep your provider list organized.
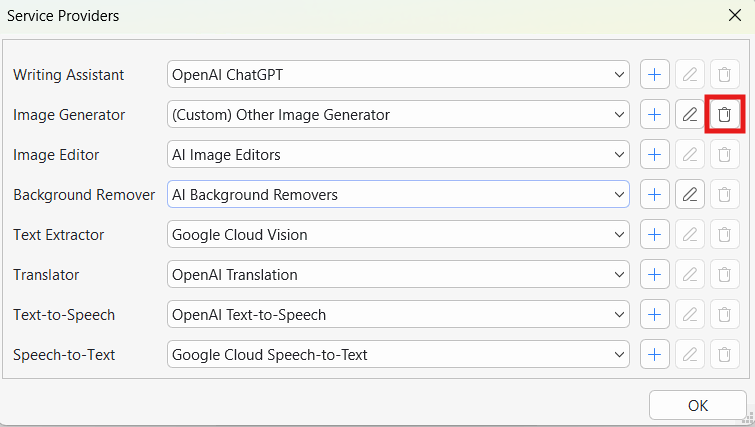
- Open AI Services.
- Select the custom provider you want to remove.
- Click Remove.
- Confirm the removal if prompted.
Tip: Removing a provider from ActivePresenter does not cancel your account or subscription with that AI service. To manage billing or cancel a service, contact the provider directly.
Helpful Tips for Using Custom AI Providers
- Keep your API key private. Do not share it in project files, screenshots, or public documents.
- Check your provider account first. Make sure your account is active and has the necessary permissions or balance before connecting it to ActivePresenter.
- Use the correct credentials. A small typo or an expired API key can prevent the provider from working.
- Review provider costs. When using a custom provider, any usage fees are charged directly by that provider.
- Test with a simple request. After adding a provider, try a short and simple prompt first to confirm that the connection works correctly.
By adding custom AI providers, you can connect ActivePresenter 10 with AI services that suit your workflow, account setup, and content-creation needs.
See also: