In the previous tutorials, you learnt how to customize tabbed toolbar and hotkeys which are applied to all the slides in your projects. Today, I will continue introducing you to general preferences and project settings with more different customization options. Check out our software’s unique features before getting started right here.
Setting Up Global Preferences
Global preferences in ActivePresenter includes general options which are applicable to the entire software.
To access this tool, do the following steps:
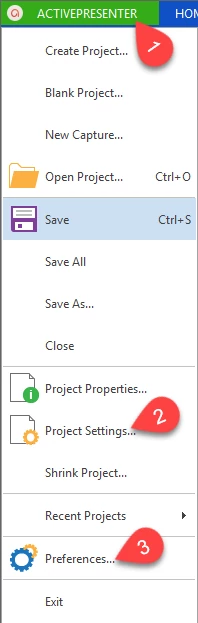
Step 1: Click the ActivePresenter button (1), and click Preferences (3).
Step 2: By default, the General tab will appear right on the Preferences pop-up window. Take further actions to customize it.
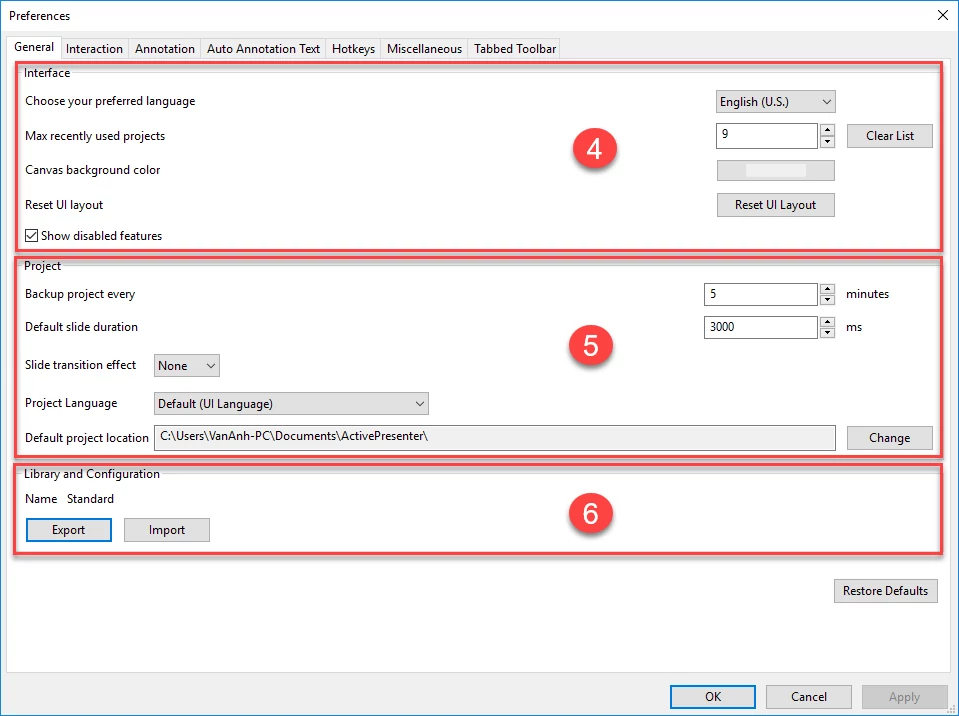
In the Interface section (4):
- Choose your preferred language: Select the language for the user interface.
- Max recently used projects: Specify the maximum number of projects in the recently used list.
- Canvas background color: Change the color of the canvas background. You can click the gray button to select any desired color from the color palette.
- Reset UI layout: Bring the default layout of the program back.
In the Project section (5):
- Backup Project every n minutes: Define how often the program saves your projects automatically. In case something happens during you are working with a project, this option will allow you to recover your last opening one from the latest back-up.
- Default slide duration: Set a default duration for each slide in milliseconds.
- Project Language: Change the default language of a project.
- Default Project Location: Change the default folder path where you want all your projects to be saved.
In the Library and Configuration section (6):
- You can export and import the preferences to reuse them whenever you want or share with other members of your team. Check out the Exporting and Importing Preferences tutorial to learn those techniques.
Setting Configurations for Projects
The Project Settings item in the ActivePresenter main menu allows you to set the properties for all the objects in the working project quickly. This means that you don’t need to spend much time on customizing them.
Take the next steps to access it:
Step 1: Launch a project. Please click here if you want to know how to create a project.
Step 2: Click the ActivePresenter button, and click Project Settings (3).
Step 3: There are two tabs in the Project Settings dialog box.
The important thing you need to remember is that all settings in this tab are not applied to any object inserted into the current project before.
Step 4: Go to the Interaction tab.
Select an element from the list on the left, and look at its corresponding settings on the right. Those configuration options will change depending on the type of the object.
To demonstrate, I will adjust the default settings for the Text Box object.
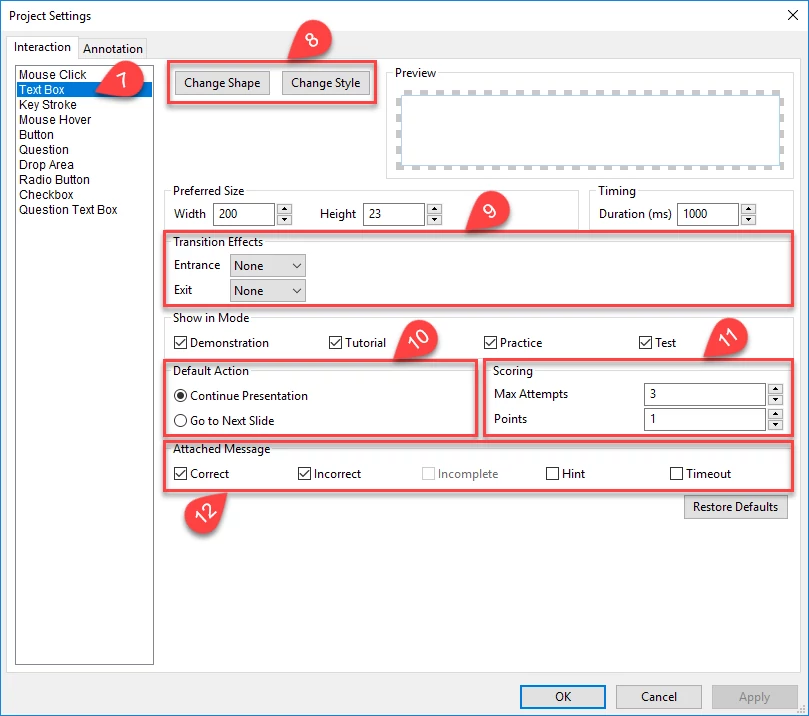
- Select Text Box (7).
- Click to change the shape and the style of the object (8).
- Change the animations of the objects in the Transition Effects section (9).
- Choose the default behavior for events in the Default Action section (10).
- Specify the maximum number of time users can enter their answers and the score in the Scoring section (11).
- Choose the types of messages that you want them to be displayed with the target area when you insert any interactive object (12).
- Also, you can resize, and change the time duration for a object.
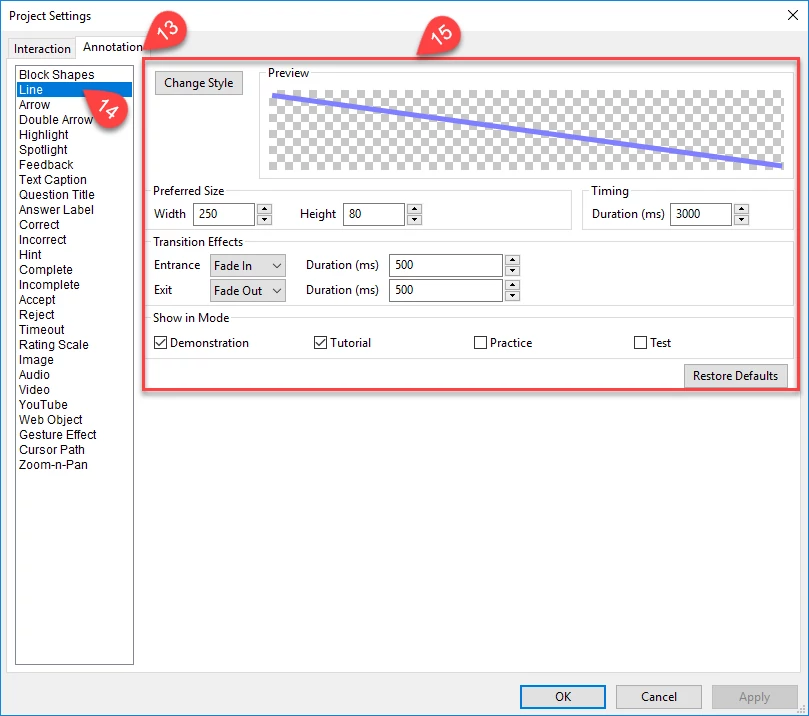
Step 5: Take a closer look at the Annotation tab (13).
Unlike the Interactive tab, the annotation elements in this tab can be divided into three different groups. Each group has some common properties settings as described below:
Group 1: Block Shapes, Line, Arrow, Double Arrow, Highlight, Spotlight, Text Caption, Question Title, Answer Label, Correct, Incorrect, Hint, Complete, Incomplete, Accept, Reject, Timeout, Rating Scale, and Gesture Effect.
Take a typical example of the Line object (14). As you can see, most of the customization options (15) in the Preferred Size section, the Transition Effects section, and the Show in Mode section are similar to these sections in the Interactive tab.
Group 2: Image, Video, YouTube, Web Object, Zoom-n-Pan, Feedback.
For instance, look at the settings for the Image element (16):
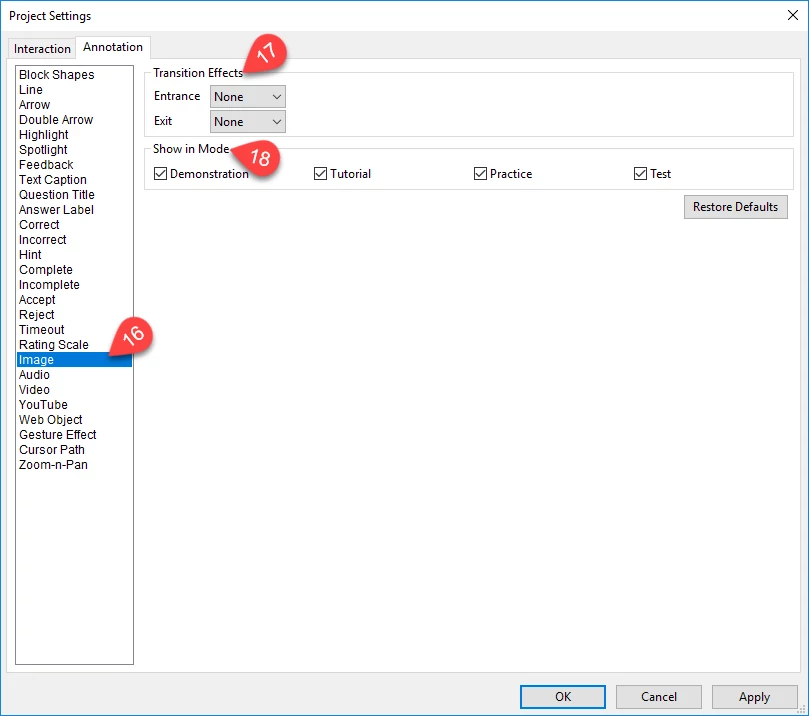
- Change the animations for objects in the Transition Effects section (17).
- Choose the modes you want the objects to be displayed (18).
Group 3: Cursor Path (19).
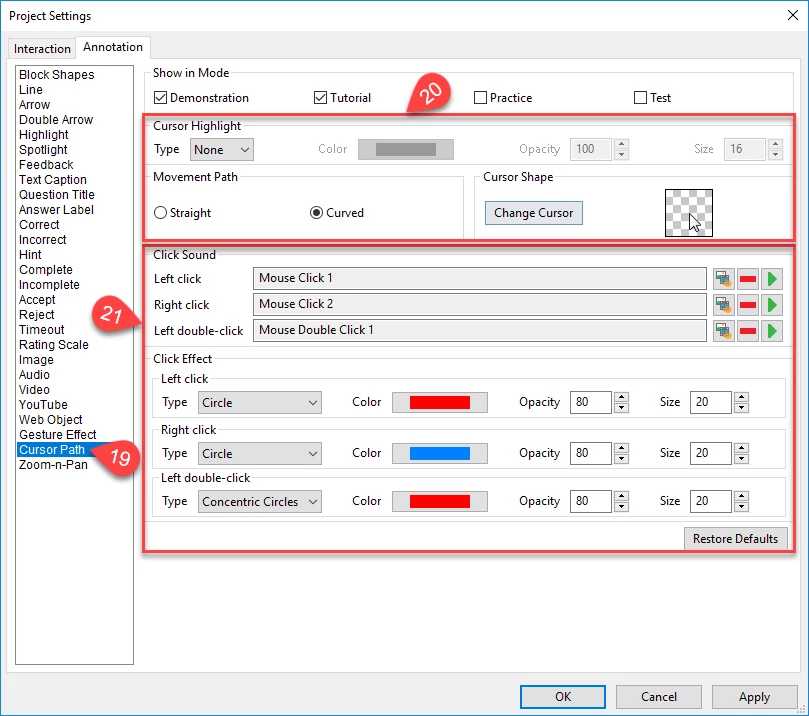
- Change the color, opacity, the type of the movement path and cursor in the Cursor Highlight section (20).
- Adjust the clicking effect and sound (21).
That’s how to set up general preferences and configurations for each project in ActivePresenter. Please contact us if you have any obstacle.