Feedback objects are kinds of messages that ActivePresenter provides corresponding to viewer actions when they interact with the HTML simulation. There have many kinds of feedback messages namely Correct, Incorrect, Incomplete, Timeout and Hint message. In this tutorial, I will introduce you what they are and how to work with them so as you can have a better using experience.
Types of Feedback Messages
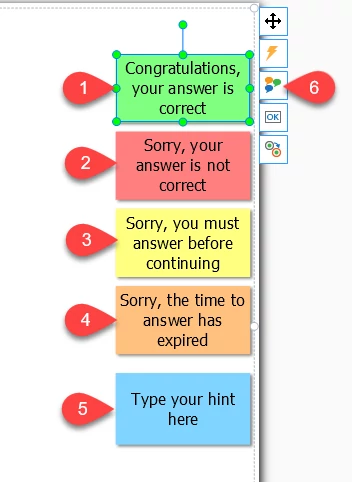
Correct Message (1): Display when the user action is correct.
Incorrect Message (2): Appear if the user action is incorrect.
Incomplete Message (3): Display to let users know that they have to complete the task before moving to the next steps.
Timeout Message (4): Show up when users don’t complete actions in predefined time.
Hint Message (5): Display when users hover the mouse over interactive objects. (Mouse Hover)
It doesn’t mean every question needs all types of those feedback messages. You can have one or may for each, or even none of them depending on your specified purpose.
Insert More Feedback Messages
Normally, each of interactive question has a correct, an incorrect and an incomplete message automatically inserted. You can insert more message by taking those steps below:
- Select the question.
- Click the Insert Message (6)
- Choose the message to insert in.
If you want to delete any feedback message, just select it and press Delete key on your keyboard.
Customize Feedback Messages
A feedback message is also considered as a shape, so, all the attributes and settings for shapes applied here too. You can change the text inside the shape by directly type in. On the other hand, you can use either one of below ways to customize your feedback messages:
From the Format Tab
- Select the message.
- Open the Format (7)

- Style the feedback message in your own way you like. (fill, line, color, etc.) (8)
- Change Entrance and Exit Effect Duration. (9)
From the Properties Pane
- Select the message.
- Go to change the base style, fill, line, color, et., in the Properties pane. (10)
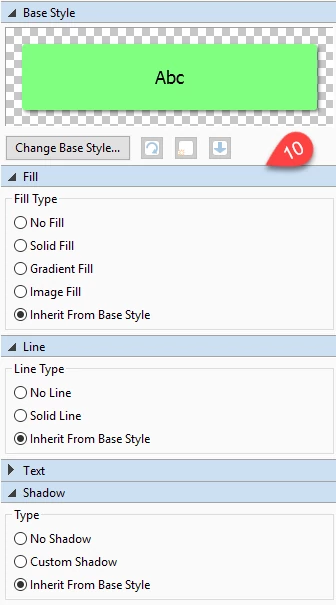
- Change Entrance and Exit Effect Duration in the Timing and Animation (11)

From Preferences
Using this way to customize your feedback messages, the new style will not only be applied in the current project but new projects later on.
To customize from the Preferences, do as followings:
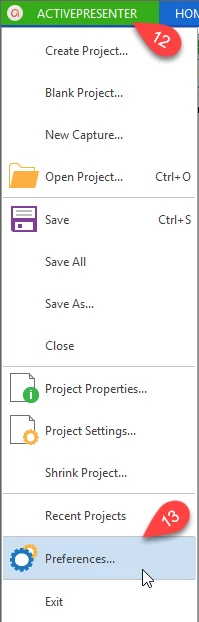
Step 1: Access the ActivePresenter menu (12) and select Preferences (13).
Step 2: Open the Annotation tab. (14)
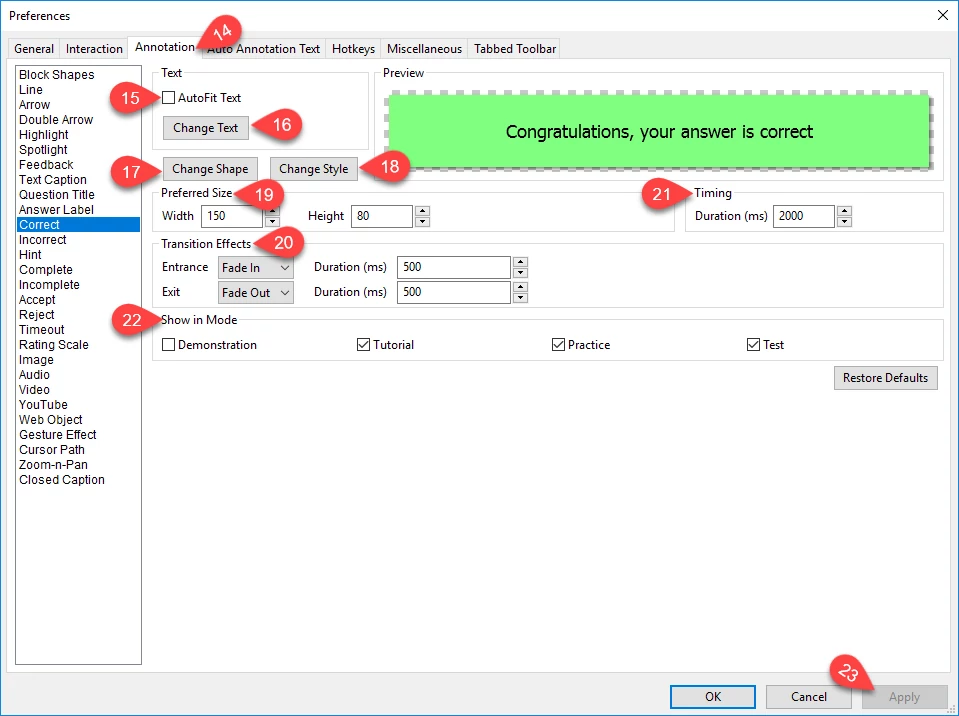
Step 3: Choose the feedback message you like to customize and get started. Here I will choose the Correct Message, you can do the same for other kinds of messages like Incorrect, Timeout, etc.
Autofit Text (15): Automatically enlarge the outline of the shape until the text fits inside the shape.
Change Text (16): Change the default text into the text you like.
Change Shape (17): Assign a new shape for the message.
Change Style (18): Apply the new style for the message in terms of fill, line, etc.
Preferred Size (19): Define the default width and height of the message shape.
Transition Effects (20) and Timing (21): Specify the entrance and exit effect and time duration for messages.
Show in Mode (22): Select the operation mode(s) in which the message will be shown.
Click Apply (23) to save all the change you have made, then you will have your own feedback message styles that you can use for next projects.
Let’s try it today to have your feedback messages more customizable with ActivePresenter. Feel free to contact us if you need any support.