ActivePresenter 9 provides you with a flexible system of events-actions, advanced actions and variables, which enable you to create highly interactive eLearning courses without a single line of code. But if you want to go beyond the long list of built-in actions then execute custom JavaScript.
Executing custom JavaScript can be triggered by objects’ or slides’ events or even when the project loads.
Execute JavaScript Action in an Event
When adding events and actions to objects or slides, if you look down the action list, you’ll find the Execute JavaScript action. This action performs the custom JavaScript code you wrote in response to the event.
For example, you can run JavaScript to change the color of an object like this:
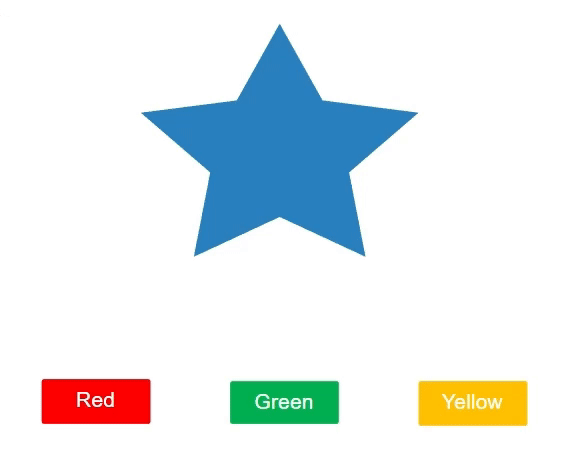
So, to add custom scripts with the Execute JavaScript action, do as follows:
1. Select one of the colored buttons.
2. Navigate to its Properties pane > Interactivity tab > Events – Actions section > Add the On Click event.
3. Assign the Execute JavaScript action to the On Click event. Then, click Click to edit. A dialog appears allowing you to write a script.
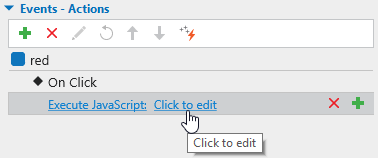
Write the script like the below image.
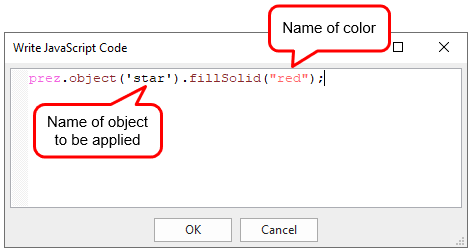
For your reference, here is the code:
prez.object('star').fillSolid("red");Note: You must write the exact object name in the script as the name in its Properties pane > Interactivity tab > General section > Name. For the color name, you can replace it with the RGB color code.
4. Click OK to finish.
5. In the Home tab or Export tab, click HTML5 Preview to preview your project in a browser.
ActivePresenter allows retrieving elements of presentation in the HTML5 output by exposing the JavaScript API. The list of JavaScript APIs is available from page 320 in the PDF Manual.
Run Custom JavaScript When the Project Loads
Besides running custom JavaScript actions in the object or slide’s events, you can execute JavaScript when the project loads. Perform the following:
Step 1: Click the ActivePresenter button > Project > Properties.
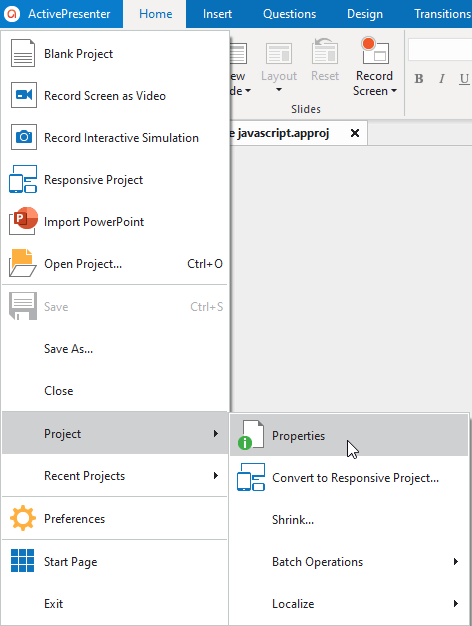
Step 2: Navigate to the Properties pane > Interactivity tab > Events-Actions section > add the Execute JavaScript action to the On Load event of the project.
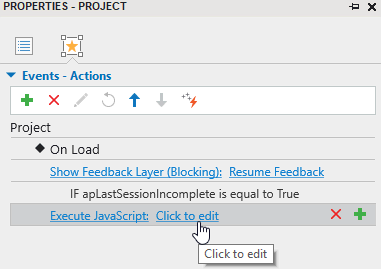
For instance, when you need to show the progress out of the total time of the project then execute the following custom JavaScript:
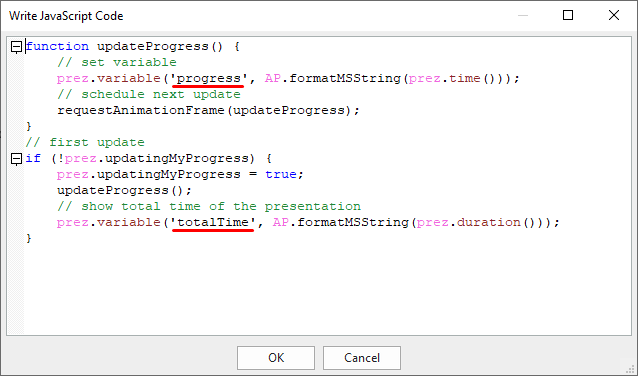
function updateProgress() {
    // set variable
    prez.variable('progress', AP.formatMSString(prez.time()));
    // schedule next update
    requestAnimationFrame(updateProgress);
}
// first update
if (!prez.updatingMyProgress) {
    prez.updatingMyProgress = true;
    updateProgress();
    // show total time of the presentation
    prez.variable('totalTime', AP.formatMSString(prez.duration()));
}
In which, “progress” and “totalTime” are text variables you need to create to reference them on Canvas.

Customize the Script Editor
If you want to customize the features and colors in the custom JavaScript Function form then open the Preferences dialog > Script Editor. All changes you make are immediately reflected in the preview editor (1) on the right side.
If your experiments go haywire, you can always restore to the defaults by clicking the Restore Defaults button (2).
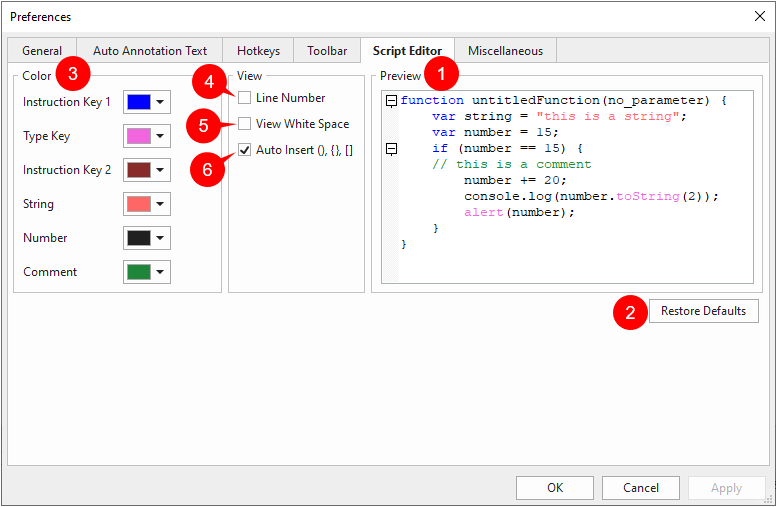
- Change the color of the editor components (3): Click the colored rectangle next to the component in the component list, and then select a color in the Color Picker.
- Change the code view options: Select the checkboxes to show line numbers (4), show dots in place of white space (5), and insert matching closing brackets into the code (6).
That’s how to execute custom JavaScript in ActivePresenter 9. Try it out to extend the functionality of your course.
