The Advanced Actions is a fantastic feature in ActivePresenter 9 that helps you create multiple actions in one place and reuse them for other objects without repeating the same manipulations.
In the previous tutorial, we’ve learned how to use events-actions to add interactivity to your courses. In case there are many objects which do the same tasks, you can use a feature called Advanced Actions to help speed up your work. Let’s take a closer look at this example:
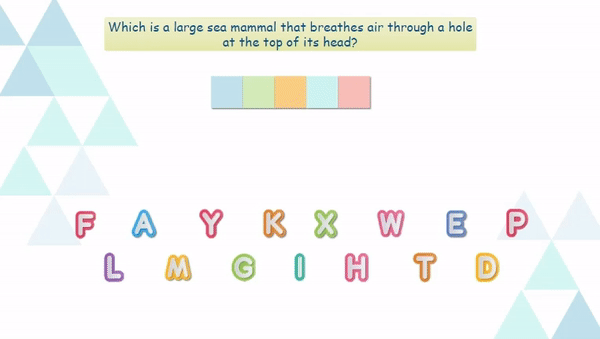
To get the result as in the demo above, you can add the On Click event and the same set of the following actions to letter images W,H,A,L,E.
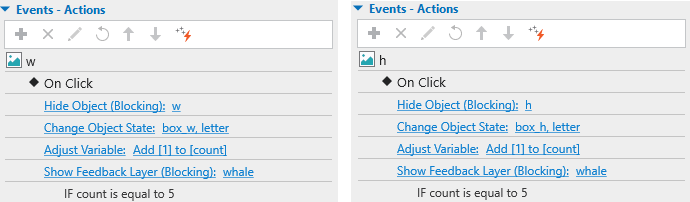
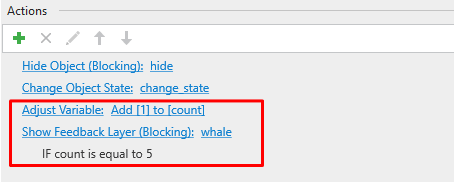
In which, “count” is a customized number variable. When you click on the letter, it will add 1 point to that variable. Once the variable value reaches 5, a feedback message will be shown.
Adding the event and actions to each letter image one by one may cost time and effort. To solve that issue, the Advanced Actions feature comes to your aid just by passing parameters to each object correspondingly.
Let’s explore how to do that in this tutorial.
- Open the Advanced Actions Dialog
- Create New Advanced Actions
- Add Parameters
- Add General Actions
- Include Conditions to Actions
- Apply Advanced Actions to Event
Open the Advanced Actions Dialog
Firstly, to add an Advanced Action, you access the Questions tab and select Advanced Actions to open the Advanced Actions dialog.

Alternatively, you can navigate to the Properties pane > Interactivity tab > Events-Actions section > click on the Advanced Actions icon.
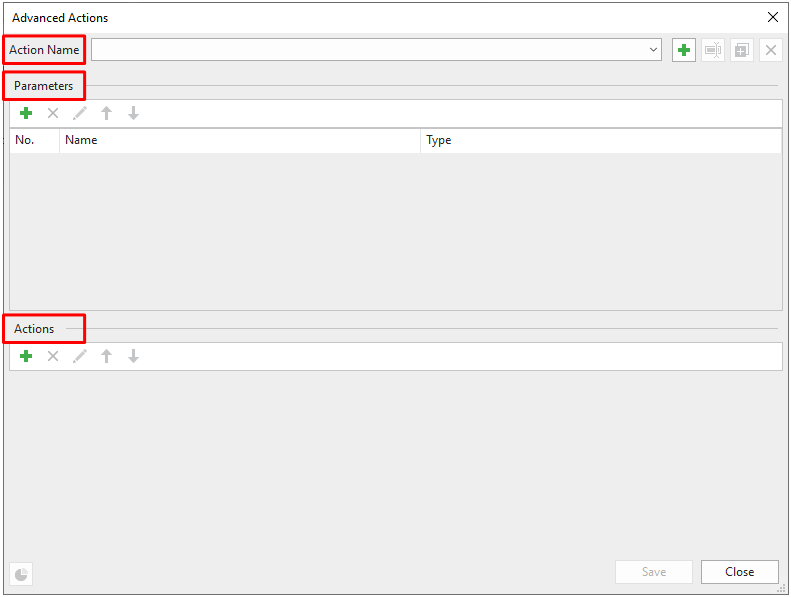
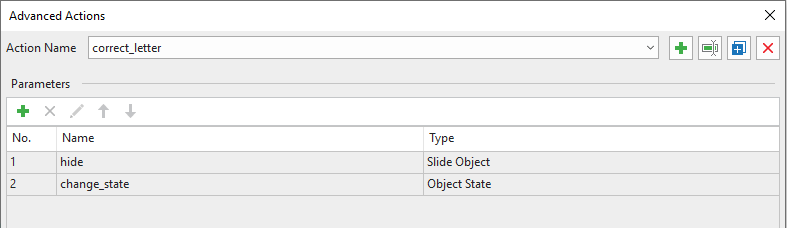
After that, you can see the following dialog appears with three sections: Action Name, Parameters, and Actions.
Create New Advanced Actions
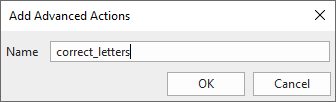
In the Action Name section, click on the green plus button to add a new advanced action. Give it a specific and meaningful name, eg. correct_letters, then click OK.
Note that you can use the commands in this section to rename, duplicate, or delete any advanced action if you want.
Add Parameters
Parameters mean different types of objects or values that can be referenced in a single action. In other words, you can reference different target objects/values in an action.
To add parameters for an advanced action, click on the green plus button under the Parameters section, enter the parameter name in the Name box, and select the corresponding type from the Type list.
Take a look at the following section to see the description for each type of parameter:
| Animated Timer | Use this for Start Timer, Pause Timer, and Stop Timer actions. |
| Audio Resource | Apply to Audio objects. Use this for Play Audio action. |
| Boolean | Use this for True/False variable type as a condition for an action. |
| Drag Source | Use this for Drag Source type as a condition for an action. |
| Dropdown | Use this for Dropdown type as a condition for an action. |
| Feedback | Use this for Show Feedback Layer and Hide Feedback Layer actions. |
| JavaScript | Use this for Execute JavaScript action. |
| Keyboard | Use this for Keyboard type as a condition for an action. |
| Mouse | Use this for Mouse type as a condition for an action. |
| Number | Use this for Go to Slide at Index action and Attempt type as a condition for an action. |
| Object State | Use this for Change Object State action and Object State type as a condition for an action. |
| Question/Interaction (Clearable) | Use this for Clear User Input action. |
| Question/Interaction (Submittable) | Use this for Submit action. |
| Radio Button/Checkbox | Use this for Radio Button/Checkbox type as a condition for an action. |
| Response | Use this for Show Responses action. |
| Shape | Apply to objects that have states, except Footer, Chart, Table, Audio, Video, YouTube Object, Web Object, Cursor Path, Zoon-n-Pan, and Closed Caption. |
| Slide | Use this for Go to Slide actions. |
| Slide Object | Apply to all types of objects in the slide. Use this for Show Object, Hide Object, Toggle Visibility, and Highlight Object actions. |
| Slider | Use this for Slider type as a condition for an action. |
| String | Use this for Text variable and Text Entry type as a condition for an action. |
| Timeline | Use this for Start Timeline, Pause Timeline, and Continue Timeline actions. |
| Variable (Boolean/Number/String) | Use this for Adjust Variable action and Variable type as a condition for an action. |
Take the demo at the beginning as an example:
You need to hide and change the state of several letter images. So you create 2 parameters and choose the corresponding type.
Note: Each added parameter in an advanced action must be in proportion to the created action depending on your purposes.
After adding a parameter, you can edit it (rename, change parameter type), change its positions (move up, move down), or remove it.
Add General Actions
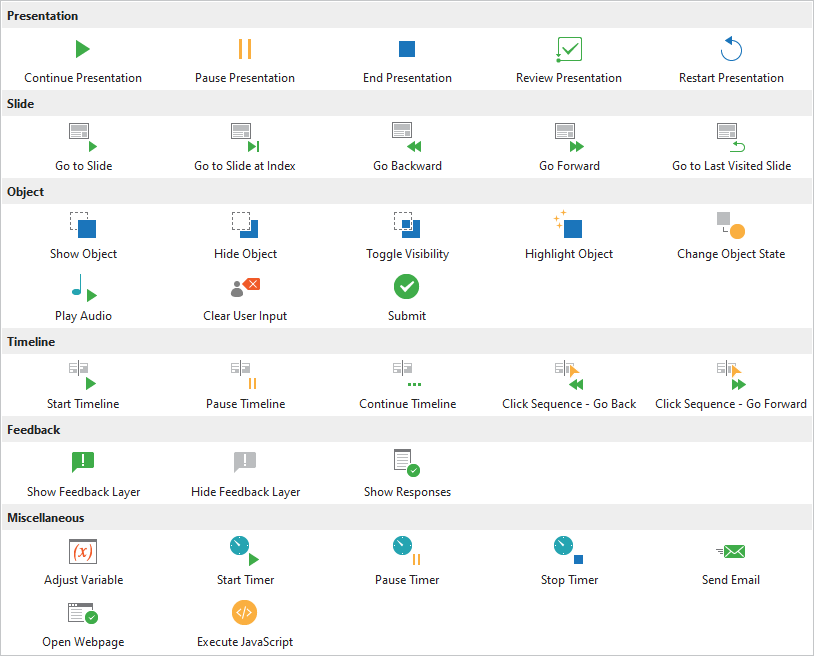
After finishing adding parameters to the Advanced Action, you click on the green plus button under the Actions section to add actions, and choose one action from the list that pops up:
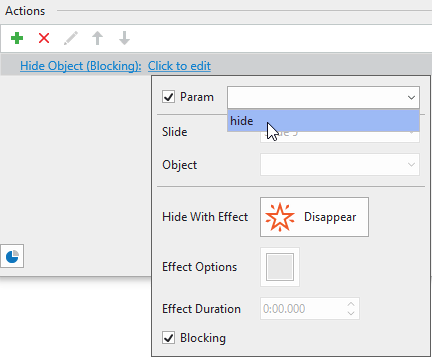
Then, click on Click to edit line to take further steps with your action. If you need to apply the action to multiple objects, you select the Param checkbox and choose the parameter applicable to that action.
Then, you can edit other properties of action as normal.
Note: You can still add actions not using parameters in the Advanced Actions dialog. The target object/value in this action is specified.
Include Conditions to Actions
To add a condition to an action, you click on the green plus button next to the action name. The Add Condition dialog will appear as follows:
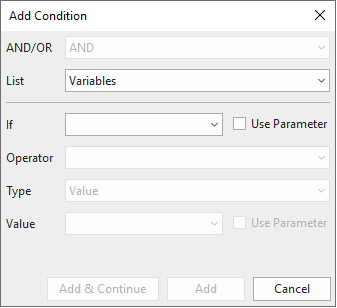
This dialog is similar to the one you have when adding conditions to a normal action. However, it has the option to use parameters. Select this option and choose a corresponding parameter.
Apply Advanced Actions to Events
To make the Advanced Action work, now you need to apply it to an event. Do as follows:
Step 1: Select the object, eg, a letter image, in the Properties pane > Interactivity > Events – Actions > click on the green plus button next to the object name > select an event.
Step 2: Click on the green plus button next to the event entry or Click to add action line > select Advanced Action.
(For more detailed information about how to add Events – Actions, refer to this tutorial).
Step 3: Click on Click to edit line and choose the name of Advanced Action.
After doing that, parameters that have already been created will appear, then click the drop-down arrow to select the suitable values.
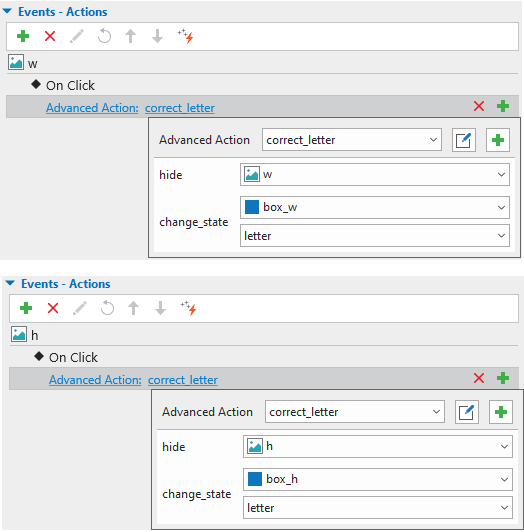
Actions in the Advanced Actions dialog that don’t use parameters will be applied to all objects using that Advanced Action.
Note: You can apply as many Advanced Action actions to an event of an object if you want.
Here are some practical examples of using Advanced Actions to create interactive eLearning content with ActivePresenter:
| Create Color Patterns Game Make Interactive Flashcards | Create Hidden Objects Game Create Interactive Images |
Download ActivePresenter and you can try creating your own actions and reuse them for multiple objects.

See also: