ActivePresenter 10 allows you to easily increase or decrease the volume of videos and audio clips. You can adjust the volume for the entire track or fine-tune specific parts to better control the audio in your project.
As a powerful all-in-one eLearning software, ActivePresenter provides flexible audio editing tools that help you balance narration, background music, and other sounds in your project. Besides manually adjusting volume, you can also use Audio Ducking to automatically lower background audio when narration is playing, ensuring the voice-over remains clear and easy to hear.
Today’s tutorial will walk you through basic steps to adjust the audio volume in ActivePresenter 10. Before continuing, don’t forget to download and install the latest version here.

This tutorial covers:
- Adjust audio volume for the whole track
- Change volume for specific parts of the track
- Restore original volume
- Audio Ducking
Adjust Audio Volume for the Whole Track
In ActivePresenter 10, you can adjust the volume for both audio and video objects. Take the following steps:
Step 1: Select the audio or video object (on the Canvas, Timeline, or Selection pane).
Step 2: Click the Adjust Volume button (1). Then, a dialog appears to allow adjusting volume from 0% (mute) to 500% (original volume x 5)
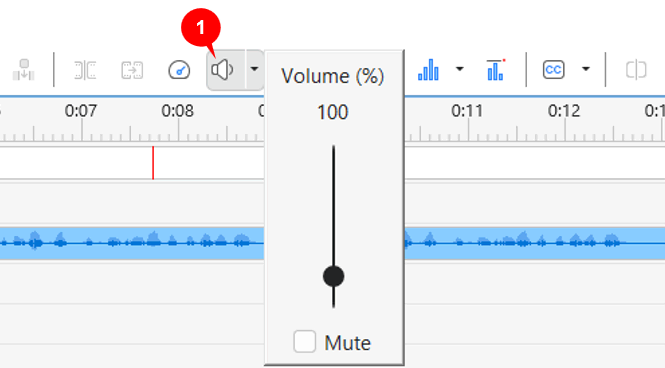
Step 3: Drag the slider up/down or scroll the mouse wheel up/down to adjust the desired audio volume. Besides, you can click the Mute check box to quickly silence the audio.
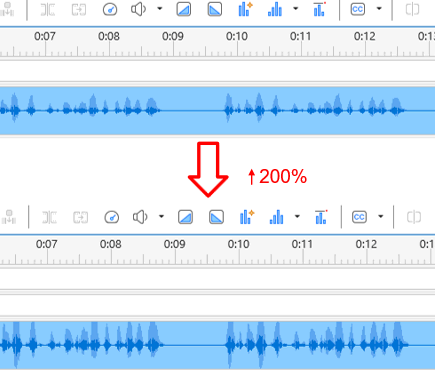
The volume change will be reflected on the waveform of the object. A larger waveform means a louder volume, and vice versa.
Change Volume for Specific Parts of the Track
Besides changing the volume for the whole track, it’s possible to adjust the volume to a specific part of the audio or video as well. Do as follows:
Step 1: Drag the Start and End markers of the Playhead to define the range you want to change the volume.
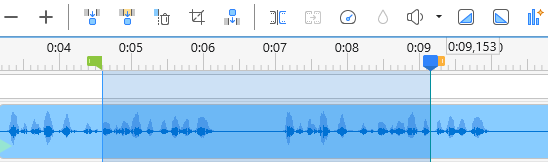
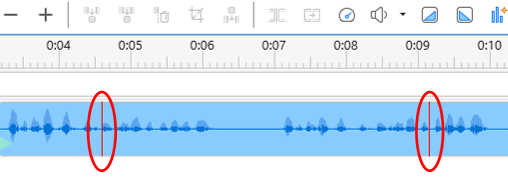
Step 2: Click the Adjust Volume button (1) and select a volume scale to apply to this range. Whenever a range is adjusted volume, it will be marked by the 2 red vertical markers at both the start point and end point.
Restore Original Volume
By doing the following basic steps, you can bring the volume back for the whole audio track or a part of it.
Step 1: Choose the audio track or a range you want to restore the volume.
Tip: By default, the snapping mode is on to make it easier for you to select the range. In case it is off, just access the View tab and click Timeline Snapping to turn it on.
Step 2: Click the drop-down arrow (2) next to the Adjust Volume button > Restore Original Volume.
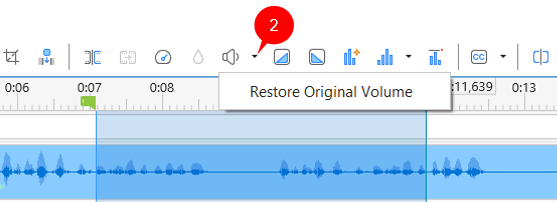
Now, you get the original volume for your audio track.
Audio Ducking
Audio Ducking is a new feature since ActivePresenter 10 that automatically lowers the volume of background music or other audio when someone is speaking. This makes sure your voice (or a narrator’s voice) is always clear and easy to hear, without being drowned out by background sounds.
How to Use Audio Ducking:
- Select the audio track in the Timeline pane or the Canvas.
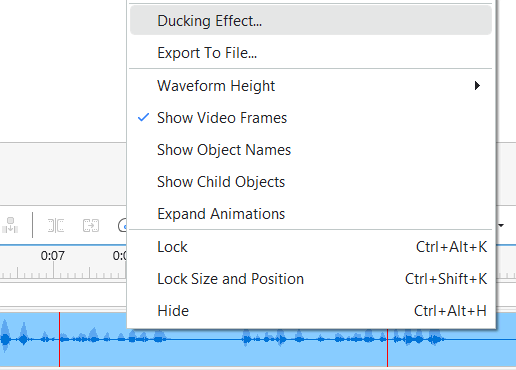
- Right-click it > Ducking Effect…
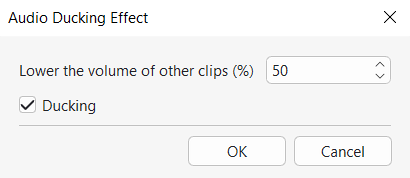
- Tick the Ducking option
- Choose the percentage (%) by which you want the other audio track(s) to be lowered.
- Click OK to apply and you will see the changes in the waveform of the other track(s).
To remove Ducking Effect, repeat the 2 first steps, untick the Ducking option > clicking OK to apply.
Now, you can easily adjust the volume of audio, videos, and audio attached to objects by using the same basic steps in ActivePresenter 10, while Audio Ducking automatically lowers background audio when narration plays, helping the voice-over remain clear and easy to hear. Let’s visit our Tutorials page, and Youtube channel to get more useful things.
See also: