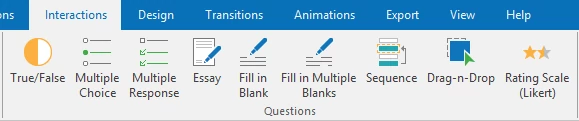
Quizzes are critical elements of a test. They allow you to test performances of learners, collect information and opinions of viewers, and so much more. Besides, quizzes come in handy when you need to create surveys. With ActivePresenter 7, you are free to create quizzes with the selection of 9 types of questions. They are True/False, Multiple Choice, Multiple Response, Essay, Fill in Blank, Fill in Multiple Blanks, Sequence, Drag-n-Drop, and Rating Scale (Likert).
Let’s get to know how to create quizzes in ActivePresenter.
Insert Question Slides
Creating quizzes in ActivePresenter is easy. Just open the Interactions tab and select the question type that you want to create. Then, a new question slide will be inserted in your project.
Question Slide Components
Regardless of question type, each question slide in ActivePresenter consists of three components: question title, answer area, and submit button:
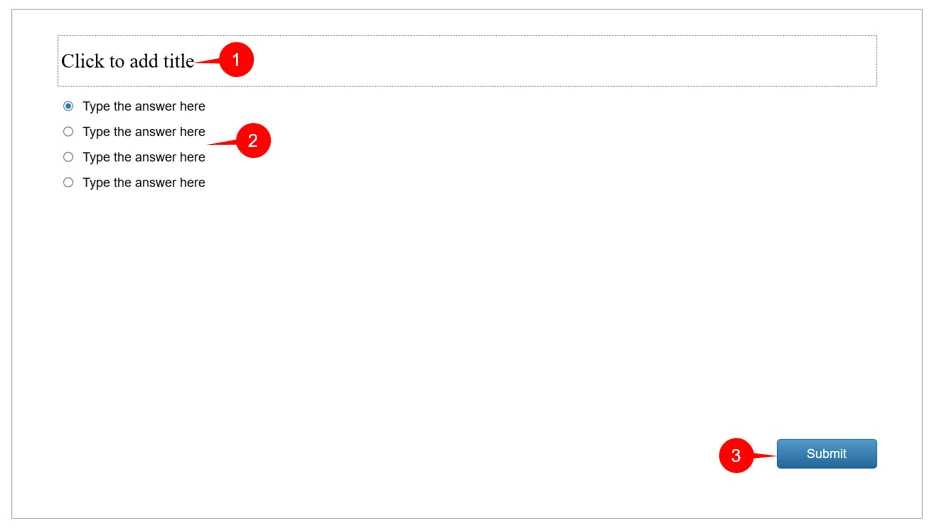
1. Question Title
You can type the title of the question in this section.
2. Answer Area
From your side, Answer Area is a place where you can create answer options for a question. From learner’s side, they can give their answers in the Answer Area by performing necessary actions such as choosing the correct answer, filling in blank, performing drag-n-drop actions, typing text, etc. The number of answer options for each question type varies depending on its nature. For example, a True/False question has only two answer options (True and False) while a multiple choice question has four by default. For most types of question (except from True/False, Essay, and Fill in Blank), you can add more answer options or delete them.
To insert more answer options to a question, do the following:
Step 1: Select the answer area
Step 2: Click the green circle button that appears

On the other hand, to delete an answer, just select it and press the DELETE key.
3. Submit Button
As you may know, ActivePresenter 6 has four predefined buttons, which are Back, Clear, Skip, and Submit. However, with ActivePresenter 7, there is only Submit button. If you want to create your own custom-made button for all slides in your project, follow these steps:
Step 1: Access View tab, open Slide Master view
Step 2: Insert button
Do one of the following to insert a button:
- Open the Interactions tab and click Button
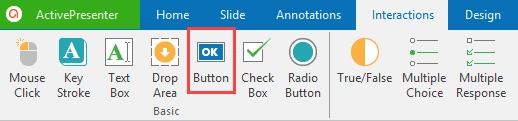
- Alternatively, you can open the Home tab, click Interactions
 and select Button .
After that, you can rename and customize the button as you wish.
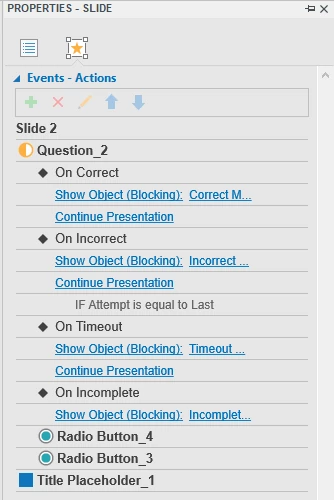
Step 3: Add events – actions to button
It’s important to add events – actions to the button to make it interactive so that learners can interact with it. To do that, select the button and access the Events – Actions section in the Properties pane.
Let’s take an example, you can insert a Next button following the above steps and set events – actions for it so that when learners click on it, the presentation will go forward one or two slide(s) or any specific slide that you want.
See Working with events – actions for more details.
Step 4: Close Slide Master view
Note: Follow four steps above if you want to create a button for all slides in your project. In case you just want to create a button for only the current slide, you do not need to open Slide Master. This means you just need to perform step 2 and 3 (ignore step 1 and 4).
Add Events – Actions to Questions
Adding events – actions is an important part of creating quizzes. Normally, ActivePresenter has default events – actions for each question. However, you can change it or make it more advanced if you want. In general, you can add events – actions to the question in the same way as adding events – actions to objects.
Step 1: Select the answer area
Step 2: In the Properties pane, open the Interactivity tab, then access the Events – Actions section.
Step 3: Remove your unwanted default events and actions and add new ones that you wish
See Working with Events – Actions for more details.
Score and Reporting of Questions
Graded and Survey Mode of Questions
Except from Rating Scale (Likert), which has only Survey mode, other types of question in ActivePresenter have two modes to choose. They are Graded mode and Survey mode. Select Graded mode if you want to assess learner’s performance. On the other hand, if you want to collect viewer feedback, select the Survey mode.
Follow these steps to select Graded or Survey mode:
Step 1: Select the answer area
Step 2: In the Properties pane, open the Interactivity tab
Step 3: Access the Score & Reporting section and select Graded/Survey from the Mode list
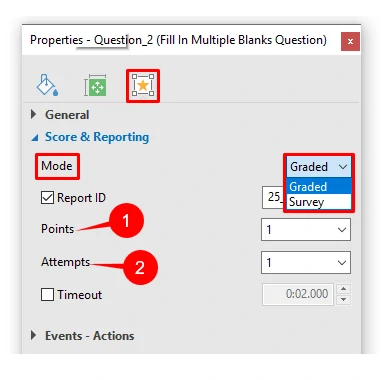
Note: Because of its own nature, Graded mode has the score settings (Points (1), Attemps (2)) while Survey mode doesn’t. The reason is Survey mode is used to collect opinions or feedback, not for scoring.
Points and Attempts of Questions
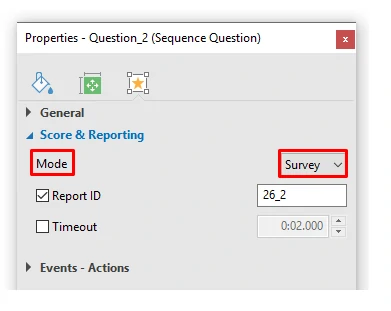
The Score & Reporting section provides you many setting options over how the quiz should be presented to learners and how it is reported to you. The components of this section may vary differently depending on the question type you are working with and the mode you select. For example, if you choose Survey mode, Points (1) and Attempts (2) will not appear:
Let’s go through each component of Score and Reporting section and learn how it is used:
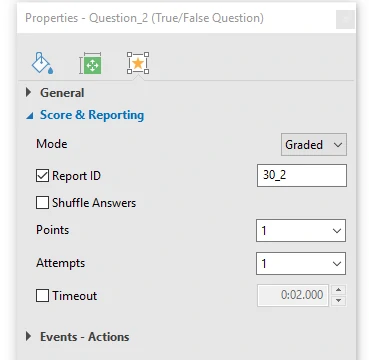
- Report ID: This unique reference number is automatically generated by ActivePresenter. You can change from this number to meaningful text for easy identification. For example, look at Report ID in the above image, you can change from the number 30.2 to the question name: True False Question, which is much more meaningful. Note that only text that contains alphanumeric characters (A-Z, a-z, 0-9) and underscore (_) is allowed. The maximum length is 250 characters.
- Shuffle Answer: This component only exists in some types of questions, including True/False, Multiple Choice, Multiple Response, Sequence, Drag-n-Drop. It allows you to mix up answer options.
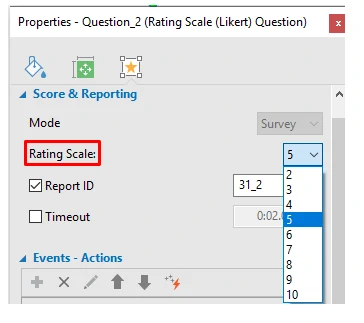
- Rating Scale: This component only appears in Rating Scale (Likert) question. The number that you select from Rating Scale list represents for the numbers of rating scale columns in the answer area. For example, if you select 5, in question slide, there will be 5 rating scales in the answer area.

- Points: Select the numbers of points that you want learners to get if they have a correct answer. For example, learners can get 1 point for a correct answer.
- Attempts: Select the maximum number of attempts that learners could make. Whenever exceeding this predefined number, users cannot interact with objects anymore. However, if you select Infinite, there is no limit for the number of attempts that learners can make.
- Timeout: Enable you to specify the time limit. When you check this check box and set the time limit, if learners don’t respond within this defined time, objects will be disabled.
- Password Field: When you check this check box, the answers (except answers of the essay and sequence question) that contain text boxes will be considered as password fields, which means all the characters that users type in will not be shown.
- Case Sensitive: If you select this option, the letter case is sensitive. Otherwise, it’s insensitive.
- Submit: Allow you to specify the short key for the submission. You can also simply let it be Auto, which means the answer will be automatically submitted when finishing.
- Variable: Define the variable to take place. See Variables for more details.
Group Layout of Questions
This section lets you specify the layout of the Answer Area. See Group Layout of questions for more details.
Note: After inserting and customizing questions, you can save the question as a question template to use in other slides of the project. To do that, right-click the question and select Set as Default from the context menu.
Finally, when finishing all the settings for the quiz, it’s time to export it to HTML5. To do that, open the Export tab and click HTML5.
See Export to HTML5 for more details.
So, creating quizzes with a powerful eLearning authoring tool like ActivePresenter 7 is not hard to follow, right? Download the app today and start to create your eLearning courses with multiple types of question. Besides, don’t hesitate to contact us if you need help.