Dialogue simulations stand out as a powerful and frequently utilized interactive simulation type within the eLearning landscape.
These simulations offer invaluable practice for employees in communication-intensive roles, allowing them to hone their client interaction skills in a safe and realistic environment. Within each simulated dialogue, learners face real-world scenarios, such as persuading customers or de-escalating tense situations, demanding quick thinking and effective communication strategies.
Creating these engaging and realistic dialogue simulations is made accessible with easy-to-use eLearning authoring tool like ActivePresenter, which provides the features and flexibility needed to design interactive quizzes and realistic conversational flows.
With ActivePresenter, we can easily create dialogue simulations thanks to its powerful features, namely events – actions and text-to-speech feature.
Let’s learn how to make them in today’s blog.
I have created a dialogue simulation below with ActivePresenter. This example presents a common situation in a restaurant which is dealing with customer complaints.
Before that, make sure to download ActivePresenter for free & no sign in and follow our upcoming step-by-step guide to build your own dialogue simulations project.

Let’s dive right into how to create this dialogue simulation right away.
Build a Mind Map
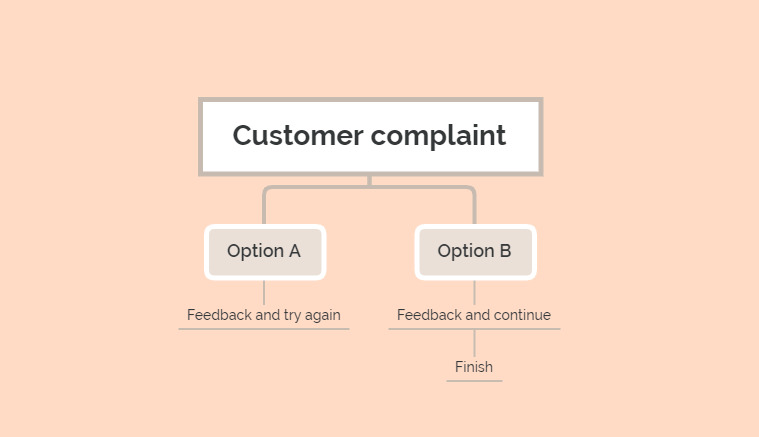
The main factor of a dialogue simulation is the branched scenario, where each action you make can lead to a different consequence. Therefore, it’s necessary to have a clear thought on how to build a conversation simulation. You can quickly draw your idea on a paper or create a mind map using mind-mapping software tools such as XMind, Mindomo, or Freemind.
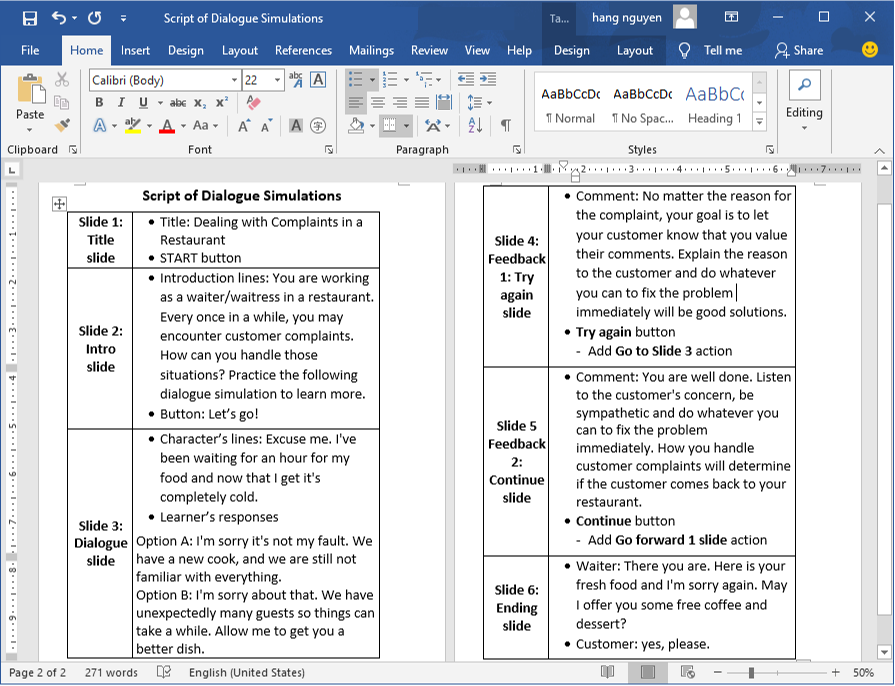
Write Scripts
Now you will write your full scripts based on the mind map you have created. Starting from the title and introduction slide, continue to develop the conversation, give feedback, and then finish it. Think of the branching, the learners’ responses, whether their answer can lead to another branch or return to the right path. With this in mind, you can write a logical and close dialogue simulation script.
Create a Dialogue Simulation with ActivePresenter
After having done the two steps of preparation above, there are several things that you need to consider. First of all, think about the following questions to see if they can help to optimize your work productivity.
- Are there any slides having the same layout?
- Should I use Slide Master to create? If so, how many slide layouts that I need?
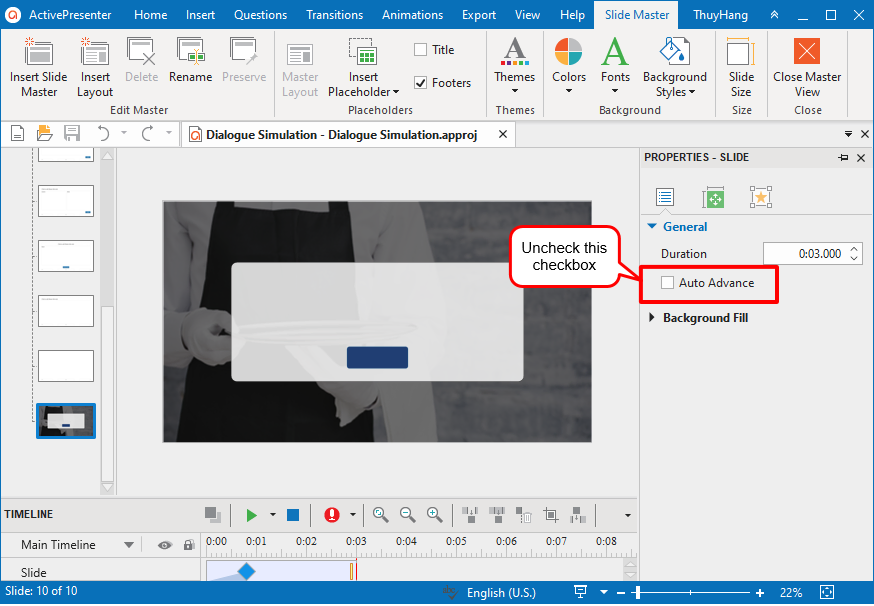
In my example, I will use 2 types of slide layouts, which are blank and feedback. These two layouts need interaction to move to the next one, so we have to uncheck the Auto Advance option.
Then, I will use the feedback layout to display different feedback messages. This means all the feedback in the project has the same style but carries different messages. Therefore, adding placeholders would be helpful to create a text box and button in Slide Master. After that, we can easily type text into them in the normal view. (View tab > Slide Master > Insert Placeholder > choose Text or Button to add).
Title Slide
As you may know, the title slide is always a need for every project. It lets us know the course topic and often includes a button to start the course. According to the autoplay’s policies of most web browsers nowadays, muted autoplay is always allowed. And autoplay with sound is allowed if the user has interacted with the domain (click, tap, etc.). Therefore, inserting a button on the first slide is a great choice to handle this issue.

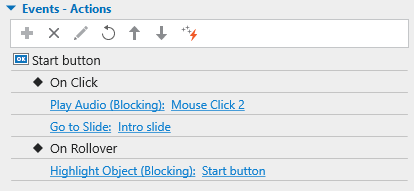
So, you can make this button interactive by adding a Go Forward action to it. Or even make it more appealing by adding a hover effect and click sound. For example, when your learners hover the mouse over the START button, it will be highlighted.
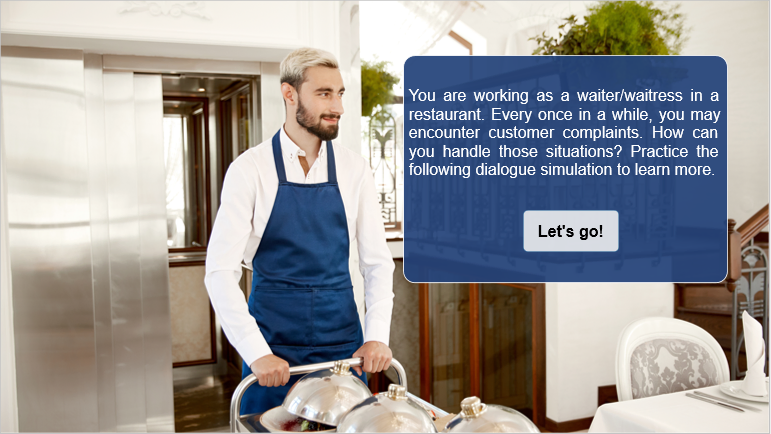
Introduction Slide
The introduction slide is not so different from the Title slide. It also includes content and a button for learners to advance to the next slide. However, since the purpose of this slide is to introduce the course, it contains brief information about what learners are supposed to do next. You can insert and style shape with introduction lines. Then, add a Go Forward action to the Let’s go! button as in the previous slide.
Character’s Lines
ActivePresenter allows you to create dialogue simulations with voice-overs that imitate real-life conversations. Adding voices to the dialogue is now as easy as pie since you can choose from recording narration or generating text to speech voices.
To add the character’s lines, do the following:
- Insert a callout. (Insert tab > Shapes > Callouts > choose one from the list).
- Add text into the callout by double-clicking it.
- Convert text to speech. (In the Properties pane, select the Audio tab > generate the audio voice).
Learner’s Responses
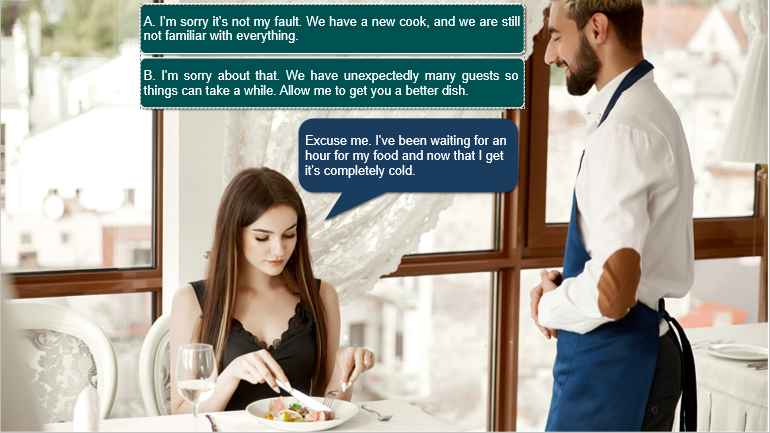
Two Options
In this step, learners need to choose one out of many provided options that they think should be used to respond to the interlocutor. I build up 2 options for this dialogue simulation, A and B; and B is the better choice. If learners click this B option, congratulation feedback will show up. The Continue button on the feedback will take them to the next slide. Otherwise, if they select option A, another feedback will show up with a Try again button to take them back to the previous slide. Each option selected will play corresponding audio. When the audio is over, feedback will show up.
Steps to Create 2 Options
- Insert 2 buttons at the timestamp where the character’s lines end. (Insert tab > Button).
- Type the text into each button by double-clicking the button.
- Create new audio for these 2 buttons. (Insert tab > Audio > Create New > Copy text from the shape you want to convert it to audio > generate the audio).
- Add a transparent shape to cover the 2 options. This shape will prevent learners from interacting with the other option if one is selected. (Insert tab > Shape > Rectangle. Then make this rectangle transparent by changing its opacity to 0).
- Delete the two audio objects that you have created.
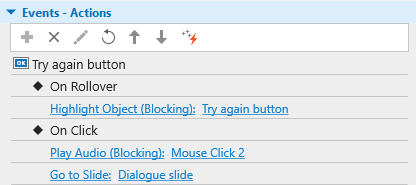
- Add actions to these two buttons as in the image below:
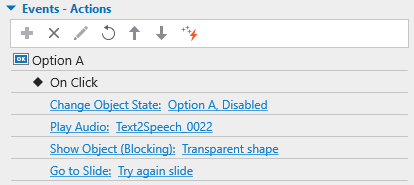
Please refer to this tutorial on how to add events -actions in ActivePresenter.
Note that you have deleted the two newly created audio objects, so now you have to add them again to the options by clicking the Select an audio from project button. Also, we should uncheck the Blocking option for the Play Audio action. By doing this, the next “showing the transparent shape” action will be executed simultaneously. For the transparent shape, Hide After 6 seconds, which is equivalent to the duration of the audio, and check the Blocking option.
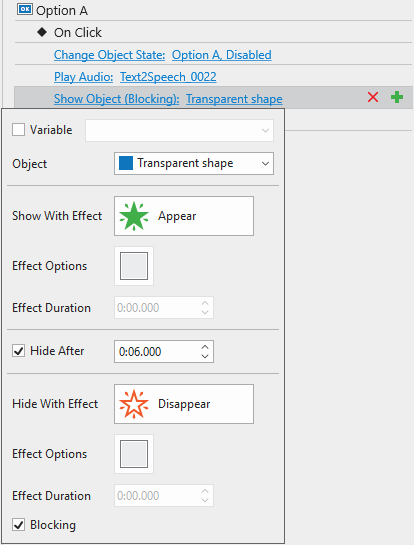
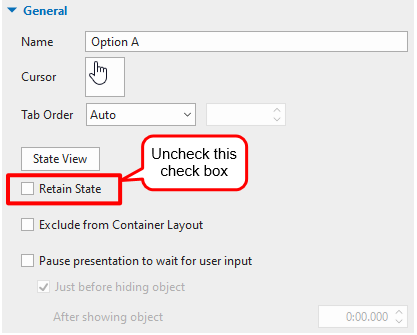
Finally, we uncheck the Retain State checkbox so that the button will reset its normal state on the slide revisit.
Feedback Messages for Dialogue Simulation
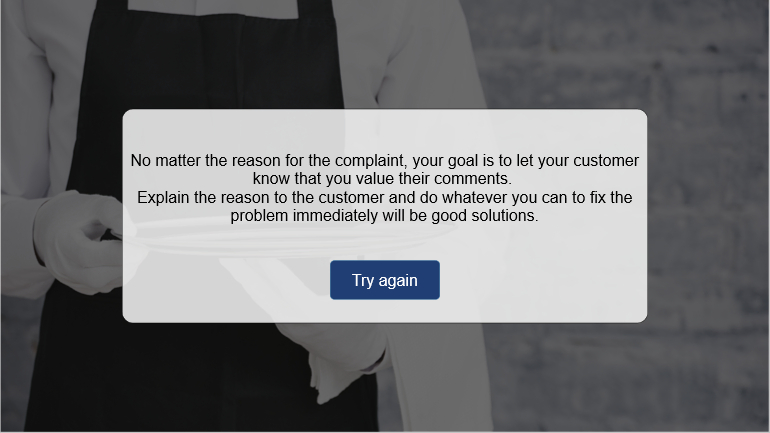
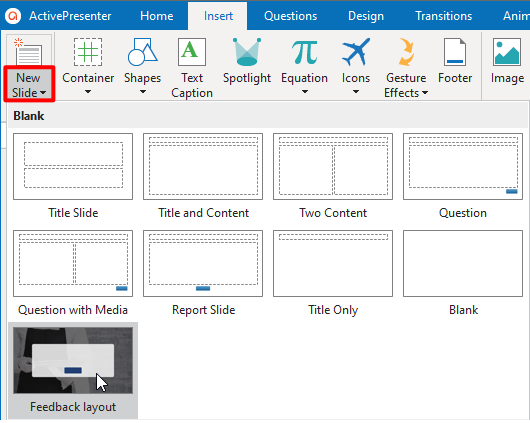
In a dialogue simulation, feedback messages are indispensable. As aforementioned, each option that learners choose will lead to a different consequence or feedback. One takes learners to the previous slide, the other takes them to the next slide. Since feedback layouts have been created in Slide Master, now we can easily add a feedback layout slide to the project as follows: In the Home or Insert tab, click the arrow on the New Slide button, then choose the desired one.
Then, add text into the text box and the button. Finally, we add actions for this button:
Similarly, I will create a congratulation feedback slide for learners to continue the simulation.
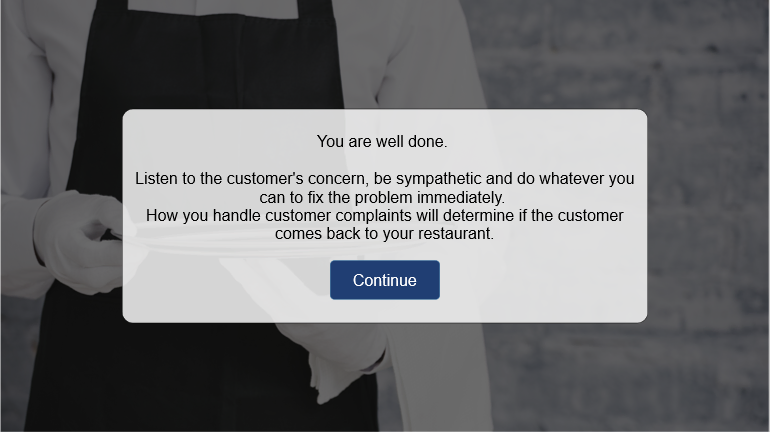
After clicking the Continue button, learners will come to the last slide to finish this project. To end this dialogue simulation, we simply create a dialogue with voice-overs as follows:
- Insert callouts and add text to them.
- Generate audio using object text.

More Interactions and Effects
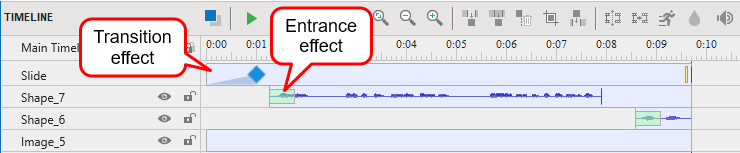
Basically, you have done creating a simple dialogue simulation. However, to make the eLearning course more appealing, you can add transition effects to slides or entrance effects to the character’s lines.
Preview and Export your Dialogue Simulation
You can preview your dialogue simulation in a browser without exporting it by using the HTML5 Previxew feature. This feature lets you know how your learners would experience the content output on HTML5 before exporting and sharing it. After that, you can choose to directly publish project to ActivePresenter Online or export it to HTML5 and publish it on other LMS platforms.
That’s all about how to create a dialogue simulation with ActivePresenter.