If you’ve ever wanted learners to practice writing, drawing characters, or tracing paths directly to create an eLearning course, a Tracing Interaction/Question in ActivePresenter eLearning authoring tool is the feature you need.

Looking for the right tool to build your interactive learning library? While ActivePresenter shines with advanced simulations, you can explore the pricing, SCORM compliance, and capabilities of the market leaders in our round-up of the Best Quiz Software 2026 for Creators and instructional Designers in this list.
1. Overview about Tracing Interaction/Question
A Tracing Question is an interactive question type that asks learners to draw strokes on screen. ActivePresenter then evaluates those strokes against one or more test elements, calculates a tracing accuracy score, and grades the response automatically.
Whether you’re building a course for handwriting practice, symbol recognition, or map navigation, the Tracing Question gives you a structured, scorable way to assess drawing-based responses.
Tracing Question vs. Tracing Interaction
ActivePresenter offers two related features: the Tracing Question and the Tracing Interaction and it’s worth understanding how they differ before you build.
| Tracing Interaction | Tracing Question | |
| Structure | Standalone object | Question group with guide board & test board |
| Guide elements | Referenced as separate slide objects | Managed inside a Guide Board |
| Test elements | You can draw anywhere on the Canvas | You only can draw inside a Test Board |
| Best for | Flexible, freeform practice activities | Quizzes and scored assessments |
The Tracing Question is a self-contained question group. ActivePresenter organizes the Guide Board, Test Board, and all child elements inside its own container layout making it easier to manage in quiz-based projects.
The Tracing Interaction, by contrast, is a standalone object. It references guide and test elements that exist separately on the slide, giving you more layout flexibility.

For most quiz and assessment scenarios, the Tracing Question is the recommended choice.
Use Cases to Apply Tracing Interaction/Question
The Tracing Question is purpose-built for any learning activity where the correct answer is a drawn path. Common use cases include:
- Handwriting practice: Help learners practice writing letters, numbers, or characters with guided stroke paths and instant accuracy feedback.
- Symbol and shape tracing: Teach learners to draw specific symbols, icons, or geometric shapes with precision.
- Route and map drawing — Ask learners to trace a route, boundary, or geographic path, then score how closely they followed it.
2. How to Add a Tracing Interaction
Step 1: Insert a Tracing Interaction
Getting a Tracing Interaction onto your slide takes just a few clicks:
- Go to the Insert tab and click Tracing, or
- Navigate to Home tab > Interactions > Tracing (inside the Interactions group)
ActivePresenter will place a Tracing Interaction on the Canvas, complete with a Draw button and default Correct/Incorrect feedback messages.
Step 2: Add Guide Elements Using SVG Images
Guide elements are the reference paths your learners see and follow. They power the animated tracing guide that plays when a learner clicks the Guide button in HTML5 output showing exactly how a shape or stroke should be drawn before the learner attempts it themselves.
You can add predefined shapes or import SVG images. For the most accurate and flexible guides, SVG images with strokes are the recommended choice.
Here’s how to add one:
- Add shapes or SVG images
- Select the Brush tracing symbol on the Canvas > Properties > Tracing > Select the target shape or image in Guide Elements
ActivePresenter reads the stroke paths embedded in the SVG and uses them to generate the animated guide your learners will see.
Important: Your SVG file must contain actual strokes for this to work. An SVG made up entirely of filled shapes or outlines without stroke attributes will not produce a tracing animation.
Step 3: Preview in HTML5
You can preview by navigating to Export > HTML5 Preview. Start to see the animated shape or images by clicking the Guide.
With Tracing Interaction, you are able to draw freely on the Canvas
3. How to Add a Tracing Question
Step 1: Insert a Tracing Question
Go to the Questions tab and click Tracing.
Alternatively, use Home tab > Interactions > Tracing (in the Questions group).
Step 2: Understand the Default Structure
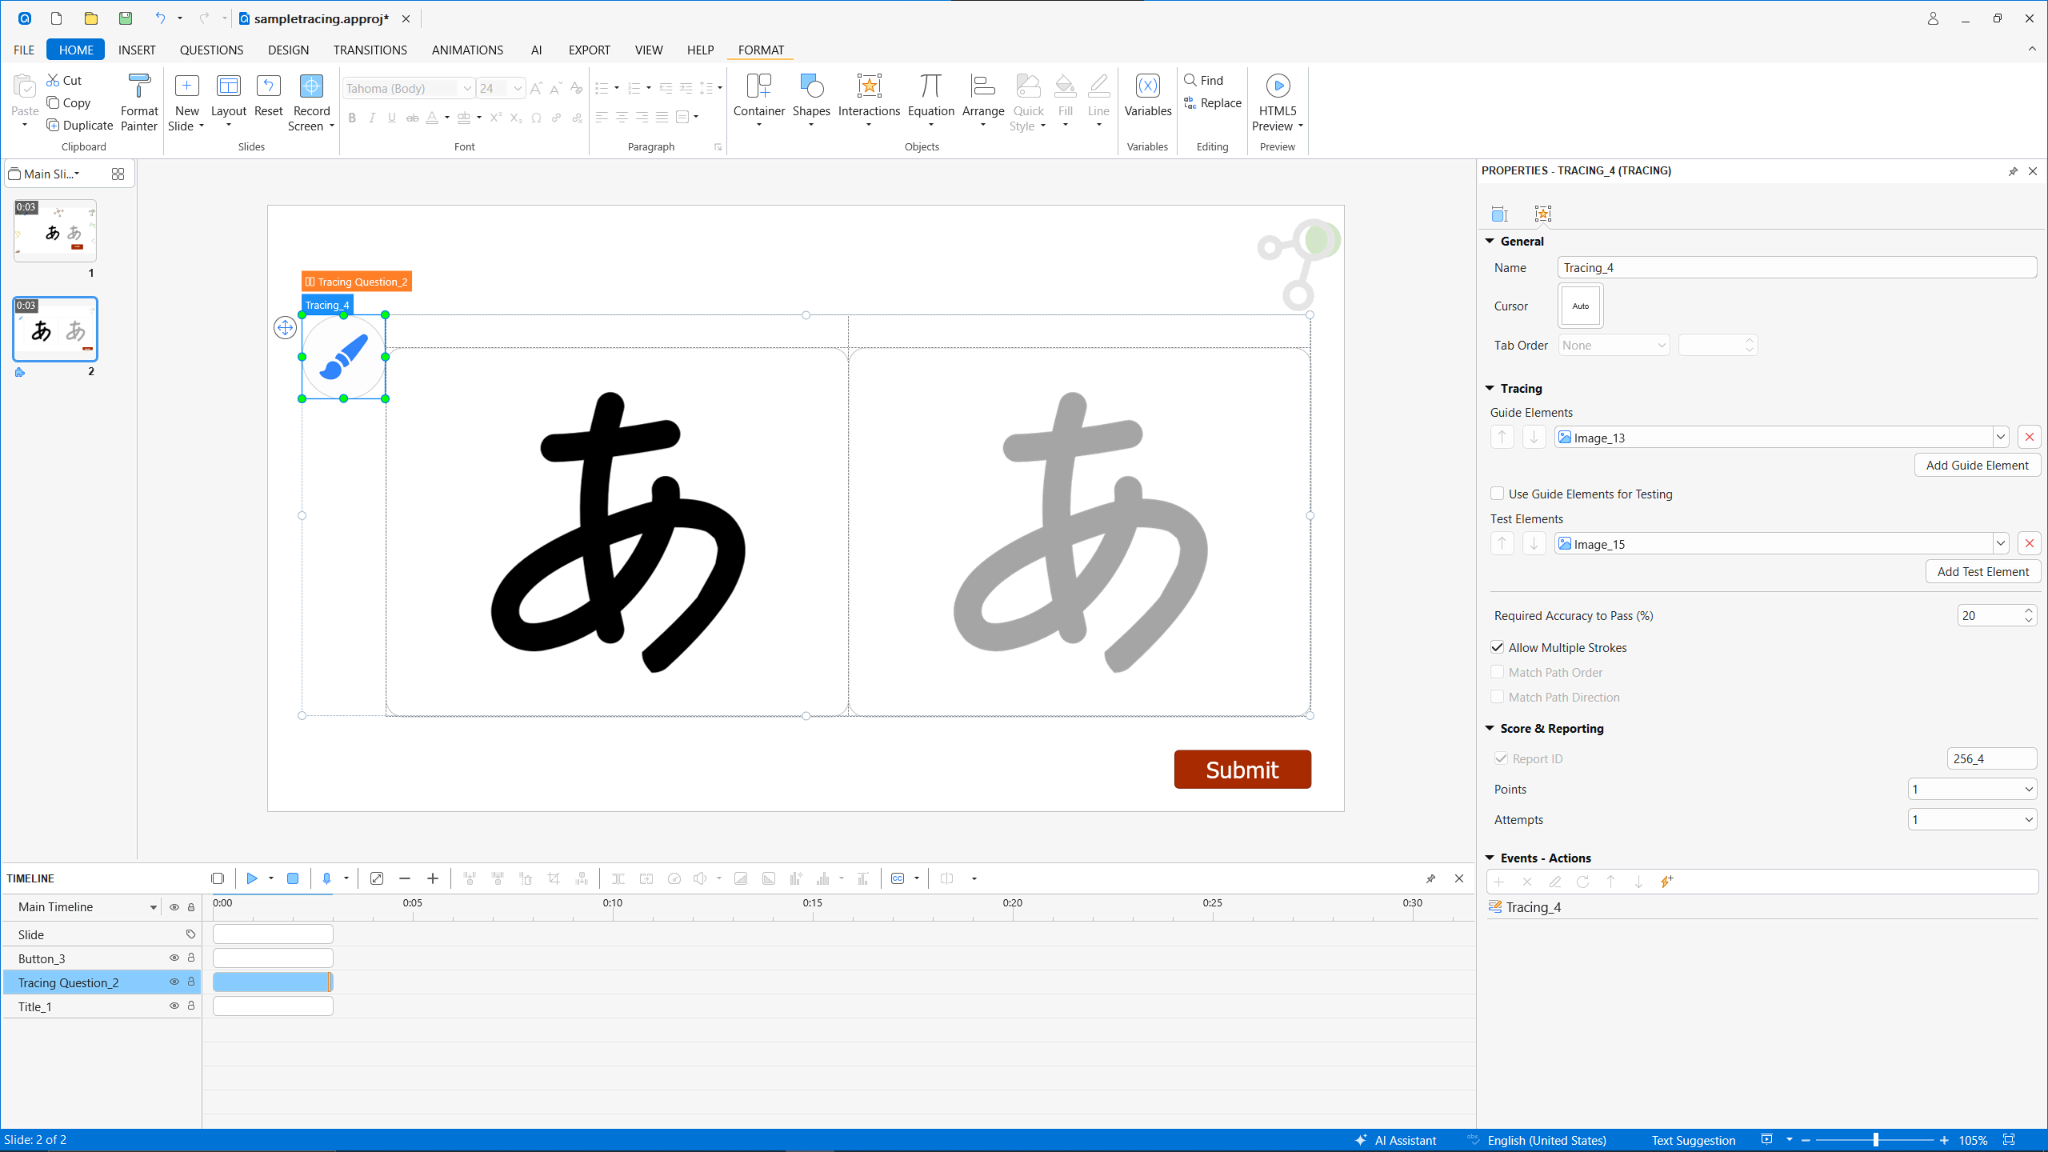
Once inserted, ActivePresenter automatically builds out the Tracing Question with everything you need to get started. Here’s what each component does:
Tracing Area is the overall container region that holds the entire question on your slide. Everything else lives inside it.
Guide Board displays the reference shape or animated path that learners watch before they attempt the drawing. Think of it as the “show me how” area.
Test Board is where learners actually draw. Whatever strokes they make here get compared against your test elements to calculate their accuracy score.
Draw Button is the paintbrush icon that appears in the editor. In HTML5 output, it activates the drawing controls panel so learners can start tracing.
Default Feedback: Correct and Incorrect messages are included automatically, inherited from the project’s default event-action settings. You can customize or replace these at any time.
Step 3: Add Guide Elements
Guide elements are the reference paths learners see and replay before drawing. A well-designed guide makes the difference between a frustrating task and a genuinely instructive one.
To add a guide element:
Click the + button inside the Guide Board area
Choose Add Shape or Add Image to import an SVG file
If using a shape, make sure a line style is applied, shapes without a visible border have no stroke to animate
If using an SVG, the file must contain strokes
You can add multiple guide elements to the same Guide Board. This is especially useful for complex characters or symbols made up of several distinct strokes, each stroke becomes its own guide element, and learners can watch each one animate in sequence.
Note: Guide elements are for display and animation only. They are not used for grading unless you explicitly enable Use Guide Elements for Testing in Tracing Properties (covered in Step 5).
Step 4: Add Test Elements
Test elements define the exact paths ActivePresenter measures the learner’s drawing against.
To add a test element:
Click the plus (+) button inside the Test Board area
Choose Add Shape or Add Image (SVG with strokes)
Once added, resize, reposition, and style the element just like any other object on the Canvas
You can add multiple test elements if the answer requires several separate strokes or path segments
⚠ Note: If your guide path and grading path are identical, which is the case in most handwriting or shape-tracing activities, skip adding separate test elements entirely. Instead, enable Use Guide Elements for Testing in Tracing Properties. It saves time and keeps your project cleaner.
Step 5: Adjust Tracing Properties
With your elements in place, open Properties pane > Interactivity > Tracing to fine-tune how the question behaves and how learner responses are evaluated.
Guide & Test Elements panel
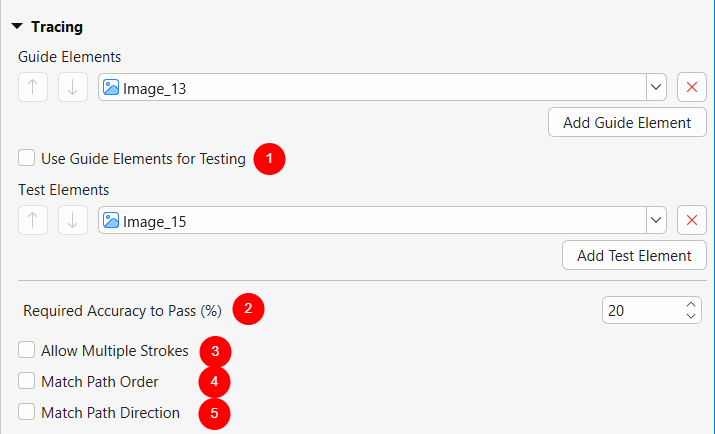
From here you can review, reorder, add, or remove guide and test elements without going back to the Canvas. You’ll also find the Use Guide Elements for Testing (1) toggle: enable it if you want the same objects to handle both the animated display and the accuracy grading.
Accuracy & Stroke Rules
This is where you control how strictly ActivePresenter grades the response:
(2) Required Accuracy to Pass (%) sets the minimum accuracy score a learner must hit for the response to count as correct. A higher percentage demands more precise tracing; a lower percentage gives learners more room for natural variation.
(3) Allow Multiple Strokes lets learners lift the stylus or mouse and draw in separate passes. When this is on, path order and direction checking are automatically disabled, giving learners full freedom in how they complete the shape.
(4) Match Path Order requires learners to trace each path segment in the exact sequence you defined. Enable this for characters or symbols where stroke order matters, for example, Japanese kanji practice.
(5) Match Path Direction requires learners to draw each path going the correct way: left to right, top to bottom, and so on. Useful when direction is part of the learning objective, not just the final shape.
Note: For strict assessments like formal handwriting evaluation, combine a high Required Accuracy with Match Path Order and Match Path Direction. For exploratory freehand practice, lower the accuracy percentage and turn on Allow Multiple Strokes to keep the experience encouraging.
Step 6: Score & Reporting
Open Properties pane > Interactivity > Score & Reporting to set up how the question contributes to the learner’s overall score.
Question Mode lets you choose whether this is a graded question or a survey item depending on your target goal with attempts learners can try at maximum.
Score Settings is where you define the Max Score and choose how points are awarded. For a full breakdown of scoring and grading, go to Assign Scores to Questions
Step 7: Preview and Test in HTML5
Never skip this step. A Tracing Question that looks correct in the editor can behave unexpectedly once it’s running in a browser especially when real mouse or touch input is involved.
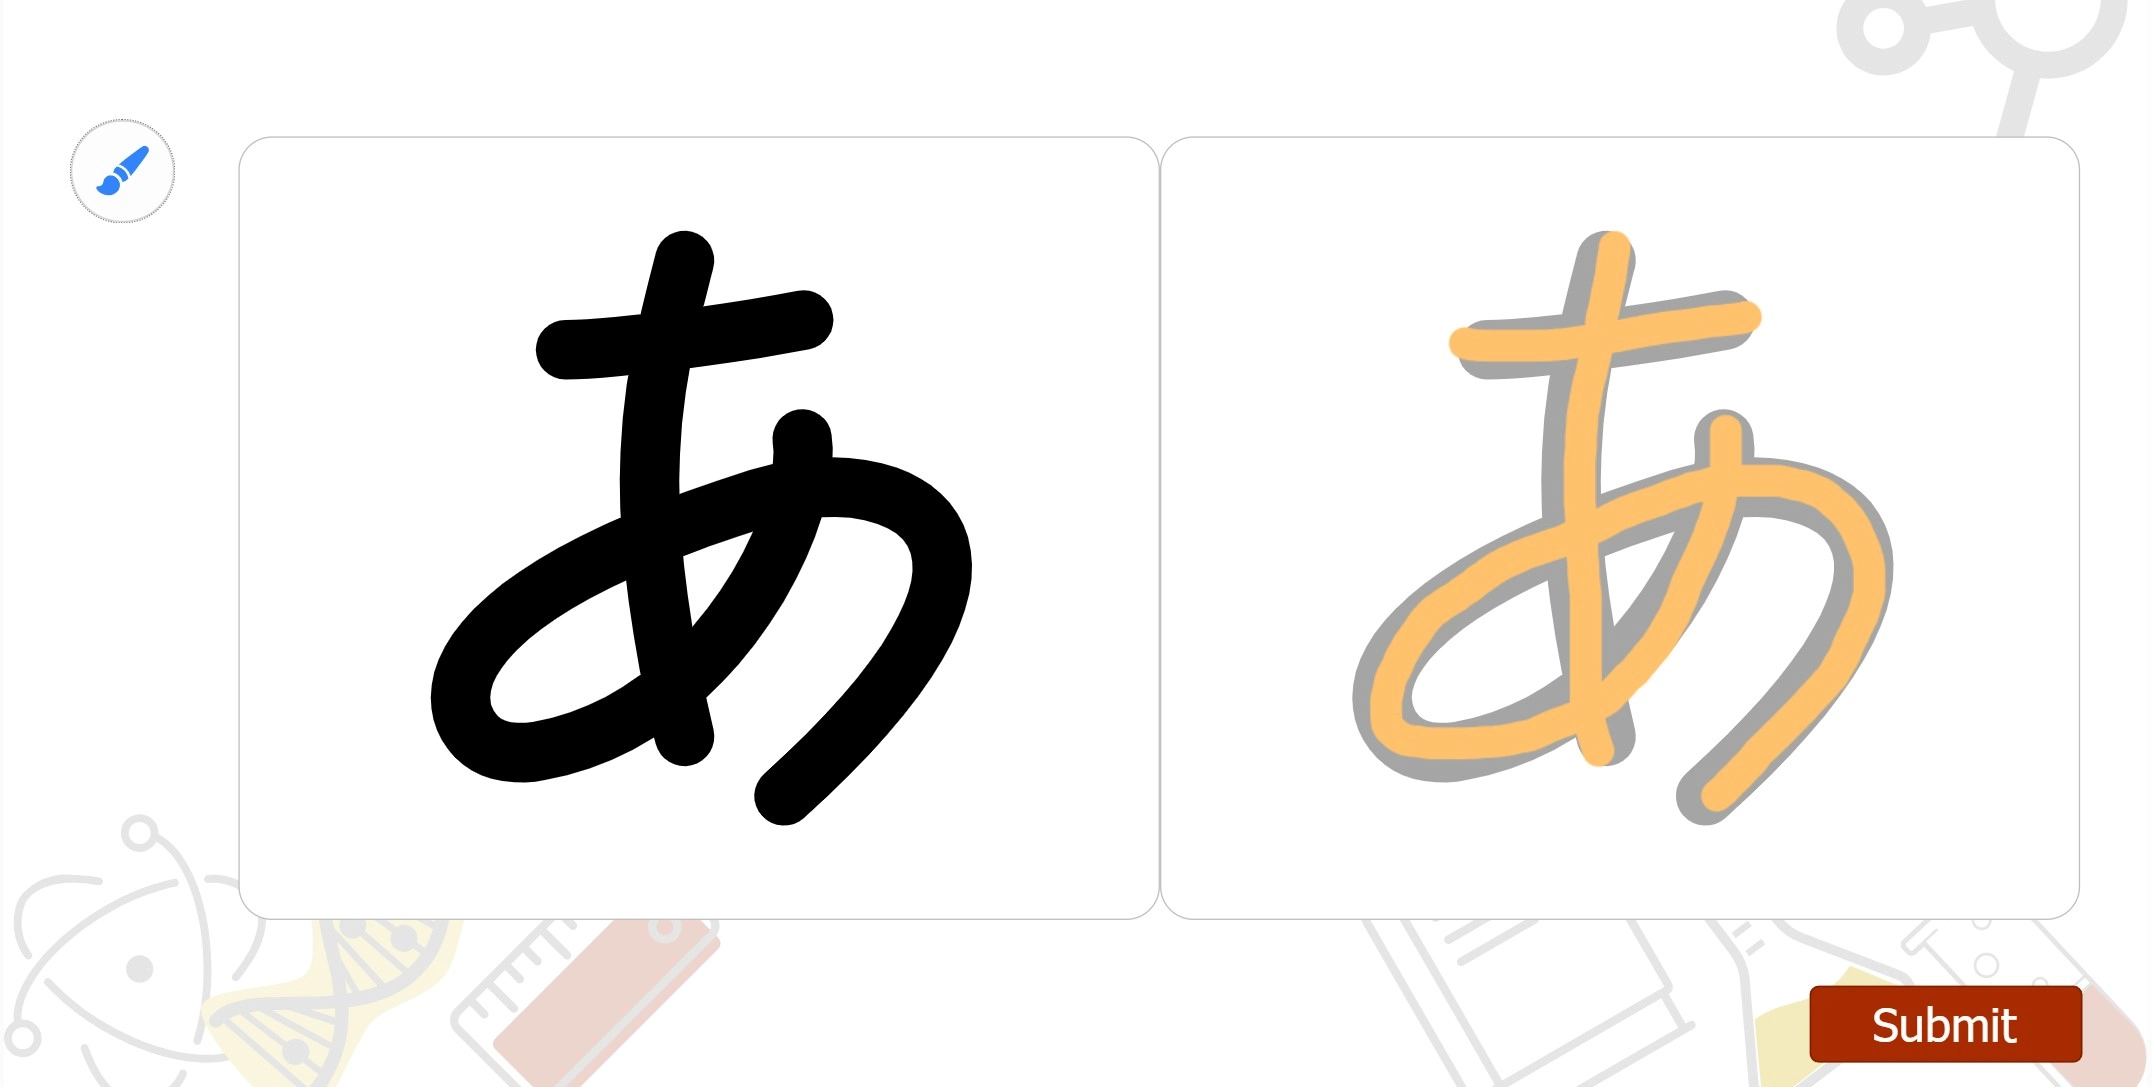
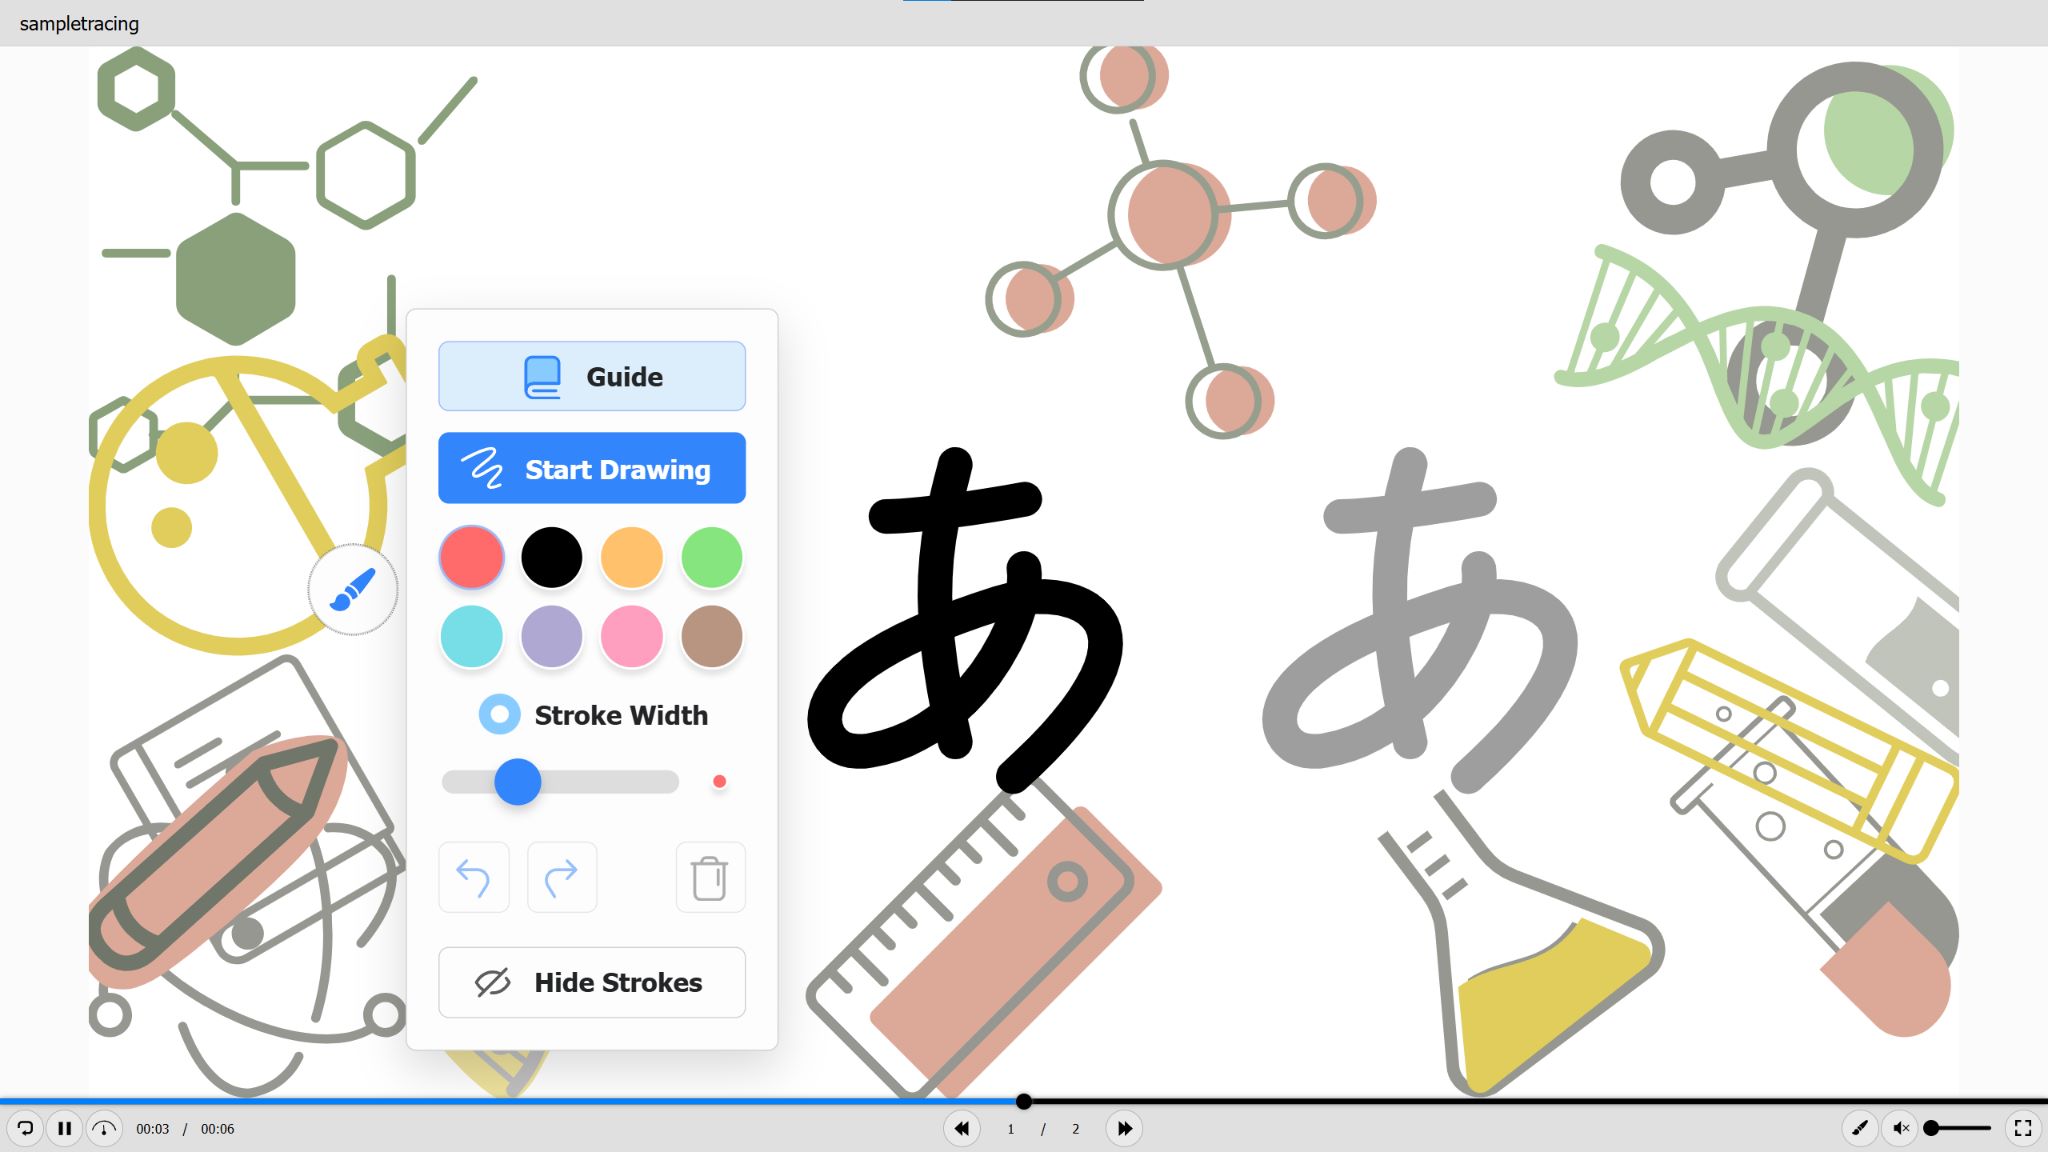
To preview, go to Export > HTML5 Preview. This opens the question exactly as learners will see and interact with it. Click the Guide to start seeing the animation, and Start Drawing to practice on your own. When you want to finish drawing, hover back to the Brush icon > Finish drawing or press ESC (Windows) as shortcut keys.
Last Words
A Tracing Question transforms eLearning content into hands-on, skill-building practice. Whether you’re teaching handwriting to learners, or helping students recognize and write characters, ActivePresenter gives you everything you need to build, grade, and refine path-based assessments all inside one tool.
The best way to understand what a Tracing Question can do is to build one yourself.
ActivePresenter is free to download – no subscription required, no feature limitations during the trial period.
Download ActivePresenter for Free and start building your first Tracing Question right away.