How to create an online course is no longer just a question for educators or large training companies, it’s a practical skill for entrepreneurs, coaches, marketers, and professionals who want to share knowledge at scale.
From my experience working with beginners who launch their first course, the biggest challenge isn’t expertise, it’s execution. Many creators know their subject well, but struggle to transform that knowledge into a clear, professional course.
This is where professional authoring tools come into play. A professional authoring tool is an all-in-one solution that brings together screen recording, video editing, and interactive learning activities into a single workflow.
With these tools, creators can create structured, engaging online courses without advanced technical skills or the need for a full production team. Among the well-known solutions in this space, ActivePresenter stands out as a reliable choice for creating an online course.
In this guide, I’ll walk you through a proven, step-by-step workflow, from planning your course idea to publishing it for real learners. The focus is practical and beginner-friendly, based on industry-standard eLearning practices used by trainers, instructional designers, and corporate learning teams worldwide.
By the end, you’ll understand not just what to do, but why each step matters, and how professional authoring tools help bridge the gap between simple video tutorials and truly effective online courses.
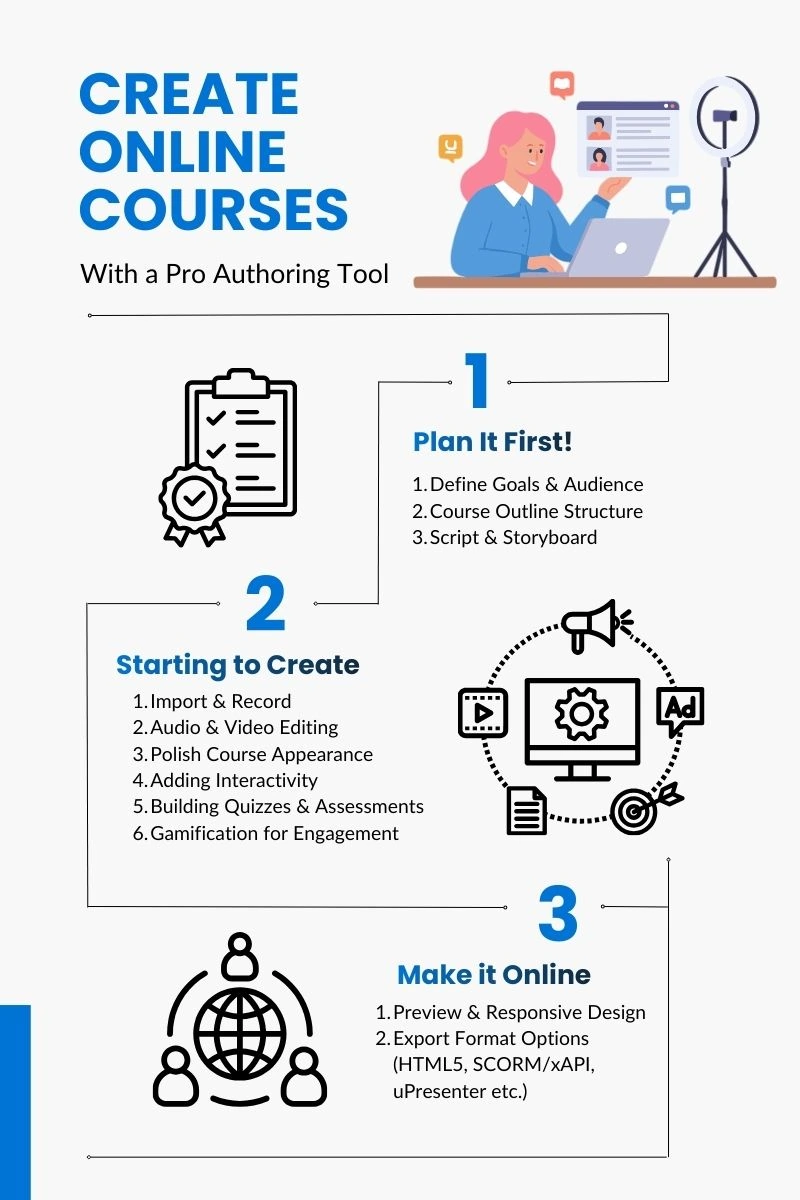
Step 1: Before Creating an Online Course – Plan It First!
Before opening any software or hitting the record button, the success of an online course is largely decided in the planning stage. In professional eLearning practice, this phase is known as pre-production. Skipping or rushing this step often leads to confusing lessons, unnecessary re-recordings, and low learner engagement.
Define Goals & Audience
The first and most important question to answer is: Who is this course for? Clearly defining your target learner helps shape every decision that follows.
At this stage, you should identify:
- The learner’s current level of knowledge (beginner, basic familiarity, or transitioning from another skill).
- The specific problems, skills, or knowledge gaps the course is meant to solve.
- The desired learning outcomes: what learners should be able to do after completing the course.
With a clearly defined learner persona, instructors can more effectively refine course topics and design lessons in manageable, bite-sized learning units.
Course Outline Structure
Once the goals are clear, the next step is creating online course’s structure. Instead of creating one long, overwhelming lesson, professional course designers break content into manageable modules and lessons.
A strong course structure typically:
- Divides the course into logical modules based on topics or skill progression.
- Keeps each lesson focused on one main idea or task.
- Builds knowledge gradually, moving from simple concepts to more complex ones.
Scripting & Storyboarding
A storyboard acts as a visual and instructional blueprint for your course, outlining what appears on screen, what is said, and how learners interact with the content.
Creating a storyboard helps you:
- Clarify the flow of each lesson before recording.
- Reduce mistakes, pauses, and unnecessary edits.
- Save significant time during the production and editing phase.
Alongside storyboarding, this is the right time to gather all necessary assets. These may include images, audio files, icons, and existing presentation materials.
By investing time in the planning phase, you lay a solid foundation for a professional, learner-centered course that reflects expertise, builds trust, and delivers real educational value.

Step 2: Starting to Create Online Courses (Using Authoring Tool)
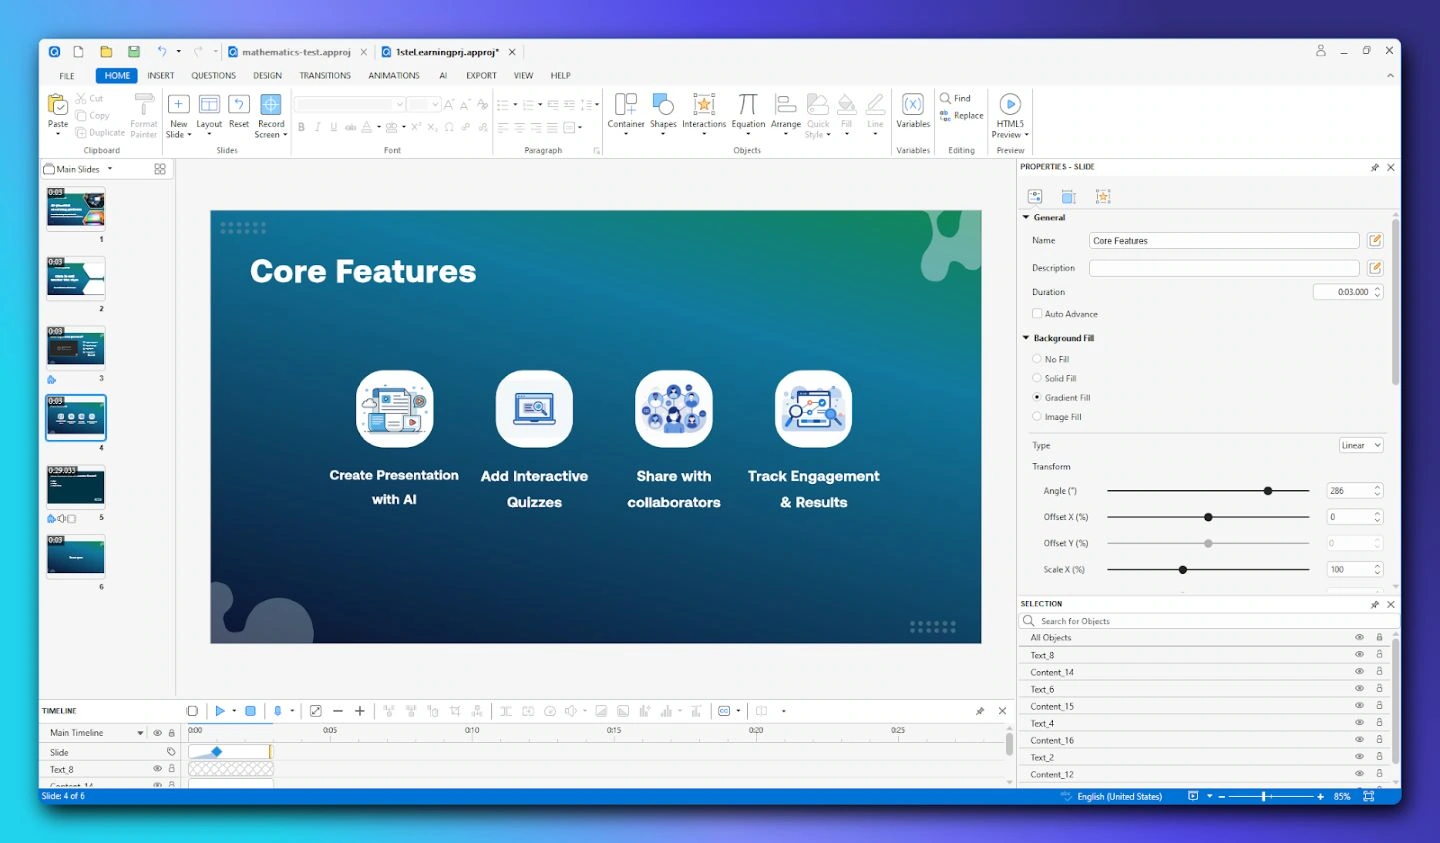
Once planning is complete, the course moves into the production phase, where ideas are transformed into real learning content. This is the stage where a professional authoring tool truly shows its value.
With ActivePresenter, beginners can produce high-quality, interactive courses using a single, integrated environment, without switching between multiple tools or relying on external editors.
Why ActivePresenter?
For course creators, especially beginners, ActivePresenter offers a practical balance between power, simplicity, and professionalism. Below are the key reasons why it’s a strong choice for creating online courses:
- All-in-one authoring tool
Screen recording, slide design, video editing, audio editing, quizzes, and interactivity are all handled in one tool. You don’t need to jump between multiple software solutions. - Beginner-friendly, yet professional
The interface is intuitive enough for first-time course creators, while still offering advanced features used by professional instructional designers. - Seamless PowerPoint integration
Existing slide decks can be imported and converted into interactive HTML5 courses, saving time and preserving prior work. - Powerful screen recording for tutorials
Supports full motion recording and software simulations, making it ideal for step-by-step tutorials, demos, and technical training courses. - Built-in interactivity and assessments
Easily add quizzes, feedback layers, slide pools, and randomization - Flexible export and publishing options
Publish to HTML5, SCORM, xAPI, video formats, or host directly online, allowing creators to reach learners on websites, LMS platforms, or social media. - Scales as your skills grow
You can start with simple recordings and gradually adopt advanced interactions and assessments as your confidence increases.
Download ActivePresenter for free to enjoy eLearning features

1. Import & Record
One of the core strengths of ActivePresenter lies in its flexible content creation options, especially for tutorial-based and skills-focused courses.
Screen Recording allows creators to capture on-screen actions efficiently. Depending on the learning objective, you can choose between:
- Record screen, which automatically records user actions and generates step-by-step slides with captions, highlights, and interaction points.
- Record software simulation, ideal for demonstrations that require smooth cursor movement or real-time explanations.
These features significantly reduce manual work while ensuring accuracy and instructional clarity, which is an important factor in building learner trust.
For those with existing materials, PowerPoint import is another major advantage. Slide decks can be brought directly into ActivePresenter and converted into interactive HTML5-based lessons. This allows creators to reuse prior content while enhancing it with quizzes, narration, and interactive elements, rather than starting from scratch.
2. Audio & Video Editing
Clear audio and clean visuals are essential for professional eLearning. ActivePresenter includes built-in editing tools that cover most production needs without requiring separate software.
Creators can perform:
- Basic video edits such as cutting, joining, and splitting clips.
- Audio processing tasks including noise reduction, volume normalization, and fade-in or fade-out effects.
For narration, you can either record voiceovers directly within the project or use Text-to-Speech (TTS) features to generate consistent, natural-sounding audio. This is particularly useful for beginners who may not have access to professional recording equipment or who want to maintain uniform audio quality across lessons.
3. Polish Course Appearance
Beyond recording and editing, visual enhancement is what elevates a course from simple screen capture to professional instruction.
ActivePresenter offers a wide range of visual tools, including:
- Annotations such as shapes, arrows, callouts, and text captions to emphasize key concepts.
- Zoom-n-Pan effects that guide learners’ attention to specific areas of the screen, reducing cognitive overload.
- Spotlight and Blur effects to highlight important details while masking sensitive or irrelevant information.
These enhancements are not just decorative, they support instructional clarity and improve learning outcomes by directing focus exactly where it’s needed.
By using ActivePresenter during the production phase, beginners can follow professional eLearning workflows while maintaining full control over content quality, consistency, and learner experience.
4. Creating Interactivity To an Online Course
Interactivity is what separates a professional online course from a passive video tutorial. At this stage, learners stop being just viewers and start actively engaging with the content.
Activities you can insert into your online course:
- Drag-n-drop
- Timer
- Spotlight
- Button
- Slider etc.,
5. Building Quizzes & Assessments
Quizzes and assessments play a key role in reinforcing learning and validating understanding. Instead of waiting until the end of the course, well-designed eLearning integrates short checks throughout each lesson.
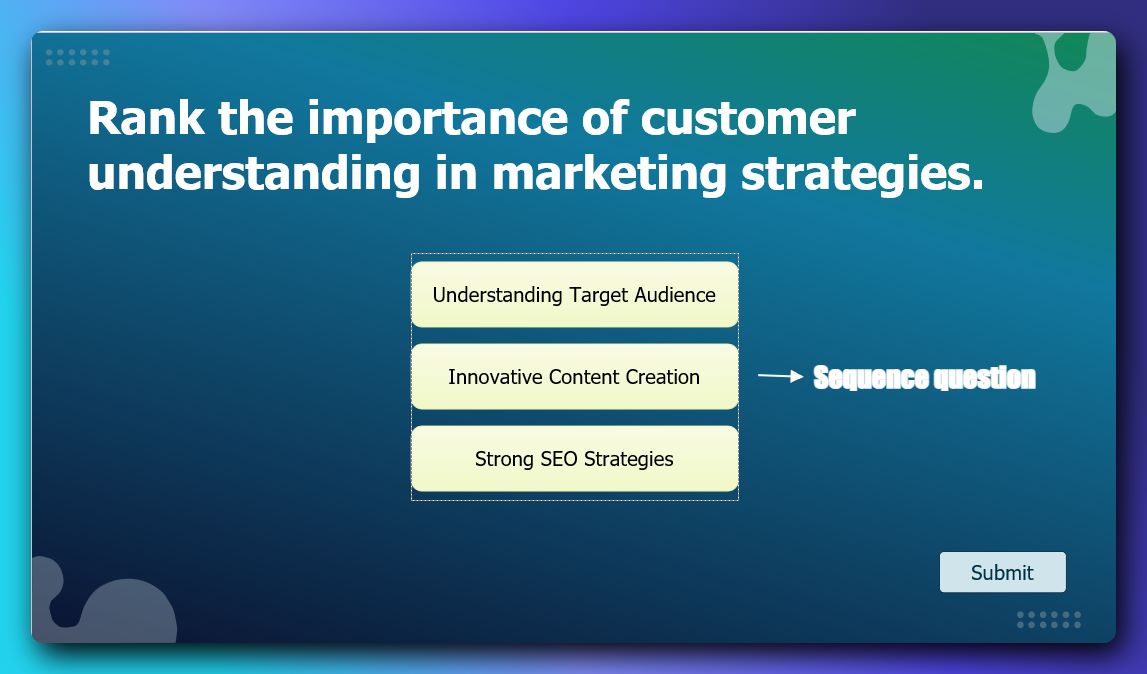
ActivePresenter supports 13 question types commonly used in professional training:
- Multiple Choice
- Dropdowns
- True/False
- Fill in the Blanks
- Hotspots
- Essay, and more.
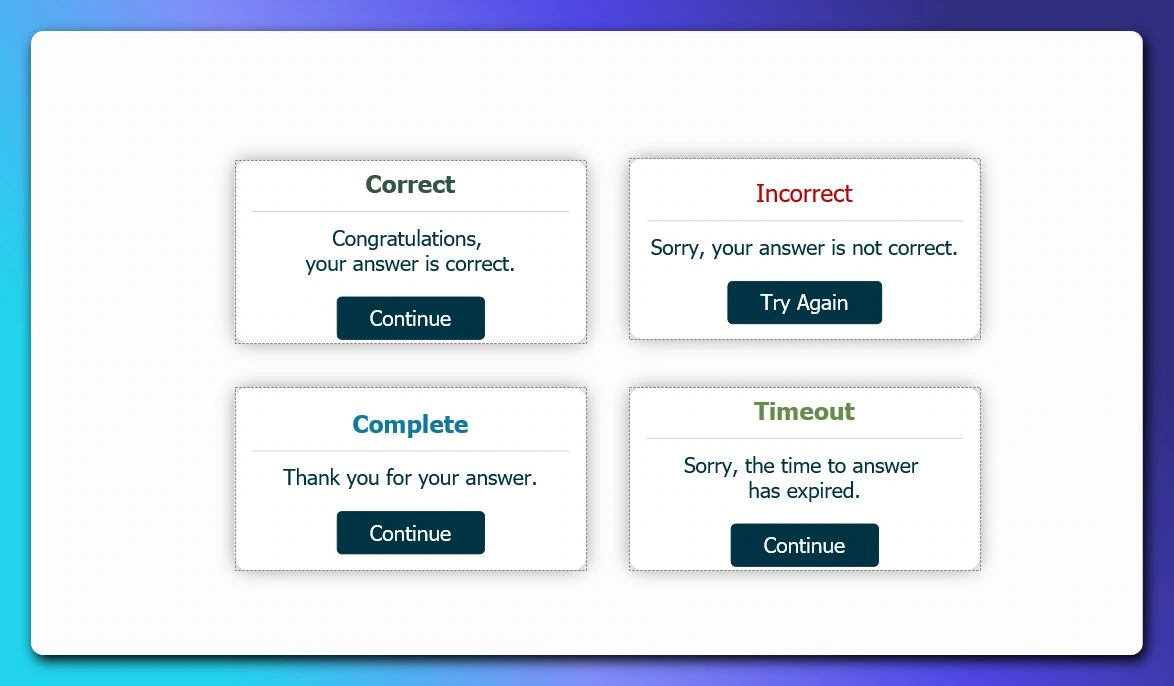
Beyond question creation, feedback response is equally important. You can set up feedback layers that display customized messages for correct or incorrect answers, helping learners understand why an answer is right or wrong.
Last but not least, ActivePresenter supports slide pools and randomization. Slide pools allow creators to group multiple slides, such as quiz questions or practice scenarios, and randomly present a subset to each learner.
In practice, this works like organizing questions into different categories, where selected questions are randomly drawn from each group.
6. Gamification for Engagement
Gamification introduces game-like elements to learning without turning the course into a game. Simple mechanics such as scores, progress indicators, or challenge-based questions can significantly increase motivation and completion rates.
By combining quizzes, branching logic, and interactive feedback, ActivePresenter enables course creators to design learning experiences that are engaging, responsive, and learner-centered. This level of interactivity is often what defines a course as truly professional, and what keeps learners coming back to complete it.
Step 3: Make It Online for Public Access
After the course content is complete, the final step is making it accessible to real learners. A professionally designed course only delivers value when it can be easily accessed, tracked, and viewed across different devices and platforms. This phase focuses on testing, exporting, and publishing your course using industry-standard formats.
1. Preview & Responsive Design
Before publishing, it is essential to preview the course and test how it behaves on different screen sizes.
Modern learners may access content from desktops, tablets, or mobile phones, often switching devices during a course.
ActivePresenter provides built-in preview modes that allow creators to:
- Test layouts and interactions on desktop, tablet, and mobile views
- Ensure text, buttons, and interactions remain readable and usable
- Verify that quizzes, branching, and navigation function correctly across devices
This step helps prevent usability issues and reinforces the professional quality of the course.
2. Export Formats
One of the key advantages of professional authoring tools is flexible export options. Depending on your delivery goals, you can publish the same course in multiple formats.
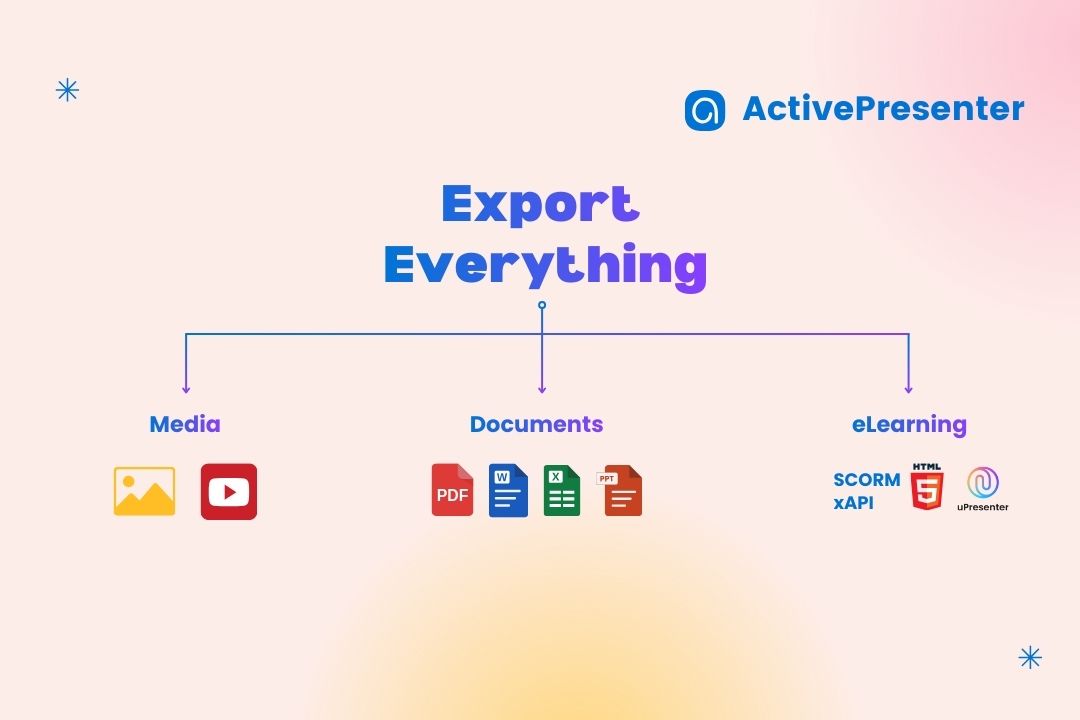
Video (MP4 / MKV)
For passive learning or promotional purposes, courses can also be exported as video files. This format is suitable for platforms such as YouTube or social media, where interaction and tracking are not required but reach and visibility are priorities.
Fits for: Upload to social media, Youtube, video-based learning platforms such as Future learn, Udemy, Coursera etc.
HTML5
HTML5 output is ideal for direct web delivery. Courses published from ActivePresenter will be packaged in a zip file, then you can host it on websites and invite learners to view and interact with. This option works well for open-access learning and marketing-focused educational content.
Fits for: Individual websites host courses directly.
Note: It may require you to understand about techniques (hosting, etc) to run a HTML5 file on a website.
SCORM / xAPI (Tin Can)
For formal training environments, SCORM and xAPI are industry standards. These formats allow Learning Management Systems (LMS) to track learner progress, quiz scores, completion status, and interaction data. They are essential for corporate training, academic courses, and certification programs.
Fit for: Courses built for companies &
Hosting & Distribution
Once exported, the course must be hosted on a platform accessible to learners. There are two common approaches.
Using an LMS provides structured learner management, progress tracking, and reporting. Popular platforms such as Moodle, TalentLMS, SCORM Cloud, Canvas support SCORM and xAPI packages and are widely used in education and corporate training.
Alternatively, courses exported as HTML5 or video can be hosted on a personal website or web server. This option offers greater control over branding and access but typically does not include built-in learner tracking unless integrated with additional analytics tools.
By choosing the right export format and hosting method, you ensure that your course is not only professional in design but also accessible, scalable, and ready for public use. This final step completes the transition from content creation to real-world learning impact.
Direct Export for Public Access (uPresenter LMS) – Highly Recommended
These above-mentioned export formats are powerful, but they often come with a downside: technical complexity. Configuring SCORM or xAPI packages, setting up hosting environments, uploading files to an LMS, and troubleshooting compatibility issues usually require technical know-how that drain
To simplify this process, course creators can publish directly to uPresenter, a lightweight eLearning platform designed to work seamlessly with ActivePresenter.
Instead of exporting files and managing servers or LMS settings, you can host your course directly from ActivePresenter with just one click. Once published, the course is instantly available online, ready to share via a simple link.
Beyond hosting, uPresenter also provides built-in sharing and reporting capabilities. Creators can invite learners, manage access, and track key learning data such as progress, slide views, quiz results – all without complex setup.
This approach removes technical barriers and allows course creators to focus on what matters most: delivering valuable learning experiences and reaching learners faster.
You can refer to Export an eLearning Project in ActivePresenter article to learn more about other export formats
To Wrap Up
Creating an online course as a beginner doesn’t have to be overwhelming or technical. When you follow a clear workflow Plan > Create > Interact > Publish, the entire process becomes structured, manageable, and repeatable. From defining your learners and outlining content, to producing lessons, adding interactivity, and finally making the course available online, each step builds on the previous one to ensure quality and clarity.
If you’re ready to turn your knowledge into a structured, interactive course, the best way to start is by practicing. Download a trial version of ActivePresenter, explore its features, and begin building your first project.
Hands-on experience is the fastest way to gain confidence, and the first step toward creating online courses that learners could trust and complete.