Manufacturing operations concern the operation of a facility to make a product. In manufacturing, an operations manual explains the steps through which raw materials are transformed into the final product. Its critical role is indisputable.
The operations manual can be a great source of learning materials for learners to grasp a procedure. Therefore, they can understand how a product is made without actually practicing it, which may be too expensive or time-consuming. This article will show you how to create an operations manual of the pencil making, with just one tool – ActivePresenter.
To create this type of manual, external resources like images are important. You may have to insert them a lot. So, ActivePresenter makes it easy for you to insert objects as it is a multimedia editing tool. All of the design elements (shape, text caption, themes, templates, etc.) are included in it. All you have to do is insert them and make some more customizations if needed.
So, download the app first, install and open it to start designing manufacturing operations manual following this guide right away:
How pencils are made?
In general, a stock of wood goes through seven steps to become a pencil that comes into use. Because we’re creating a manual guiding how to make a pencil, let’s get an overview of the process:
- Pencil stock is cut into pencil blocks.
- Pencil blocks are cut into pencil slats with circular saws.
- A groover machine cuts grooves into the slat.
- Writing cores are placed into the grooves.
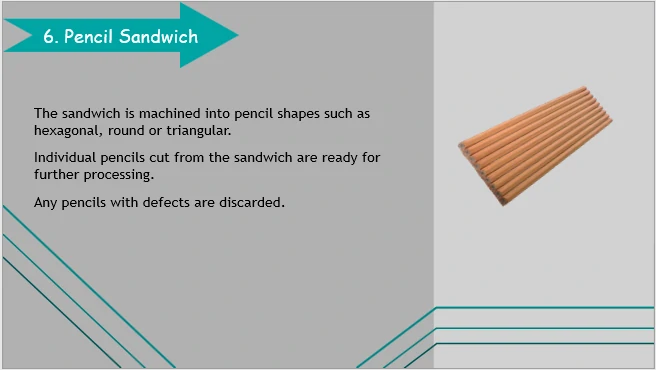
- A second grooved slat is glued onto the first, making a sandwich.
- The sandwich is machined into pencil shapes.
- An eraser and a ferrule are crimped into place on each pencil.
Now, let’s start from the first and continue to the seventh step to create the operations manual.
How to create an operations manual?
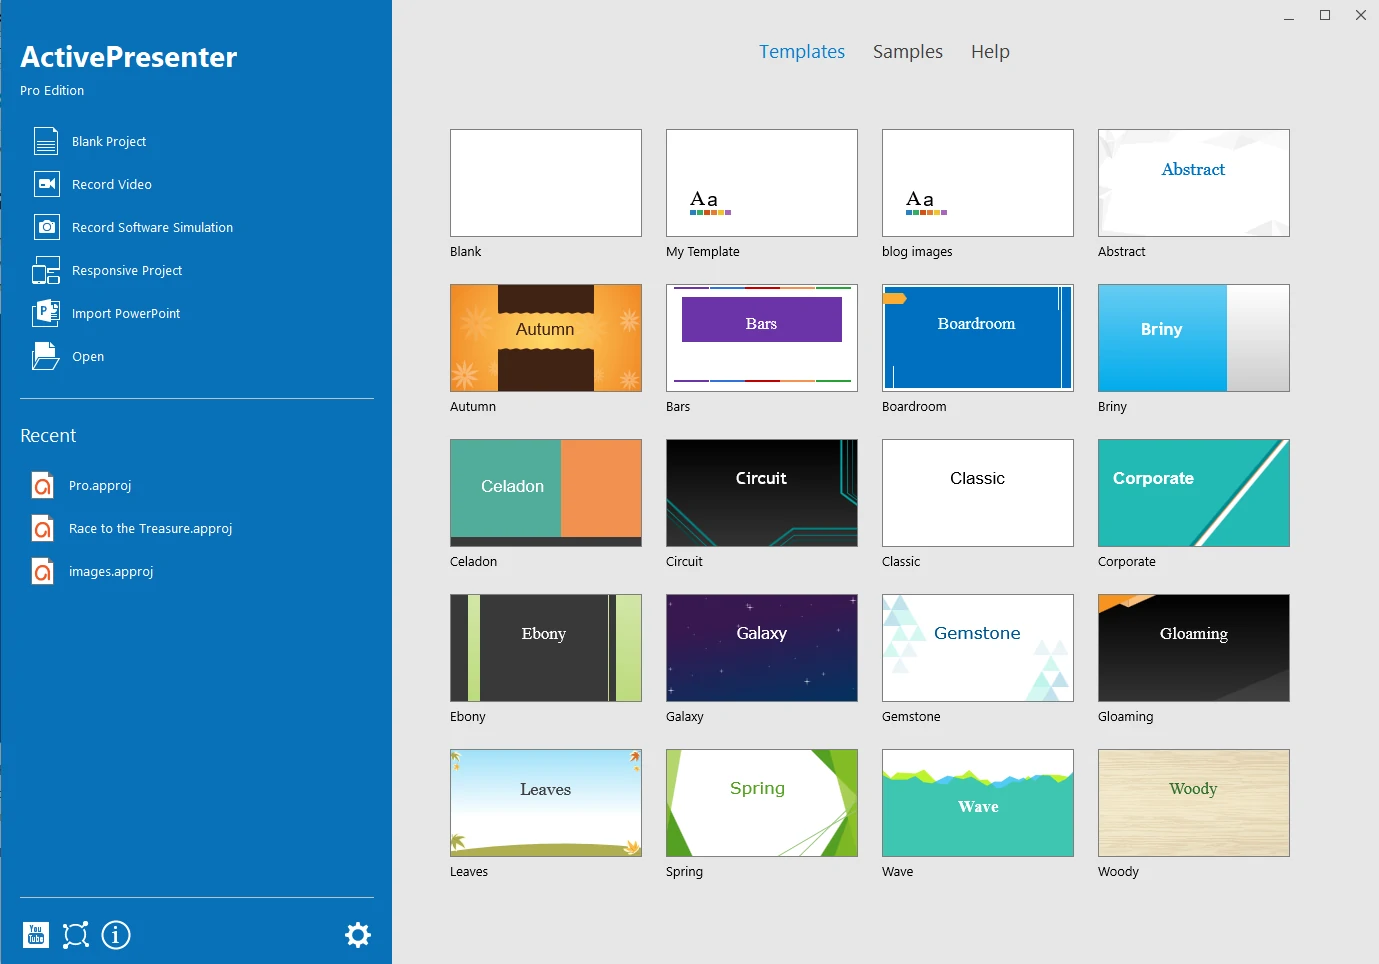
Step 1: Create a blank project
The first step to have an operations manual is to create a blank project. It contains blank slides where you can add text, images and other types of content.
To create a new project with a default theme, click one of the themes in the Templates tab of the Start Page. You can also click Blank Project to create a new one. However, a newly created project will appear with a blank slide having a blank theme.
A new project always comes with a default theme and you can change or customize it the way you like. Thanks to themes and templates, a project with an uniform appearance is attainable. Using themes gives your final manuals an engaging look. See the next part to know how to change project theme.
There are some other methods to create a new blank project that I don’t mention here. For those ways as well as for details about working with a project (add new slides, change slide size, etc.), see Creating New Blank Projects.
Step 2: Change theme for the project
After creating a new project with a theme, you change your mind and want to use another set of colors and styles, just change it.
To do that, open the Design tab and select the theme style you want.
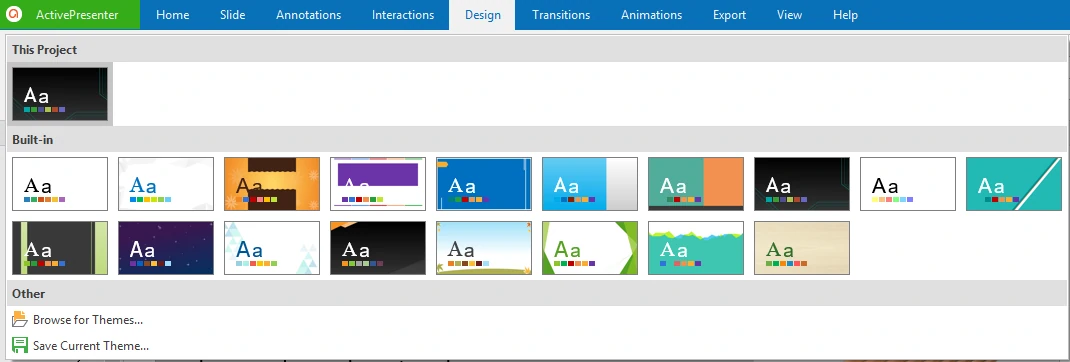
Tip: Before applying a new theme, you can hover the mouse over each theme thumbnail to see how a theme will change the appearance of your project.
For more information about themes, see the following tutorials:
Step 3: Customize slide background
As you can see, there are ready-to-use themes with colorful decorations. You can use any of them without modification. However, customizations may take your projects go further by providing the better user experience. Besides, customized backgrounds give your project an ordinary look.
There are two ways to do that. One is to edit the slide background (modify the Preset Background Styles). The other is to customize the theme (change theme colors and theme fonts, etc.).
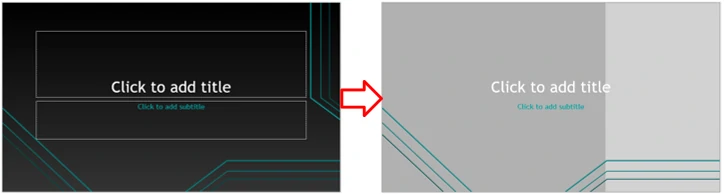
Tip: After modifying the slide background, you can save the theme to use in other projects.
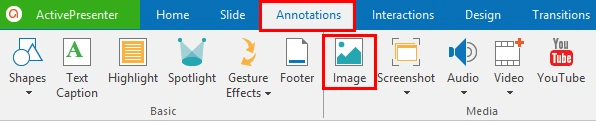
Step 4: Insert image
In this step, you’re going to insert images of the product about which the procedure is talking. In this article, they are images of the material to form a pencil (pencil block, pencil slat, etc.).
You can insert images from the Annotations tab.
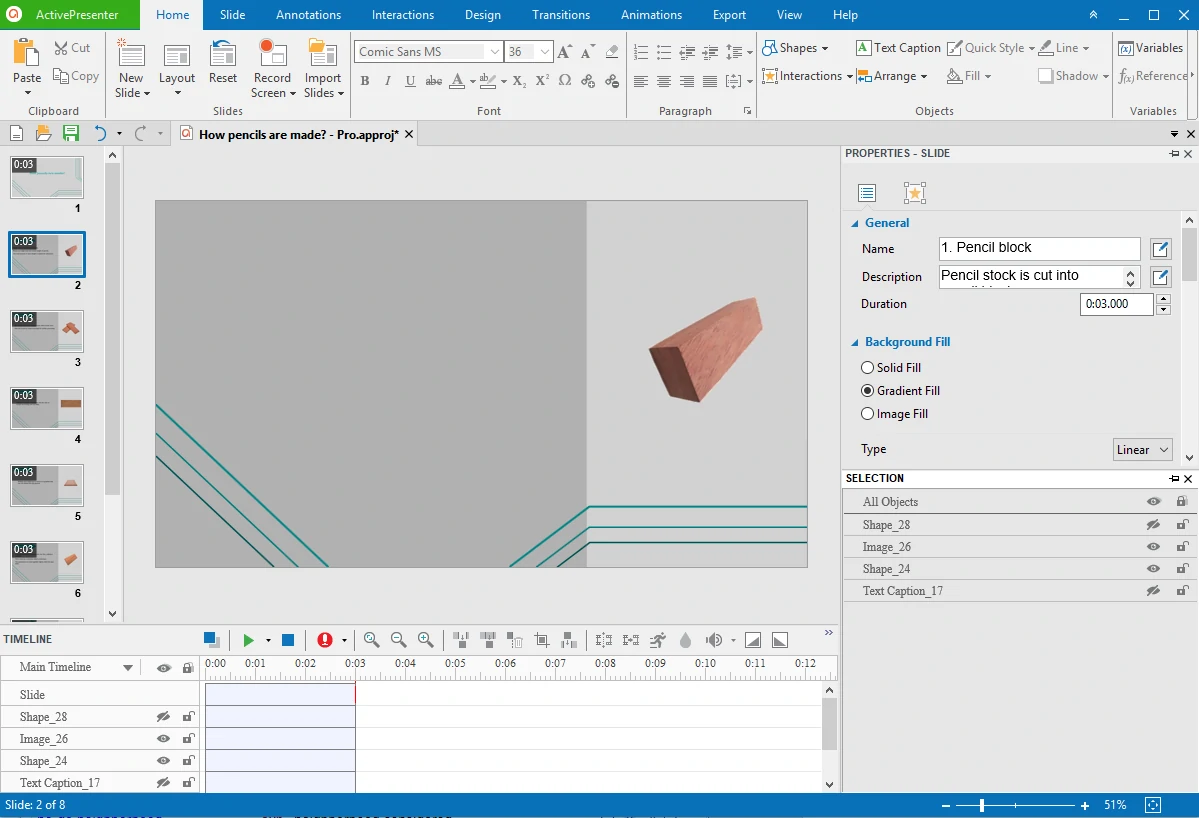
After that, place the inserted image at a proper position in the slide. If there is more than one image, you can use the align tool to arrange them more easily.
Below is the screenshot of the ActivePresenter user interface with the slide demonstrating the first step of the pencil-making process. The slide has the pencil block image inserted.
Tip: You can insert a logo of the product or organization into the manual to increase the product recognition.
Step 5: Insert shape, text caption and other annotations
By default, a slide always come with a layout that contains position, size, and formatting of the placeholders and different elements in a slide. Depending on the content of the manual you’re creating, select the slide with the layout you want. For example, with an operations manual that need content on one side and images on the other side of the slide, the Two Content layout will be a great choice.
After that, you will insert contents into slides. For the text lines, you can use some annotation objects such shape or text caption.
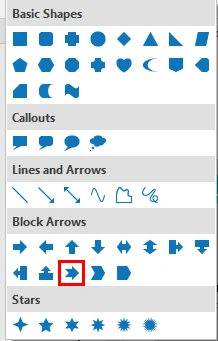
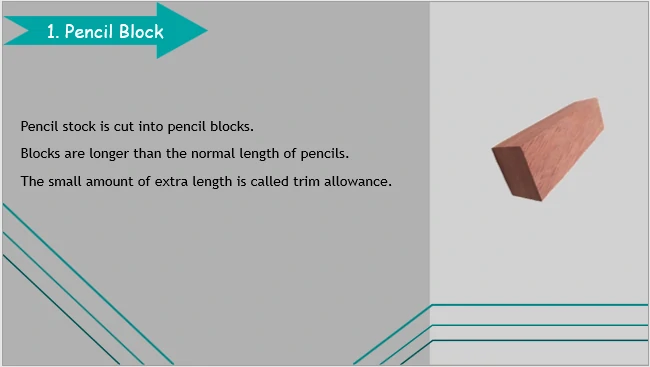
Shapes and text captions can be inserted from the Annotations tab. In this example, I use the notched right arrow to create the name of each step:
And use the text caption for the content of each step. Note that any types of object that can contain text can be utilized:
Here is the final slide:
Step 6: Change slide name and slide description
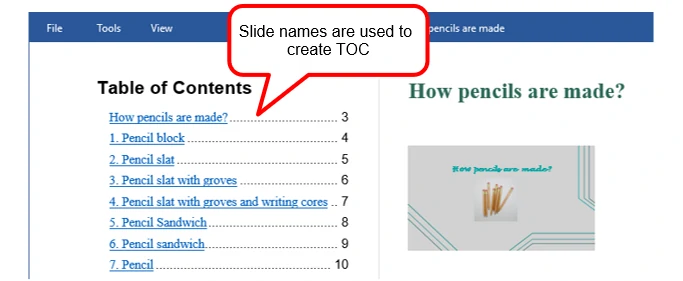
Even though slide names are automatically generated, they are not really content-related from the beginning. You should make them more meaningful so that users can grab what the slides are about at the first glance.
Slide names come in handy especially when you export projects to PDF or Microsoft Word. With these two types of output, bookmarks (for PDF) and table of contents (for Microsoft Word) will be created with the slide names.
To change the slide name, select the slide and go to the Slide Properties tab of the Properties pane. Type the text in the Name box.
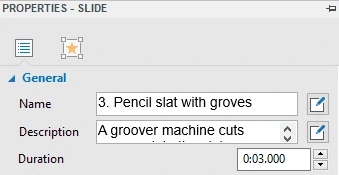
From here, you can also give the slide a description, making the content more details. The slide description will be shown in the document output, right below the slide title.
Tip: When it comes to Microsoft Word output, you can even design and use your own custom Word template. See Creating and Using a Custom Word Template for details.
Step 7: Export the project
Since what you need is an operations manual, you need to export your project to document formats. ActivePresenter makes the following popular outputs available: PDF document, Microsoft Word, Microsoft Excel, Microsoft PowerPoint, HTML SlideShow.

See Export To Document Formats to know more about how to export projects to different document types.
Tip: Before exporting, if there are redundant slides/steps, you can remove them without affecting other slides or steps. To remove slides, select them and press the DELETE key.
Final thought
We’ve gone through seven steps to create an operations manual for the pencil-making process. Remember that you can create not only written materials like this but also other lively training materials such as videos, simulations, etc. With ActivePresenter, you will always find a suitable solution for each purpose.
Let’s create your own manuals today and feel free to contact us if you need any support.