Whether you’re a teacher building an online course, an IT professional documenting a workflow, or a content creator filming your first tutorial, knowing how to record your screen on Windows 11 is a fundamental skill in 2026. The problem? With so many options floating around — built-in tools, browser extensions, and full-featured software — it’s easy to waste hours on the wrong solution.
In this guide, I’ll walk you through 5 battle-tested methods to record your screen on Windows 11, from the quick-and-free to the professionally powerful. I’ll share honest pros and cons, real-world use cases, and the insider tips I’ve gathered from nearly a decade of creating screen-based content. By the end, you’ll know exactly which free screen recording tool matches your workflow.
Why Windows 11 Screen Recording Has Never Been More Important
The demand for screen recordings has exploded. From remote employee onboarding to YouTube tutorials, from software simulations to university eLearning modules — video content captured directly from a screen is now the universal language of digital communication.
Windows 11 introduced several improvements to the OS experience, but the native screen recording capabilities still leave many professionals wanting more. That’s why understanding all your options — not just the obvious ones — gives you a real competitive edge.
How to Evaluate a Screen Recorder: 5 Key Criteria
Before jumping into tools, let me share the framework I use to evaluate any screen recorder. A strong tool should score well across all five:
| Criteria | What to Look For |
| Video Quality | 1080p or 4K output, lossless or high-bitrate codec support |
| Audio Capture | System audio + microphone simultaneously, with noise reduction |
| Ease of Use | Minimal setup time, intuitive UI |
| Editing Capabilities | Trim, cut, annotations, callouts, zoom effects |
| Export Flexibility | MP4, AVI, SCORM, HTML5 — depending on your use case |
Keep these in mind as we explore each method below.
Method 1: Xbox Game Bar — The Built-in Quick Option
Best for: Casual users, gamers, quick one-off recordings
Windows 11 ships with Xbox Game Bar, a built-in overlay designed originally for gaming but usable for screen capture in most app windows.
How to Use Xbox Game Bar to Record Screen on Windows 11
Step 1: Open the application or window you want to record.
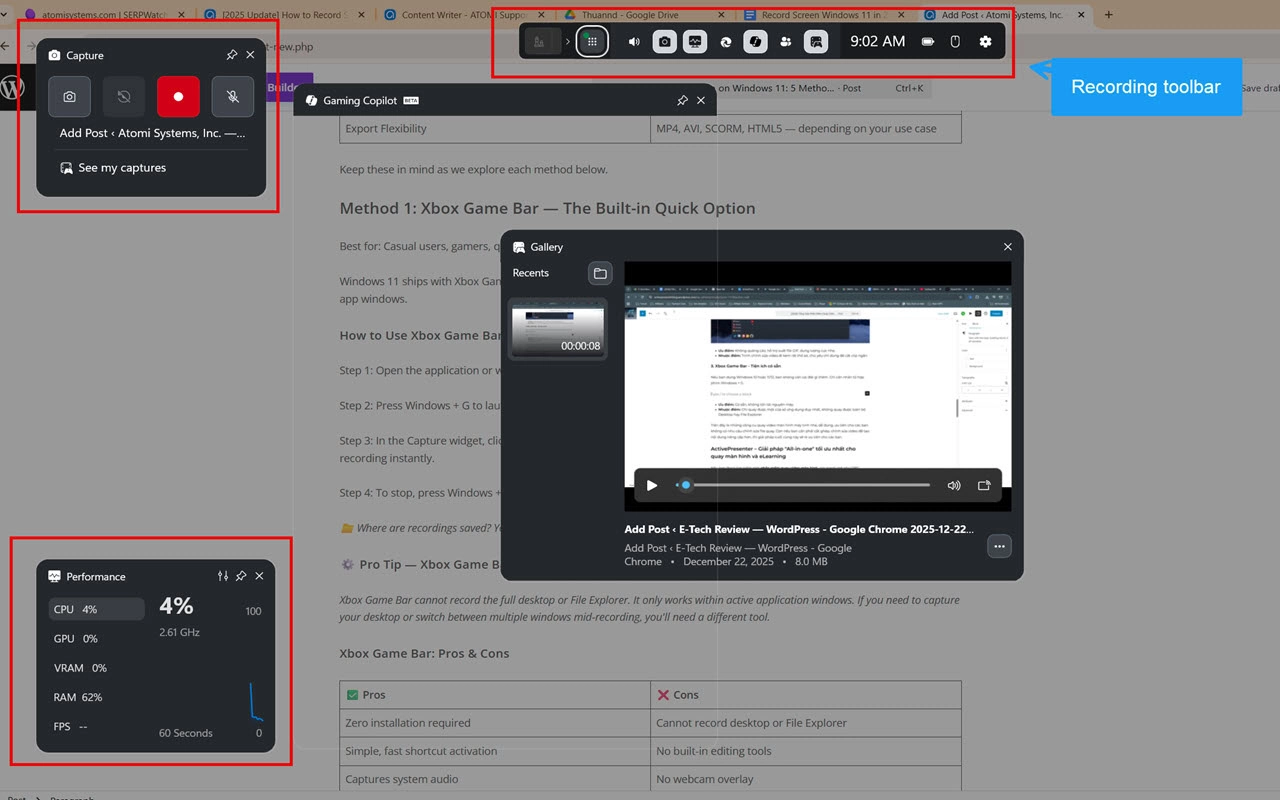
Step 2: Press Windows + G to launch the Xbox Game Bar overlay. The widget panel will appear on top of your screen.
Step 3: In the Capture widget, click the Start Recording button — or use the keyboard shortcut Windows + Alt + R to begin recording instantly.
Step 4: To stop, press Windows + Alt + R again or click the Stop button in the floating capture bar.
📁 Where are recordings saved? Your videos are automatically saved to: C:\Users\[YourName]\Videos\Captures
⚙️ Pro Tip — Xbox Game Bar
Xbox Game Bar cannot record the full desktop or File Explorer. It only works within active application windows. If you need to capture your desktop or switch between multiple windows mid-recording, you’ll need a different tool.
Xbox Game Bar: Pros & Cons
| ✅ Pros | ❌ Cons |
| Zero installation required | Cannot record desktop or File Explorer |
| Simple, fast shortcut activation | No built-in editing tools |
| Captures system audio | No webcam overlay |
| Free | Limited to one active window |
Method 2: Snipping Tool (Windows 11 Update) — Screenshot Meets Screen Record
Best for: Quick, lightweight recordings without third-party software
With a Windows 11 update, the Snipping Tool gained a screen video recording feature — a lesser-known but genuinely useful addition.
How to Use Snipping Tool for Screen Recording
Step 1: Open Snipping Tool (search for it in the Start Menu).
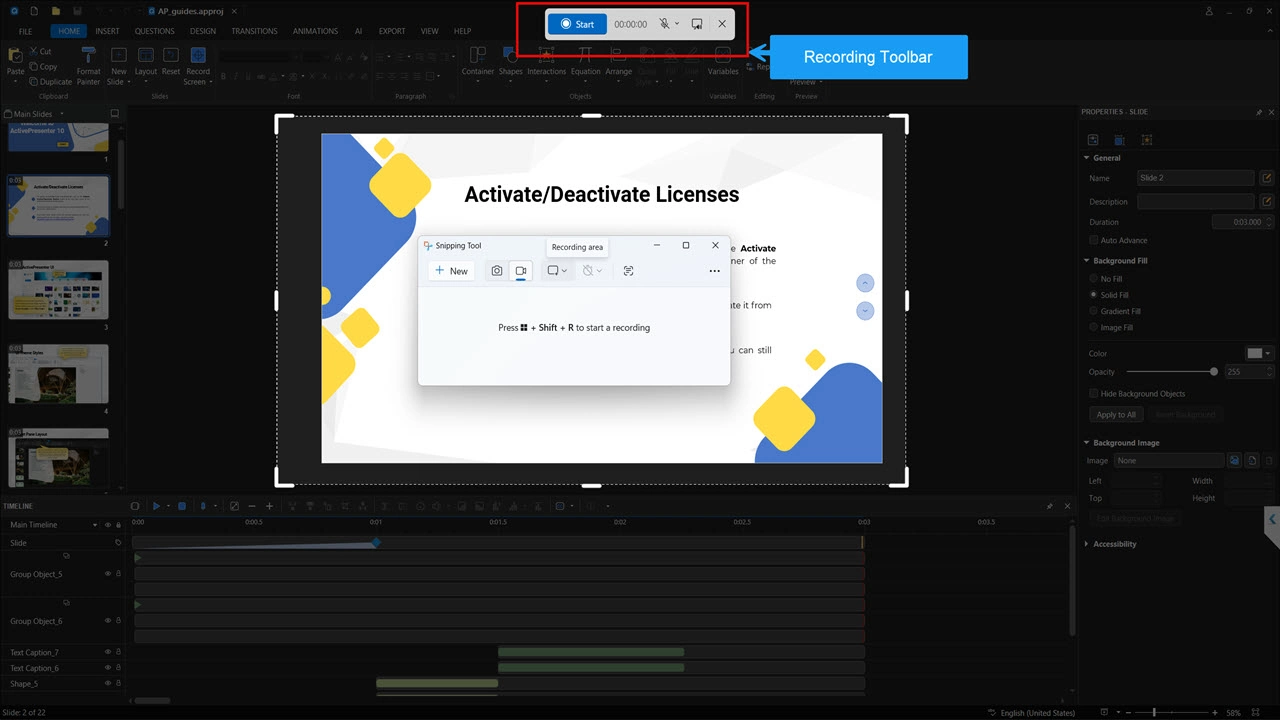
Step 2: Click the video camera icon in the toolbar to switch to recording mode.
Step 3: Click New, then drag to select the area of your screen you want to record.
Step 4: Click Start to begin recording within that region. Click Stop when finished.
⚠️ Note: The Snipping Tool screen recorder is only useful when you create short bug reports as it has no editing capabilities.
Snipping Tool: Pros & Cons
| ✅ Pros | ❌ Cons |
| Native, no install needed | No editing tools |
| Region-specific recording | No preset templates |
| Simple and clean interface | No cursor highlighting or annotations |
Method 3: ShareX — The Free Open-Source Powerhouse
Best for: Technical users, developers, and anyone who wants a capable free tool with deep customization
ShareX is a free, open-source screen recording and screenshot tool that has built a loyal following since its launch in 2007. It packs a surprising number of features for a completely free application — and unlike Xbox Game Bar or Snipping Tool, it gives you meaningful control over your recording settings.
How to Record Screen with ShareX on Windows 11
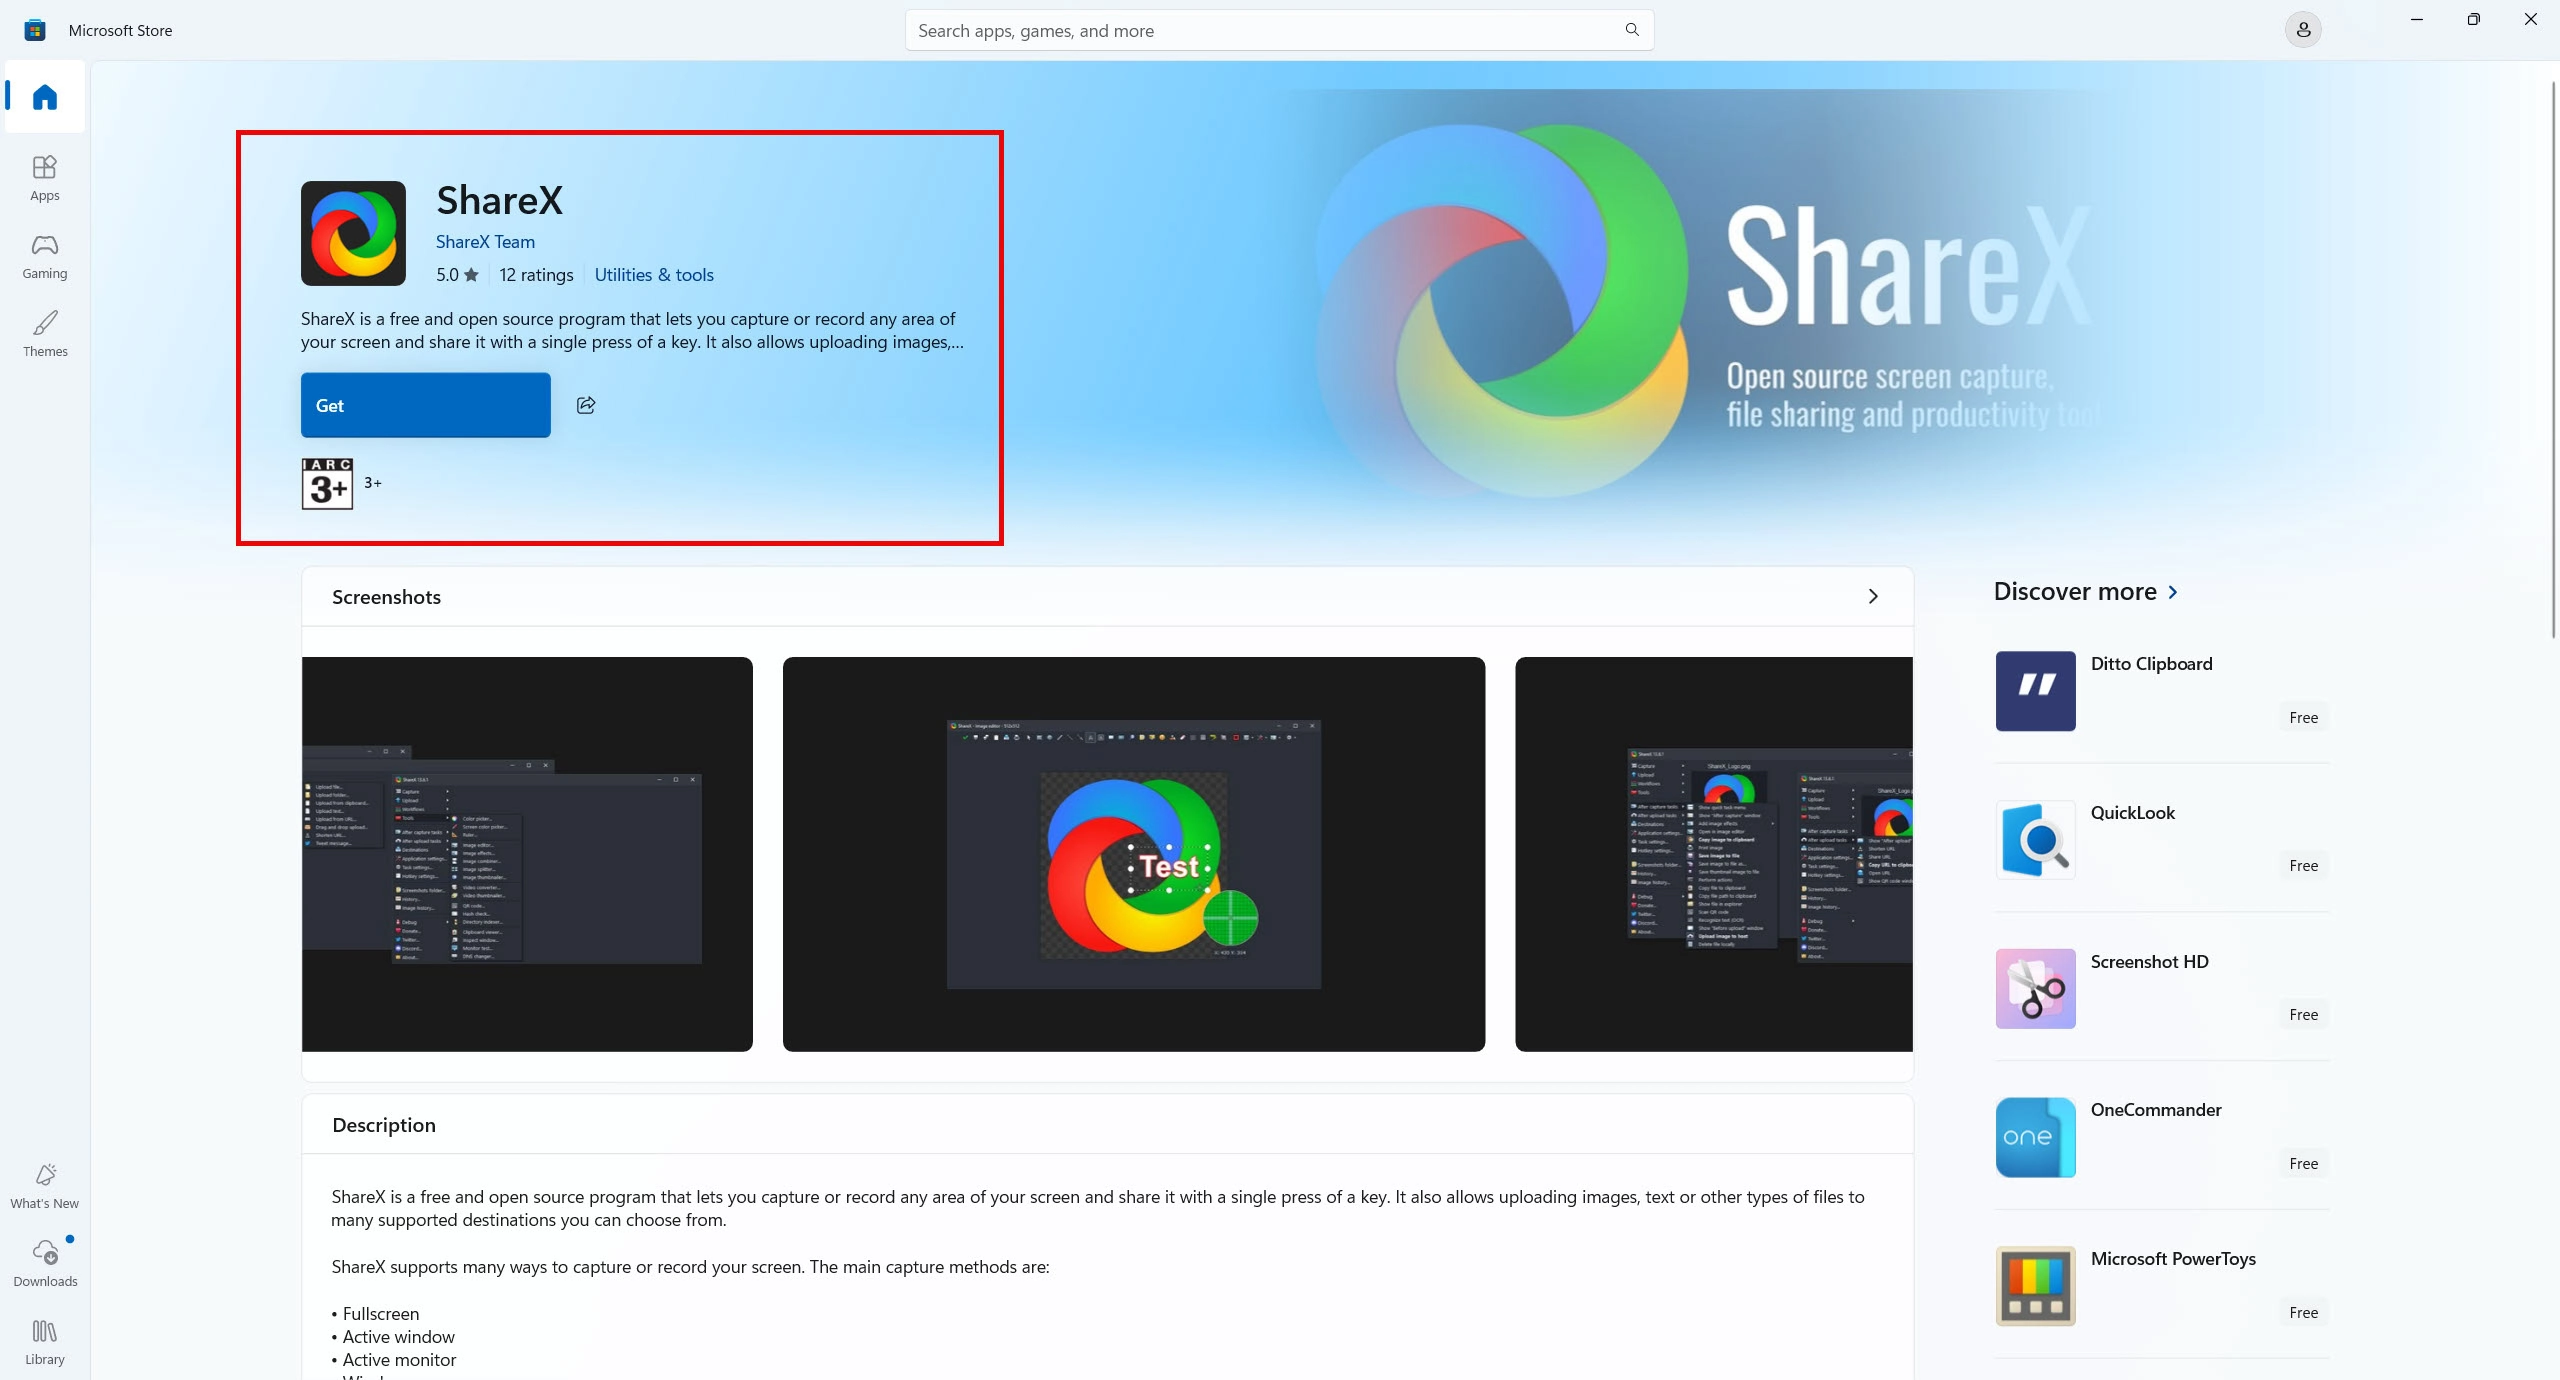
Step 1: Download and install ShareX from their official website or the Microsoft Store — it’s free and open-source.
Step 2: Launch ShareX. In the main window, click Capture from the top menu, then select Screen Recording.
Step 3: Your cursor will turn into a crosshair — drag to select the region of your screen you want to record, or press Enter to capture the full screen.
Step 4: ShareX will begin recording immediately. A small floating toolbar appears showing the recording timer.
Step 5: Click the Stop button in the toolbar (or use your configured hotkey) to end the recording. ShareX will automatically process and save the file.
💡 Pro Tip — ShareX Audio Setup:
By default, ShareX may not capture audio. Before recording, go to Task Settings > Capture > Screen Recorder and configure your audio sources under the FFmpeg options. Select your microphone and/or system audio (loopback) to enable sound capture.
⚙️ Key Features of ShareX for Windows 11
- Hotkey-driven workflow — assign custom shortcuts for every action
- Multiple capture modes — full screen, region, window, and scrolling capture
- Built-in annotation tools — arrows, text, blur, and highlight for screenshots
- Automatic upload — share recordings directly to Imgur, Google Drive, Dropbox, and more
- Task automation — chain actions like “record → convert → upload → copy link” automatically
- No watermarks, no time limits, completely free
ShareX: Pros & Cons
| ✅ Pros | ❌ Cons |
| Completely free, no watermarks | Interface can feel overwhelming for beginners |
| No recording time limits | No built-in video editor |
| Highly customizable hotkeys & workflows | No cursor effects or click animations |
| Multiple upload/sharing integrations | Audio requires manual configuration |
| Active open-source community | No eLearning or SCORM export features |
Method 4: OBS Studio — The Power User’s Free Choice
Best for: Streamers, advanced users, multi-source recording setups
OBS Studio (Open Broadcaster Software) is the gold standard of free, open-source screen recording. It offers professional-grade control — but with a steeper learning curve.
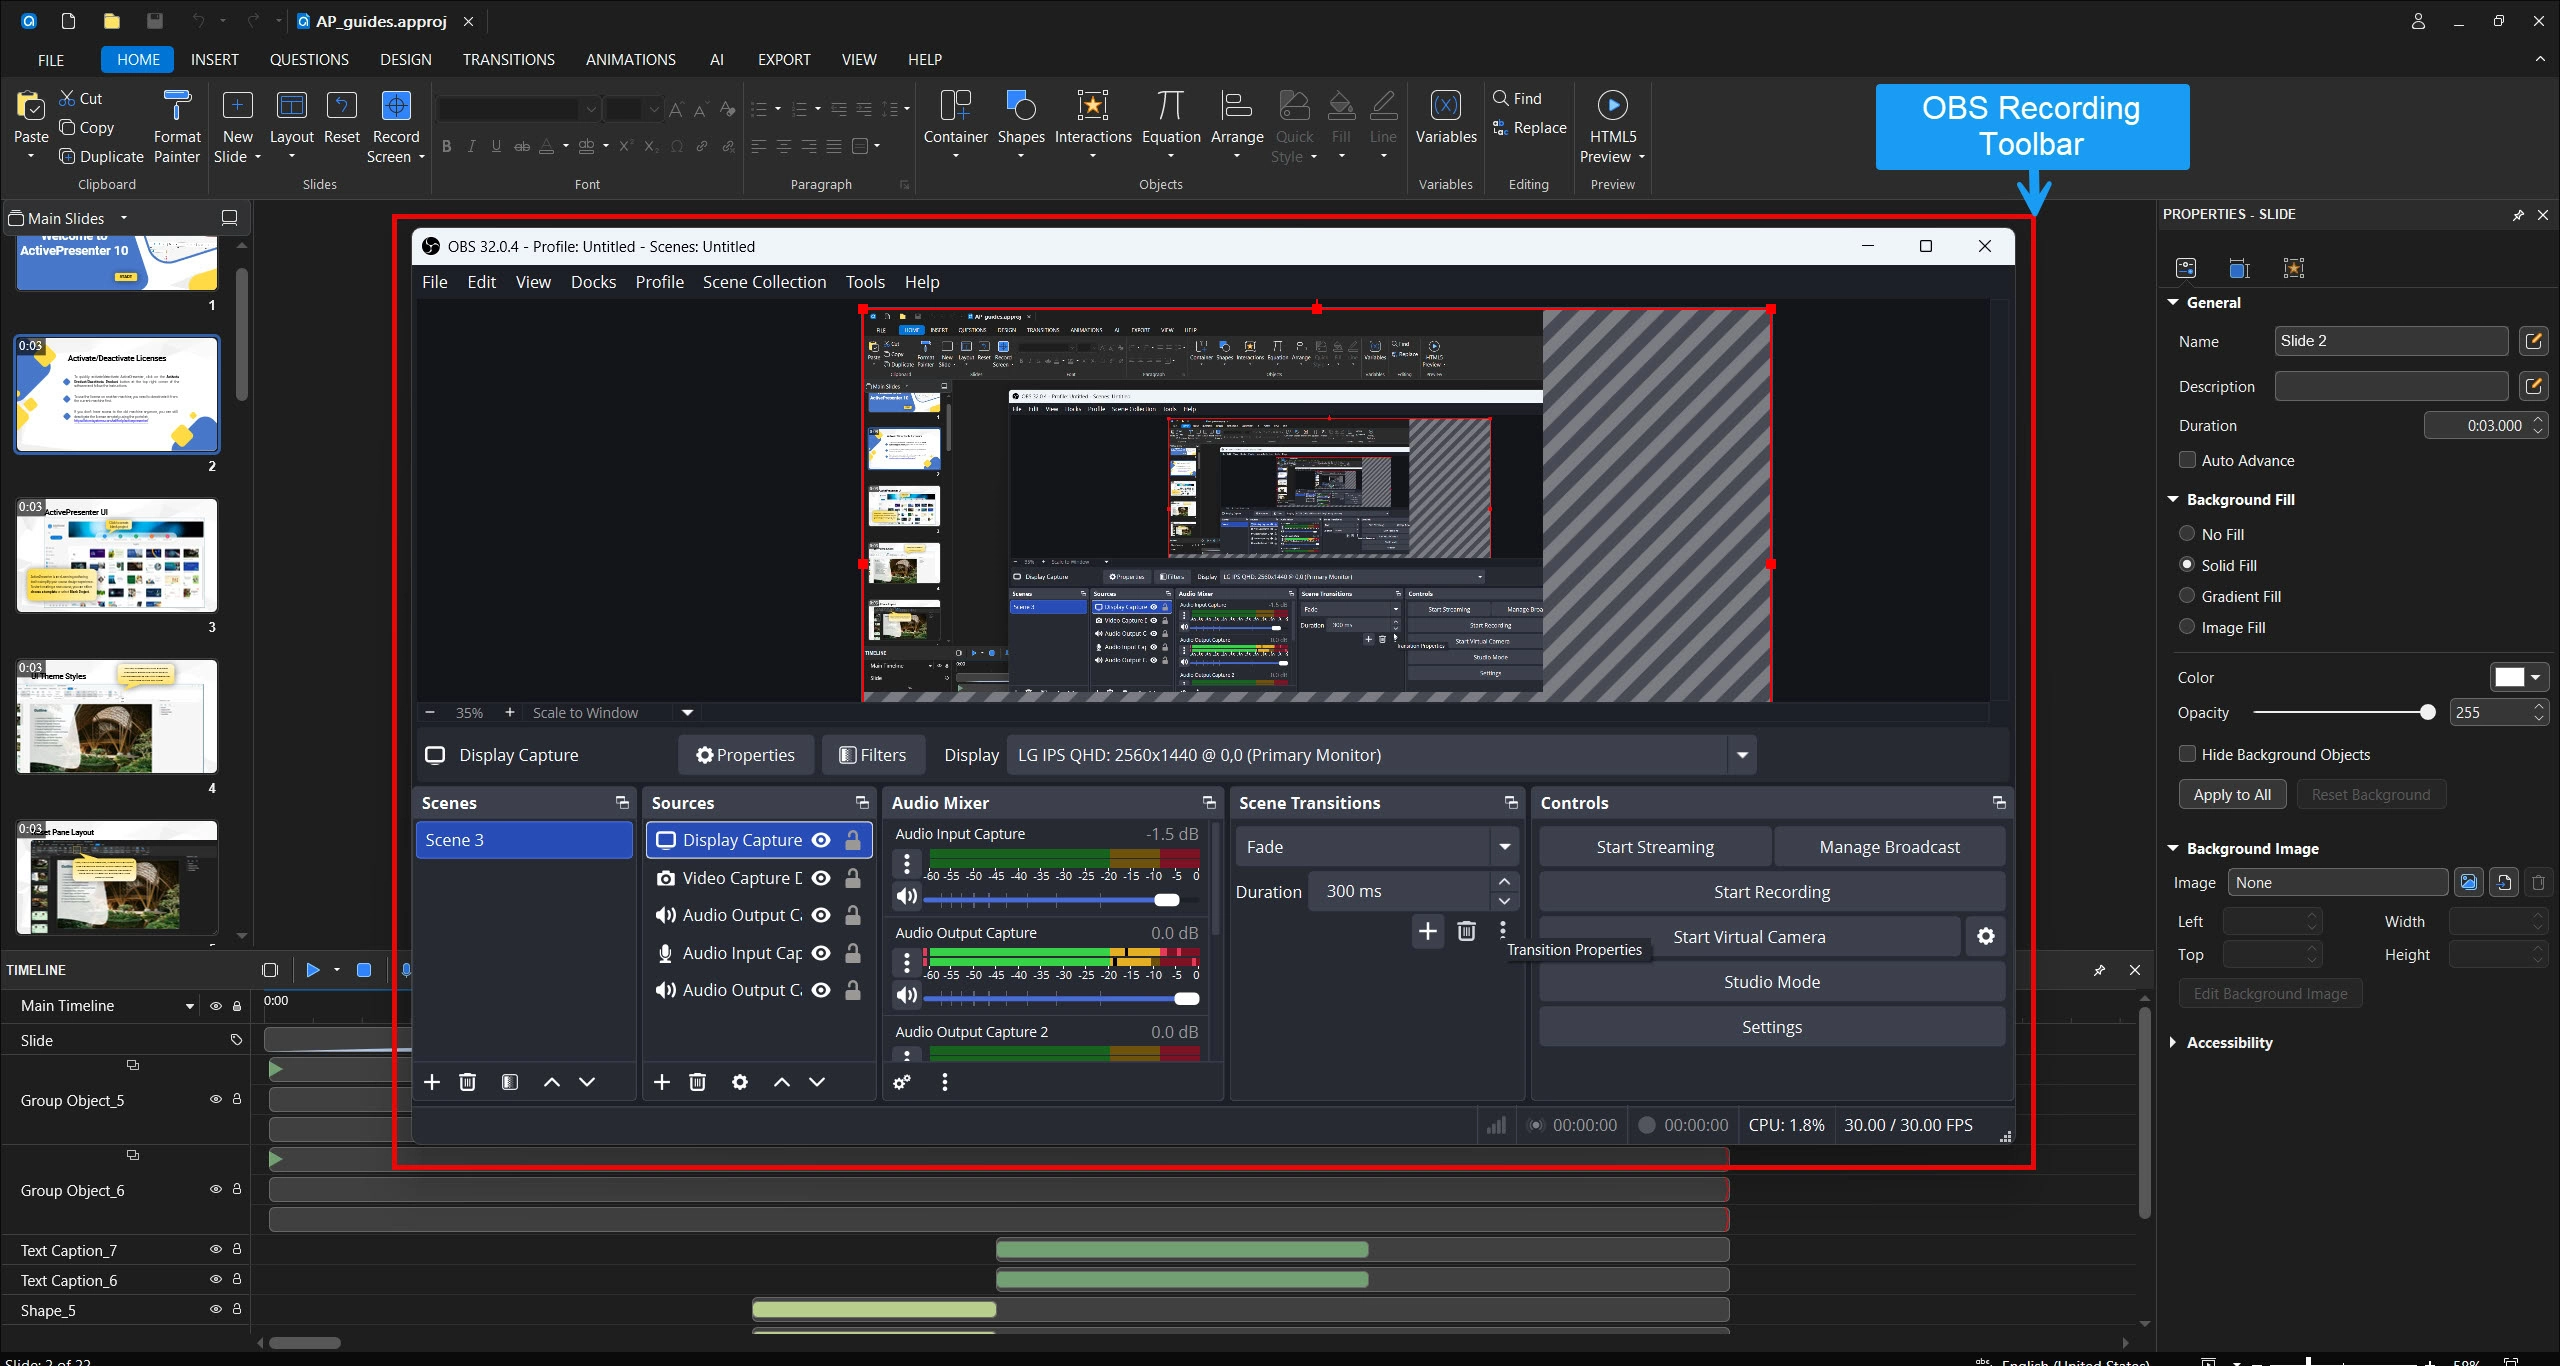
Key Features of OBS for Windows 11 Screen Recording
- Multi-source capture (screen, webcam, audio, external devices simultaneously)
- Scene switching for complex productions
- Streaming to YouTube, Twitch, and other platforms
- Custom bitrate and codec settings for fine-tuned quality control
💡 Pro Tip — OBS Bitrate Optimization:
For tutorial recordings at 1080p, set your video bitrate to 4,000–6,000 kbps with the x264 encoder for an ideal balance between file size and visual sharpness. If you’re targeting 4K, step up to 12,000–15,000 kbps.
OBS Studio: Pros & Cons
| ✅ Pros | ❌ Cons |
| Completely free and open-source | Steep learning curve for beginners |
| Extremely powerful multi-source setup | No built-in video editor |
| High-quality output with custom codecs | Overkill for simple tutorials |
| Active community & plugin support | Interface can feel overwhelming |
Method 5: ActivePresenter — The Professional’s All-in-One Tool
Best for: eLearning developers, instructional designers, corporate trainers, and anyone creating polished tutorial videos
“After testing over a dozen screen recording tools in the past 9 years, ActivePresenter is the one I keep coming back to — not because it’s the simplest, but because it’s the most complete.”
ActivePresenter by Atomi Systems is a professional-grade screen recording and eLearning authoring tool that goes far beyond simple screen capture. It’s the solution for users who need to record, edit, annotate, and publish — all within a single, cohesive workspace.
How to Record Screen on Windows 11 with ActivePresenter
Step 1: Download and install ActivePresenter (free version available at atomisystems.com).
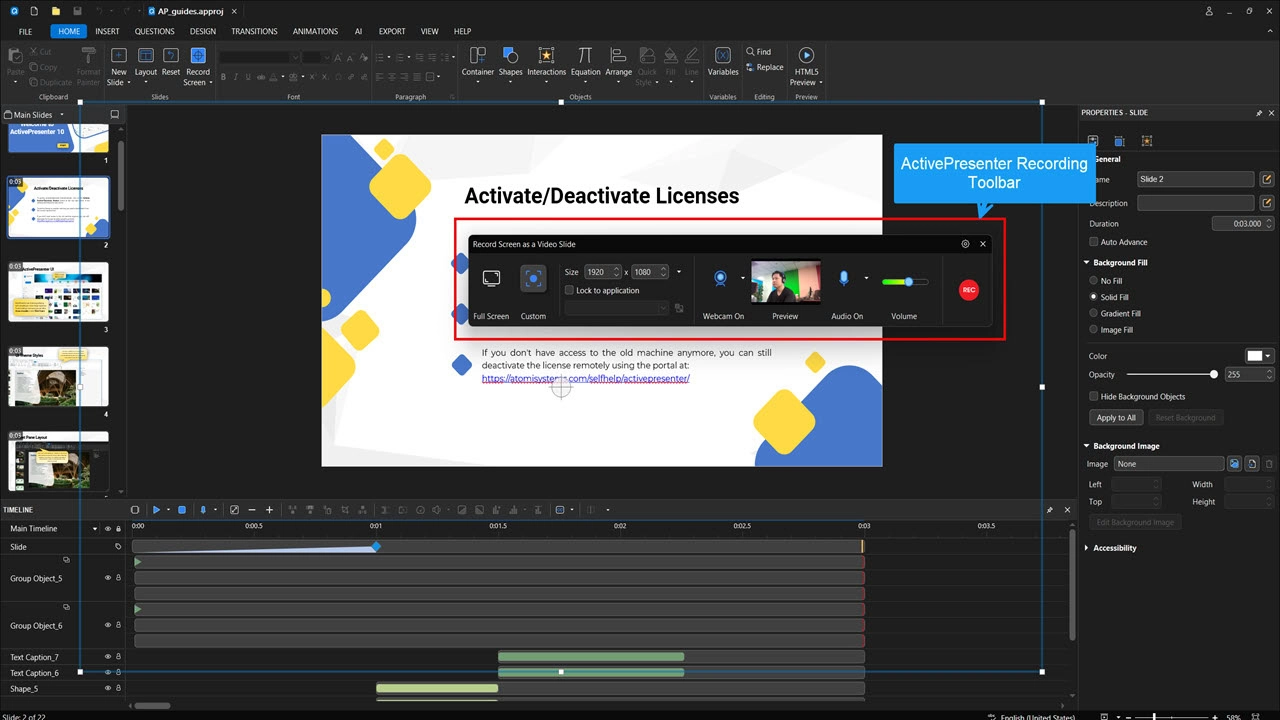
Step 2: Launch the app and click Record Screen As Video from the start screen.
Step 3: Choose your recording area — full screen, a specific region, or a single application window.
Step 4: Configure your webcam, audio sources: microphone, system audio, or both simultaneously.
Step 5: Click Record (or use the hotkey) to begin. ActivePresenter captures every mouse click, keystroke, and cursor movement with precision.
Step 6: Once stopped, your recording opens automatically in the timeline editor — ready for trimming, annotation, and enhancement.
What Makes ActivePresenter Stand Out for Windows 11 Screen Recording
🎬 High-Quality, Non-Destructive Recording
ActivePresenter captures video in lossless quality, meaning your source recording stays intact no matter how many edits you make. This is critical when you need crisp visuals for 4K monitors or detailed software demonstrations.
✏️ Built-in Professional Video Editor
Unlike Xbox Game Bar or Snipping Tool, ActivePresenter includes a full non-destructive video editing suite with:
- Timeline-based editing with clip trimming and splitting
- Zoom-and-pan effects to highlight specific UI elements
- Callout annotations, arrows, and text overlays
- Noise reduction for cleaner audio
- Cursor path editing and click effect customization
🎓 eLearning Authoring Built In
This is where ActivePresenter truly separates itself from the competition. You can transform any screen recording into a fully interactive eLearning module with:
- Quizzes and knowledge checks
- Branching scenarios with Event-Action logic
- Variable-driven interactivity
- SCORM 1.2 / SCORM 2004 / xAPI export for LMS compatibility
- HTML5 output for browser-based delivery
- Export directly to the built-in LMS
🖥️ Software Simulation Mode
ActivePresenter’s software simulation feature lets you record a workflow once, then automatically generate interactive exercises where learners must click the correct elements to proceed — without any manual programming.
3 Real-World Use Cases for ActivePresenter on Windows 11
Use Case 1: IT Department Software Rollout Training
An IT manager needs to train 500 employees on a new internal CRM system. Using ActivePresenter’s software simulation, they record the CRM workflow once, then export an interactive SCORM module. Employees practice clicking through the real interface in a safe environment — reducing support tickets by 40%.
Use Case 2: University Professor Building a Hybrid Course
A professor records their screen while demonstrating data analysis in Excel. They add quiz questions at key moments, apply annotations to highlight formulas, and export the lesson as an HTML5 package uploaded directly to their LMS — all without leaving ActivePresenter.
Use Case 3: YouTube Creator Producing Tutorial Videos
A content creator records software tutorials for their channel. They use ActivePresenter’s zoom effects to spotlight menu options, add callout bubbles to explain steps, apply noise reduction to the audio, and export a clean MP4 — saving hours compared to juggling separate recording and editing apps.
ActivePresenter: Pros & Cons
| ✅ Pros | ❌ Cons |
| All-in-one: record + edit + publish | Learning curve for advanced eLearning features |
| Lossless recording quality | Limited video effects |
| Non-destructive video editing timeline | Not designed for live streaming |
| SCORM/xAPI export for LMS | Commercial use restrictions |
| Software simulation & interactive quizzes | |
| Free version available |
Side-by-Side Comparison: All 5 Methods
| Feature | Xbox Game Bar | Snipping Tool | ShareX | OBS Studio | ActivePresenter |
| Cost | Free | Free | Free | Free | Free / Paid |
| Audio Recording | ✅ | ❌ | ✅ | ✅ | ✅ |
| Webcam Overlay | ❌ | ❌ | ❌ | ✅ | ✅ |
| Built-in Editor | ❌ | ❌ | ❌ | ❌ | ✅ |
| Annotations | ❌ | ❌ | ✅ (screenshots) | ❌ | ✅ |
| SCORM Export | ❌ | ❌ | ❌ | ❌ | ✅ |
| Ease of Use | ⭐⭐⭐⭐⭐ | ⭐⭐⭐⭐⭐ | ⭐⭐⭐ | ⭐⭐⭐ | ⭐⭐⭐⭐ |
| Best For | Quick capture | Region capture | Free power users | Advanced streaming | Tutorials & eLearning |
Which Windows 11 Screen Recorder Should You Choose?
With five solid options on the table, the right choice comes down to your specific needs. Here’s a quick decision guide:
- Just need a quick clip with no setup? → Go with Xbox Game Bar (Windows + Alt + R and you’re recording in seconds).
- Need to capture a specific region without audio? → Snipping Tool gets the job done with zero friction.
- Want a free tool with no watermarks, no time limits, and powerful workflow automation? → ShareX is an excellent choice — just be prepared to spend a few minutes configuring audio and hotkeys before your first recording.
- Running a multi-camera streaming setup or need maximum technical control for free? → OBS Studio is unmatched — once you climb the learning curve.
- Creating training materials, eLearning courses, or polished tutorial videos? → ActivePresenter is the clear winner. Nothing else on this list combines recording, editing, interactivity, and LMS-ready publishing in a single free-to-start package.
Frequently Asked Questions
Does Windows 11 have a built-in screen recorder?
Yes — Windows 11 includes two built-in screen recording options: Xbox Game Bar (Windows + G) and the updated Snipping Tool. Both are free and require no installation. However, they have significant limitations: Xbox Game Bar cannot record the desktop or File Explorer, and the Snipping Tool does not capture audio. For more control without spending a cent, ShareX is a powerful free alternative. For anything beyond basic capture, a dedicated tool like ActivePresenter is recommended.
Can I record my screen on Windows 11 for free?
Absolutely. Xbox Game Bar, Snipping Tool, OBS Studio, and the free version of ActivePresenter are all available at no cost. ActivePresenter’s free tier is particularly generous — it includes unlimited recording time, full access to the video editor, and no watermarks on exported videos.
How do I record screen with audio on Windows 11?
Both Xbox Game Bar and ActivePresenter support simultaneous system audio and microphone recording. In Xbox Game Bar, you can toggle the microphone on or off directly in the Capture widget before hitting record. In ActivePresenter, you select your audio sources in the recording setup dialog — giving you granular control over which inputs to capture and at what levels.
What is the best screen recorder for Windows 11 without a watermark?
Several free tools record without watermarks: Xbox Game Bar, ShareX, OBS Studio, and ActivePresenter (free version) all produce clean, watermark-free output. ShareX is notable because it imposes no recording time limits either. ActivePresenter is particularly attractive for professional use — you get advanced editing and publishing capabilities without paying upfront, and without a watermark degrading your final video.
Can I record screen and webcam at the same time on Windows 11?
Yes — but not with every tool. OBS Studio and ActivePresenter both support simultaneous screen and webcam (picture-in-picture) recording. This is ideal for tutorial creators who want to add a personal, face-cam element to their videos. Xbox Game Bar, Snipping Tool, and PowerPoint do not support webcam overlay during screen recording.
Is ActivePresenter free to use on Windows 11?
Yes, ActivePresenter offers a free version that includes screen recording, basic video editing, and HTML5 export — with no time limits or watermarks. Advanced features like SCORM export, software simulation, and full eLearning authoring capabilities require a paid license. You can download the free version directly from atomisystems.com.
Final Verdict: Record Screen on Windows 11 the Right Way
In 2025, there’s no excuse for settling for clunky recordings or spending hours in a fragmented workflow. Windows 11 gives you capable built-in tools for quick tasks — and a thriving ecosystem of third-party software for when you need more.
Here’s the bottom line:
For casual users: Xbox Game Bar or Snipping Tool will handle 80% of your needs with zero effort.
For power users and professionals: ActivePresenter delivers a level of control, quality, and publishing flexibility that no free built-in tool can match.
Whatever your goal — a quick screen grab, a YouTube tutorial, or a full-scale SCORM eLearning module — one of these five methods is the right fit. Start with what you have, upgrade when your needs demand it, and never let the wrong tool slow down your workflow.
Found this guide helpful? Share it with a colleague who’s still struggling with screen recording on Windows 11. And if you’re ready to take your screen recordings to the next level, download ActivePresenter for free and see what a purpose-built tool feels like.
