Need to capture a Zoom meeting, create a YouTube tutorial, or record gameplay on Windows 10? While Windows 11 is widespread, Windows 10 remains the go-to OS for millions due to its stability and performance.
The good news? You don’t always need expensive software. In fact, Windows 10 has powerful “hidden” tools you might be overlooking. In this guide, we’ve benchmarked the 8 best screen recorders for 2026—ranging from built-in freebies to professional-grade suites. Whether you need a no-lag gaming recorder or a high-end e-learning tool, we’ve found the perfect match for your workflow.
| Top 4 Best Free Screen Recorders for Windows 10 | Best PAID screen recorders |
| 1. ActivePresenter | 5. Camtasia |
| 2. Windows 10’s built-in Game bar | 6. Bandicam |
| 3. OBS Studio | 7. Screencast-O-Matic |
| 4. Flashback Express | 8. Icecream Screen Recorder |
Top 4 Best Free Screen Recorders for Windows 10
1. ActivePresenter
ActivePresenter by Atomi Systems is an all-in-one screen recorder and video editor. It is most loved by YouTubers, video producers, educators, and trainers who look for video demos, how-to videos, and step-by-step tutorials. ActivePresenter has virtually all the features and effects one may need to record screen and edit videos.
The free version of ActivePresenter is free of charge with no watermark or time limit when using it for personal purposes. You can test all features of ActivePresenter without any functionality or time restrictions. After the capture phase, you’re allowed to trim, cut, split your recording, change the speed and volume, add closed captions, annotations, animations, and more. When you upgrade to the paid versions, more advanced audio and video editing features are available to create impressive videos and software simulations.

Pros
- Record full screen, window, region, webcam, microphone, computer sound.
- Feature a video editor to edit captured videos as well as imported videos.
- Basic video editing features: trim, cut, split, change speed/volume, add closed captions, zoom-n-pan, annotations, multimedia, transitions, animations, and more.
- Advanced video editing features: blur effect, green-screen effect, audio fade in/out, noise reduction, audio normalization.
- Record software simulations with automatic annotations.
- No time limit, ad-free.
Cons
- Not allowed to schedule recordings.
Download ActivePresenter and try all the features for free with no sign in required.

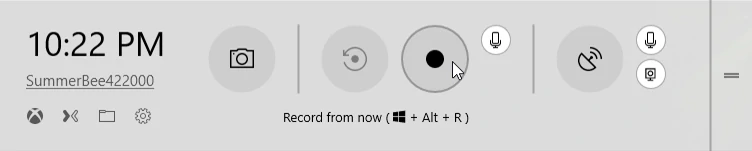
2. Windows 10’s built-in Xbox Game bar
You might be surprised that Windows 10 has a pre-installed Game bar for anyone who wants to capture their game clips and screenshots. Of course, this Game bar can be used to record apps only – it cannot record full screen or a specific region. This makes sense as it is designed for gaming capture. Although the Game bar is available on all Windows 10 PCs, to record game clips and screen, your computer’s video cards must meet the hardware requirements.
Recording your screen with the Game bar is easy by following these steps:
- Press WINDOWS+G to open the Game bar. If required, select the “Yes, this is a game.” check box.
- Press the Start/Stop Recording button to start and stop a recording. Use the Turn Microphone On/Off button to toggle microphone if you wish.
- After recording, trim your video or rename it in the Xbox app. Your video will be saved in the Captures folder, which by default is in your Videos folder.
Pros
- Convenient to use without installing any software.
- Trim the beginning and end of videos after recording.
- No watermark, no time limit, ad free.
Cons
- Not allowed to record full screen, webcam, or specify a resolution to capture. The Game bar will generate a screencast at the resolution of the size of the target app.
- No “pause” function for recording.
- Limited video editing features.
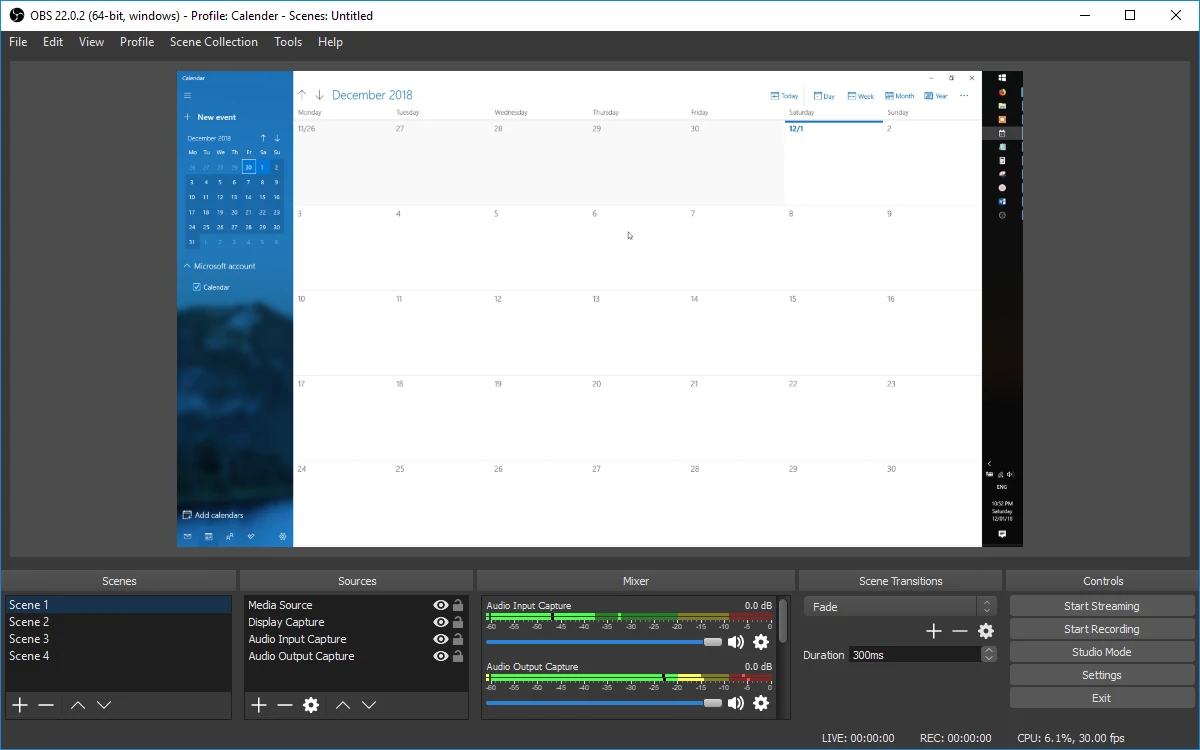
3. OBS Studio
OBS Studio is a free application for video recording and live streaming without watermark or time limit. It is much preferred by hardcore gamers for broadcasting their live gameplay footage. Using OBS Studio, you can capture not only the entire display or a window but also from webcam and microphone. When it comes to streaming, the program lets you select which desktop applications and audio sources to be shared, as well as create layered videos for webcam.
While OBS Studio is a versatile app for capturing screen, it integrates no video editor. You need to employ another tool if you want to edit your recorded video. As a side note, as OBS Studio is an open-source program, you should be careful not to download the program from any website but the official site.
Pros
- Record full screen, window, region, webcam, microphone, computer sound.
- Stream to Twitch, YouTube, Mixer, DailyMotion, and more.
- No watermark, no time limit, ad free.
Cons
- No “pause” function for recording.
- No built-in video editor.
- Not suitable for beginners
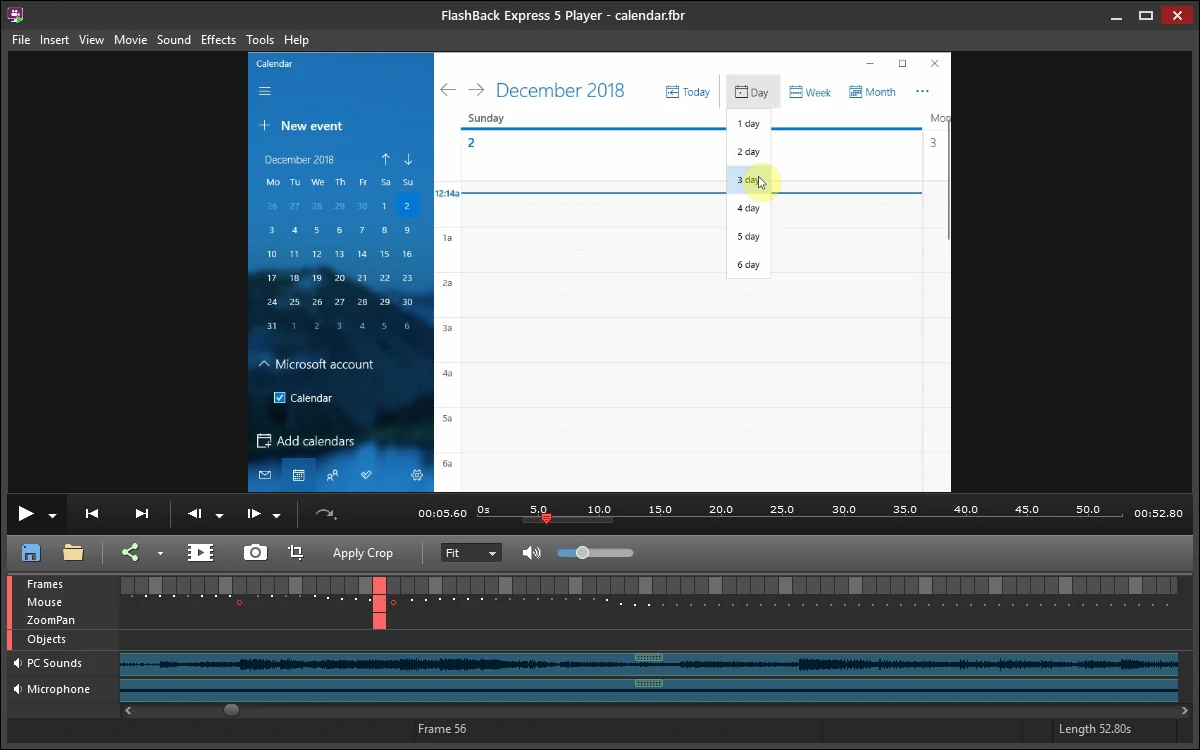
4. Flashback Express
Flashback Express is a at no cost app that can record screen, webcam, and sounds. It neither sets time limit on recording nor stamps watermark on the output videos. If you are running this software on a multi-monitor system, you can either record screens across multiple monitors or limit capturing to a single monitor. You can also make use of scheduled recordings to start and stop recording at scheduled times or when a specified application is launched.
Flashback Express is a free version of a paid application, Flashback Pro. While the two versions share the same recording features, the free version doesn’t include any video editing features, annotations, or effects. Regarding sharing, users can save videos as MP4, AVI, or WMV and directly upload videos to YouTube. Only paid users are entitled to save videos as Flash, QuickTime, GIF, or standalone EXE and set password protection for videos.
Pros
- Record full screen, window, region, webcam, microphone, computer sound.
- Publish videos directly to YouTube.
- No watermark, no time limit, ad free.
Cons
- Not allowed to record webcam alone.
- Limited video output formats: MP4, AVI, WMV.
- No built-in video editor.
4 Paid Tools to Record Screen in Windows 10 If you have budget
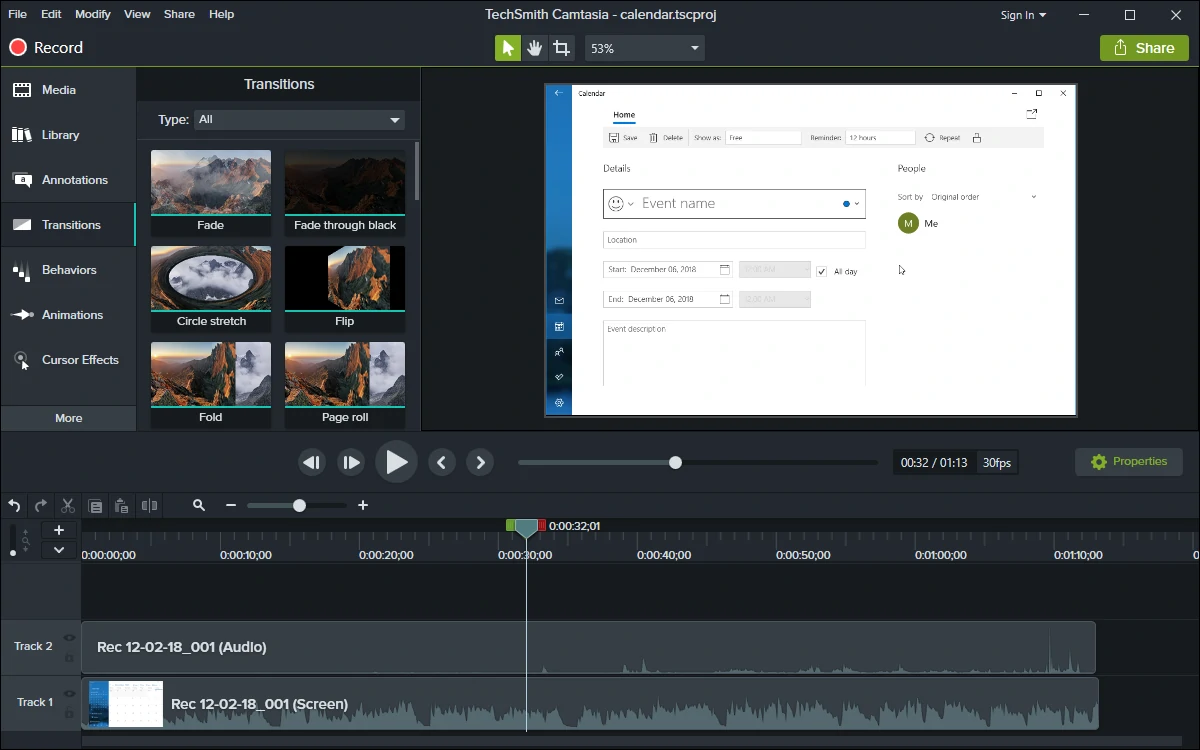
5. Camtasia
Developed by TechSmith, Camtasia is one of the highest-priced screen capture applications at present. It has over 14 million users worldwide and might never be absent in top screen recorder rankings.
Camtasia 2025 comes with a collection of brand-new video assets such as customizable intros, outros, and lower thirds. It also includes a number of themes to maintain a consistent look and feel across a series of videos. A 30-day free trial is available with watermark added.
Pros
- Record full screen, window, region, webcam, microphone, computer sound.
- Feature a video editor to edit captured videos as well as imported videos.
Cons
- Relatively expensive in comparison with other screencasting software.
- 64-bit only.
6. Bandicam
Bandicam by Bandicam Company is widely popular as one of the most powerful game recording app for gamers in Windows 10. It can record various 2D/3D games with 4K UHD resolution at up to 144 FPS. Bandicam can also record full screen, part of screen, and external video devices such as webcam and game console.
While the recording features might please the pickiest users, the software has no single video editing feature. Even when combining with Bandicut, a video cutter from the same company, you can only trim, split, and join recordings. The free version has a recording limit of 10 minutes per video with watermark added.
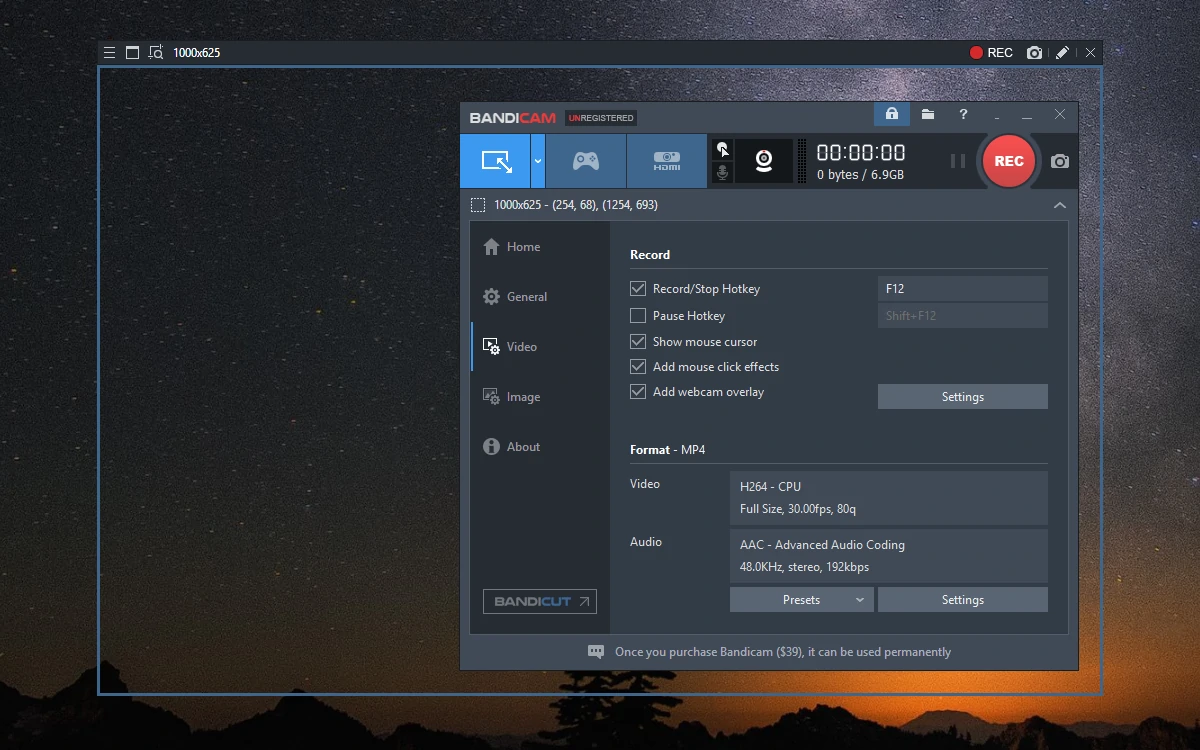
Pros
- Record full screen, region, webcam, microphone, computer sound.
- Record 4K UHD resolution at up to 144 FPS.
- Draw, add text, and take screenshots while recording.
Cons
- The editing process can be recorded while capturing the screen, making the video unprofessional.
- Limited video output formats: MP4, AVI.
- No built-in video editor.
7. Screencast-O-Matic
Screencast-O-Matic is a web-based screencasting software presented by screencast-o-matic.com. This tool can be launched directly from a browser or used as a desktop app without an internet connection when you install the full version. Screencast-O-Matic offers a good number of features ranging from screen recording, and video editing, to video hosting and sharing.
The free version is limited to make 15-minute recordings with watermark added. You are allowed to trim your recording, add closed captions, and publish videos to YouTube or share to social media platforms. When you upgrade to the paid version, you’ll have no time limit on recording and no watermark on the output. The paid version also comes with full video editing features plus the ability to record computer sound.
Pros
- Record full screen, window, region, webcam, microphone, computer sound.
- Publish videos directly to YouTube, Vimeo, and other platforms.
- Password protects videos and make them searchable or unlisted.
Cons
- The editing process can be recorded while capturing the screen, making the video unprofessional.
- Most features are only available in the paid version.
- Not allowed to test paid features before paying.
8. Icecream Screen Recorder
Icecream Screen Recorder by Icecream Apps is a good choice if you are looking for a screen recorder with very basic video editing features in Windows 10. In fact, the paid version of this software includes only the ability to trim the beginning and end of recordings. This is highly limited but can be enough when you want simple screencasts.
Icecream Screen Recorder comes with two versions: free and paid. The free version limits you to 5 minutes of recording time with only one output video format (WEBM) and video codec (VP8). Meanwhile, the paid version includes AVI, MP4, and MOV as well as H.264 and MPEG-4 codecs. Apart from no watermark added like the free version, the paid version supports scheduled recordings, custom watermarks, and trimming features.
Pros
- Record full screen, region, webcam, microphone, computer sound.
- Hide cursor or desktop icons while recording..
- Schedule recordings to be recorded at a certain time.
- Trim the beginning and end of videos after recording.
Cons
- Not allowed to record webcam alone.
- The editing process can be recorded while capturing the screen, making the video unprofessional.
- Limited video editing features.
- Not allowed to test paid features before paying.
Wrap It Up
Professional-looking videos are the icing on the cake for tutorials, lessons, reviews, and blog posts. After exploring the best tools for Windows 10, ActivePresenter stands out as an all-in-one solution for anyone serious about creating professional content. Here is why it is the top recommendation:
- All-in-One Functionality: It combines a powerful screen recorder with a comprehensive video editor, providing virtually every feature needed to record and polish videos in one place.
- Generous Free Version: Unlike many competitors, the free version of ActivePresenter has no time limits and no watermarks when used for personal purposes.
- No Restrictions for Testing: You can test every single feature of the software without any functionality or time constraints, allowing you to explore its full potential before deciding to upgrade.
- Advanced Editing Suite: Beyond simple recording, you have access to professional tools like green-screen effects, noise reduction, audio normalization, and automatic annotations for software simulations.
- Optimized for Educators and Creators: It is specifically designed to meet the needs of YouTubers, educators, and trainers who require high-quality video demos and step-by-step tutorials.
- Long-term Value: It offers a lifetime license at an affordable cost, backed by great technical support and a commitment to quality.
How to Record Your Screen with ActivePresenter
For more clarity, please check out the tutorial video on our official YouTube channel.
Capturing your first high-quality screencast with ActivePresenter is straightforward and can be done in just a few simple steps.
1. Choose Your Recording Mode
After launching the software, you can choose to record the full screen, a specific application window, or a custom region of your display.
2. Configure Audio and Webcam
Before hitting the record button, you can customize your inputs to fit your needs:
- Webcam: Enable this to show your face in a picture-in-picture format.
- Microphone: Capture your voiceover or narration.
- Computer Sound: Capture the internal audio coming from your Windows 10 system.
3. Record Software Simulations
If you are creating a “how-to” guide, use the software simulation mode. ActivePresenter will automatically generate annotations based on where you click and what you type, significantly reducing your manual editing time.
4. Edit and Enhance Your Video
Once you stop the recording, the video opens immediately in the built-in editor. From here, you can:
- Trim and Cut: Remove mistakes or unwanted sections.
- Add Annotations: Insert shapes, text, closed captions, and animations to highlight key points.
- Apply Effects: Use zoom-and-pan, transitions, or advanced audio effects to make the final result look professional.
5. Export and Share
Finally, export your project in popular video formats (like MP4) or as an interactive simulation. Your high-quality video is ready to be uploaded to YouTube or shared with your students.
Give ActivePresenter a try now. Your first recording is just a few clicks away!