Knowing how to add and customize shapes on a slide is one of the building blocks of learning ActivePresenter 10. Once you become skillful in shape, you can do so much more. Explore the basic manipulation with shapes through today’s tutorial.
In addition to shapes, ActivePresenter also provides many other objects to enrich your slides and make your lessons more engaging. These objects help present information clearly and support interactive learning experiences. To explore more tools available in the software, check out our guide on create eLearning content with ActivePresenter.
This article covers:
Before going ahead, let’s download ActivePresenter by clicking the button below:

Overview of Shapes
As you can see, ActivePresenter offers users a vast number of shapes. In fact, even a text caption you add to a slide is a shape with a No Fill and No Line property fundamentally.
All shapes are placed in the shape gallery. This gallery consists of five sections representing seven groups of ready-made shapes, namely Basic Shapes, Callouts, Lines and Arrows, Block Arrows, Stars and Banners, Flowchart and Equation Shapes. Each group has many shapes with different forms. And here is the ActivePresenter 10 shape gallery.
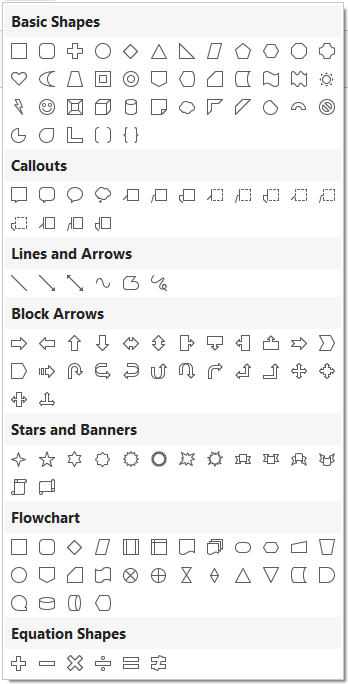
- Basic Shapes: This section contains common shapes such as the oval, triangle, cube, heart, etc.
- Callouts: This part offers speech and thought bubbles.
- Lines and Arrows: These are straight and curved lines, with or without arrowheads. Additionally, there are options for creating freeform paths and scribbles.
- Block Arrows: This section offers you a comprehensive assortment of arrow shapes.
- Stars and Banners: This part includes many different types of stars.
- Flowchart: Shapes used to illustrate processes and workflows.
- Equation Shapes: Symbols used for mathematical equations.
In general, the shapes’ initial color, line color, text color, and font are determined by the theme used for the current slide. However, you can customize these properties using available commands. We’ll discuss these techniques in the latter part of this tutorial.
Besides, the app lets you order, align, and group multiple shapes as you do with a normal object.
Add a Shape
Firstly, let’s say you want to insert an octagon shape. Here’s how:
Step 1: Access the Insert tab > Shapes ![]() . Alternatively, click on Shapes in the Home tab.
. Alternatively, click on Shapes in the Home tab.
Step 2: Select a shape you want and click anywhere on the Canvas.
Tip: You can insert a shape into multiple slides at the same time. See Inserting and Deleting Multiple Objects to learn the procedure.
Customize Shape Properties
Change Shape Appearances
After inserting a shape, it’s easy to change its appearance in ActivePresenter 10. Just follow the performances below:
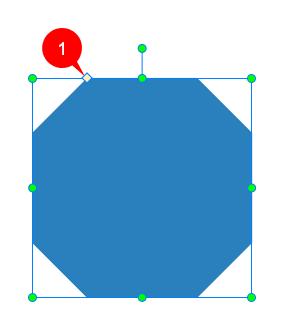
- Change the dimensions of the shape by dragging the yellow diamond (1).
- Move the shape to a different spot on the Canvas by dragging and dropping it. Alternatively, access its Properties pane > Size & Properties tab > Transform section > adjust the Left and Top combo boxes’ value.
- Resize the shape by simply dragging its resizing handles. Or navigate to its Properties pane > Size & Properties tab > Transform section > adjust the Width and Height combo boxes’ value.
- Rotate the shape by right-clicking it > Rotate > Rotate Right/Left 90*. Or, drag the rotation handle.
- Flip the shape by right-clicking it > Rotate > Flip Vertical/Horizontal.
Add Text to Shape
ActivePresenter 10 also allows you to add text to the shape. Do any of the following:
- Click inside the shape to enter text.
- Click the shape and press F2 on your keyboard.
- Right-click the shape and select Edit Text.
Customize Shape Styles
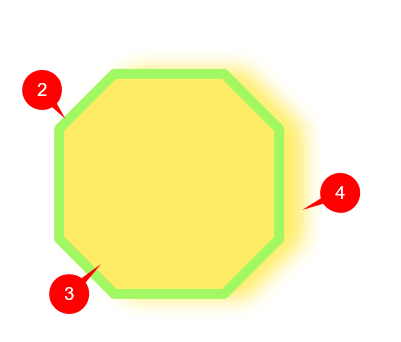
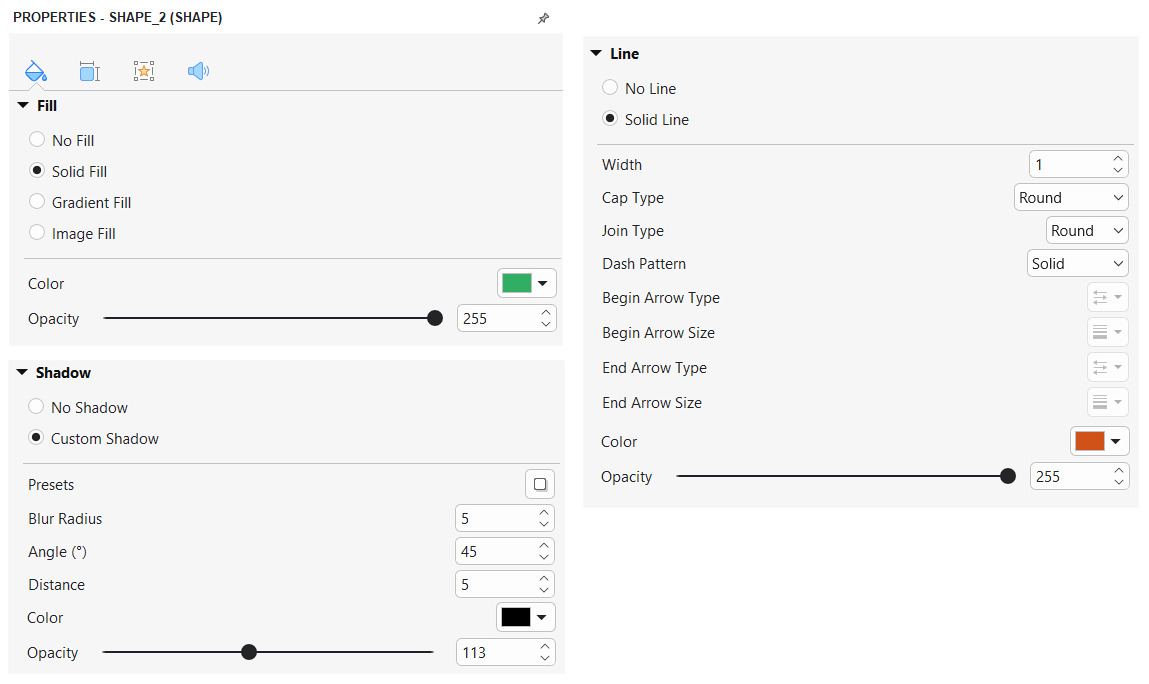
Generally, each shape has three basic properties: Line (2), Fill (3), and Shadow (4). So, to customize the look of shapes, just change any of these properties.
ActivePresenter 10 offers you four ways to customize shape styles:
- Customize the theme used for the current slide. Refer to How to Work with Themes for further information.
- Use the Format Painter tool
- Apply ready-made styles.
- Change each property of the shape manually.
Now, let’s learn how to use the third and fourth techniques in detail.
Use Ready-Made Styles
To style shapes using ready-made styles, take the following steps:
Step 1: Select one or more shapes.
Step 2: Do any of the following:
- Select any style in the Quick Styles box that displays available in the Format tab. To have more styles, click (5). Or click (6) to show the Theme Styles gallery.

- Select Quick Styles in the Home tab. This opens the Theme Styles gallery. Next, click any style you want.

Note:
- Styles in the Theme Styles gallery differ according to the theme used for the current slide.
- The Format tab is a contextual tab that only appears when you select a shape or variants of shape objects.
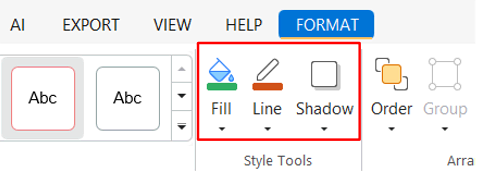
Use Style Tools or Properties Pane’s Tools
Now, you can change each shape style manually using any of the following ways:
- Use commands in the Home tab or Format tab.
- Work with the Fill, Line, and Shadow sections in the Style & Effects tab of the Properties pane.
In both these techniques, commands are very common. So, styling a shape comes naturally to you, for sure.
Tip: When you’re done with customizing a shape, right-click it and select Set as Default Shape. That way, the current formatting will be set as default and used each time you insert a new shape in the current project. On the other hand, you can use Object Settings to save all the object properties and reuse them later. In addition, keeping the object in Object Template is a great way as well.
Change and Remove Shapes
Change a Shape to Another
ActivePresenter 10 allows you to change a shape while remaining its formatting. To get it done, perform the guides below:
Step 1: Select the shape.
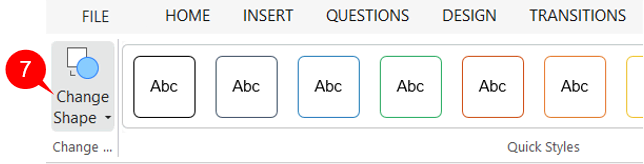
Step 2: Click Change Shape (7) in the Format tab > select any shape you want. Then, the new shape replaces the old one.
Remove Shapes
As you may know, shapes are annotation objects. Hence, to remove shapes, let’s apply the same technique as when you remove normal objects. That is, you just need to select the shapes and do any of the following:
- Press DELETE on the keyboard.
- Right-click it > Delete.
For more information, see Copy, Cut, Duplicate and Delete Objects.
Draw Freeform Shapes
To explore line drawing tools, open the Home/Insert tab > Shape > Line and Arrows section.
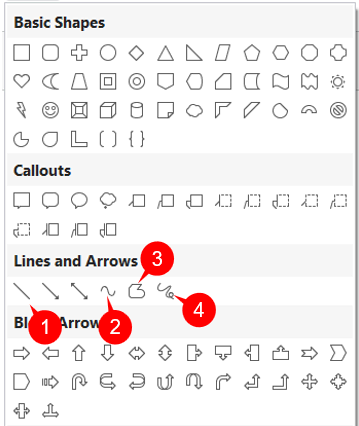
There are 4 types of line drawing: Line (1), Curve (2), Freeform Shape (3), and Freeform Scribble (4). They let you draw straight lines, curves or freestyle.
- Line (1): Draw simple straight, point-to-point lines.
- Curve (2): Draw curved lines or shapes.
- Freeform Shape (3): Draw lines/shapes that include both straight and freeform segments (dual capability).
- Freeform Scribble (4): Draw lines/shapes as if you were using a pencil on paper.
Draw Lines
To draw a line, follow these steps:
Step 1: Click anywhere on the Canvas to set the start point. Keep holding the left-click and move to another position where you want to set it as the end point.
Note: While moving the mouse, hold the SHIFT key on your keyboard to make a truly horizontal, vertical, or diagonal straight line. You can draw a 0, 30, 45, 60, 90, 120, 135, 150, and 180-degree line

Step 2: Release the mouse button to finish.
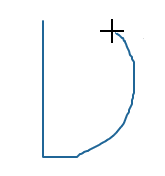
Draw Curves
To draw a curve, do the following:
Step 1: Click anywhere on the Canvas to set the start point. Move the mouse to a different position, then click to add a new turn. The line is curved at the position of that click. If you move the mouse, the curve will change correspondingly. Each click adds a new turn to the curve.
Step 2: A curve can be either open or closed. Do one of the following to finish your drawing:
- Double-click at any position to create an open curve.
- Move the mouse toward the start point until it forms a filled shape, then click to create a closed curve.
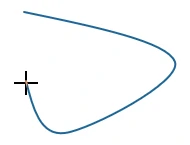
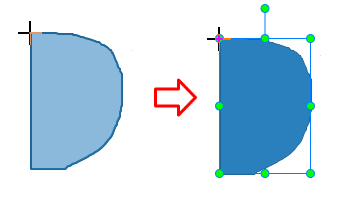
Draw Freeform Shapes
This drawing tool has a dual capability that allows you to draw both straight and freeform lines. Perform the following steps:
Step 1: Click anywhere on the Canvas to set the start point. Now you can:
- Release the mouse button and move to another position, then click to draw a straight line.
- Hold down the mouse button and draw freeform lines like using a pencil.
Step 2: A freeform shape can be either open or closed. Do one of the following to finish your drawing:
- Double-click at any position to create an open freeform.
- Move the mouse cursor to the start point and click to create a closed freeform shape.
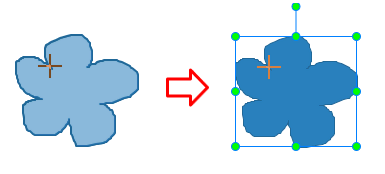
Draw Freeform Scribbles
Drawing using the Freeform Scribble tool shares some similarities with those of the Freeform Shape. This tool lets you draw freestyle as if you were drawing on paper with a pencil. To do that, you have to keep holding the mouse button while drawing. When you want to finish, just release the mouse button.

If the end point meets the start point, you create a closed scribble. Otherwise, you create an open one.
Edit Freeform Drawing
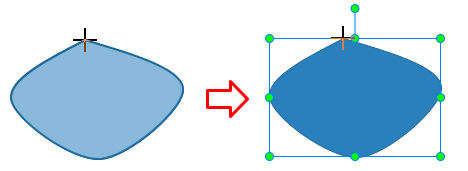
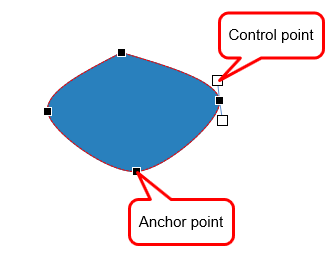
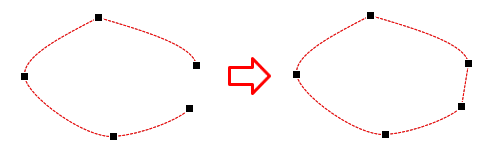
After finishing drawing, sometimes you may want to edit it. Right-click the drawing > Edit Points to open the edit mode. Then, you will see the shape is outlined by a red dashed line containing multiple black squares. They are anchor points that indicate the start and end of each line segment. When you select an anchor point, two blue handles appear with control points (white squares) at their ends.
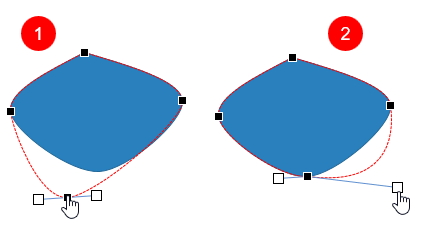
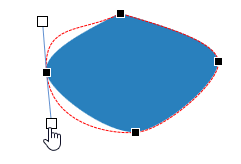
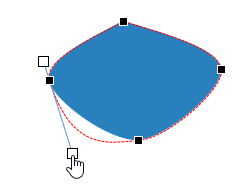
Click and drag an anchor point (1) to sharpen or smooth a corner or curve. Alternatively, drag a control point (2) to change the degree of the curve or line. A red dashed line appears indicating changes.
Once you finish editing, click any elsewhere outside to exit the edit mode. Alternatively, right-click a shape no matter its outline, anchor points, or control points, and select Exit Edit Point.
Add and Remove Anchor Points
Right-click a freeform shape > Edit Points to enter the edit mode:
- To add an anchor point, click anywhere on the outline of the shape.
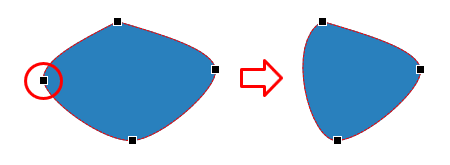
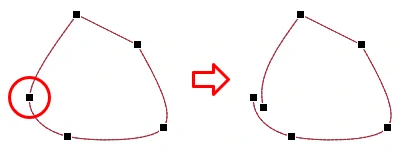
- To delete an anchor point, hold down CTRL and click it, or right-click it > Delete Point. The selected anchor point will disappear, and the shape will be changed accordingly.
Open and Close Paths
In the edit mode of a closed shape, right-click an anchor point > Open Path to open the shape right at the selected point.
Otherwise, select Close Path to close an open shape. The app will add a new path to connect the start and end points together.
Change the Point Types
To change the type of an anchor point, right-click it and select an option:
- Smooth Point: The two handles point in exactly the opposite direction (180 degrees) from each other. A similar distance separates them from the anchor.
- Straight Point: The two handles point in exactly the opposite direction (180 degrees) from each other.
- Corner Point: The two handles go off in different directions. This is the default mode.

Make Straight Segments
ActivePresenter 10 allows you to straighten a curve segment easily. In the edit mode, right-click the curve segment > Straight Segment.
That’s all about drawing and editing freeform shapes in ActivePresenter 10. Besides, you can apply these techniques to draw and edit motion paths for objects. So, you’ve known all the simple steps to add and customize shapes in ActivePresenter 10. Contact us if you need any help.
Related articles: