Closed caption or CC is the text version of the spoken part of videos, or movies. It makes videos/movies more accessible for people who are hard of hearing. So, in this post, you will learn how to add CC to projects in ActivePresenter eLearning tool.
Table of content:
- Add and Import closed captions
- Add more languages to closed captions
- Format closed captions
- Convert closed captions to speech
- Toggle the closed caption
- Export closed captions to file
- Delete closed captions
Add CC to Projects
To add closed captions to your project, follow the steps below:
- In the timeline, place the Playhead at the timestamp that you want the closed caption to appear.
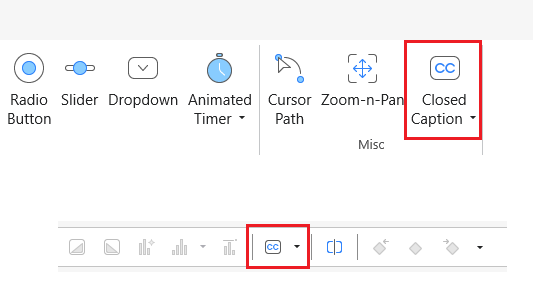
- Open the Insert tab > Closed Caption
 or click the Insert Caption button in the Timeline pane.
Then, an CC node will appear on the Timeline pane at the position of the Playhead. On the Canvas, an CC editor also appears for you to type the caption.
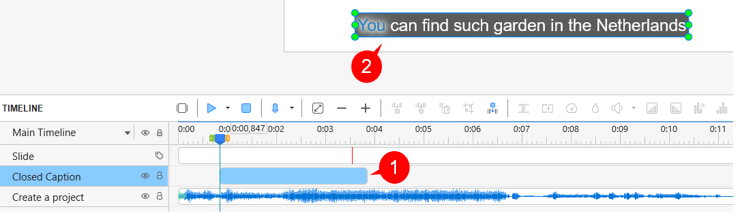
- Type the caption in the editor (2). Repeat these steps to add more closed caption nodes. These nodes are put in the same line on the Timeline and considered as one closed caption object.
- Drag the CC node or its start/end point to change its timing and duration. You should display each CC for adequate time so that your audience can read it comfortably.
- To remove one or more CC nodes, select them and press DELETE. To remove all closed captions, click the Closed Caption object to select all CC nodes and press DELETE
Besides, take note of the following:
- If you don’t specify the timestamp, ActivePresenter 10 will append the new CC node to the end of the previously existing CC node.
- The CC nodes are arranged in time order. There is no overlapping in time between CC nodes, meaning that only one CC node can be displayed at a time.
- You cannot switch the order of the CC nodes.
On the other hand, if you have a caption file created in ActivePresenter or another software, you can import it into a single slide or multiple slides. ActivePresenter supports *.srt and *.vtt formats for closed caption files. To import a Closed Caption file into ActivePresenter, follow these steps:
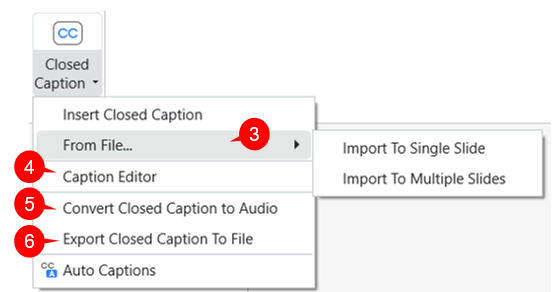
- Open the Insert tab, click the arrow on the Closed Caption button > From File (3) > Import To Single Slide or Import To Multiple Slides > select the file that you want to import.
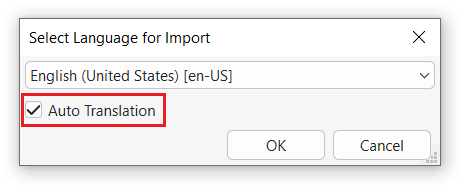
2. A dialog will appear, allowing you to select the language for the imported closed captions and enable Auto Translation.
If a closed caption already exists in the current language, importing another caption file in the same language will overwrite the existing one.
However, if you import a caption file in a different language and select that language for the caption, one of the following ases occurs:
- If Auto Translation is not selected, a new caption language will be created without translating the captions.
- If Auto Translation is selected, a new caption language will be created and the captions will be translated automatically.
You can switch between these caption languages in the Current Language option for further editing.
In the output, you can then switch between caption languages to preview them.
Add More Languages to Closed Captions
ActivePresenter supports multiple languages for closed captions. This feature is useful when your content needs to be accessible in more than one language. Once you’ve added the initial closed captions, you can add additional languages by following these steps:
1. Access the Insert tab > Closed Caption > Caption Editor.
Alternatively, select a closed caption > in the Properties pane > Size & Properties > General > Caption Editor.
Then, the Edit Closed Caption dialog appears.
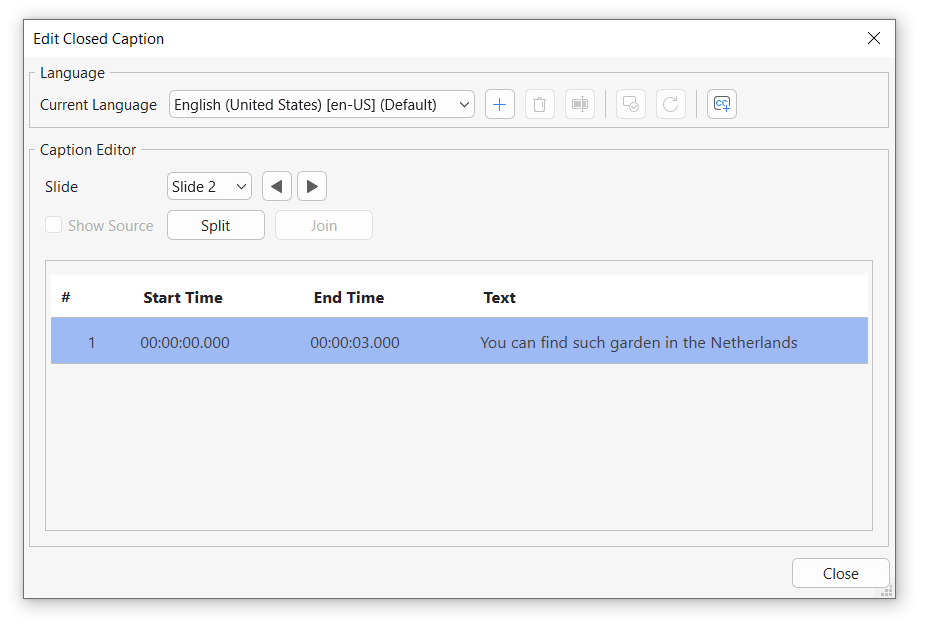
2. Click the Add New Language button to add a new language. If Auto Translation is selected, a new caption language is created and the captions are translated automatically. If it is not selected, the captions are kept in the original language without translation. Then, click OK to apply.

3. The Caption Editor displays subtitles for one slide at a time. To navigate between slides, click the navigation buttons located on the right side of the Slide section. Start time, End time and Text can also be edited directly here.
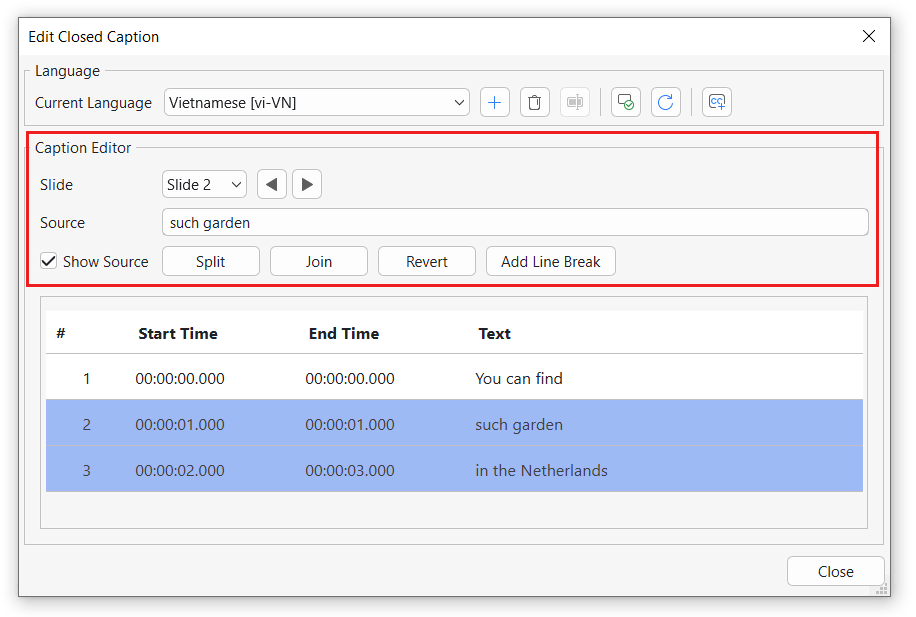
4. Tick the Show Source checkbox to show the source of the closed caption. Use the functions: Split, Join, Revert, Add Line Break to adjust the Closed Caption.
5. Click Close to finish.
Format Closed Captions
Preset Style
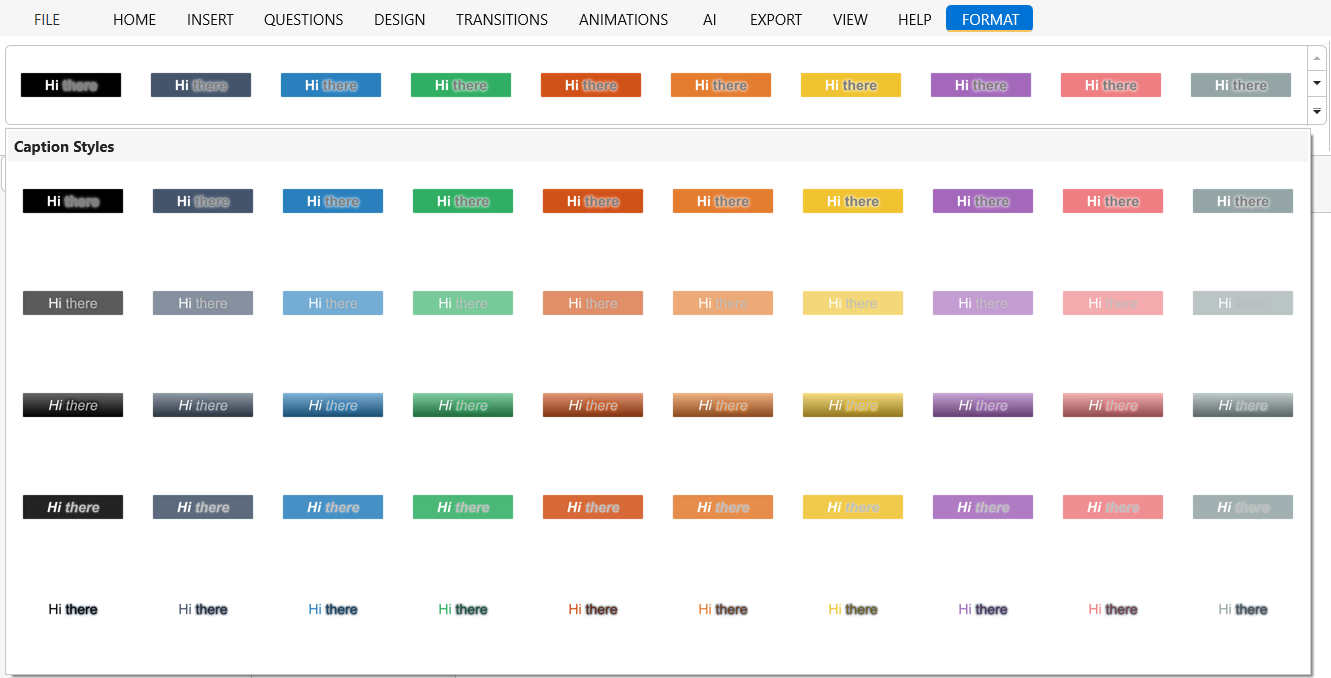
ActivePresenter 10 provides a set of built-in caption styles that allow you to quickly format closed captions with predefined appearances.
To apply a caption style, select a closed caption, then go to the Format tab and choose a style from the Caption Styles gallery.
When a caption style is applied, the Word Highlight feature is also enabled by default along with its associated effects (such as Glow Effect), depending on the selected style. You can further customize the applied style using options in the Properties pane if needed.
Word Highlight
The Word Highlight feature allows you to highlight each spoken word in closed captions during playback. To use this feature, select a closed caption, then open the Properties pane > Closed Caption tab > Word Highlight.
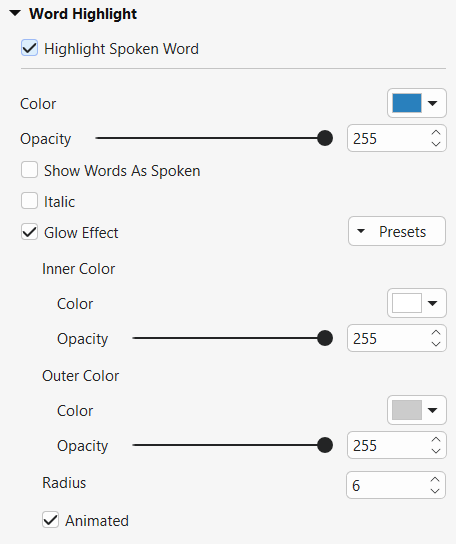
By default, Highlight Spoken Word and Glow Effect are selected when inserting a closed caption.
- Highlight Spoken Word: Enable this option to highlight words as they are spoken.
- Color: Select the highlight color.
- Opacity: Adjust the transparency of the highlight color.
- Show Words As Spoken: Display words progressively as they are spoken.
- Italic: Apply italic style to highlighted words.
- Glow Effect: Add a glow effect to highlighted words.
- Inner Color: Select the inner glow color.
- Opacity: Adjust the inner glow transparency.
- Outer Color: Select the outer glow color.
- Opacity: Adjust the outer glow transparency.
- Radius: Set the glow size.
- Animated: Enable animation for the glow effect.
Flexible Positioning
You can place closed captions anywhere on the Canvas.
To reposition a closed caption, do the following:
- Select the closed caption on the Canvas.
- Drag it to the desired location.
This feature helps prevent captions from covering important content and allows more flexibility when designing slide layouts.
Note:
- The style of the closed caption will be the same regardless of displaying in any language.
- Remember that, in case you export the project to video, remember to export closed captions as hard subtitles to encode it to the video.
- Formatting settings (including styles and Word Highlight) applied to closed captions in one slide will be applied to all closed captions across the project. However, the position of closed captions can be adjusted independently on each slide.
Convert Closed Captions to Speech
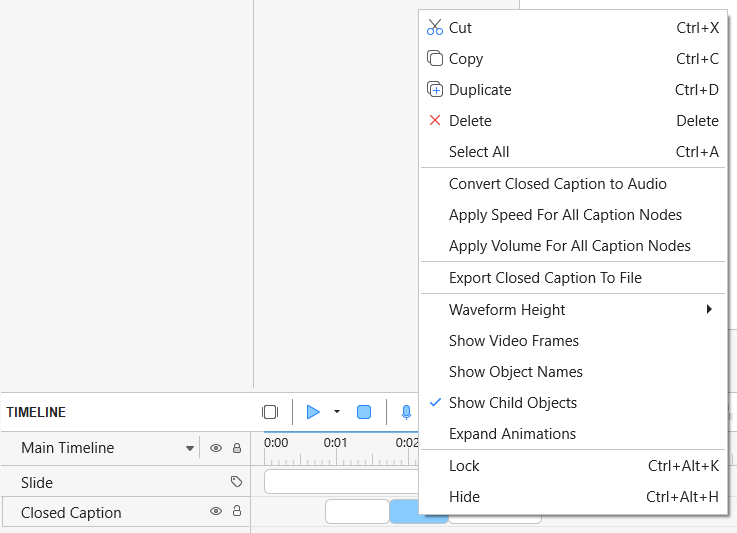
You can convert closed captions to audio in ActivePresenter 10 thanks to the Text-to-Speech feature. To do that, right-click a CC node > Convert Closed Caption to Audio, or access the Insert tab > Closed Caption > Convert Closed Caption to Audio (5).
Then, all CC nodes in the current slide produce a combined single audio object.
For details about this, see Convert Text to Speech.
Toggle the Closed Caption
There are two ways to toggle closed captions: using the CC button in the player or using actions.
Use the CC Button in the Player
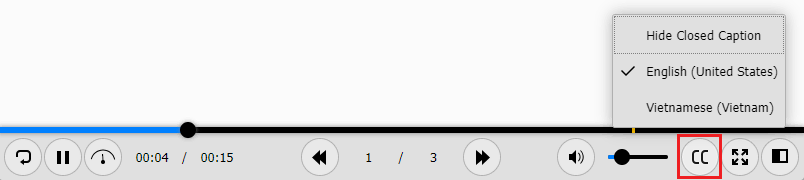
To enable this button, open Export tab > Player Settings. Then, navigate to the General tab of the Player Settings window > General Parameters > Toolbar > select the CC Button check box > OK to save changes. By doing so, the CC button will appear at the bottom right corner. Learners can click this button to toggle the closed caption or change language of closed caption.
Note: ActivePresenter allows you to customize the player for each operation mode separately or all of them together. Click the Operation Mode combo box and select the mode you want. See Customize HTML5 Player Settings for more information.
Use Actions
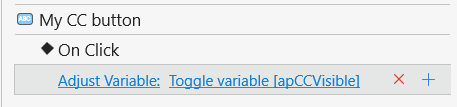
Another way to control closed captions is using actions. ActivePresenter 10 provides the apCCVisible variable that helps show or hide the closed caption. Set the variable to true to turn the CC on, and false to turn it off.
For example, you can create your own CC button that allows users to show or hide the closed caption:
Export Closed Captions to File
It’s quick and easy if you want to export closed captions to *.srt or *.vtt files without exporting the whole video. To do this, choose one of the following:
- Right-click a CC node in the Timeline pane > Export Closed Captions To File.
- Click the drop-down arrow next to the Closed Caption button in the Insert tab > Export Closed Caption To File.
All closed captions, including timing, in the current project will be exported to an *.srt or *.vtt file. You can then edit this file as needed.
Delete CC
To delete one or more CC nodes, select them in the Timeline and press DELETE.
To delete all CC nodes, click the Closed Caption name to select all the nodes and press DELETE.
That’s all about the steps to add and work with closed captions in ActivePresenter 10. Download and try this feature now.

Don’t forget to visit our Tutorials page and YouTube channel to get more ActivePresenter written and video tutorials up-to-date.
Related topics: