ActivePresenter 10, AI-powered eLearning authoring tool, introduces a Filter Effects section that makes it easier than ever to enhance and adjust the look of your images, shapes, and videos. Whether you want to boost colors, create a vintage feel, or completely transform your visuals, filter effects give you full control.
You can access this feature in the Properties pane whenever you select an object (image, shape, or video) on the Canvas.
Let’s break down how you can use it.
1. Using Presets for Quick Adjustments
Presets save you time by letting you apply and reuse your favorite color settings in just one click.
- Choose a preset: Open the preset menu to pick from custom or default presets. Once applied, it will adjust automatically.

- Save a new preset: After making your adjustments, click the save button, name your preset to reuse it anytime.
- Delete a preset: If you no longer need a custom preset, remove it with one click.
Presets are perfect for keeping your projects consistent and speeding up your workflow.
2. Adjusting Colors Manually
If you want more control, you can fine-tune visuals with sliders, input fields, or up/down arrows. Here are the available options:
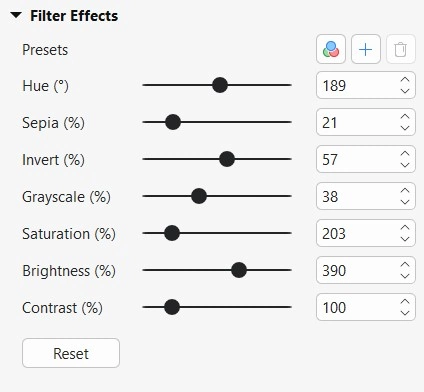
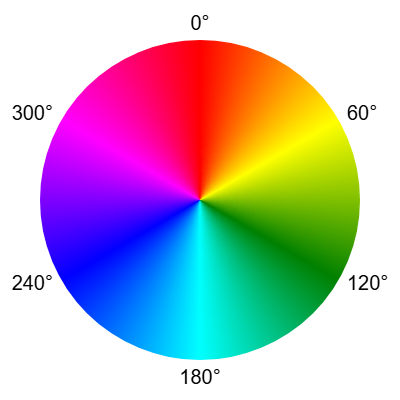
Hue (°): Shifts colors around the color wheel (red to orange, yellow, blue, etc.) without changing brightness or intensity.
Sepia (%): Adds a warm, brownish tone for a vintage effect. At 100%, it fully mimics an old photo.
Low (0): No sepia, normal colors.
High: Strong vintage/brown tone.
Invert (%): Flips every color to its opposite. Every pixel’s RGB values are flipped (mathematically new = 255 – old). Example: pure red (255, 0, 0) becomes cyan (0, 255, 255). Pure black becomes white, pure white becomes black.
Low (0): Original colors.
High: Fully inverted (black ↔ white, red ↔ cyan, etc.).
Grayscale (%): Gradually removes colors until the object is fully black and white.
Low (0): Full color.
High: Completely black and white.
Saturation (%): Controls color intensity.
Low (0): No color, everything looks gray.
High: Very strong, intense colors.
Brightness (%): Lightens or darkens the overall image, shape or video.
Low: Darker, closer to black.
High: Brighter, closer to white.
Contrast (%): Adjusts the difference between light and dark areas, making details either stand out more or blend together.
Low: Flat, little difference between light and dark.
High: Strong separation, sharper but may lose detail.

You’ll see the changes instantly as you adjust, making it easy to experiment.
3. Reset to Default
Not happy with your edits? At the bottom of the section, the Reset button instantly restores all adjustments to their default values (e.g., 100% Contrast, 0° Hue). This way, you can start fresh anytime.
Why Use Filter Effects?
The Filter Effects feature is more than just a tool for correcting images. It empowers you to:
- Enhance training videos with consistent visuals.
- Create engaging effects to highlight key elements.
- Achieve a professional look without switching to external editing software.
With presets for speed, sliders for precision, and a reset button for redo, ActivePresenter 10 gives you everything you need to make your visuals pop directly inside your project.

FAQ
1. Can I apply filters for photos?
Yes, you can apply filter effects for not only images, but also shapes and videos.
2. Can I save my custom filters?
Yes. You can save your custom filters with names, making them easy to reuse and ensuring color consistency.
See also: