ActivePresenter 10, one of the best eLearning authoring tools, makes it easy to generate captions for your videos or audio by automatically converting speech into text. This feature, called Auto Captions (Speech to Text), helps make your content more accessible and easier to follow. In this step-by-step guide, you’ll learn how to generate, edit, and manage captions with the help of artificial intelligence.
Note: AI features are only available in the paid edition of ActivePresenter. An active internet connection is also required to use AI features that rely on connected providers.
AI Services and Speech to Text
ActivePresenter uses AI services to provide features like Speech to Text. These services may consume AI credits each time you generate content. You can track your credit usage at any time by opening the AI tab to view your statistics and remaining balance.

How to Use the Speech to Text Feature in ActivePresenter 10
To get started, you first need to have an audio or video object in your project.
Step 1 : On the Canvas or in the Timeline pane, select the video or audio object you want to caption.
Step 2: Navigate to the Auto Captions feature. You can do this in one of three ways:
- Go to the AI tab > Auto Captions.
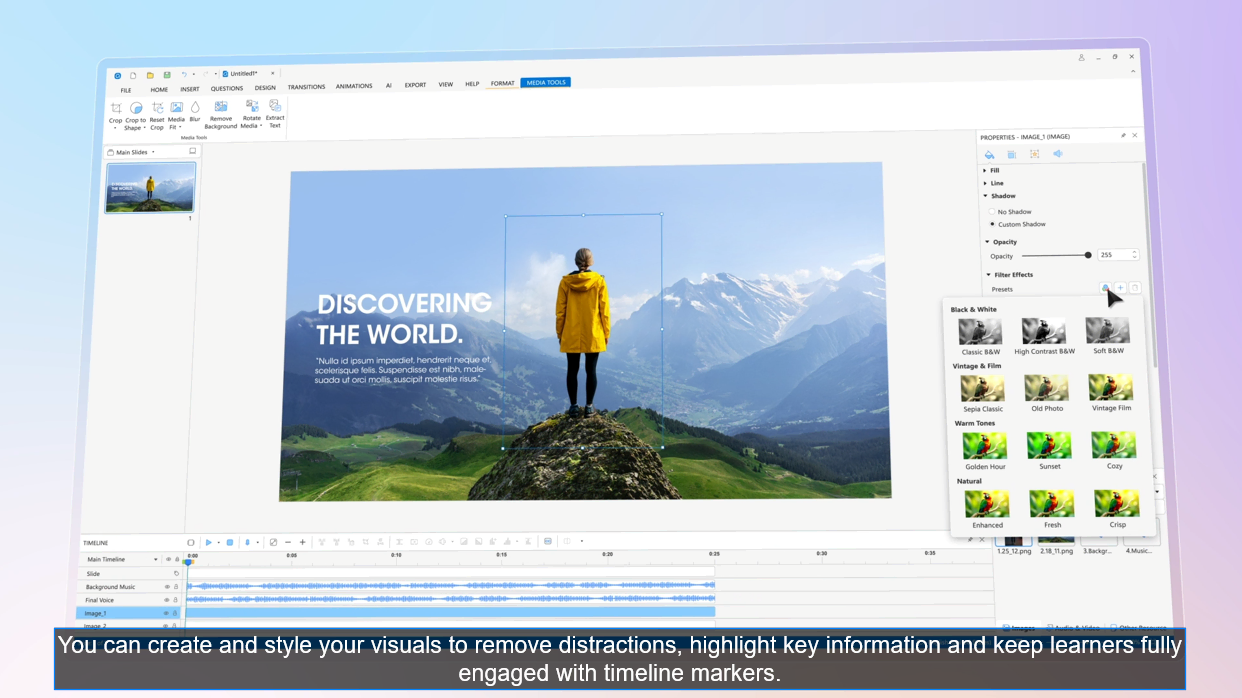
- Go to the Media Tools tab > Auto Captions.
- Go to the Insert tab > Closed Captions > Auto Captions.
This will open the Auto Captions dialog.
Step 3 : Configure the settings in the dialog box.
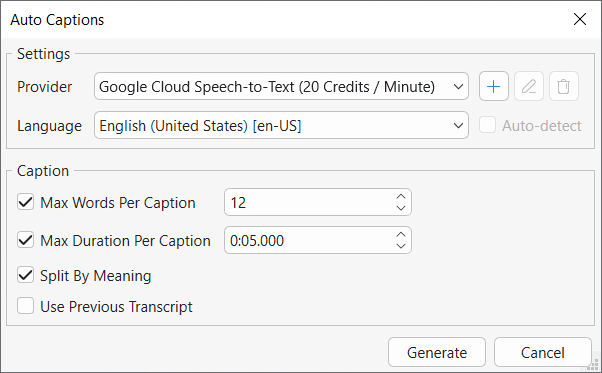
The dialog is split into two main sections: Settings and Caption.
In the Settings section:
- Provider: Choose your desired Speech-to-Text provider from the dropdown menu. You can also add, edit, or remove custom providers here.
- Language: Select the language spoken in the audio/video that you want to convert to text.
- Auto-detect: If you are unsure of the language, select this option to have the system automatically detect it. Language list & auto detect option depend on the provider. Google Speech to text doesn’t support language detection. You may use other custom providers to enable this option.
In the Caption section:
- Max Words Per Caption: This option separates the generated script into caption nodes with a maximum number of words per caption. The default is 12 words.
- Max Duration Per Caption: Use this to set a maximum display time for each caption segment. The default is 5 seconds.
- Split By Meaning: When checked, this option splits captions at natural speech boundaries like clauses or sentences to improve comprehension.
- Use Previous Transcript: If you have run this feature before, checking this box will reuse the existing script instead of generating a new one from the audio.
Step 4 : Click OK to begin the conversion process. If the slide already contains closed captions, a dialog will ask for confirmation to replace them. Once the text is generated, the Edit Closed Caption dialog will appear automatically.
Editing and Refining Your Captions
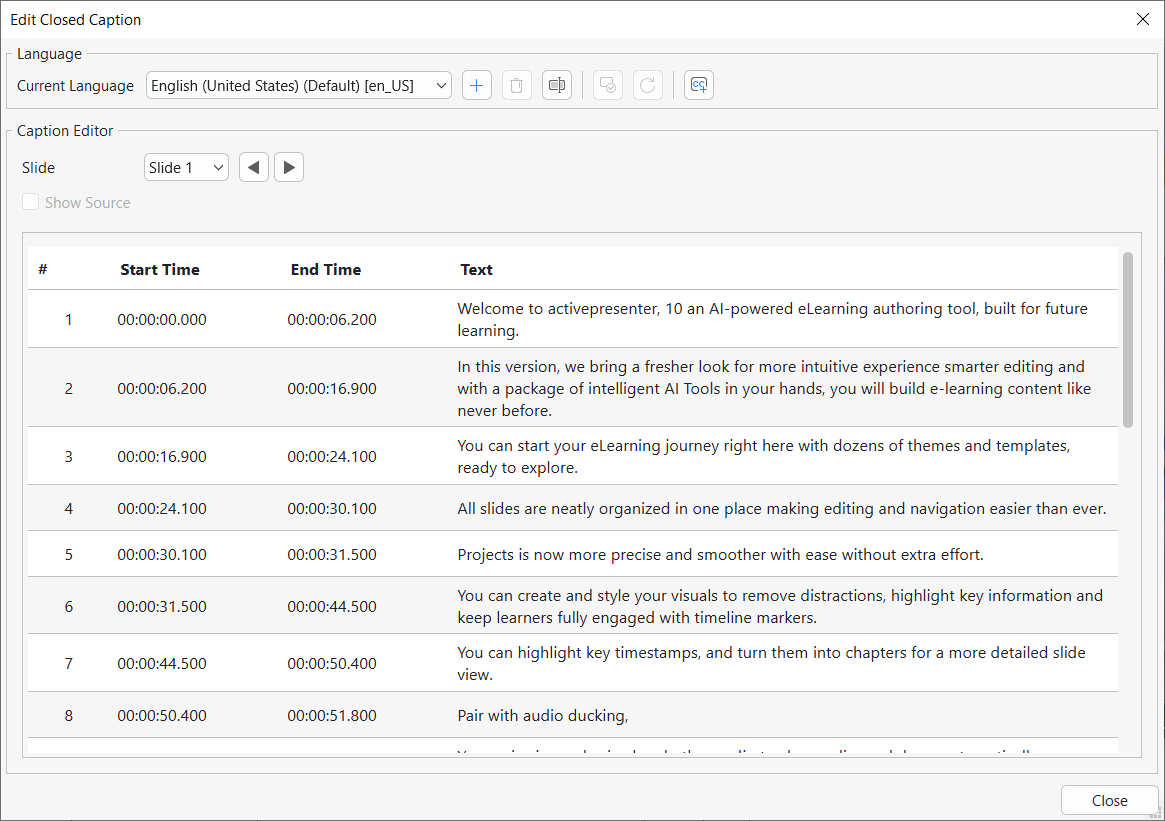
The Edit Closed Caption dialog allows you to review, edit, and manage your generated captions for one slide at a time.
Here, you can perform several actions:
1. Manage Languages
- Add New Language: Click the Add New Language button to add and manage captions in different languages.
- Manage Existing Languages: You can remove, rename, set a default language, or reuse the default subtitle for the current language.
- Import/Export: You can import subtitles from an *.srt file for a single slide or multiple slides, and export all existing captions to an *.srt file.
2. Edit Captions in the Editor The main editor allows for precise adjustments:
- Navigate Slides: Use the navigation buttons to move between slides and view their respective captions.
- Edit Timings: Double-click the Start Time or End Time values to enter new ones. The format is hh:mm:ss:ms.
- Edit Text: Double-click the text in the Text column to correct any errors or rephrase the content.
- Add Line Break: Use this button to insert a <br> tag and break a single caption into multiple lines.
- Show Source / Revert: You can view the original source of the caption or revert any changes made to a new language back to the original text.
Step 5 : Once you have finished editing, click the Close button to save your changes and exit the dialog.
You can reopen the Edit Closed Caption dialog at any time by selecting a caption and navigating to the Properties pane > Size & Properties > General section > Caption Editor. Note that any format changes you make will be applied to all closed captions in the project.
Ready to bring your ideas to life with AI writing and powerful eLearning tools?
👉 Download ActivePresenter 10 today and start creating smarter, faster, and better content!

FAQs about Speech to Text in ActivePresenter 10
1. What is the Speech to Text feature in ActivePresenter 10?
It is a feature called Auto Captions that automatically converts speech from audio or video into synchronized text captions, which makes your content more accessible.
2. Can I edit the captions after they are generated?
Yes. After generation, the Edit Closed Caption dialog opens, allowing you to edit the text content, start and end times, and add line breaks for each caption.
3. Can I add captions in multiple languages?
Yes, the Edit Closed Caption dialog allows you to add new languages and manage subtitles for each one. You can also export subtitle files (*.srt) for different languages.
4. Can I import subtitles in another language without overwriting the existing ones?
No. When you import subtitles in another language into an existing subtitle file in ActivePresenter, the original captions will be overwritten, regardless of whether you import them into one slide or multiple slides. If you want to keep the original and add an additional language, you need to create a new subtitle track directly in ActivePresenter. To do this, go to:
Insert > Closed Caption > Caption Editor
Then add a new language and edit the text for each caption.
See Also: