How to keep track of training courses is a basic question to ask for almost all eLearning designers. Not surprisingly, a simple question comes with a simple answer: to track training courses, all you need is ActivePresenter and a reliable SCORM or xAPI-compliant LMS.
First, What is ActivePresenter?
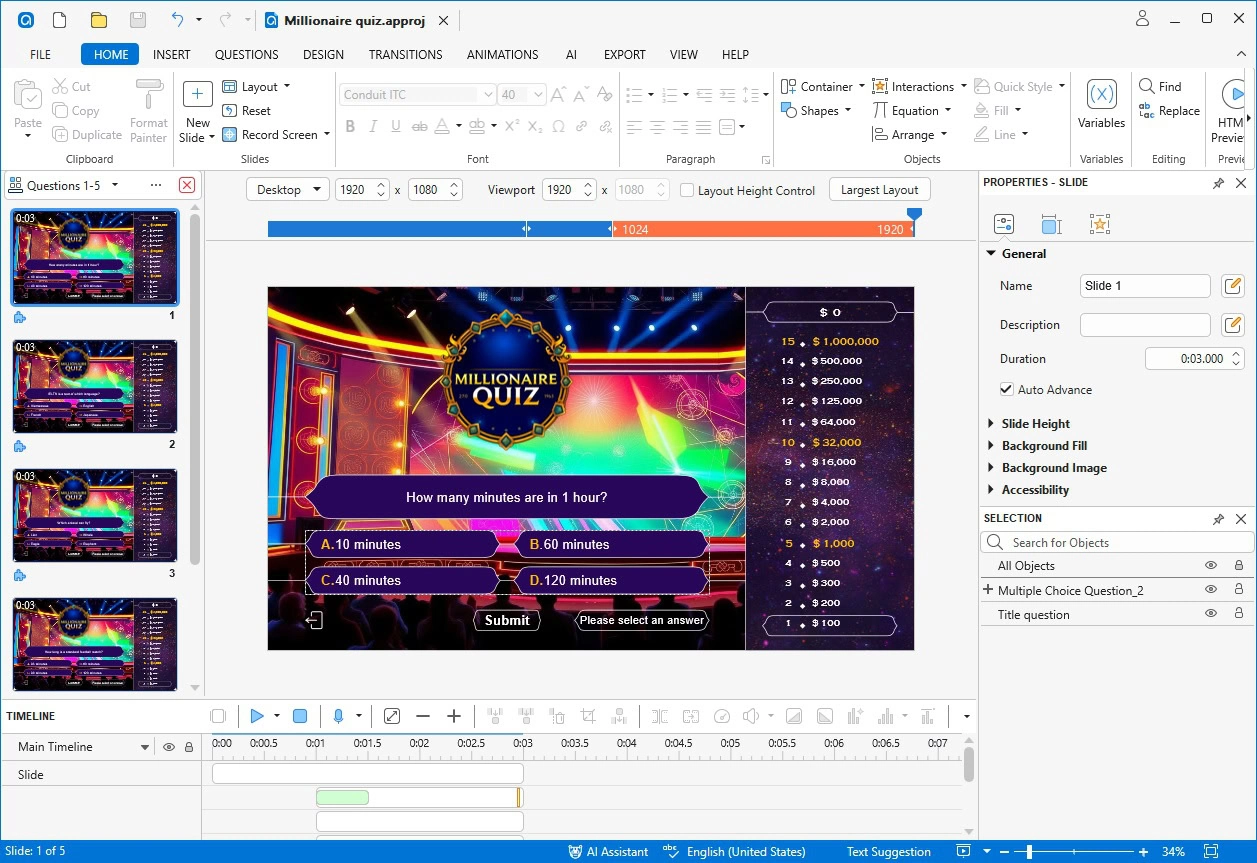
ActivePresenter is an eLearning authoring tool to rely on to design eLearning courses. It provides a wide range of features in an elegant and friendly user interface. The tool ensures you are able to design responsive, interactive, and media-rich eLearning courses. Some typical content includes video demonstrations, software simulations, quizzes, and branching scenarios.
ActivePresenter uses two common eLearning standards: SCORM (Sharable Content Object Reference Model) and xAPI (Experience API or Tin Can API). These standardized eLearning specifications guarantee the compatibility between eLearning courses and LMSes. They enable the two to “talk” to each other and exchange information. That is, any SCORM-compliant course is able to interoperate with any SCORM-compliant LMS, and vice versa.
You can download ActivePresenter (for free) to give a personal touch to design and publish your own eLearning course.

What is an LMS?
A learning management system (LMS) is a software program used to manage, deliver, and track training courses. Some of the most popular LMSes are Moodle, Edmodo, Docebo, SCORM Cloud, etc. An LMS simplifies things for both trainers and learners. You, as a trainer, upload your course to an LMS and assign it to learners. Learners access the LMS and complete their assigned course. After that, you get the data from the LMS to assess and monitor learning activities and performance.
Virtually all LMSes include many built-in reporting and tracking methods to track training courses. They allow getting an overall picture on various aspects of your training program. For example, you can get a snapshot of how many times and how long a learner has viewed a specific page within the course. This data might be useful in freshman courses to see if learners really grasp the content.
An LMS can keep track of many learning activities, including but not limited to:
- Course status (such as Not started, In progress, Completed, and Incomplete)
- Whether a learner has passed or failed
- Duration/total time spent
- Which answers were given and which pages were viewed
- How long a page was viewed
- Test/assessment scores
- Score per question
- Questions answered correct or incorrect
- User attempts
- Custom reports based on your unique needs
At this point, you must be clear about the very first question in this article. To track training courses, all you need is ActivePresenter and a reliable SCORM/xAPI-compliant LMS. The following workflow shows how to create a tracking-ready package using ActivePresenter and upload it to an LMS.
- Configure LMS reporting options within ActivePresenter
- Pack your eLearning content into SCORM/xAPI-compliant package
- Upload the SCORM/xAPI-compliant package to an LMS
Step 1: Configure LMS Reporting Options within ActivePresenter
ActivePresenter comes with several LMS reporting-related options that make a training course trackable by LMSes. The options are applied to interaction objects (including questions) and available in the Score & Reporting section (Properties pane > Interactivity tab).
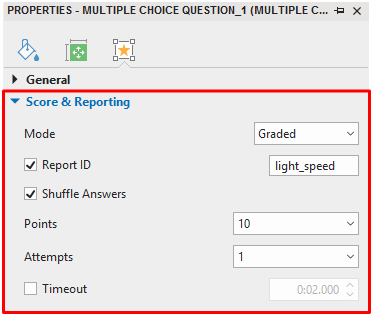
1. Question Mode
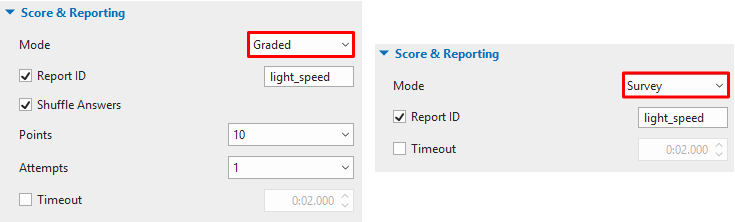
There are two question modes: graded and survey. A graded question has correct and incorrect answers to score learner response. As a result, you can track, for example, questions answered correct and scores. On the other hand, a survey question has no right or wrong answers, so it doesn’t use scores. No score tracking, but you can keep track of the learner response to each question.
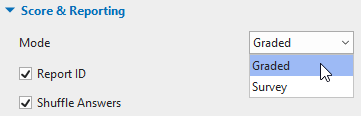
There are 11 default question types in ActivePresenter, 10 of which can be set either graded or survey. The exception is Rating Scale, which is always a survey question. So, first things first, decide the question mode to meet your training and tracking needs.
2. Report ID
Report ID is a unique identifier for each interaction, question, and question answer. An LMS uses it to identify different trackable elements within a course. ActivePresenter automatically generates report ID for every trackable element. However, you’d better change the report ID so that it makes sense to you. So, try creating report IDs that are distinctive, descriptive, and consistent.
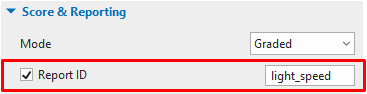
Report IDs can contain alphanumeric characters (A-Z, a-z, 0-9) and underscore (_) with the maximum length of 250 characters. For example, three questions within a quiz can have three report IDs such as quest_01, quest_02, and quest_03.
3. Points
Score tracking is common when you want to track training courses. Besides regular scoring that gives points for correct answers, you can do partial and negative scoring. Partial scoring marks a question partially correct and gives points for each of the right answers. It’s helpful to questions having more than one right answer such as multiple response, fill in text entries, fill in blanks, and hotspot. You can select Partial scoring for the entire question (1), then give each correct answer a different point (2).
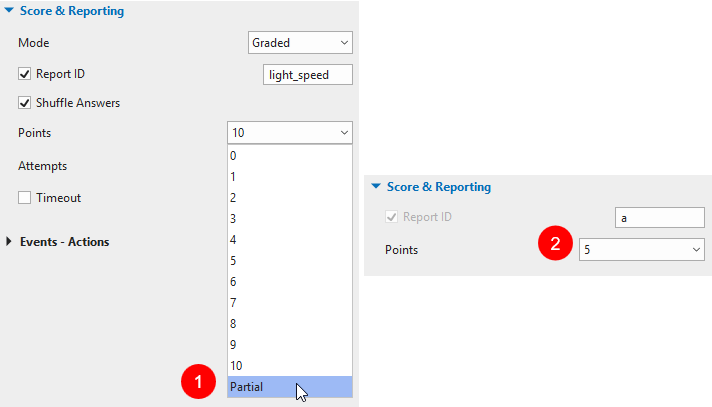
Meanwhile, negative scoring penalizes wrong answers by taking away points. It discourages learners from randomly guessing the answers. To use this type of scoring, first enable partial scoring. Then, type negative points in the Points combo box of each wrong answer.
4. Attempts
You might want an attempt limit on questions and track the actual number of attempts afterward. If a learner exceeds the limit, he could not interact with the question anymore. The allowed number of attempts can also be infinite. This means a learner can keep attempting a question (within the time limit) until he answers correctly.
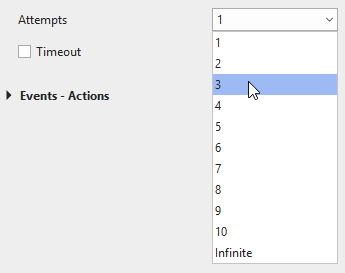
It’s good idea to include a warning message about the maximum number of attempts. That way, learners become clear about how many times he can try a question.
5. Timeout
Sometimes, it’s necessary to set a time limit on quizzes for a certain level of proficiency. In ActivePresenter, you can restrict the time allowed for not only an entire test but also each question within a test. To do the latter, just select the Timeout check box to enforce a time limit in mm:ss.nnn format. When a timed question reaches the countdown, it becomes disabled.

If you want to limit the maximum time for the entire test, keep reading. You’ll find how to do that in the next part.
Step 2: Pack Your eLearning Content into SCORM/xAPI-Compliant Package
Your project must be SCORM/xAPI-compliant so that it can be uploaded and launched in an LMS. After you’ve finished step 1, export the project to SCORM/xAPI package. Just click the Export tab > SCORM or Experience API to open the corresponding dialog.

It’s where you configure many LMS reporting-related and SCORM/xAPI-related options.
The dialog has two tabs, each of which contains separate sections. As this article focuses on how to track training courses in an LMS, we’ll discuss the Operation Modes and SCORM/Experience API Options sections. Specifically, we’ll go into the operation modes, pass condition, and package information. For details about this dialog and the way to work with it, please take a look at:
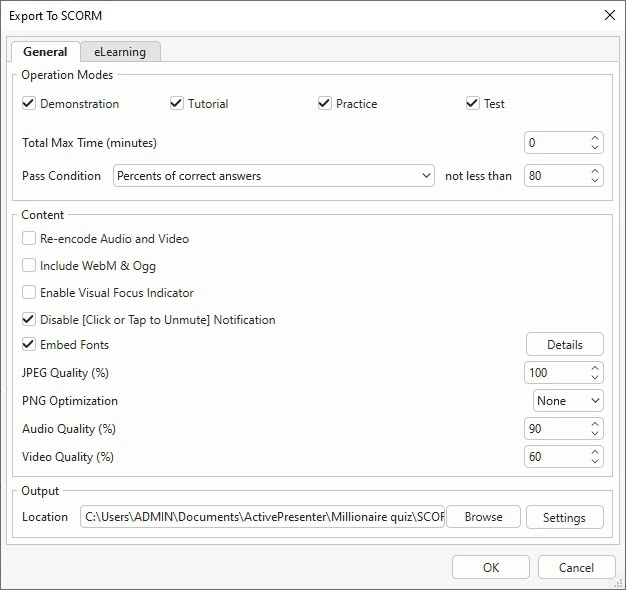
1. Operation Mode
In ActivePresenter, an interactive presentation can run in four operation modes: Demonstration, Tutorial, Practice, and Test. Each mode serves its purpose in the training process. The Demonstration isn’t interactive at all; learners can only watch the process in action.
Meanwhile, the Tutorial lets learners do the task (with guides), but they have to do correctly before they can move on. The Practice and Test modes, as their names imply, give learners a chance to practice and bring them to the real test, respectively.
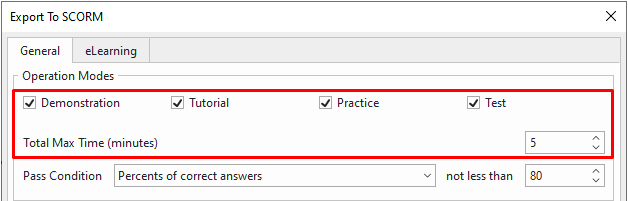
In the Test mode, as you question learners on their knowledge and grade them, you should restrict the time allowed. The Total Max Time option comes in handy in this case. This option is available for the Test mode only to set a time limit (in minutes) on an entire project. This is the total time required for learners to complete the project.
So, it’s up to your training and tracking needs to choose the right modes. ActivePresenter also lets you preview your project in these modes without exporting it.
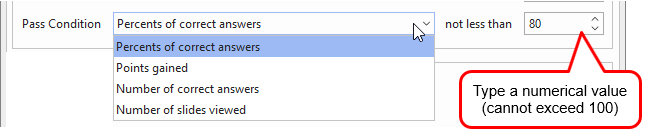
2. Pass Condition
Pass condition specifies the success condition for your training course. It determines the status of the course is either passed or failed, which is usually essential for compliance courses or certification activities. When a learner meets the condition, he is marked as passed, otherwise, he is marked as failed. You can choose one from the following: percent of correct answers, points gained, number of correct answers, and number of slides viewed.
For SCORM-compliant courses, take note of the below:
- SCORM 1.2: The raw score submitted to LMS is always a normalized value between 0 and 100.
- SCORM 2004: The raw score submitted to LMS is a normalized value between 0 and 100 only if you choose the first condition (percent of correct answers). Otherwise, it is an absolute value.
3. Package Information
To track training courses using an LMS, you have to select a specification and set up the package information. Simply open the Export To SCORM or Export To Experience API dialog and switch to the eLearning tab.
Depending on the LMS used, the package information options vary. ActivePresenter automatically generates almost all information based on the name of your project. However, it’s possible to change this information at any time.
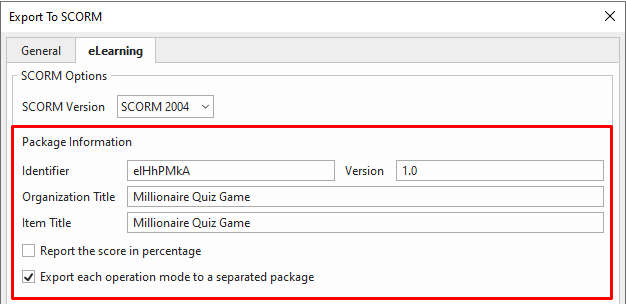
- Identifier: The unique string of characters used by the LMS to identify different manifests.
- Version: The version of the manifest that can be used to differentiate manifests with the same identifier.
- Organization Title: The title of the organization to which this item belongs. This information is only applicable to SCORM 1.2 and SCORM 2004.
- (Item) Title: The title of your project that is shown to learners viewing the project using an LMS. It defaults to the name of your project file, but changing the title won’t affect the project name.
- Description: The brief description of your project in xAPI package.
- Report the score in percentage: This option normalizes the score in the range of 1 to 100 instead of using absolute value. This option is only applicable to SCORM 2004.
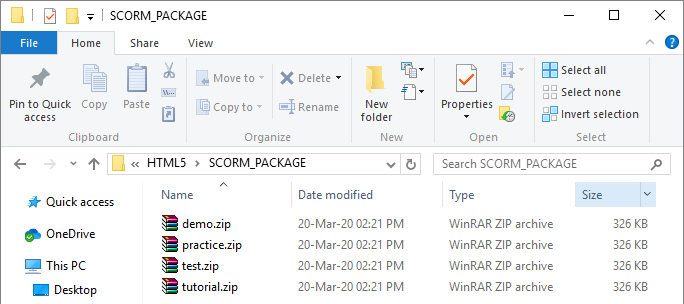
- Export each operation mode to a separated package: This option allows exporting each operation mode to a separate package instead of exporting all modes to a single package with multiple organizations.
As a side note, the eLearning tab also contains the Additional Report section which enables you to send a report on your course through the HTTP request. This option comes into play when you use some alternatives to deliver and track your course, such as Google Spreadsheet. The report is in either XML or JSON (JavaScript Object Notation) format. In general, you don’t need this method if you already have an LMS. For further information, you can refer to send quiz report to Google Sheets.

After configuring all LMS reporting-related and SCORM/xAPI-related (and other) options, export your project. Your SCORM/xAPI package is put in a ZIP file that can be directly uploaded to an LMS.
Step 3: Upload the SCORM/xAPI-Compliant Package to an LMS
ActivePresenter supports exporting projects to SCORM (1.2, 2004) and xAPI-compliant packages, which can be uploaded to any compatible LMS. The upload process may vary depending on the LMS you use.
In previous versions, ActivePresenter Online was used as an example LMS. However, this service is no longer available in ActivePresenter 10. Instead, you can upload your SCORM/xAPI package to a third-party LMS or publish your course to uPresenter for online delivery and tracking. In this article, we’ll use uPresenter as an example.
1. Upload a Course
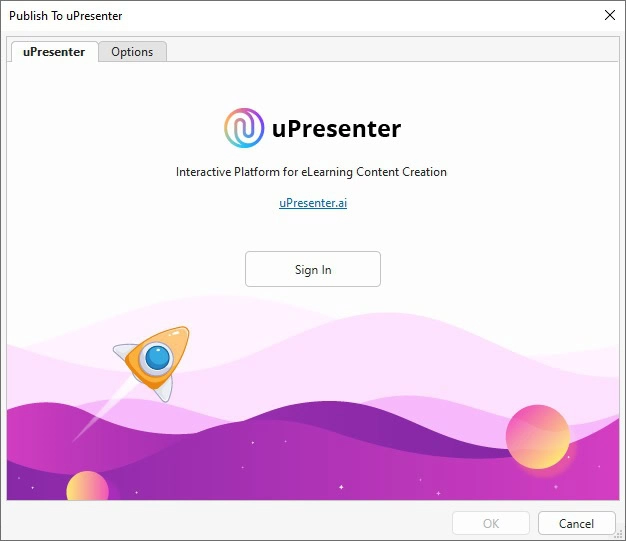
In ActivePresenter 10, the Publish to uPresenter feature allows you to upload your project directly to uPresenter (https://upresenter.ai/). This enables learners to interact with your content online while you track their progress, quiz results, and completion status in one place.
To publish a project to uPresenter, open the Export tab and click uPresenter. Then, sign in to your account and upload your project.
You can refer to our Publish Your Course to LMS tutorial for more information. Your course package is now uploaded. It’s time to try and share it with learners.
In addition, after logging in your account, you can also upload your course directly from the uPresenter website, rather than from the ActivePresenter application.
2. Track Your Course
After publishing, you can track learner performance directly on uPresenter. The platform provides detailed insights into:
- Learner progress
- Quiz results
- Completion status
These reports help you evaluate how learners interact with your course and measure their performance effectively.
3. Share Your Course
Once your course is uploaded, you can easily share it with learners via a link. Learners can access the course anytime and interact with the content directly on uPresenter without requiring an LMS.
Key Takeaways to Track Training Courses
To sum up, tracking and reporting a key part of the training process. A learning management system is the perfect tool to track training courses. Meanwhile, ActivePresenter is the ultimate solution for eLearning course development. Make use of the two to better build, deploy, and gain insight into your training course.