Besides themes, ActivePresenter now supports slide templates (also templates). This is a very useful feature as it lets you make use of ready-made slide layouts and contents. In addition, you can even share slides with others in a matter of clicks.
Basically, a slide template includes the contents of all slides in a project such as objects, audio, video, animations, events – actions, you name it. Everything you’ve added to any slide is reusable when you use slide templates.
Regarding slide templates, ActivePresenter allows you to:
- Create as many slide templates as you want.
- Use slide templates. That is, create projects from slide templates or insert slides from templates into projects.
- Share slide templates with others in minutes.
Now is time to learn how to do each of these.
Note: Apart from slide templates, ActivePresenter also provides object templates.
Creating Slide Templates
In ActivePresenter 7, creating slide templates is really easy. First, you make a project normally. Then, save it as .apslide file. Or, if you have any created project, you can also convert it into a slide template. Here’s how to save a project as a slide template.
Step 1: Open a project.
Step 2: Do either of the following:
- Press CTRL+S.
- Click ActivePresenter
 > Save or Save As….
Then, select ActivePresenter Slide Template (*.apslide) in the Save as type list.

Step 3: Navigate to the location where you want to save the file and click Save. After that, do either of the following:
- Save file in C:\Users\<user_name>\Documents\ActivePresenter Templates (for Windows) or /Users/<user_name>/Documents/ActivePresenter Templates (for macOS). In this way, your slide template will appear on the Start Page and Import from Slide Template dialog. For example, if you saved a slide template called “Business”, it’s shown in the Start Page like this.

- Save the project in other folders on your computer. Then, the app saves it in the normal way.
Note: If you have any .apslide file and want to import it into the Start Page and Import from Slide Template dialog, copy the file and paste it into the ActivePresenter Templates folder. Then, the app shows the file in these two locations.
Editing Slide Templates
To edit a slide template, do either of the following:
- Click the ActivePresenter button > Open Project.
- In the Start Page > Open.
Select a .apslide file from your file system. Then, you can edit the slide template as you do with a normal project.
Using Slide Templates
There are two ways to reuse slides in a slide template. First, create a new project based on that slide template. Second, insert slides from it into the working project. Learn how to use them right now.
Creating Projects from Slide Templates
Let’s say you want to create a new project based on the “Business” slide template. Do the following:
Step 1: In the Start Page > Templates > click the Business template thumbnail. Then, the Preview dialog opens.
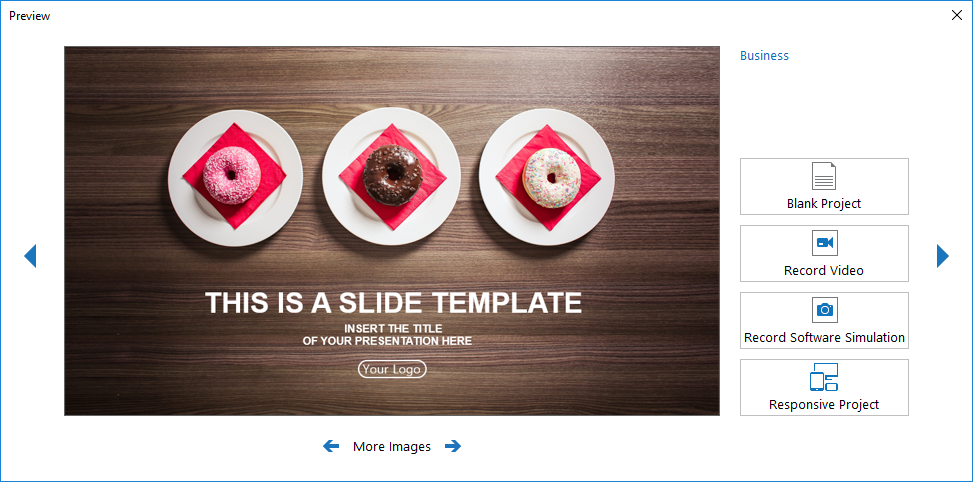
Using this dialog, you can:
- Create a templated-based project. You’re given four options: Blank Project, Record Video, Record Software Simulation, and Responsive Project.
- See slides in the selected slide template. To do that, click Previous or Next .
- See other slide templates. To do that, click Previous Item
 or Next Item
  .
.
Step 2: Click one of four options above to create a new project. For example, if you click Blank Project, the app then brings you to the editor, and this is what you get.

From here, you can edit your project the same way you normally do.
Inserting Slides from Slide Templates
To insert slides from a slide template into the current project, do the following:
Step 1: Select the location you want to add new slide.
Step 2: In the Home tab > New Slide ![]() > Slides from template….
> Slides from template….

Then, the Import Slides from Template window appears.

This window offers some options as described below:
- Click the Template drop-down button (2) to see all available slide templates. Select any of them, and all slides in a slide template are shown in the Slides box (3).
- Click the Zoom button to zoom in/out slides in the Slides box.
- Click Select All or Deselect All to select/deselect all of the slides.
Step 3: Double-click slides or select your slides > Insert Slide. Then, the selected slides are displayed at your desired position.
Note: ActivePresenter selects all slides by default. But you can choose any slides you want.
Sharing Slide Templates
To share your slide templates with friends, just send the .apslide files to them. Remember to save those files in the ActivePresenter Templates folder so they can be shown in the app.
Now you’ve learnt how to create and use slide templates in ActivePresenter 7. Try to do these tasks with the techniques above. Don’t forget to follow our Tutorial page for getting new tutorials.