Let’s say you’ve had a lot of images. Now you need to import many of them into ActivePresenter as slides to illustrate your course or video. But is there any way to quickly bring all of them into the app? Or, you have to insert slides and add images to them separately?
The truth is ActivePresenter gives you “a secret weapon” to import images as slides. You no longer take much time and effort as before. We will tell you about this “weapon” right now.
Three Steps to Import Images as Slides
In a word, you have two benefits when using this technique. First, you can insert images into the app as background images. Put differently, each image is imported into each new different slide as a background image. Second, you can import many image as slides at the same time.
Note that inserting images as slides is different from adding an Image object. See Inserting an Image, and you will know the difference.
Take these steps:
Step 1: Acess Slide tab, click Import Images ![]() .
.
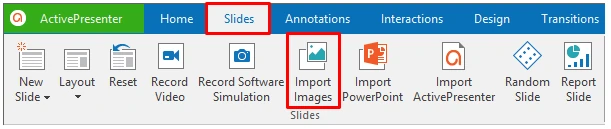
Then, the Insert Images As Slides dialog appears.
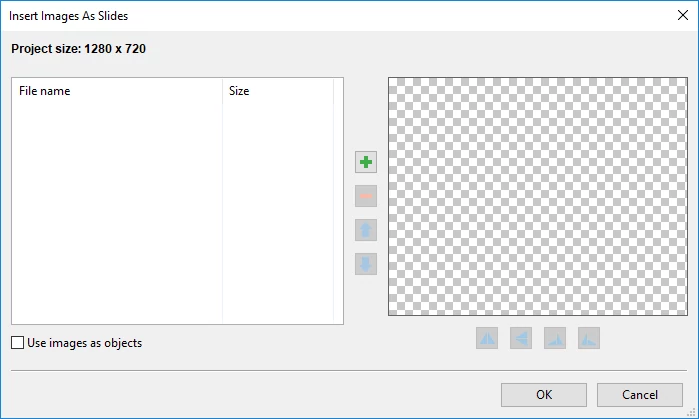
Step 2: Import images using the Insert Images As Slides dialog. Using it, you can preview images and import them as slides or objects. Besides, this dialog also offers some useful options which we’ll discuss later.
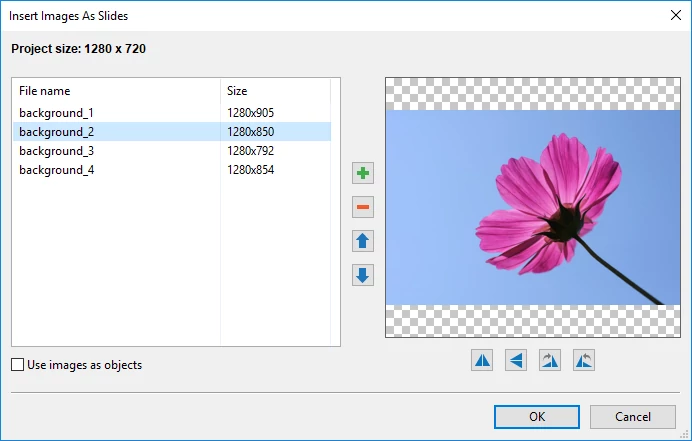
Step 3: Click OK to finish. After that, you see each image is inserted in a new different slide as a background image. This is the default option. Besides, you have another object to import them as objects. Read on to find out more.
Working with Insert Images As Slides Dialog
As you can see, there are two main boxes in this dialog. The left box shows names and sizes of image files. The right box provides you with a preview of each image. Besides, you’re given following options:
- Add images from file
 : Import images from your computer.
 - Remove selected images : Remove any image from the left box.
- Move Selected Image Up and Move Selected Image Down : Click to change the order of selected images. This order is also the order of slides in the Slides pane.
- Flip Horizontal : Reverse the selected image horizontally, that is, from left to right.
- Flip Vertical: Reverse the selected image vertically, that is, from top to bottom.
- Rotate Right 90° : Rotate the selected image clockwise by 90 degrees.
- Rotate Left 90° : Rotate the selected image counterclockwise by 90 degrees.
- Use images as objects: Select this check box if you wish to insert each image into each slide as an object.
Note:
- When you click Flip Horizontal, Flip Vertical, Rotate Right 90°, Rotate Left 90°, the changes are also applied to images which are imported into the app.
- You can click Rotate Right 90°, Rotate Left 90° three times to get the correct amount of rotation you want.
- Before importing slides, pay attention to the size of the current project. If the project size is too small for the image, the image will be clipped. However, you can re-adjust the project size after that to match the image size with it. For more details, see Change Project Size.
That’s it! Make sure you use this feature to import images as slides from now on. Don’t forget to follow us to get more useful tutorials.