In ActivePresenter 7, you can create and manage multiple timelines simultaneously with the Multiple Timelines feature. It allows you to create many timelines, each of them contains a specific task that you want to display. So, creating and managing complex interactions and animations for objects become much easier.
Multiple Timelines Overview
There is one main Timeline and as many added Timelines as you wish in a slide. Those added Timelines are Interactive Timelines.
1. Main Timeline
By default, each slide has only one main Timeline and you cannot delete it.
It contains object Time Bars along with animation effect added to the objects. The main Timeline will be played automatically whenever the slide is played.
2. Interactive Timeline
Interactive Timelines are timelines added that contain animation effect Time Bars of the object. In other words, they are used to edit the object animation. Thanks to it, creating, editing, and controlling object animations, especially complex ones, become much easier and more effective.
An Interactive Timeline starts at the start time and ends at the end time of the animation effect. You can add more or remove interactive timelines when needed.
Using Multiple Timelines
Take the following steps to use the Multiple Timelines feature.
Step 1: Add Timelines.
To add a Timeline, click the Timeline drop-down button (1) and click Add Timeline.
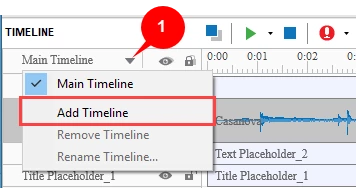
After that, ActivePresenter will create a new Timeline with an auto-generated name (Timeline N).
Step 2 (Optional): Rename added Timelines.
You should change the newly created Timeline to a more meaningful name for easily recalling.
To do that, click the Timeline drop-down button (2), select the one that you want to rename and click Rename Timeline…. Enter a new name in the pop-up dialog and click OK.
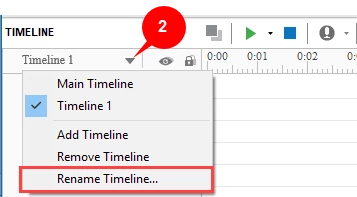
Besides, if you need to delete a Timeline, click Remove Timeline.
Step 3: Add animations to objects.
Adding animations to objects in added Timelines is similar to doing that in the Main Timeline:
1. Select the object that you want to apply animations from the Canvas or Selection pane. Hold CTRL while clicking to select multiple of them.
2. Open the Animations tab and select entrance and exit effect from the effect gallery.

3. Change the effect duration from the Animations tab or from the added Timeline by dragging the effect Time Bar.
If you need more details about how to animate objects, take a look at the tutorial Animating objects.
Step 4: Use events – actions to start/pause/continue the added Timeline.
Added Timelines don’t automatically play when slides are played. So, if you want the presentation to play them, you need to use actions to call them.
To know more about how to create an action, see Working with events – actions.
So, you know how to use Multiple Timeline in ActivePresenter 7. Use it to create animations and interactions faster and easier.