Audio and image are considered as a perfect pair in designing eLearning courses because of their ability to make lessons even more engaging, emotional, and memorable for learners. ActivePresenter supports many sound formats, including MP3, OGG, WMA, and WAV. In any project, you can add a background track, a sound to an individual slide or a sound to a specific object, such as caption, text box or image.
There are two ways to insert an audio in ActivePresenter which are recording your own audio file and importing an existing file from your computer, and in this article, I’ll explain both of them.
Inserting an Audio from Files
After selecting the desired slide, do one of the following ways to import an audio:
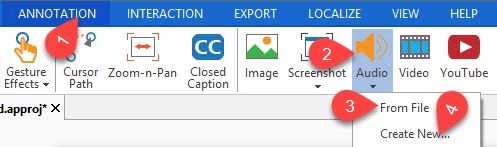
- In the Annotation tab (1), click Audio (2), and then click From File (3).
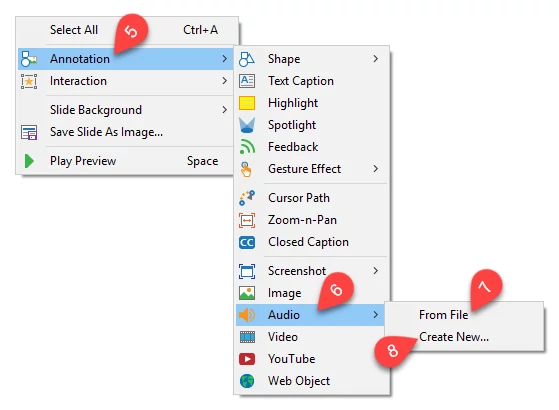
- Or right-click anywhere on the slide, point to Annotation (5), click Audio (6), and then click From File (7).
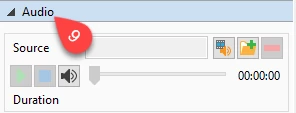
In the case of an object, you can also click audio icon in the Audio section (9) of the Properties pane to add audio from Library.
Recording a New Audio Track
If you have a microphone connected to your computer, you can record your own voice in the real time to be included on a slide.
Here some steps to record a new audio:
Step 1: Open the Recording section.
- In the Annotation tab, click Audio, and then click Create New (4).
- Or right-click anywhere on the slide, point to Annotation, click Audio, and then click Create New (8).
Step 2: Go to the Audio section, and record your audio.
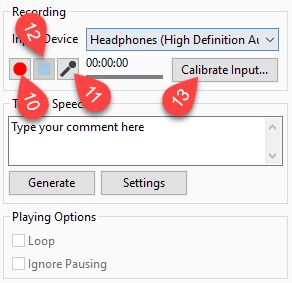
- Click the Recording icon (10) to capture the sound.
- Click the microphone icon (11) to adjust the volume.
- Click the blue icon (12) to end the recording.
Step 3 (Optional): Calibrate the microphone.
Calibrating the recording device means that you set the microphone or recording device to the correct recording level.
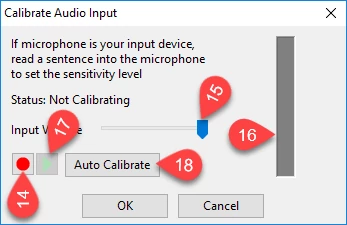
- In the Audio section, click Calibrate Input (13).
- Click the red icon (14), read a sentence into the microphone while moving the slider (15) to right. If the LED bar (16) at the right turns into a red color, move the slider a bit to the left. Once you feel OK, just stop the recording.
- Press the triangle icon (17) to play your recorded voice. If the sound has any problem, repeat the steps above.
Besides, ActivePresenter allows you to detect recording sensitivity level automatically. To do that, click Auto Calibrate (18), and continue speaking until the button changes from Stop Calibration to Auto Calibrate.
If you want to capture an audio from the beginning when creating a new project, please check out the Record System Audio & Microphone Audio tutorial to get detailed information.
Step 4 (Optional): Record narration.
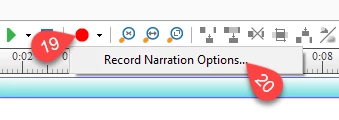
To do that, click the red icon (19) in the Timeline. Also, you can change input device, calibrate the recording sound, and adjust volume from the drop-down menu (20).
When a slide contains both narration and system audio (or audio track), the Timeline displays two different waveform bar as you can see in the picture below.
Editing an Audio
After adding an audio to a slide, you can preview and edit it in the Timeline with some following techniques.
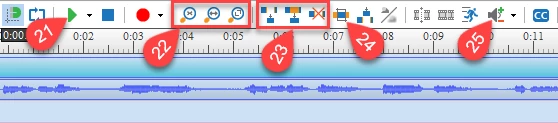
- Click Play (21) to listen the audio.
- Select to enlarge, shrink or fit the waveform into the timeline (22).
- Select cut, copy, delete, and crop to apply advanced editing for the audio (23).
- Click Insert Time (24) to add an interval of silence. The silence is inserted at the Playhead.
- Click Adjust Volume (25) to increase or decrease the sound level of the audio file. For more details, check out the tutorial Changing Audio Volume.
Remember that all of these options as are available for both system audio and narration audio.
Deleting an Audio
There are two ways to remove an unwanted audio:
- Select the waveform bar of that audio, and press the Delete key on the keyboard.
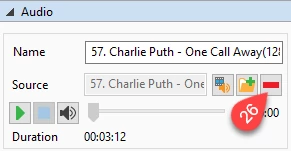
- Or select it, and click the red icon (26) next to the folder icon in the Audio section of the Properties pane.
Now, you know how to insert an audio into a specific slide or an object in ActivePresenter. You can follow us on YouTube, Facebook, Twitter and our blog to get more useful tutorials about designing eLearning courses and screencasts.