If you’ve ever wanted to create a drag-n-drop eLearning game but weren’t really sure how to start, this tutorial is for you. You’ll learn how to build a simple drag-n-drop game called Vegetable. The best part is: the game can be adapted simply by swapping out the text, audio, and image.
To bring this engaging drag-n-drop eLearning game to life, we’ll be leveraging the powerful features of ActivePresenter. This comprehensive authoring tool provides an intuitive environment for creating interactive content, including drag-and-drop interactions, customizable feedback mechanisms, and seamless integration of multimedia elements. With ActivePresenter, you’ll find it straightforward to design and develop interactive games that captivate learners and reinforce key concepts effectively.

In case you missed it, here are some tutorials to guide you how to build other eLearning games that are also created in ActivePresenter:
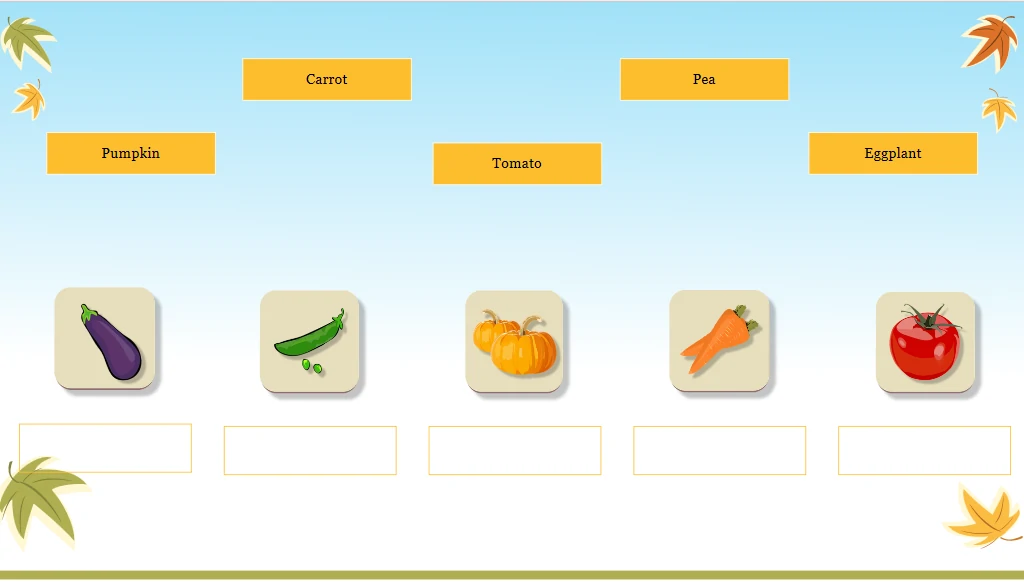
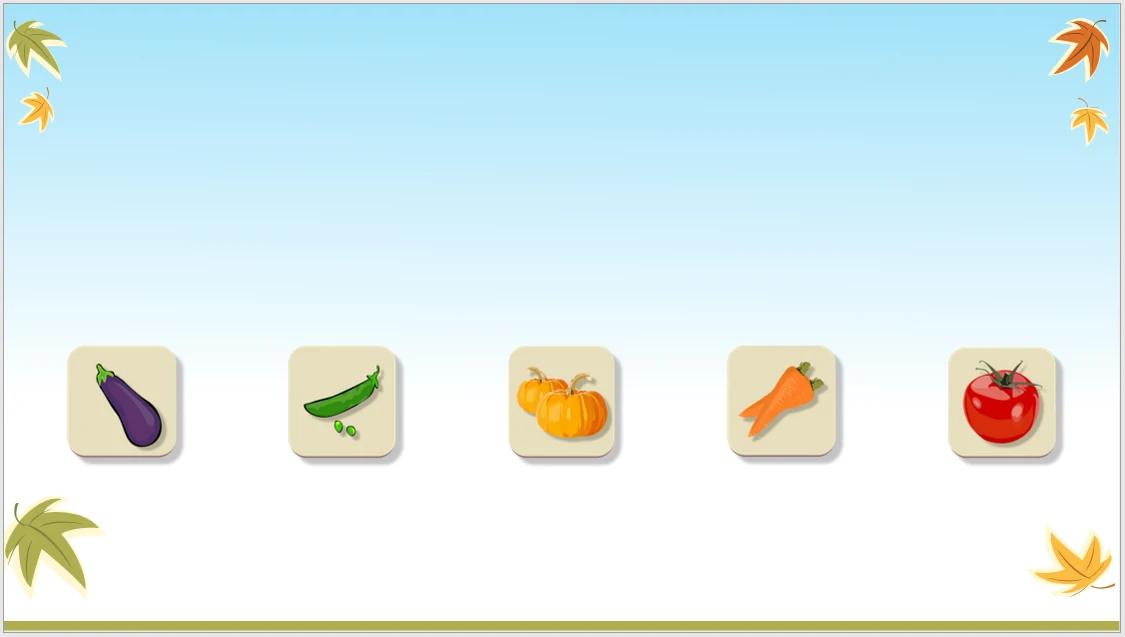
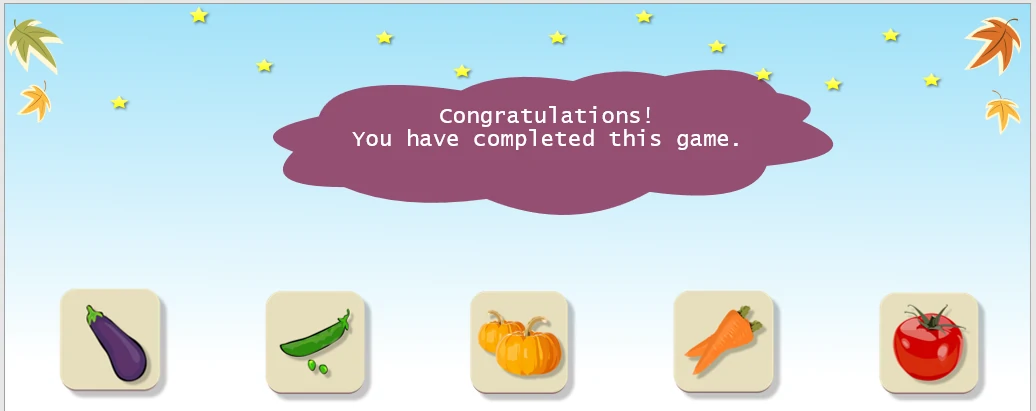
What does the Vegetable Names Game Look Like?
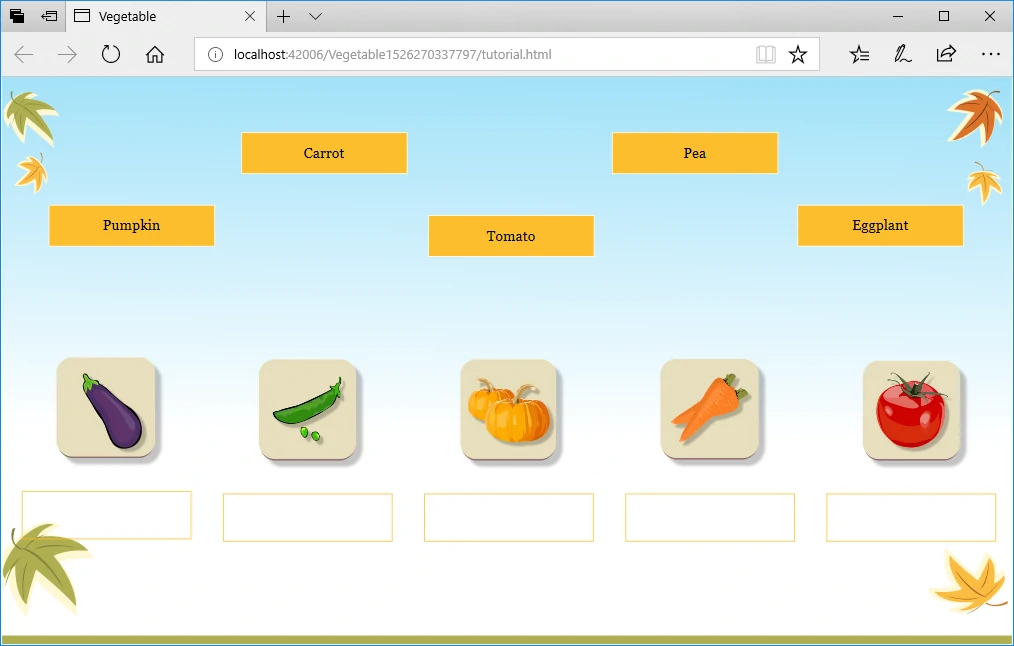
First of all, let’s play the game to see what you’ll create!
How to Play
In this Vegetable Names game, you have to label each vegetable image with its name. Do this by dragging a name box and drop it into a blank box below each image. If you drag an incorrect name box, it reverts to its original position. Once you drag and drop all name boxes correctly, you win. There is no time limit.
The game provides hints to find a correct match. That is, click each vegetable image to hear the pronunciation of its name. Use this sound to figure out the name box corresponding to that vegetable name.
Game Design Idea
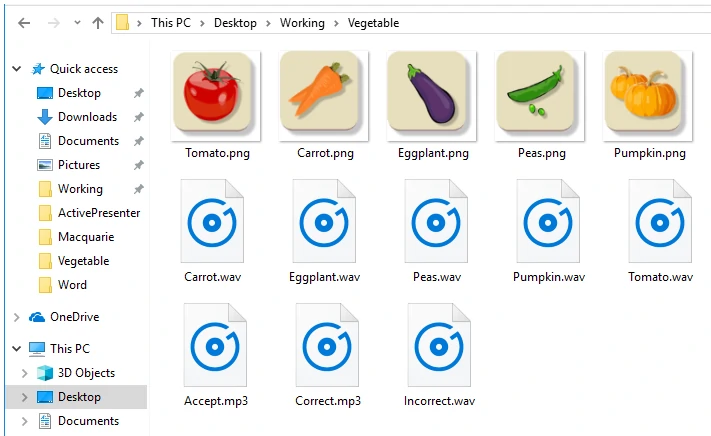
First of all, the Vegetable Names game uses some external resources, including five vegetable images, five sound files which pronounce vegetables’ names, and two other audio files for incorrect and correct answers. Make all of these resources ready before starting the creation process. Also, it’s better to give them descriptive names, so you can find them easily later.
This game has only one slide. You’ll start with a blank slide. Then, add images and insert audio to them. At the same time, you’ll design the congratulation banner and the star rain with a cloud callout and a 5-point star. After that, add an animation loop to make the star rain work.
To create drag-n-drop interactions, use the Drop Area feature. You’ll insert drag sources, drop targets as well as correct marks. Then, build the interactions with actions and JavaScript. This helps you control the answers and how the correct marks, congratulation banner, and star rain appear.
Here is the workflow of creating the Vegetable Names game using ActivePresenter:
- Add Images and Build the Interactions
- Make the Congratulation Banner and Star Rain
- Create Drag-n-Drop Interactions
- Preview and Export the Game to HTML5
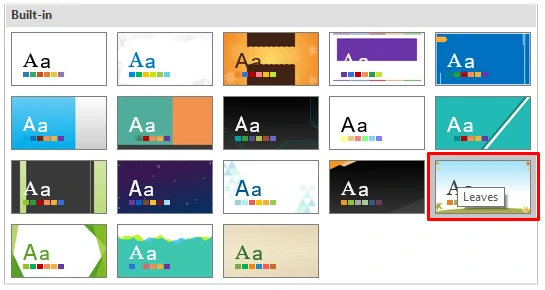
Before going into details, remember that this game aims at teaching kids how to identify some vegetables. So, a good-looking background can help increase learner engagement. In an opening project with a blank slide, select any theme in the Theme gallery (Design tab > Themes) and apply it to the slide. This way, you can change the background as you want.
Now is the time to learn how to perform each big step above.
Step 1: Add Images and Build the Interactions
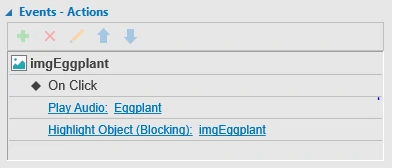
In this step, you’ll insert images into the slide. Then, use events and actions to build the interactions. Regarding interactions, recall that when you click an image, you hear a sound, and at the same time the image is highlighted. To make all images work like this, you’ll add the Play Audio and Highlight Object actions respectively.
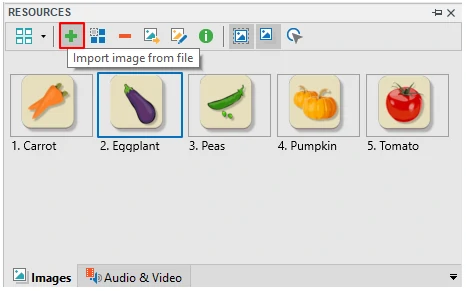
The common practice to insert and edit images is using the Image object. But when it comes to adding and editing multiple images, you’re given a quick way to perform this task. It’s using the Resources pane (View tab > Resources).

Do the following:
Step 1: In the Resources pane > Image tab > Import image from file to insert all images into the slide.
Step 2: Drag an image from the Resources pane and drop it into the Canvas. Then, go to the Properties pane > Interactivity > Events – Actions, add two actions as shown below:
Step 3: On the Canvas, copy and paste the current image four times. Then, replace the images and edit their actions.
At this point, take note of the following:
- To replace the image, select it and go to the Properties pane > Size & Properties > Image > From Project… Then, you see all imported images. Pick one of them to change the selected image.

- When you copy and paste the current image, they overlap each other. Just select and drag them to change their position.
- The Align options are used to align and distribute images. For example, to align images with each other, use Align Left, Align Middle, etc. In case you want to make the horizontal/vertical spaces between images equal, use Distribute Horizontally or Distribute Vertically.
- Place images properly to make way for blank boxes which will be explained later.
Now you’ve done with importing images into the slide and add interactivity to them. The next step is make the congratulation banner and star rain.
Step 2: Make the Congratulation Banner and Star Rain
Making the congratulation banner and star rain doesn’t need any external resource. All you need is use shapes (Home tab or Annotations tab > Shapes). Then, make use of the Quick Style, Fill, Line, and Shadow features to design the congratulation banner and star rain you wish. This step will tell you how to create them in minutes.
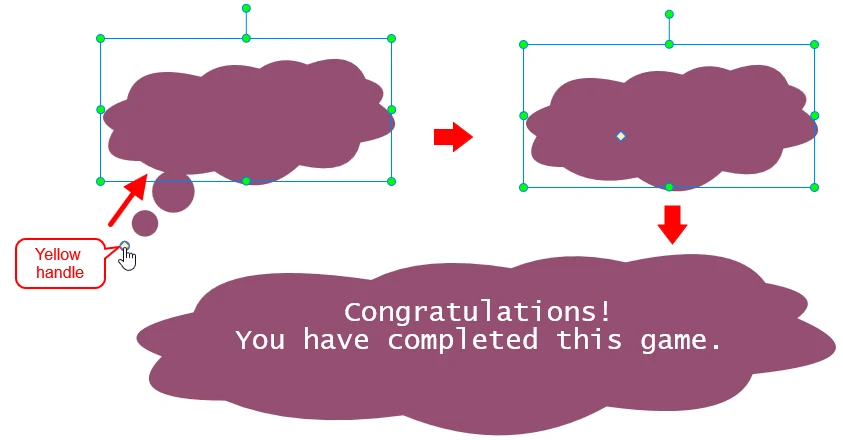
1. Design the Congratulation Banner
To create the congratulation banner, work with the cloud callout shape. To hide the yellow handle, just drag it towards the cloud. Then, resize the cloud callout and add your text.
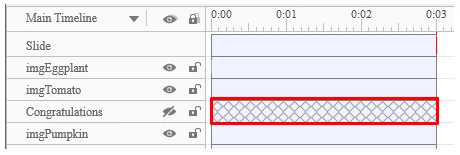
Note that the congratulation banner appears only when learners match all images with their names correctly. So, you’ll set its initial state as hidden (Properties pane > Size & Properties > Timing > Initially Hidden).
2. Make the Star Rain
When you complete the game, the congratulation banner is shown. At the same time, you see the star rain. The idea is make stars early on. Then, work with an interactive timeline and actions to create an animation loop. You’ll add the animation effect to all stars. After that, trigger an action which calls the interactive timeline when learners give all correct answers. The below part will explain how to make the star rain. Using actions to trigger it will be discussed in the next big step.
Take these steps:
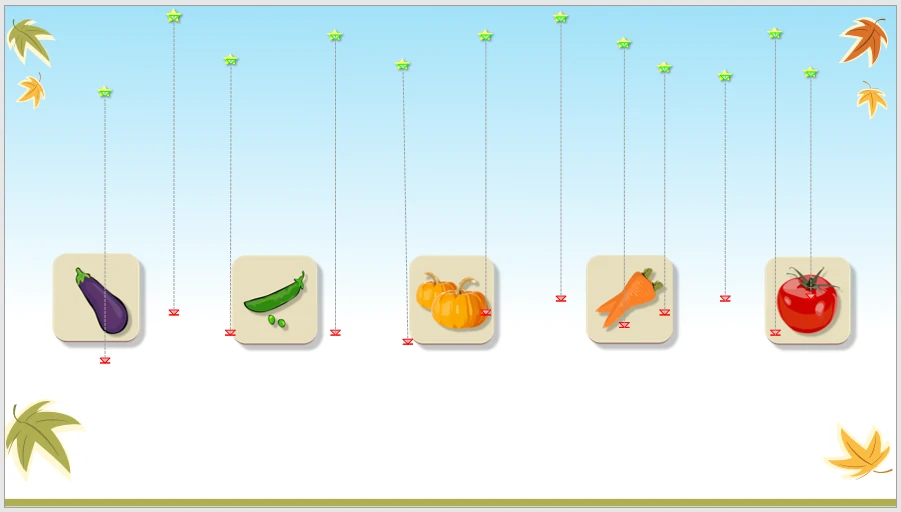
Step 1: Insert a 5-point star shape. Then, copy the star to get others and arrange them properly.
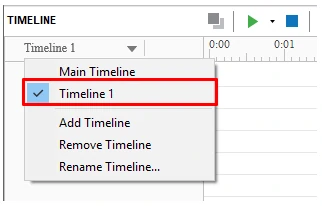
Step 2: Create an interactive timeline and name it Timeline 1 (Timeline pane > Timeline list box > Add Timeline).
Step 3: In the Timeline 1 timeline, add an emphasis effect (Line) to a star. Then, apply the effect to the rest (right-click the star on the Canvas > Apply to All Shape Objects > Animation).
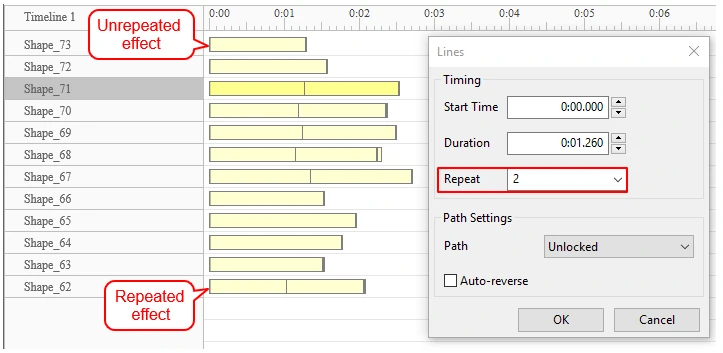
Step 4: Double-click the effect Time Bar of any star > Repeat. Then, set number of repeats to play the animation effect more than once.
Pay attention to the following:
- You can set the different duration of the animation effect for each star to make stars end at a different time. This helps add a more natural look to the animation loop.
- The rain star appears only when learners win the game. So, hide it using the Initially Hidden option.
Step 3: Create Drag-n-Drop Interactions
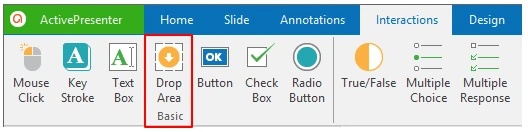
In ActivePresenter, there are two ways to create a drag-n-drop interaction. First, use the Drag-n-Drop question. Second, work with the Drop Area feature (Interactions tab > Drop Area). However, in the case of this Vegetable Names game, it’s better to use the Drop Area feature as it allows you to assess learners’ responses instantly. If you go with the Drag-n-Drop question, you can’t evaluate learners each time they drop a dragged target.
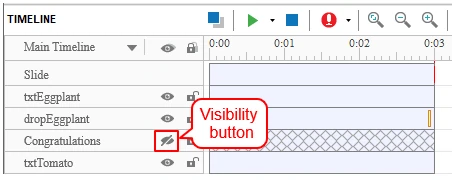
Before moving to the procedure, here is a useful tip: You can hide the congratulation banner and stars on the Canvas to prevent distractions while working with Drop Area. Do this by clicking the Visibility button.
Now is the time to learn the techniques.
1. Use Drop Areas to Make Drag-n-Drop Interactions
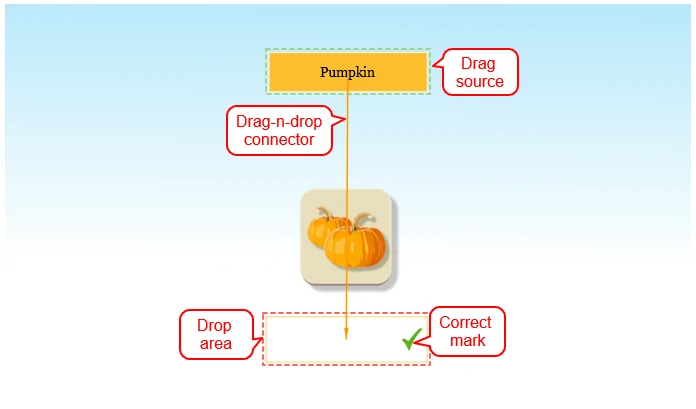
A Drop Area object contains a drop area, a drag source, and two feedback messages. You’ll insert a Drop Area object to create a drag-n-drop interaction. The drag-n-drop interaction contains a name box as a drag source and a blank box under each image as a drop area. At the same time, you also add a correct mark to its right side. This mark is displayed when learners match a vegetable image with its name correctly. To make the drag-n-drop interaction work, set up the behaviors of the drop area.
As said earlier, learners will play the game by dragging each name box and drop it into the blank box. If the match is correct, the blank box accepts the name box, the accept audio plays, the correct mark is shown, and learners get one point. Otherwise, the name box will revert to its original position, and the incorrect audio plays. Thus, the idea is you’ll customize the accept list and score of the blank box. Then, add events and actions to control the appearance of the audio and correct mark.
The Vegetable Names game has five drag-n-drop interactions in total. So, to get four other drag-n-drop interactions, copy and paste the created Drop Area object four times. Then, change the properties of the pasted Drop Area objects.
Do the following:
Step 1: Insert a Drop Area and customize it to create a drag-n-drop interaction.
Remember these:
- A Drop Area is a type of interactive objects. It gives you a drop area where you can drag objects as drag sources into it.
- An object as a drag source has a light green marker. Meanwhile, an object as a drop area has a light red marker.
- There’s an orange drag-drop connector which connects drag source with the drop area. This connector denotes that dropping the drag source to the drop area is a correct action. For this reason, it appears only when you drag the drag source to the drop area.
- Use the z-order tools to place the correct marks above the blank boxes.
- Change the initially hidden state of correct marks using Initially Hidden.
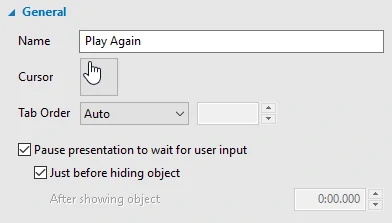
Step 2: Pause the game until learners drag a name box and drop it into a blank box. Select a name box, and in the Properties pane > Interactivity tab > General > Pause presentation to wait for user input > Just before hiding object.
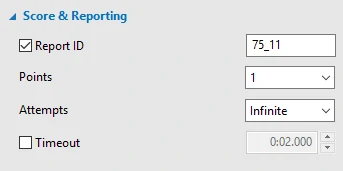
Step 3: Select the blank box as the drop area. Then, in the Properties pane > Interactivity > Score & Reporting > select a point value in the Points drop-down list. The default score value is 1.
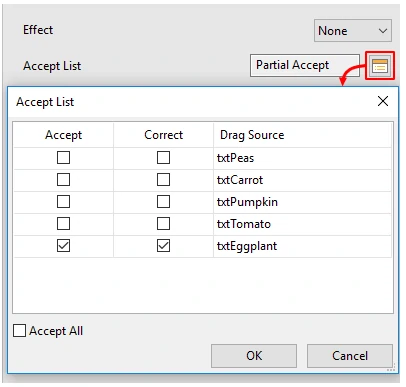
Step 4: Go to the Drag-n-Drop section and click the button to open the Accept List dialog. By default, the correct drag source is selected, and the blank box accepts all name boxes. To reset accepted name boxes, first, deselect the Accept All check box. Then, in the Accept column, choose any check box you want.
Step 5: Move to the Events – Actions section. Then, add the On Reject and On Accept events along with the following actions as shown below:
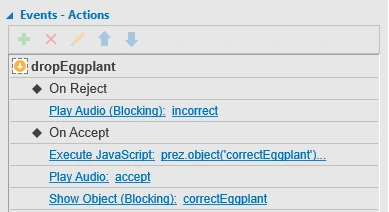
Regarding the Execute JavaScript action, it aims at displaying the correct mark each time learners make a correct match. This mark appears after the audio plays two seconds. Just paste this code into the Write JavaScript Code window: prez.object(‘XXX’).node.style.zIndex = 2000;
Remember to replace XXX with the name of each correct mark. For example, prez.object(‘correctEggplant’).node.style.zIndex = 2000;.
Step 6: Copy and paste the created Drop Area object four times. Then, follow the step 4 and step 5 to change the properties of pasted Drop Area objects. At the same time, change the text of their drag sources.
Note: Using the Blocking option for the Play Audio action doesn’t work in this Vegetable Names game. It’s because if you select the Blocking option, the correct marks aren’t shown.
2. Assess the Question
When learners find fives correct matches, the congratulation banner and the star rain appears. At the same time, the correct audio plays. To build these interactions, you’ll with the On Correct event and actions: Play Audio, Show Object, Start Timeline. Besides, you also need conditional actions to ensure that the interactions are shown only when learners match all drag sources with all drop areas correctly.
The interactions are as follows:
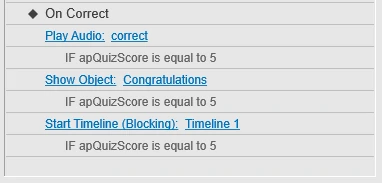
Note: If you don’t apply conditional actions to drop areas, the congratulation banner, the star rain, and the audio appears each time learners find a correct match.
Step 4: Preview and Export the Game to HTML5
It’s time to preview what you’ve created and check if everything pleases you. To do this, use the HTML5 Preview feature. Then, if you’re satisfied with the game project, just export it to HTML5.
1. Preview the Game Project
The HTML5 Preview button (Home or Export tab > HTML5 Preview) is meant for previewing the game.
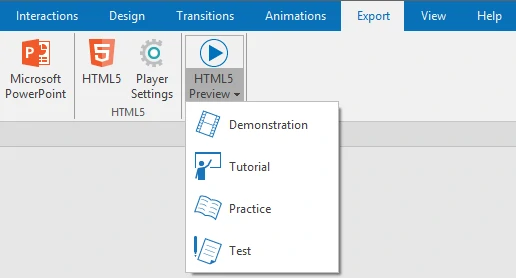
This feature gives you four operation modes: Demonstration, Tutorial, Practice, and Test. You can select a mode to preview and interact with the game. However, the Demonstration mode isn’t interactive but only viewable.
2. Export the Game
ActivePresenter supports the HTML5 output (Export tab > HTML5) which uses HTML5 standards. Also, the app allows you to customize the player skin before exporting (Export > Player Settings). So, work with this output type if you want learners to interact with your contents on the web.
Here are some things to remember:
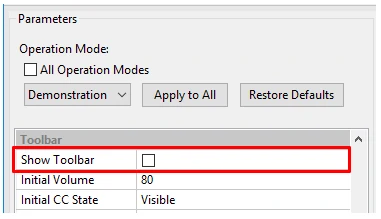
- If you don’t want to show the player toolbar, just hide it (Player Settings > General Settings > Parameters > Toolbar > clear the Show Toolbar check box).
- Remember to select Tutorial, Practice, and Test if you let learners play the game. As said earlier, the Demonstration mode is viewable only.
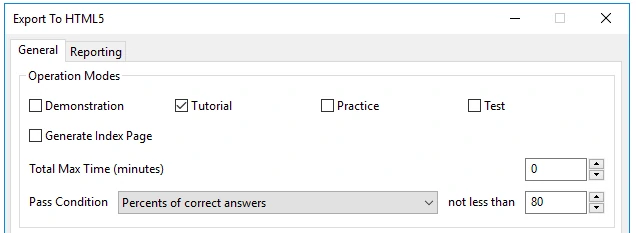
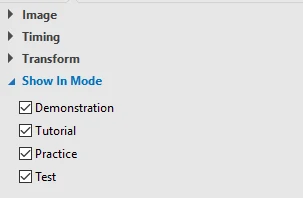
- If the mode of any object is different from the mode which you select in the Operation Modes section of the Export tab, that object will be not shown. So, it’s better to select all modes for any object (Properties pane > Size & Properties > Show In Mode). Mind that modes of some objects are automatically selected.
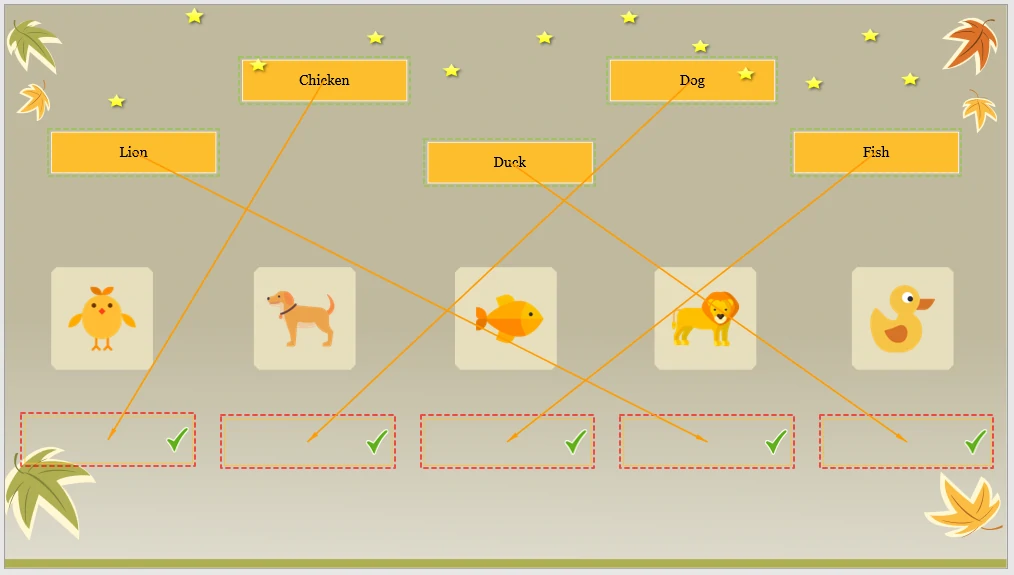
At this point, you’ve completed the process of creating the Vegetable Names game. It’s as simple as that! You can replace all images, audio clips, and words in this game with other contents to create your desired games (see the below screenshot). Alternatively, you can free your creativity to build engaging drag-n-drop interactions using the same techniques as mentioned in this tutorial.
Don’t wait for inspiration to be creative. Give ActivePresenter a try right now, and you will be inspired to start the creation process. In case you need further help, just contact us.